Databricks Volume Uploader
This application demonstrates the use of the Kelvin SDK for uploading streaming data to a Databricks Volume.
The streaming data is first batched, then exported as parquet file, and subsequently uploaded into a Databricks Volume.
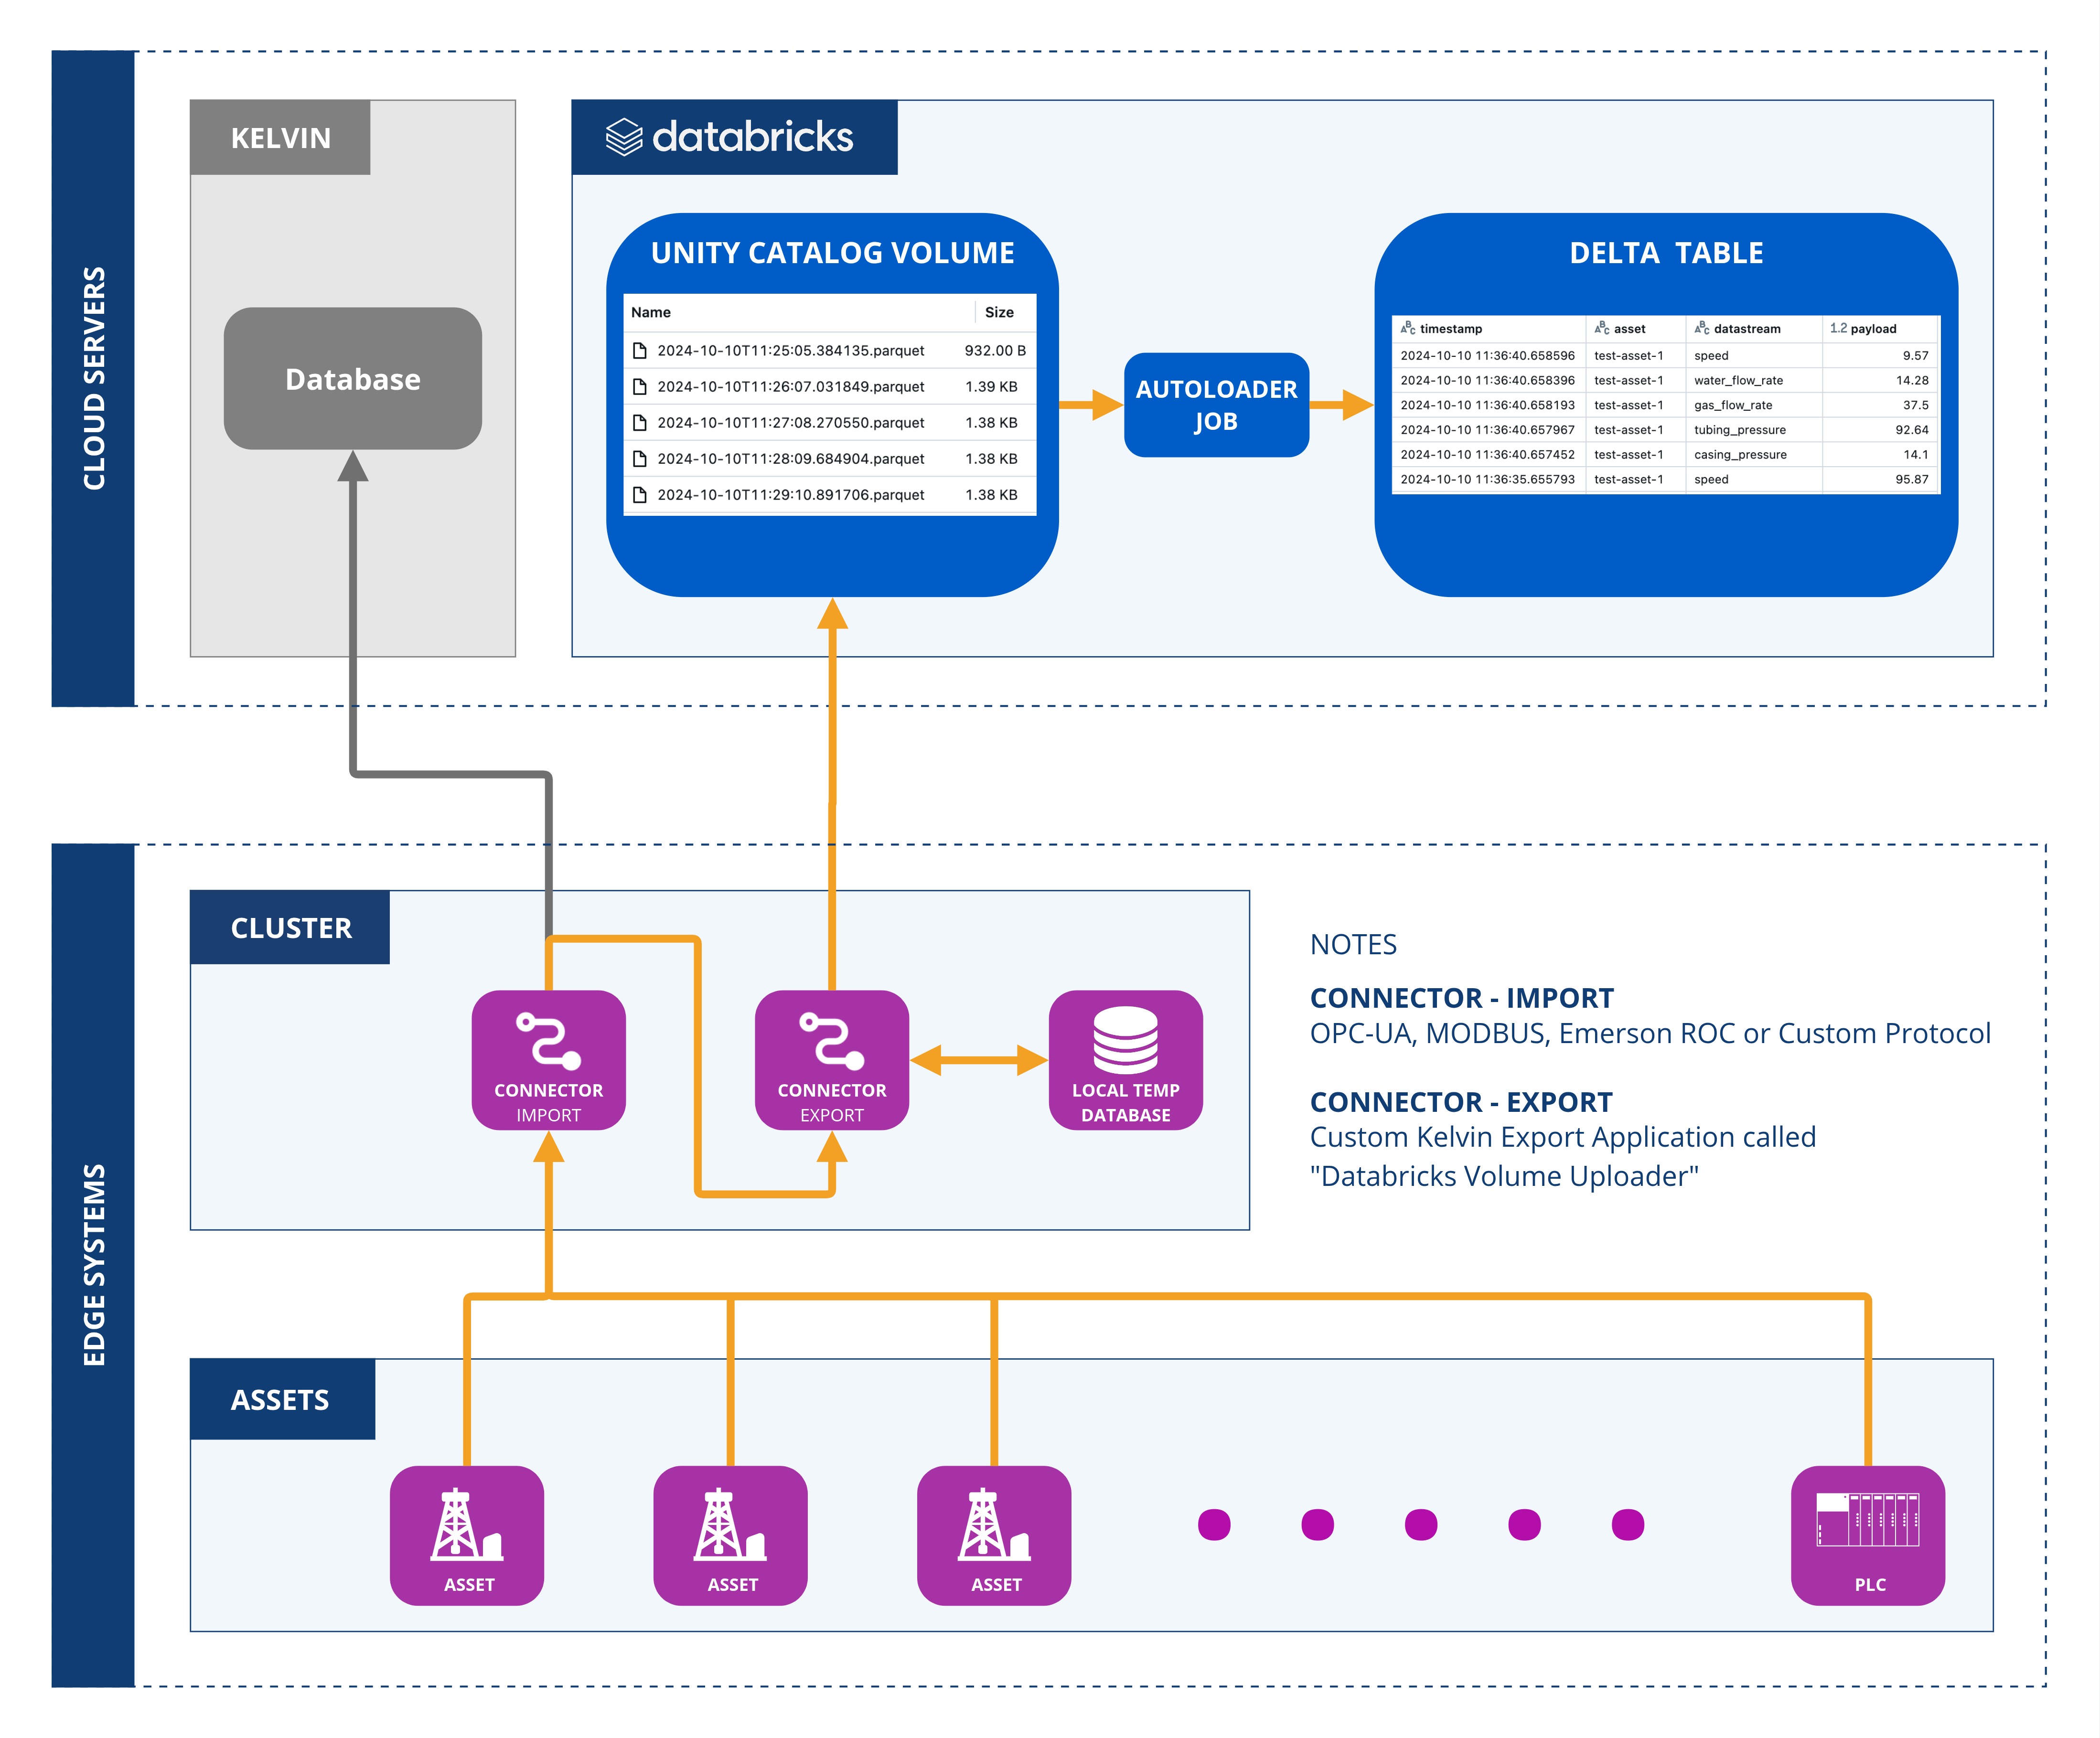
Architecture Diagram
The following diagram illustrates the architecture of the solution:
GitHub
Download from our GitHub Application examples here the full code for the Export Connection Application called "Databricks Volume Uploader.
We will use this code to create the Export Connection Application, test it then upload it to the Kelvin Platform.
The code can be found in the Kelvininc repository at kelvininc → app-samples → exporters → databricks-volume-uploader.
Written Guide
Databricks Setup Requirements
To run this application, you need to properly configure your Databricks workspace. Follow the steps below to create the required resources. We recommend using a Databricks Serverless SQL Warehouse for efficient setup.
Create Unity Catalog Volume
First create a new Volume using the following command:
| Create Unity Catalog Volume | |
|---|---|
Create Delta Table
Secondly, create a Delta Table with the following command:
| Create Delta Table | |
|---|---|
Grant Permissions
Thirdly, grant the necessary permissions for the application to access the Volume and Delta Table:
If you plan to use a data ingestion job, grant these additional permissions:
| Grant Additional Permissions | |
|---|---|
Configure Data Ingestion
Fourth, and finally, the application can create a Databricks job to continuously ingest data into the Delta Table. You have two ingestion options:
- Auto Loader (Recommended)
- SQL Task Execution
Auto Loader (Recommended)
The first option is the Auto Loader method.
If you set the DATABRICKS_JOB_CLUSTER_ID environment variable, the application will create an Auto Loader job. This job is triggered automatically when new files arrive in the volume. Below is a PySpark code snippet demonstrating how Auto Loader works:
SQL Task Execution
The second option is the SQL Task Execution method.
If you set the DATABRICKS_JOB_WAREHOUSE_ID environment variable, the application will create a job that runs the following SQL task:
| SQL Task Execution | |
|---|---|
This job is automatically triggered when new files are added to the volume.
Development Requirements
Note
You can read the full documentation on how to setup your environment to do development works for the Kelvin Platform here.
- Python 3.9 or higher
- Install Kelvin SDK:
pip3 install kelvin-sdk - Install project dependencies:
pip3 install -r requirements.txt - Docker (optional) to upload the application to Kelvin Cloud.
Local Test
You can test the Export Connection Application on your own computer using locally generated synthetic data before uploading it for use on the Kelvin Platform.
Note
In this example we focus only on this Export Connection Application.
You can click here to go to read about all the options available to test your Export Connection Applications on your computer before uploading to the Kelvin Platform.
There are three main steps;
- Define Environment Variables locally
- Run the Simulator Test Tool
- Run Export Connection Application
Define Environment Variables
Note
These environment variables are only used to test your Export Connection Application locally.
Normally these will be stored in Secrets on the Kelvin Platform. Instructions how to do this is given in the Kelvin Cloud Deployment chapter below.
-
Define Databricks environment variables:
-
Define Databricks Job environment variables:
-
If using Auto Loader (Recommended):
Auto Loader Environment Variables -
If using SQL Task Execution:
SQL Task Execution Environment Variables
-
-
Define Databricks Authentication environment variables:
-
If using OAuth machine-to-machine (M2M) (Recommended):
-
If using Databricks Personal Access Token (PAT):
Databricks Personal Access Token (PAT) Environment Variables
-
Run the Simulator Test Tool
Note
You can read more about the Simulator Test tool here.
Now Open a new terminal and Test with synthetic data.
| Run the Simulator Test Tool | |
|---|---|
Run Export Connection Application
Finally Run the application.
| Run Export Connection Application | |
|---|---|
You will now see the data being sent from the Simulator Test Tool to the Export Connection Application and then sent to Databricks where the data is processed into Delta Tables.
Kelvin Cloud Deployment
Upload to Kelvin Cloud
Now that you have tested the Export Connection Application locally on your computer, you can now package and upload it to the Kelvin Cloud where you can deploy it from Connections.
| Upload to Kelvin Cloud | |
|---|---|
Setup Environment Variables
Before deploying this Export Connection Application to a cluster using the Kelvin Cloud you need to setup the environment variables as Secrets on the Kelvin Platform.
Note
You can read all about secrets here.
-
If using Auto Loader (Recommended):
-
If using SQL Task Execution:
-
If using OAuth machine-to-machine (M2M) (Recommended):
-
If using Databricks Personal Access Token (PAT):
Deploy to Edge
You are now ready to deploy the Export Connection Application to the Edge.
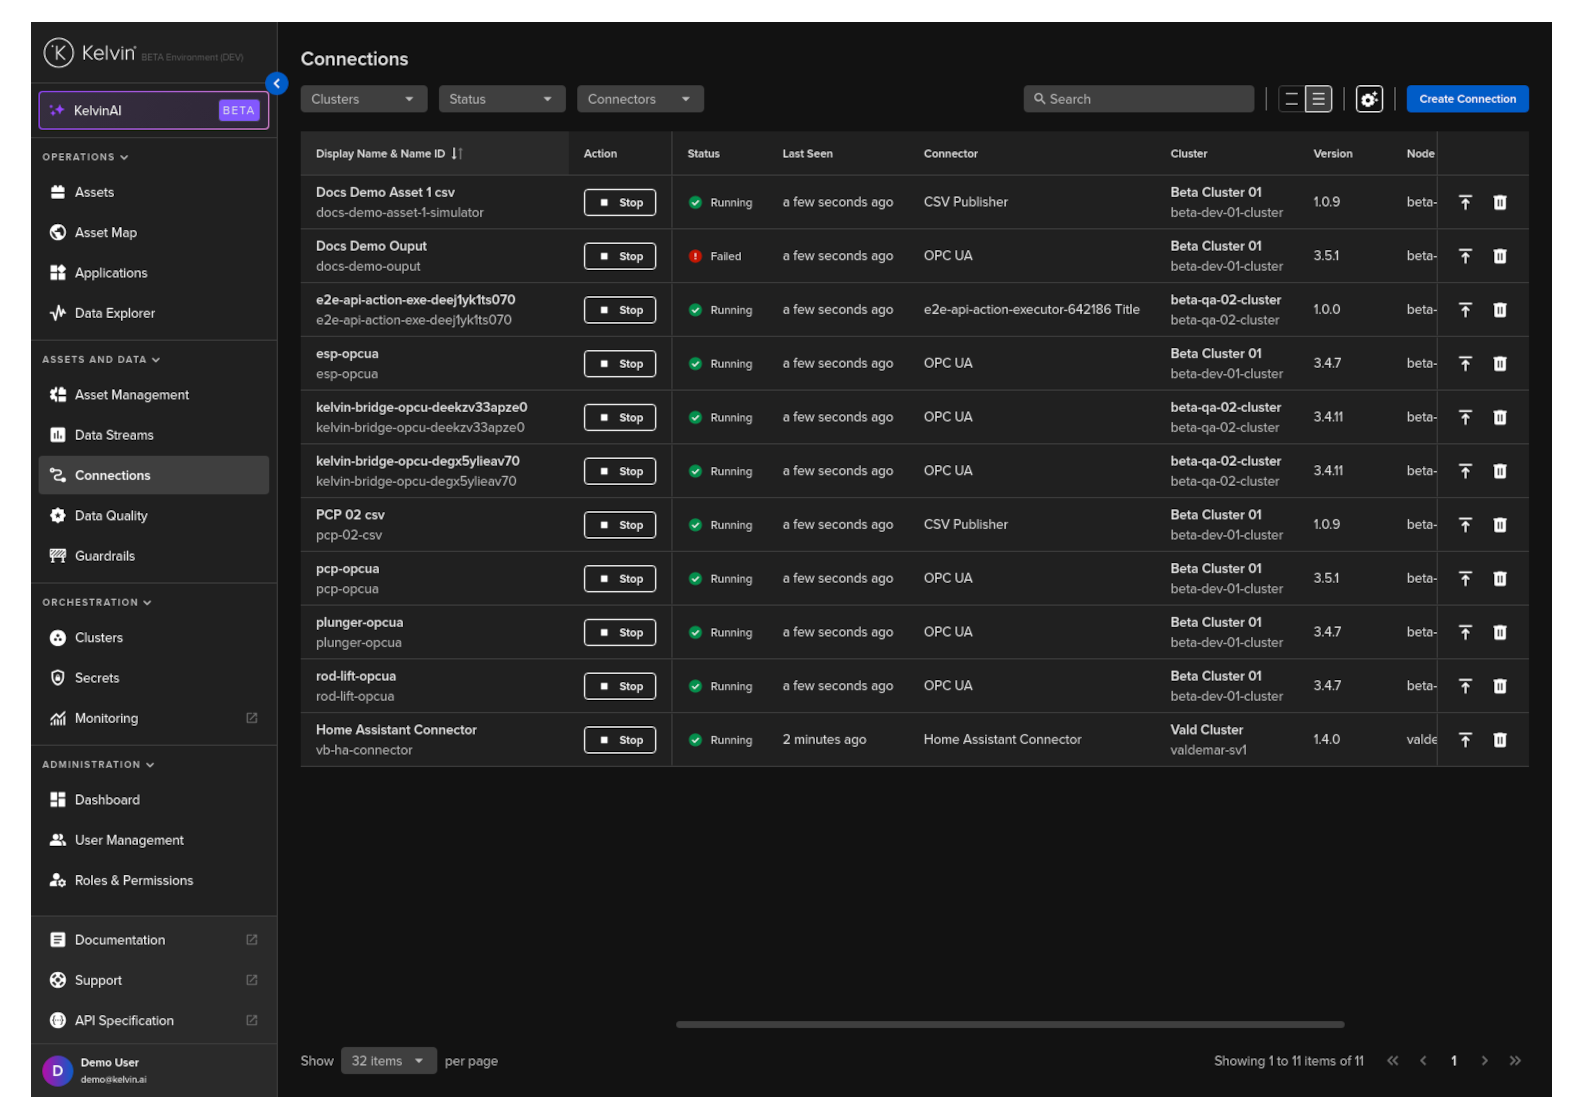
To start click on the Connections menu option from the left side bar menu.
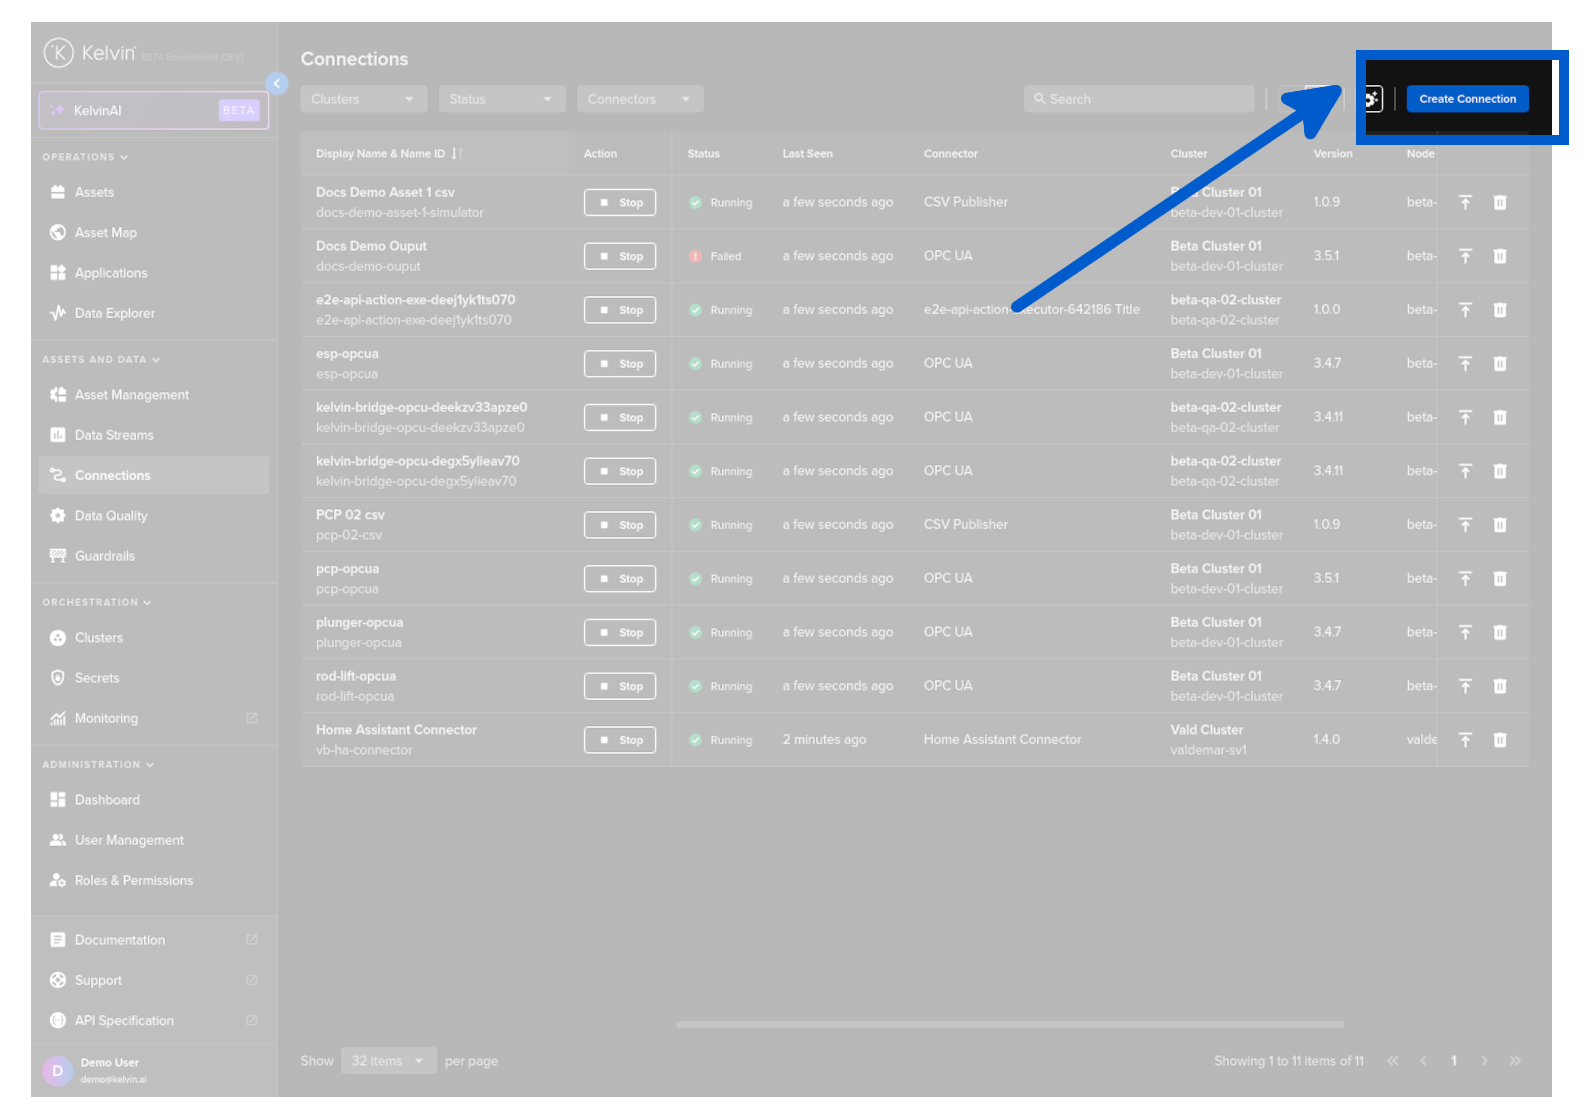
click on the Create Connection button.
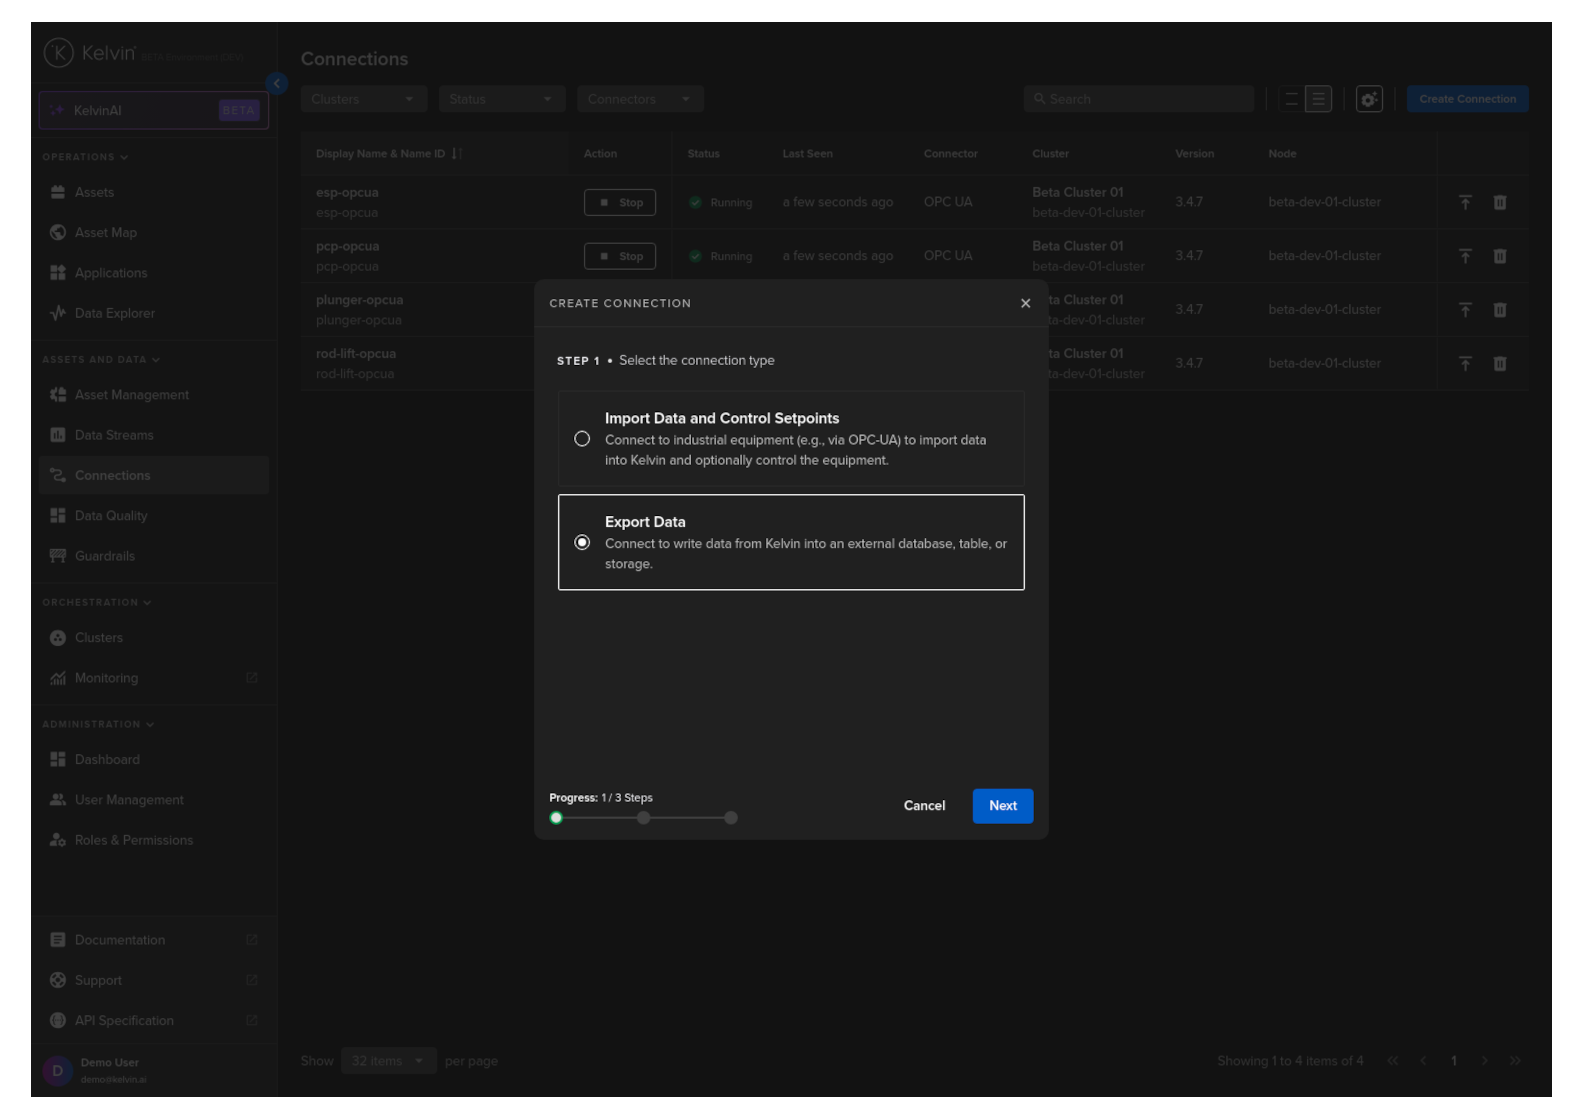
Step 1
Select Export Data and click Next.
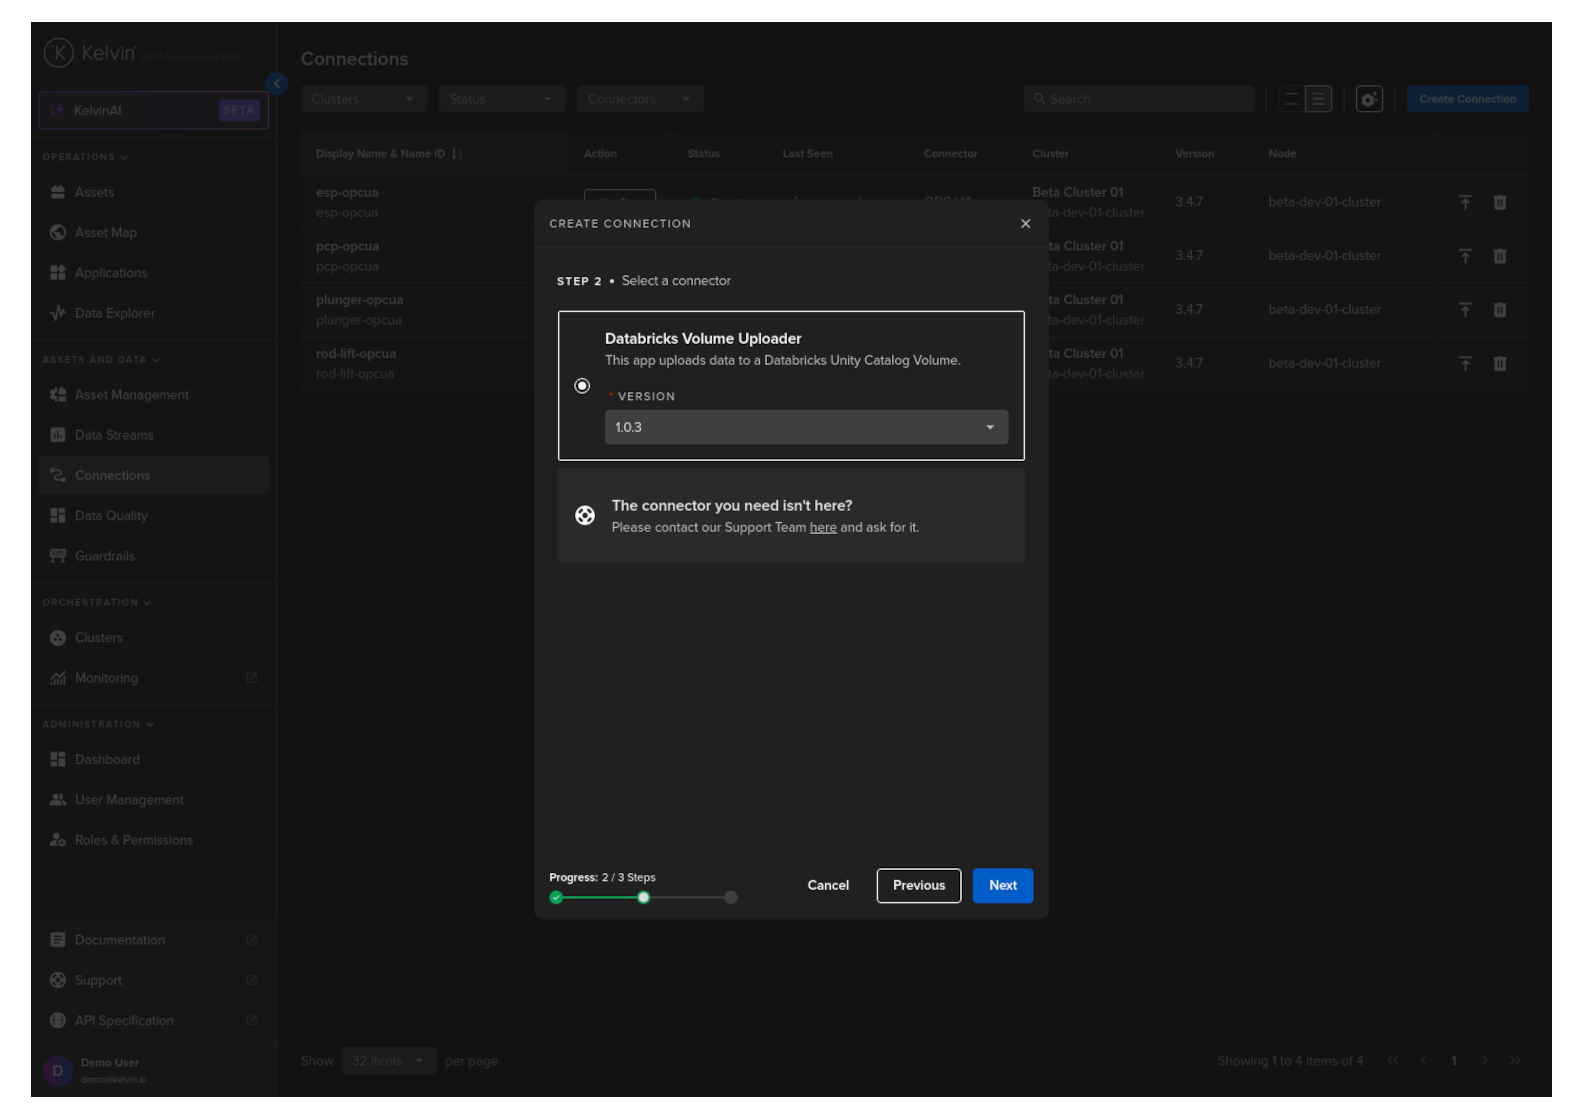
Step 2
Select the custom Export Connector's name Databricks Volume Uploader option, select a Version and click Next.
Step 3
In Step 3 you have a range of options available.
Note
You will only be able to deploy your workload once all options have a green check ![]() .
.
Information
Type in a memorable name in the Display Name text input. You can use any letters, numbers and special characters.
The Connection Name text input will be automatically converted and filled in as you type in the Display Name section. The conversion ensures the Connection Name only contains lowercase alphanumeric characters and ., _ or - characters.

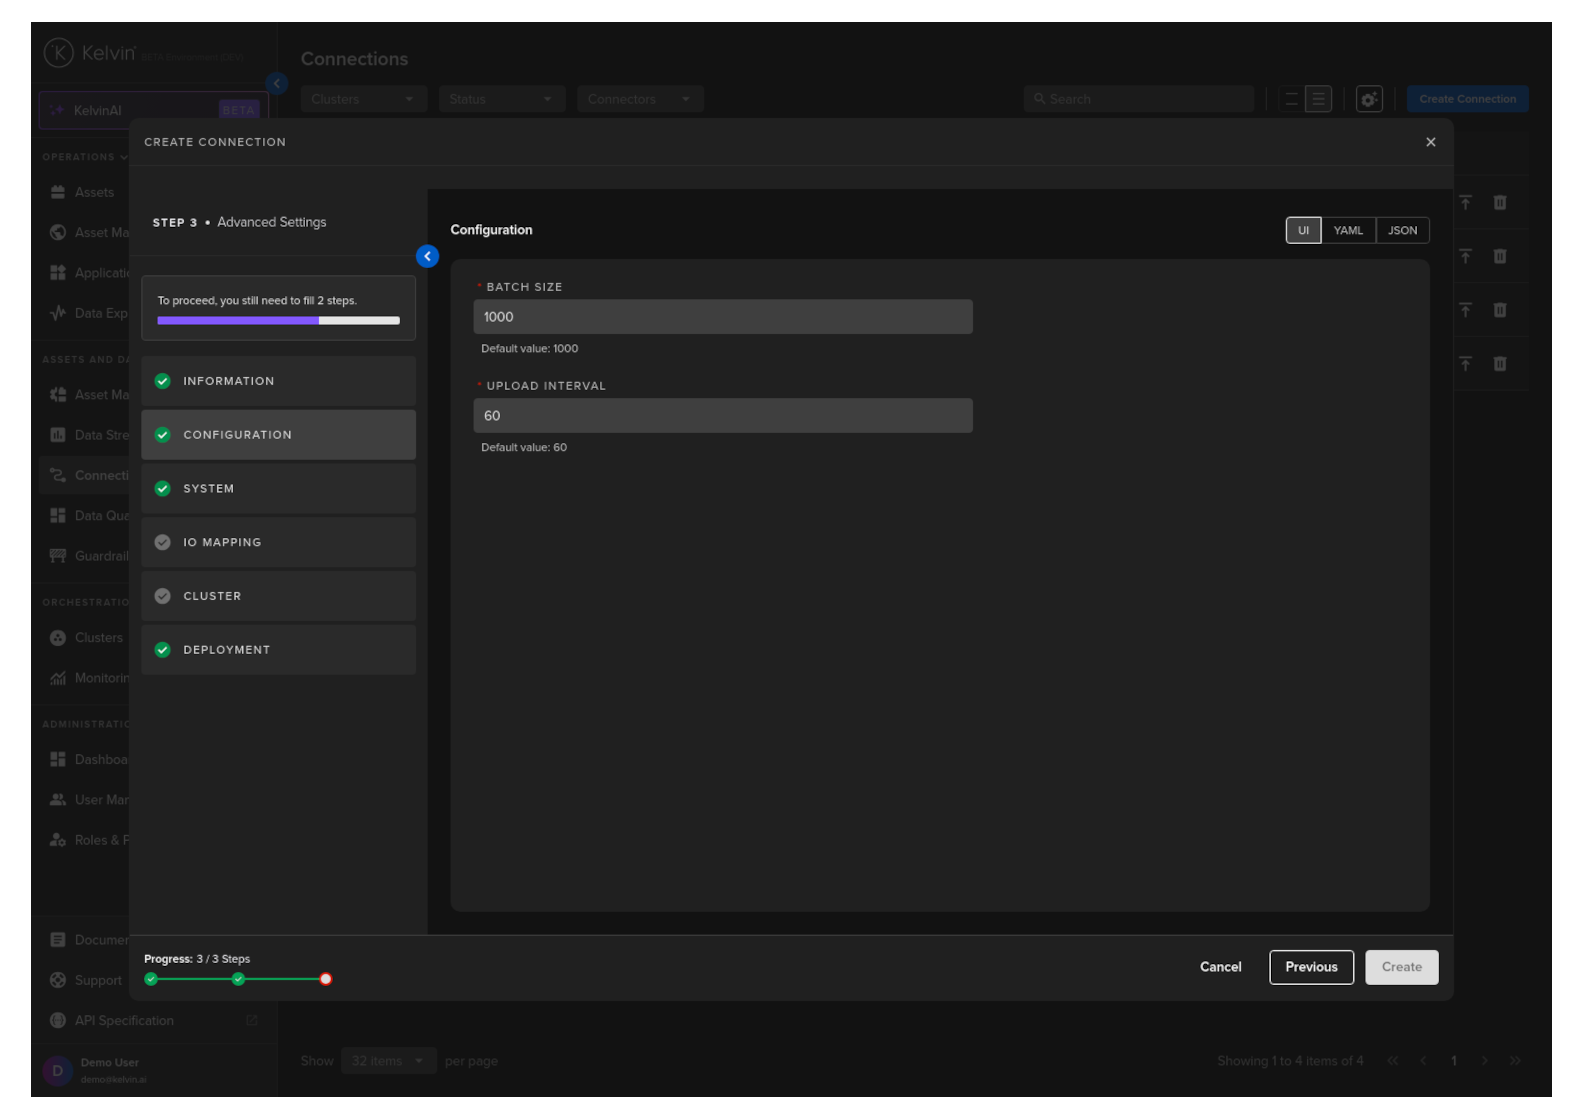
Configuration
Configuration options for the Databricks Volume Uploader allow the user to customize the batch size and upload interval.
Note
When developing the Export Connection Application, we created this UI options screen in the file configuration.json located in the ui_schemas folder.
System
Here you will be able to tune all the system variables that are present in the app.yaml file of the Application.
You can choose to edit it using a UI or directly on the YAML or JSON.
Note
Using YAML or JSON is very useful for fast application of settings if you have preset configurations and want to copy/paste them into here.
For this guide we will only show you the Env Vars and Volumes which is unique to this Export Connection Application.
Note
To understand about all the options available, you can read the full documentation here.
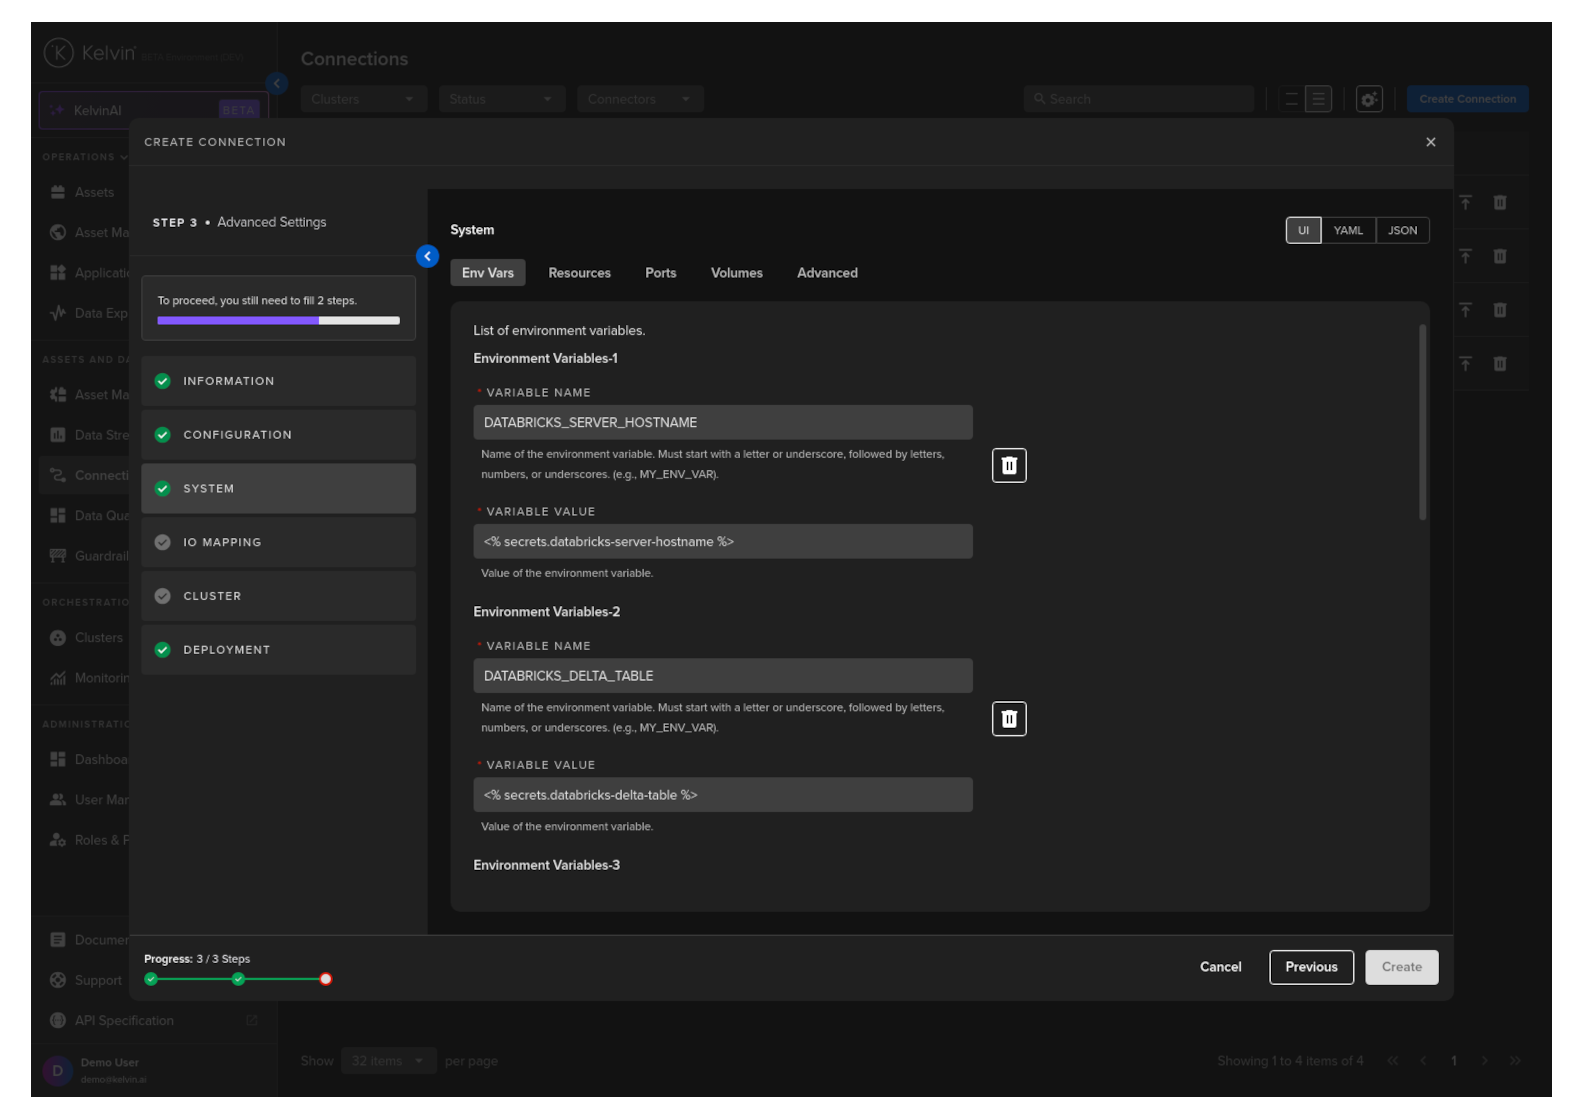
Env Vars
Here will be shown the list of required Environment Variables.
Note
You will see the default values already filled in.
The default values are defined in the app.yaml file when developing the Application.
Users should not change this as this is already setup to use the secrets feature in the Kelvin Platform which securely stores sensitive information.
Click here for a reminder of how we setup secrets for this Export Connection Application.
These are default global variables for deployed Export Connection Applications. To use different values per deployment, create unique secret names and instruct users to define the correct secret name for each deployment.
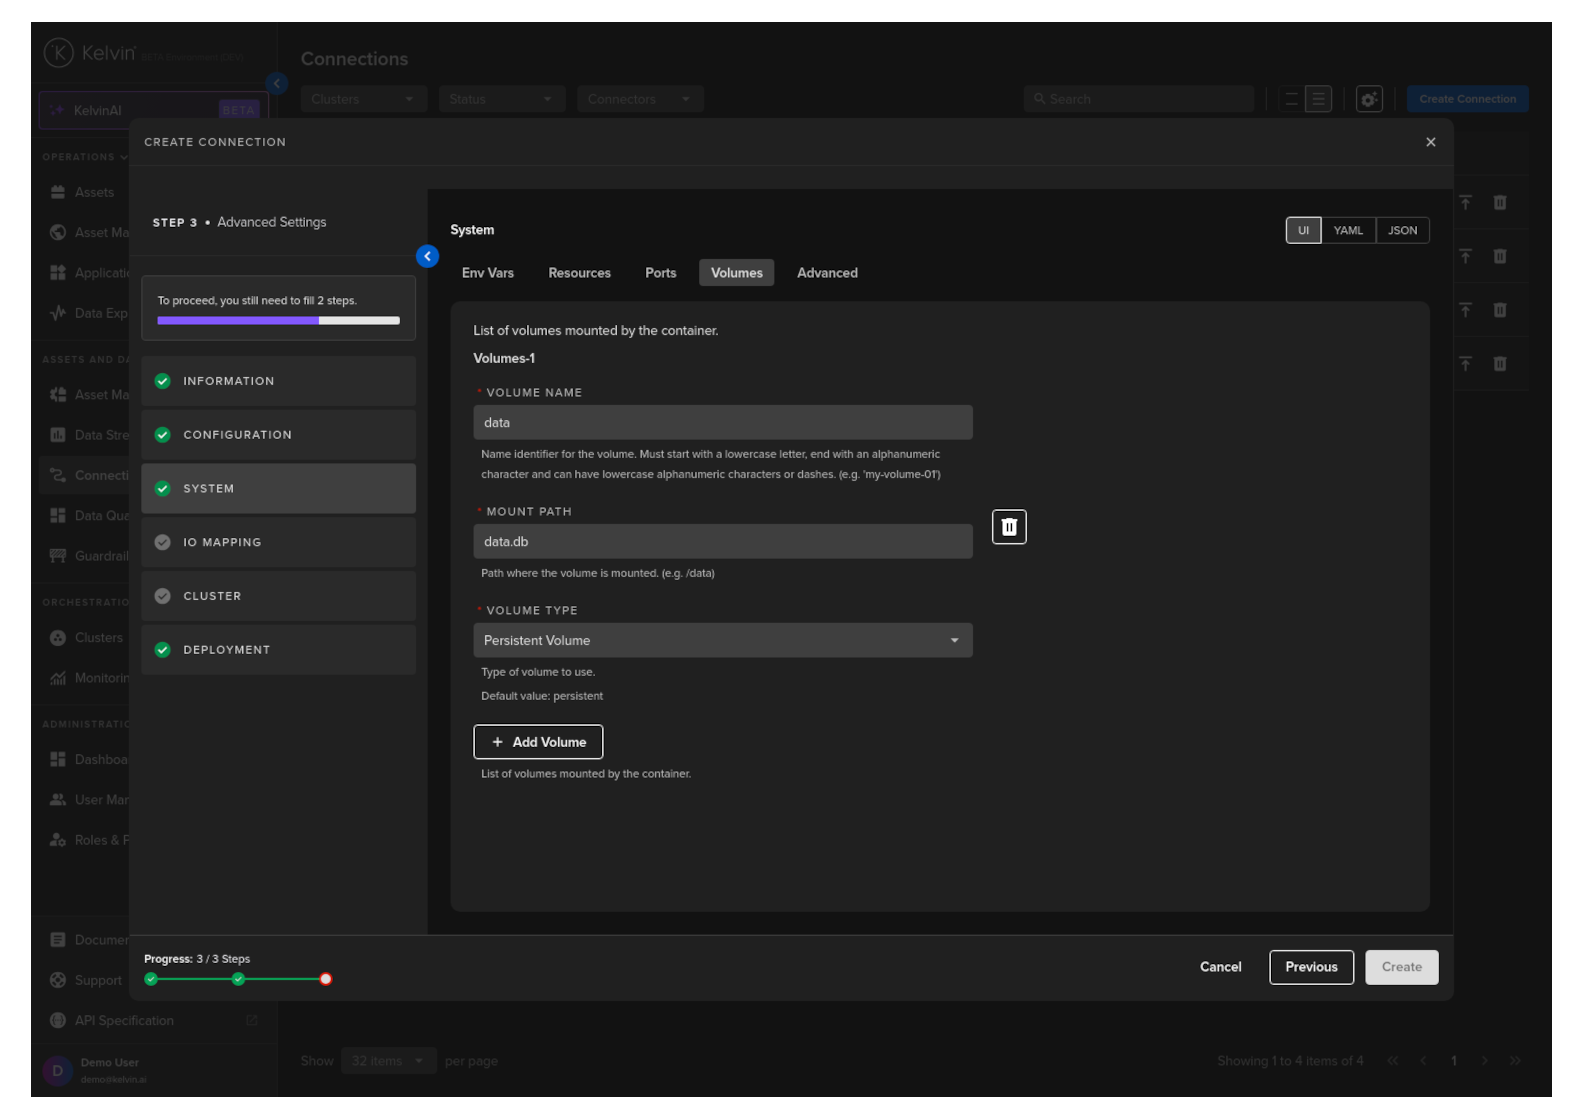
Volumes
Mount volumes to your Workload.
Note
We have already defined a default volume when developing the Export Connection Applications.
If you deploy multiple Export Connections to the same Cluster/Node, then the volume name will need to be unique to each deployment on the same node.
Deployment to different Nodes and Clusters can use the default setup.
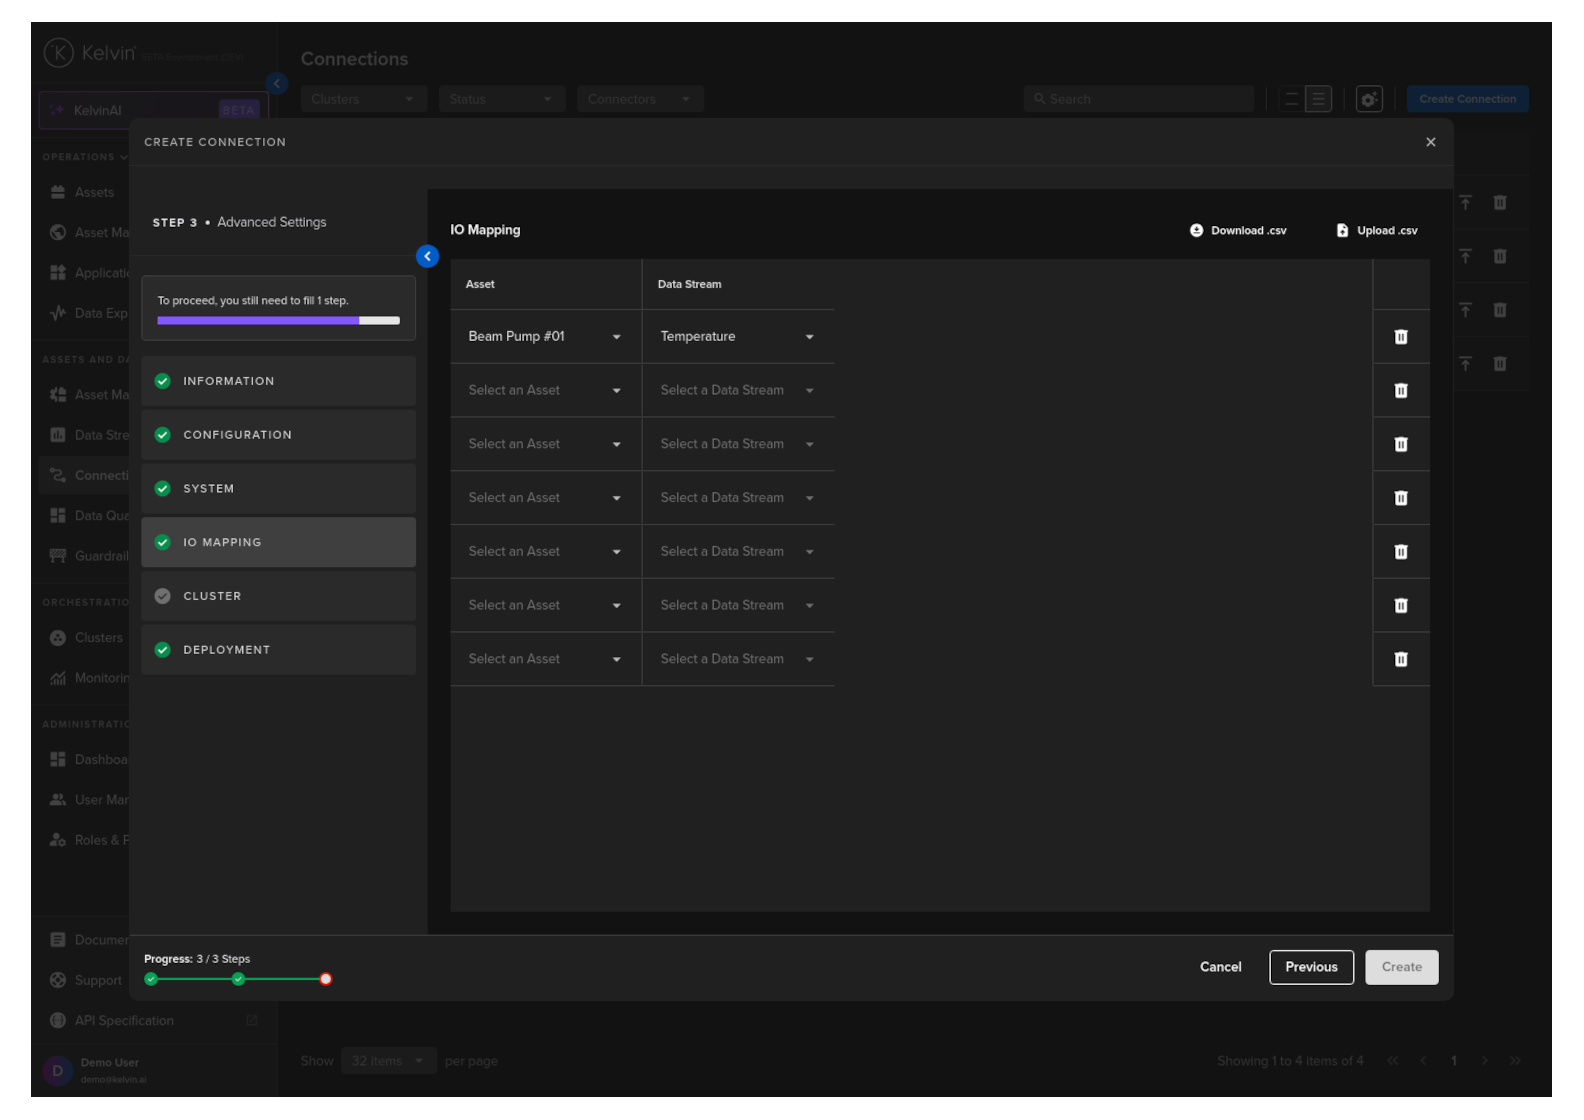
IO Mapping
Create a list of Asset/Data Stream pairs whose data will be sent to Databricks.
Full descriptions of each column is giving below.
Success
If you have many connection IO to fill in, you can save time with the download/upload csv file option in the top right hand corner of the popup.
Use Microsoft Excel or Google Sheets to fill in all the Connection IO details.
You can only upload one file. Multiple file uploads is not allowed and only the latest selected file will be used.
| Header | Description | Example | Mandatory |
|---|---|---|---|
| Asset | The Kelvin Asset name (must be lowercase alphanumeric with no spaces) | Beam Pump 01 | Yes |
| DataStream | The Kelvin Data Stream name (must be lowercase alphanumeric with no spaces) | Motor Temperature | Yes |
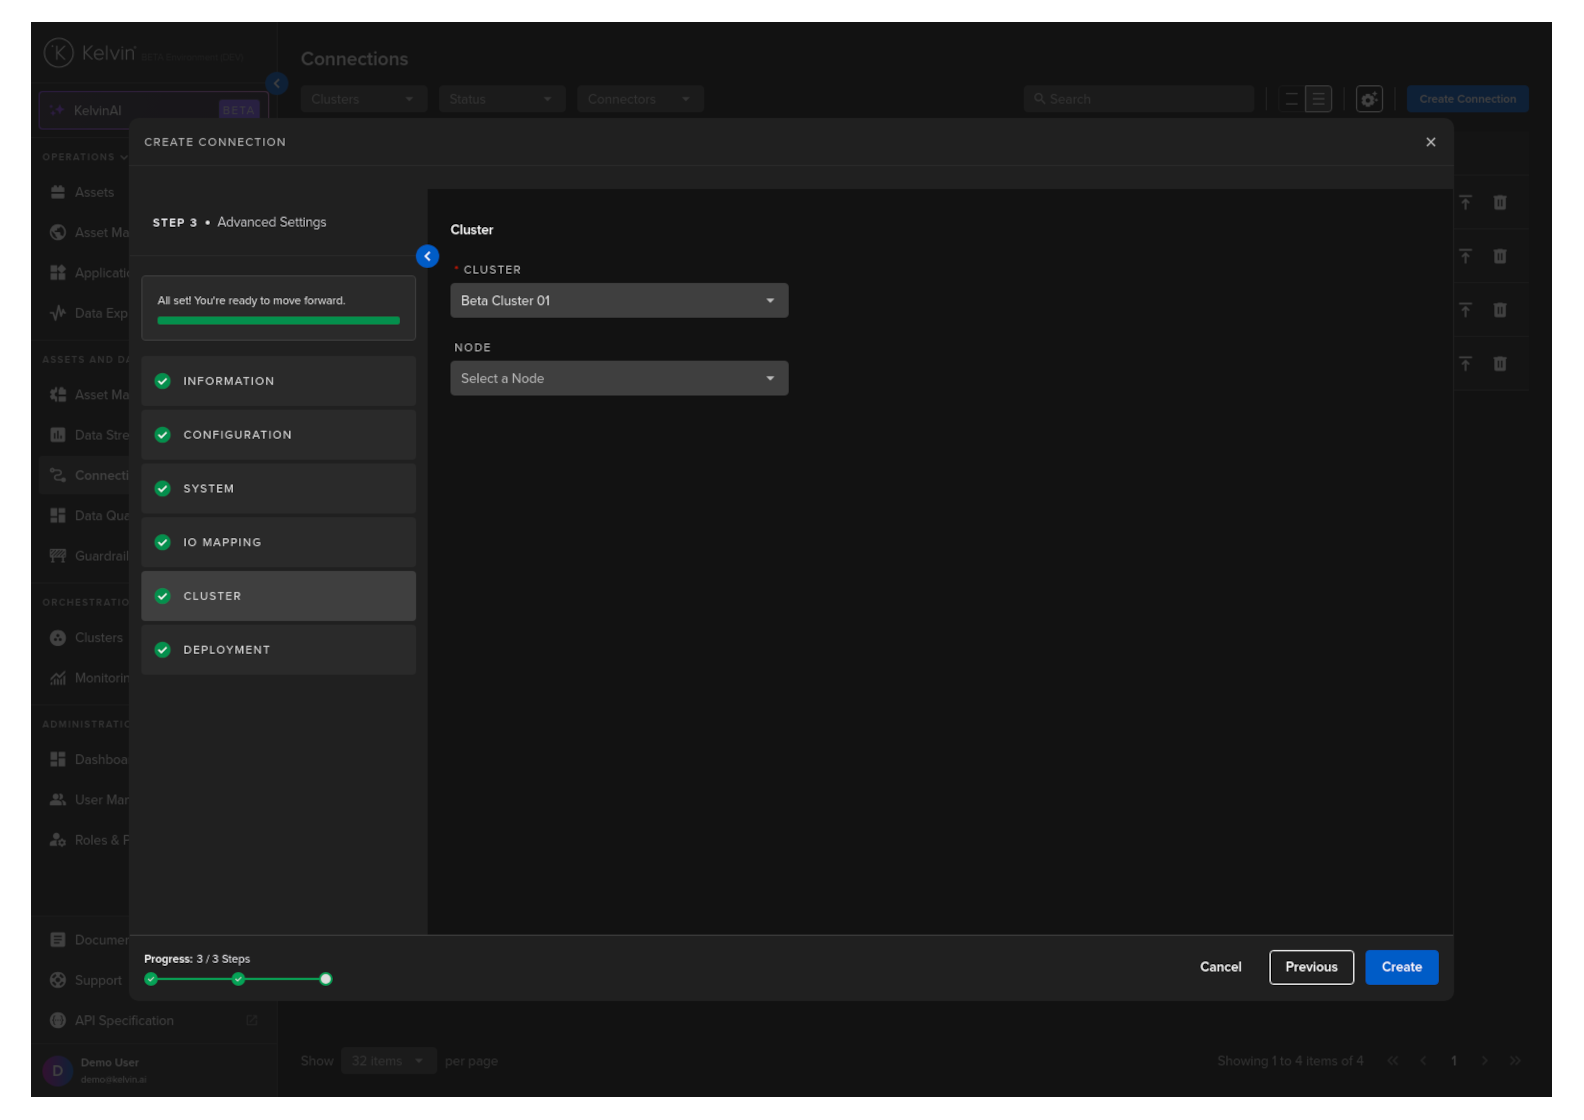
Cluster
Then select which Cluster to deploy the new Export Connector to.
Optionally you can also select the Node in the Cluster. If you do not then the system will automatically assign the Node.
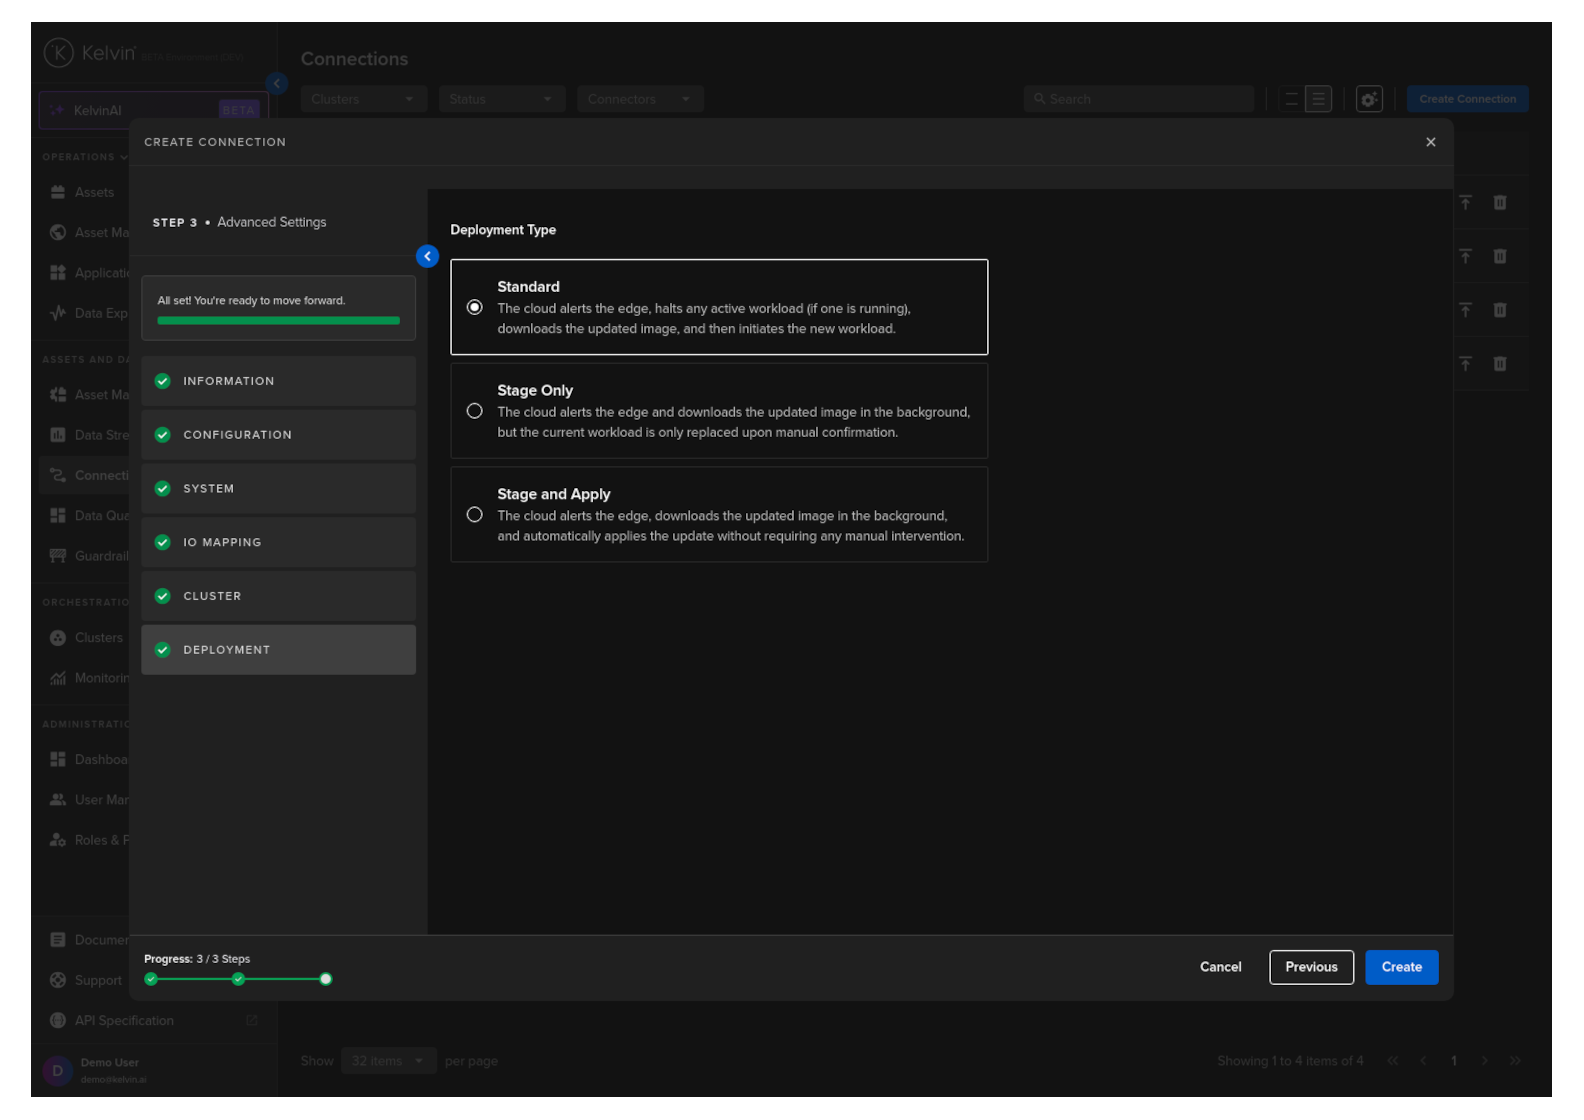
Deployment
For a standard Workload deployment, choose the Standard option.
Note
Stage Only and Instant Apply are covered in a different documentation section.
When you are ready and you have a green check ![]() on all options, you will see the Create button turn blue.
on all options, you will see the Create button turn blue.
Click it and the Export Connection will be deployed to the edge according to the Deployment setting.

You can then see the status of the Connection in the Connections list going from Pending, Deploying to Running. It will start automatically, connect to the asset and start sending data to your Databricks Volume and Delta Table.
You can even create and deploy the Connection if the Cluster is offline. It will be placed in a queue with a status of Pending and will be automatically deployed when the Cluster comes back online.