Customize Columns
On this page you will learn about customizing the columns in the Assets Overview page in Kelvin UI.
If you do any customization to the columns but do not save it as a view, you will lose your changes when you leave the Asset page.
If you want to keep your changes, make sure to save it as a View.
Asset Page
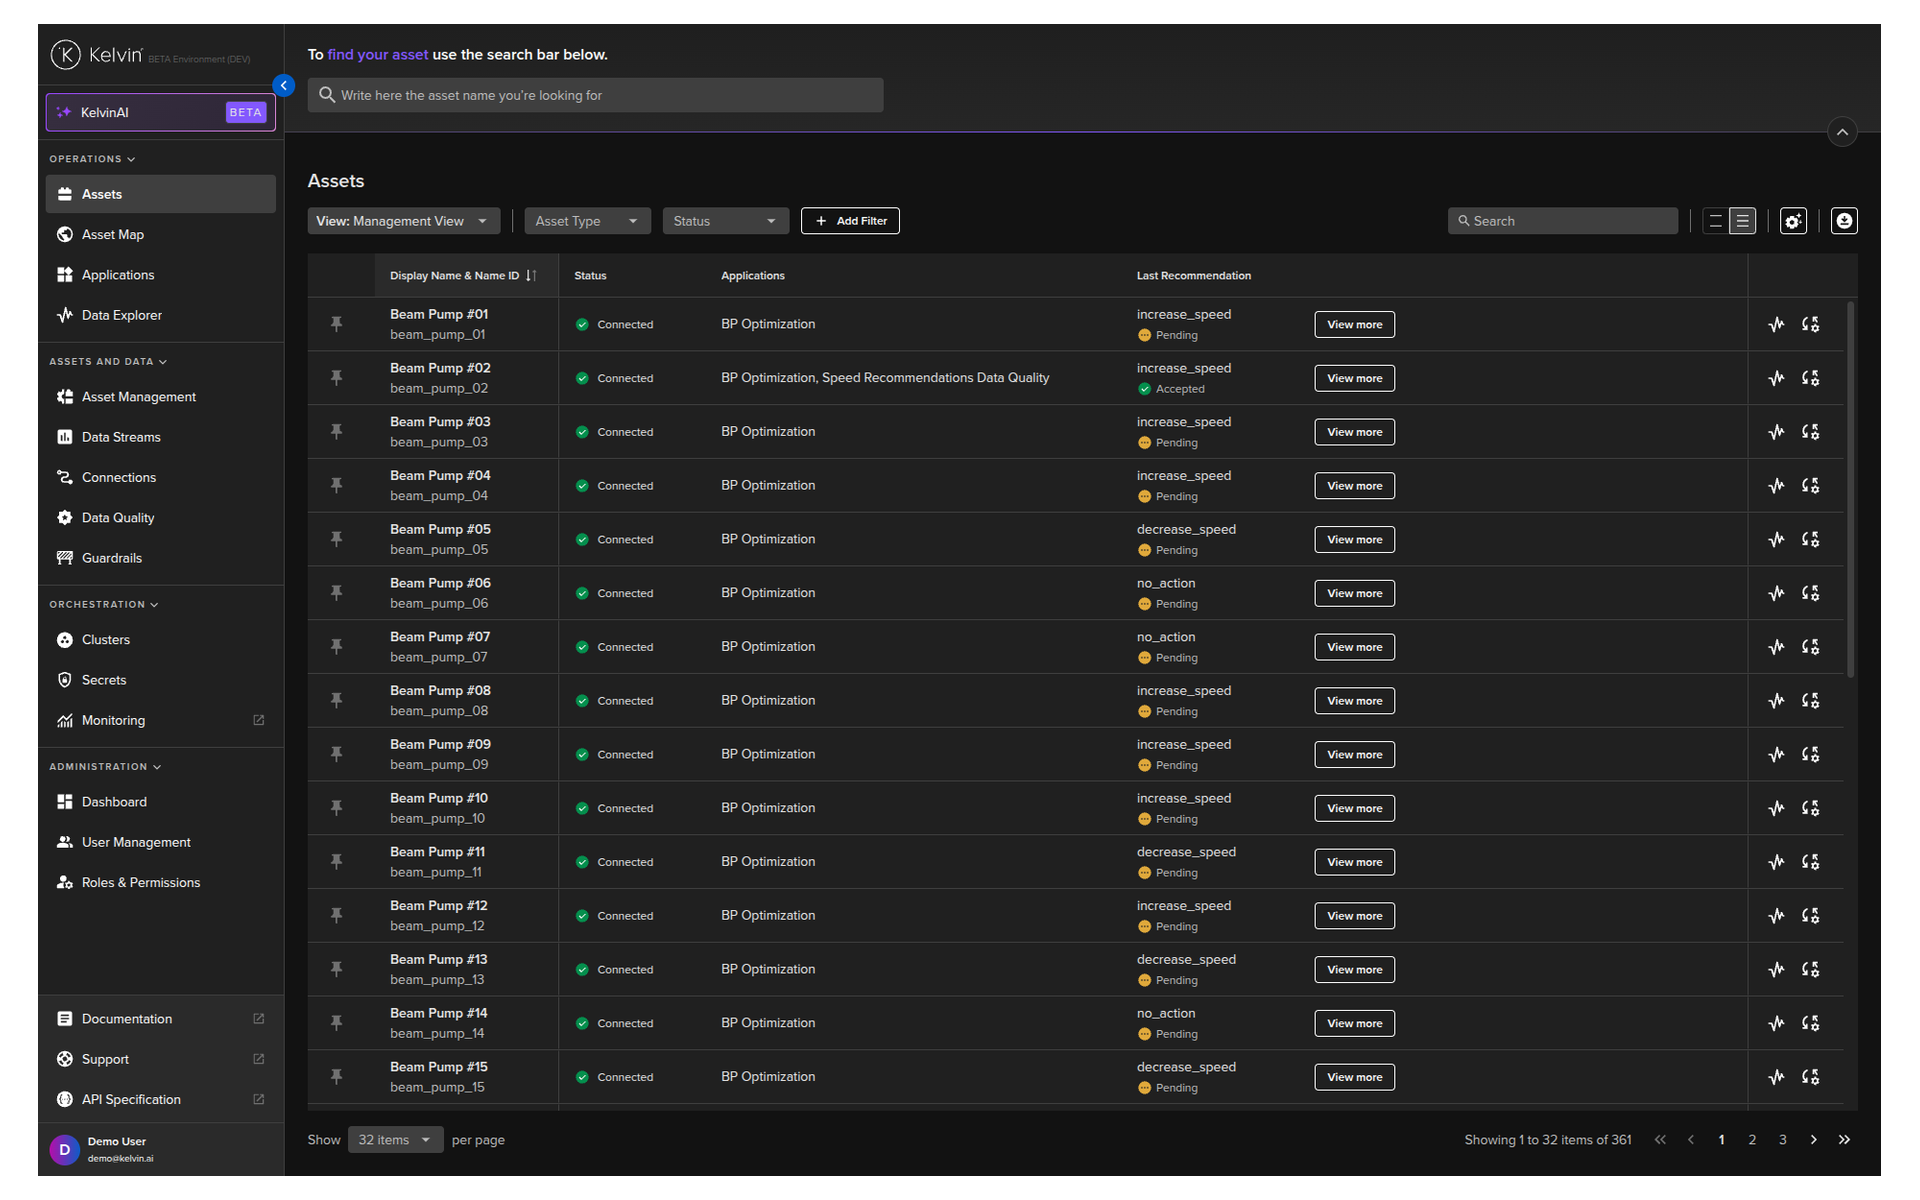
The Assets page is the first page you will see when you log into the Kelvin UI. You can also go there by clicking on the Asset option in the left sidebar.
Here you have a list of all Assets registered in Kelvin. From here you can see the Assets and associated information.
This uses the asset-centric table which is a highly optimized way to customize columns and view many Kelvin-centric information related to the assets that are relevant to you.
For example, here we have an example with Control Changes and Recommendations included.
The View More button in the Recommendations column is a button that takes you directly to that recommendation to record a decision about that Recommendation.
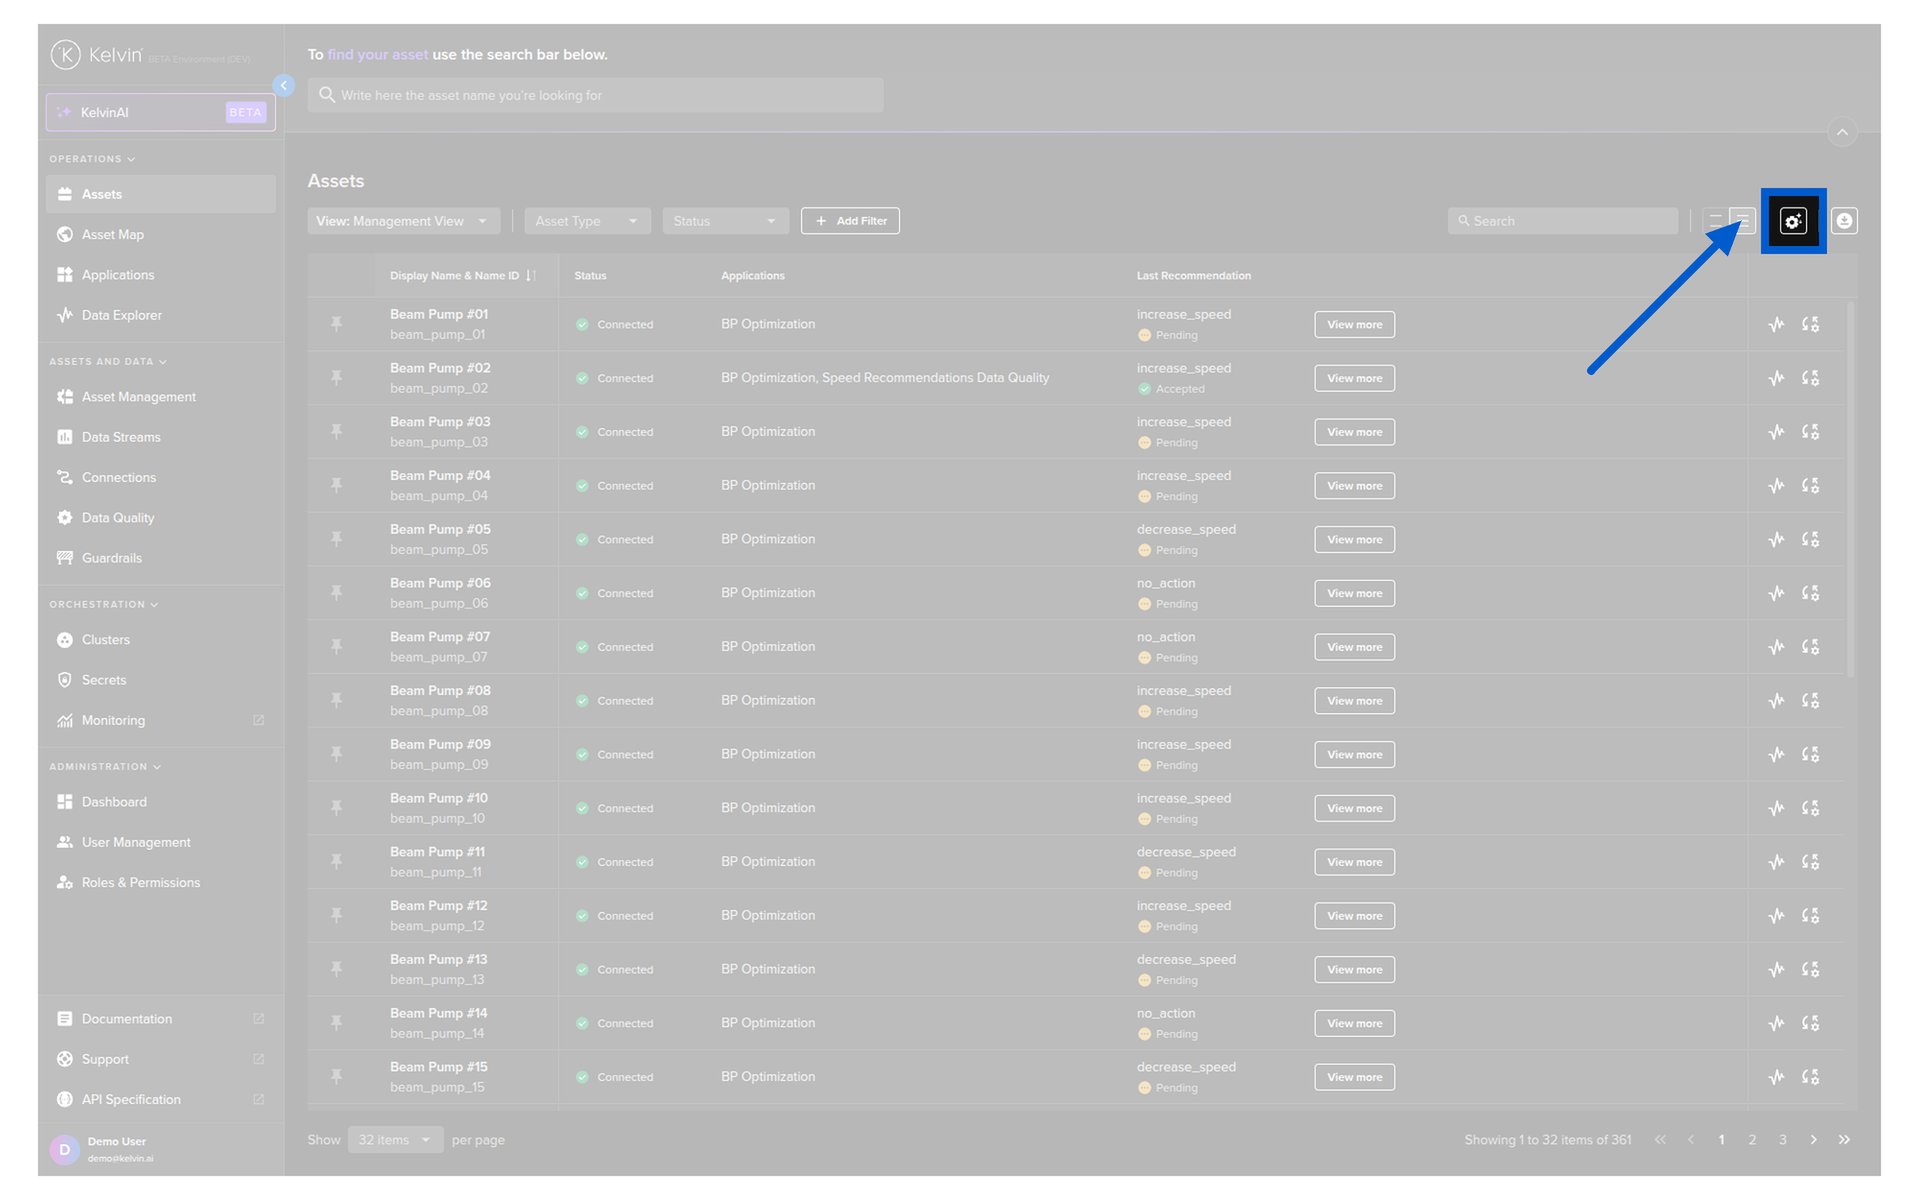
Column Settings
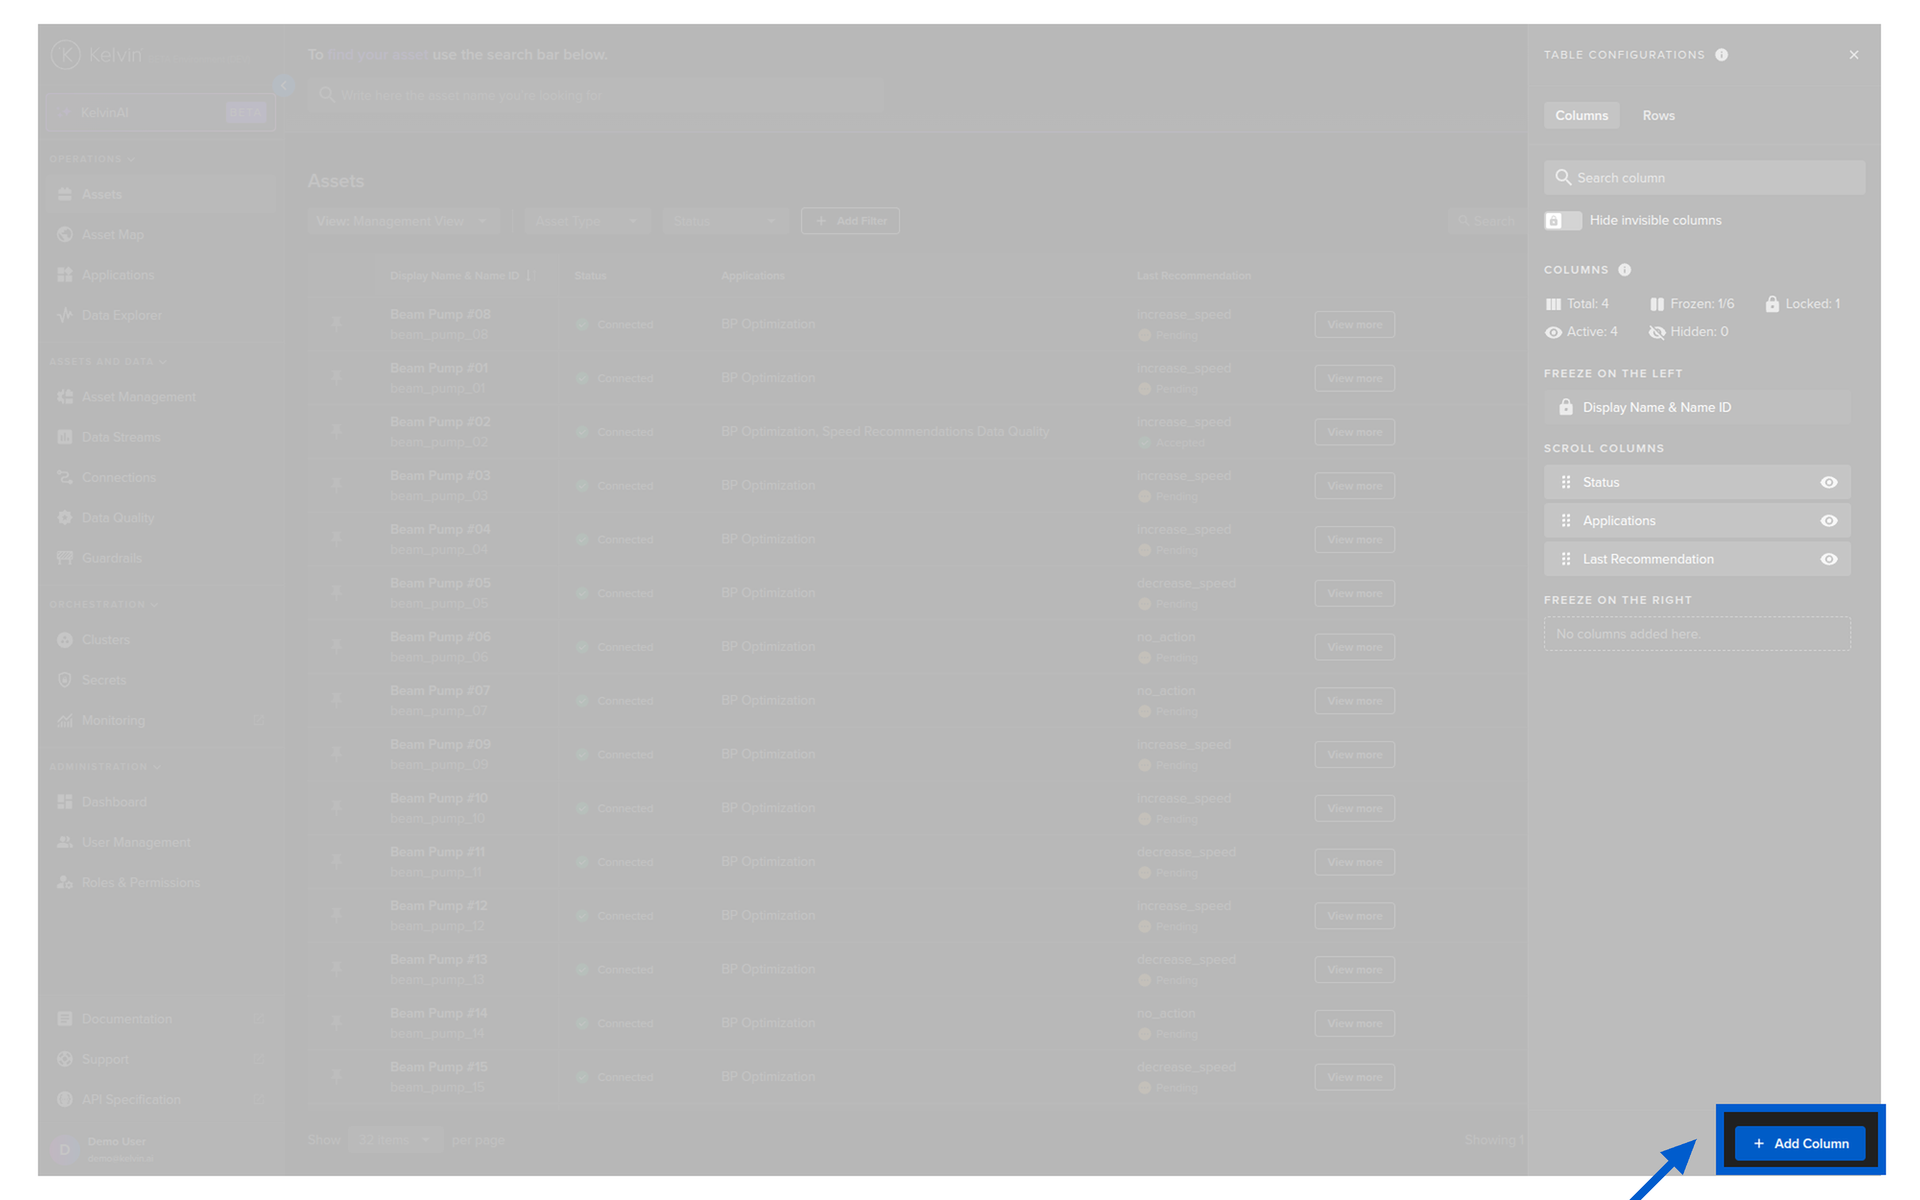
Asset-centric tables bring many more advanced features to the lists to give you greater control in setting up the right overview experience to streamline your workflow. This includes being able to incorporate specific Recommendations and Control Changes into the lists with direct links to control the Assets.
When you click on the button you will get the Configuration Table options come up;
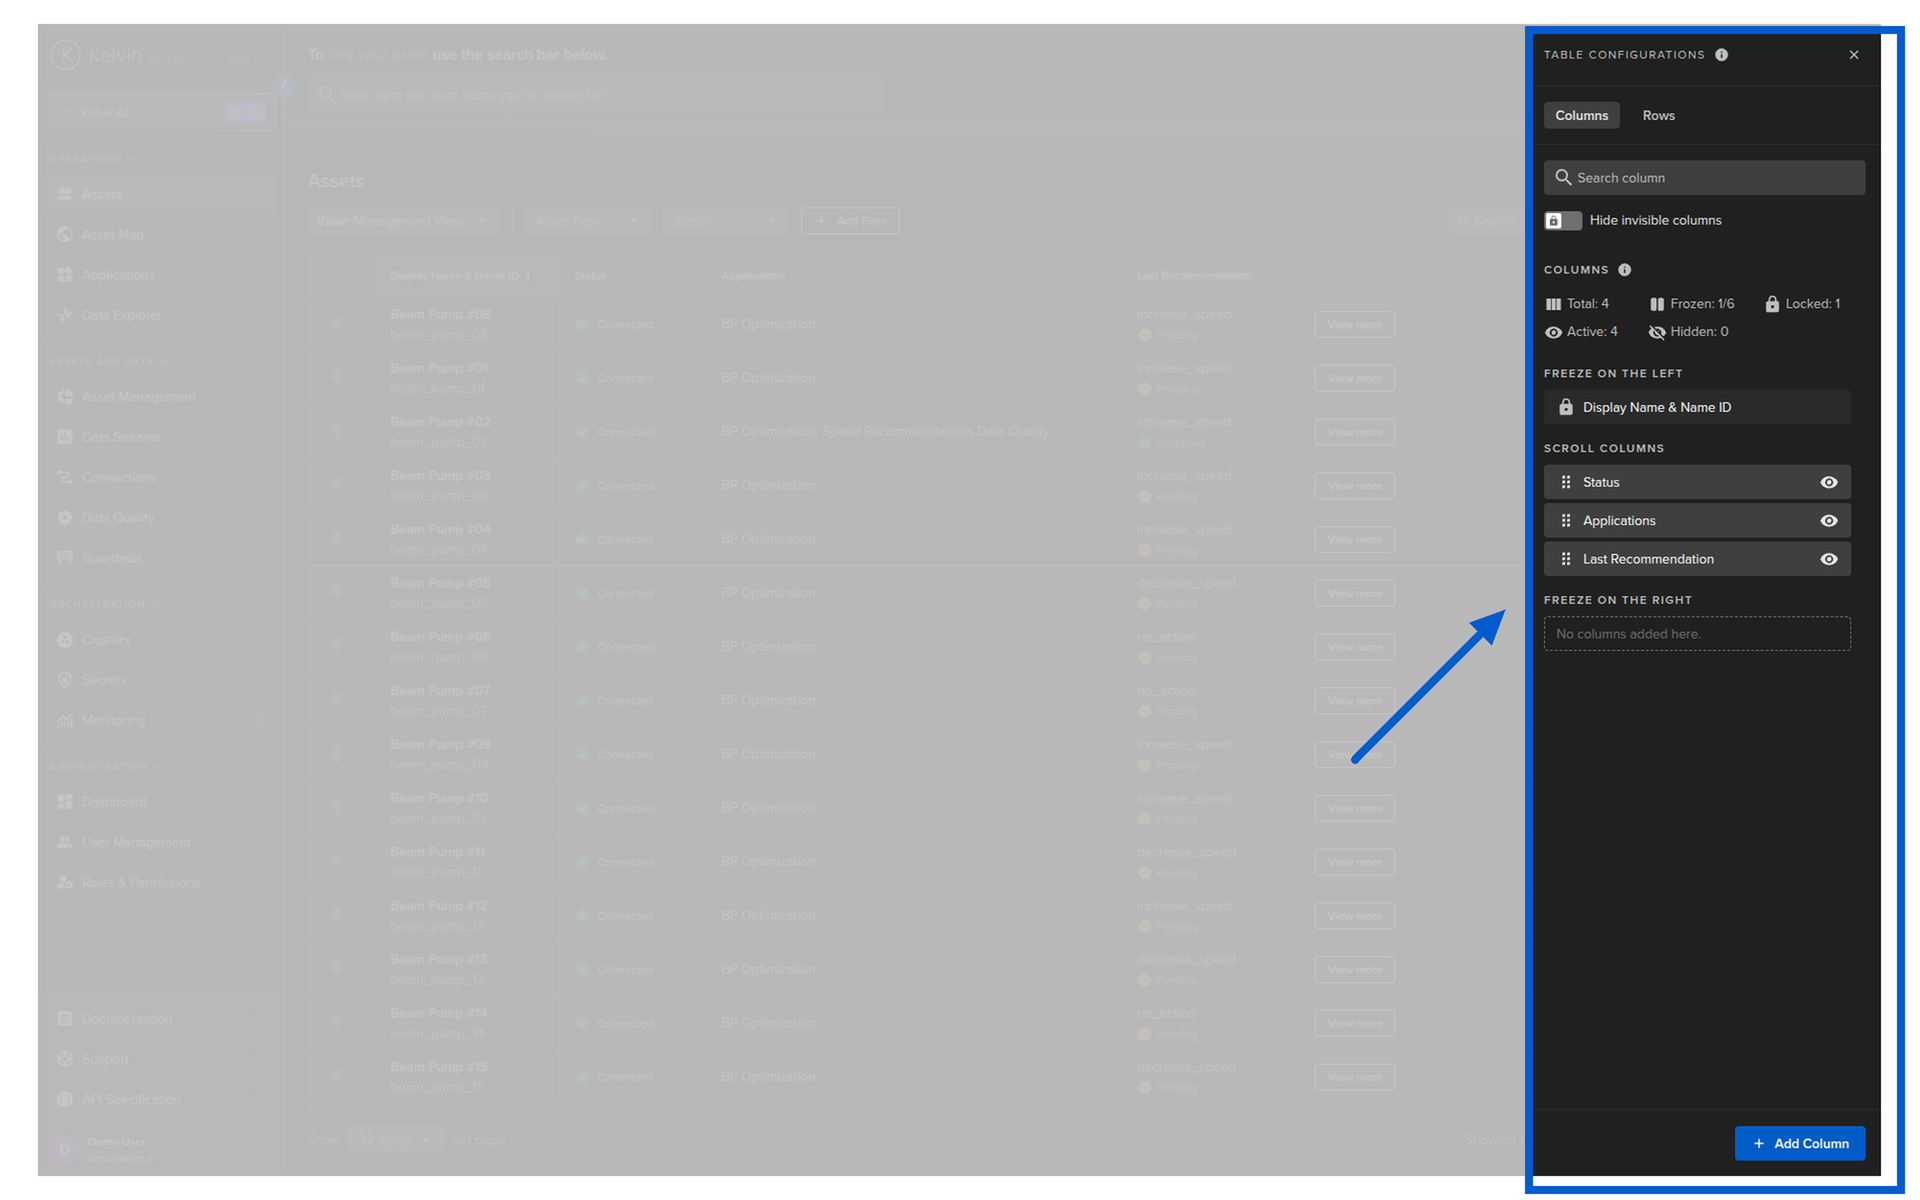
You will then see a new option bar open up on the right hand side.
Standard Options
There are a number of options available to find and pin the Assets of interest.
Kelvin UI intelligently remembers your search results from the Assets Overview page and will use it in the Asset Details page to rotate through your Assets that are on the search results ONLY. This allows you to quickly move between the details page of each Asset that matters the most to you at that time.
If you want to view other Assets in the Assets Details page you will need to return to this page and update or clear the search box and pinned Assets.
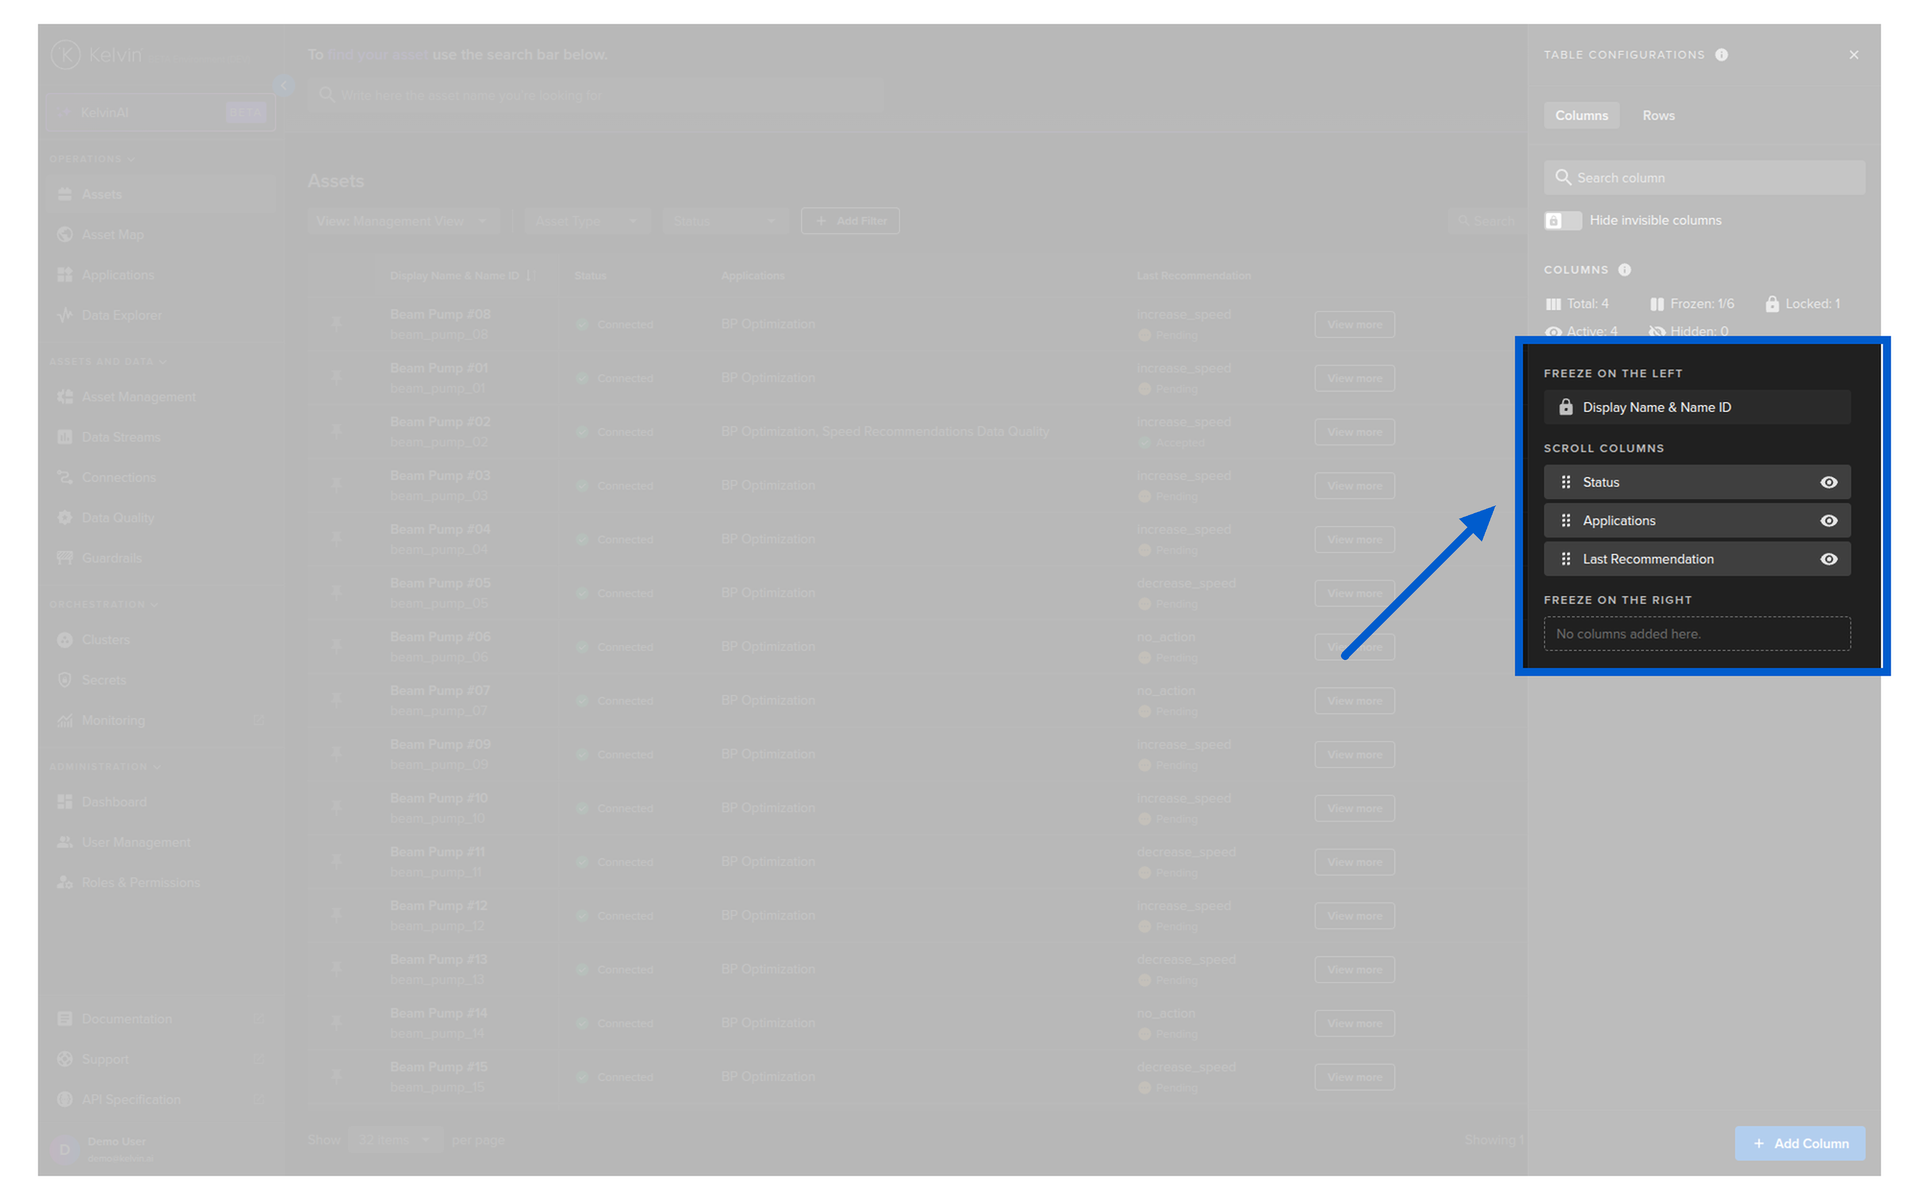
When you are inside the column settings you can freeze columns left and right. This ensures the columns will always show, even when you scroll left or right to see all the columns.
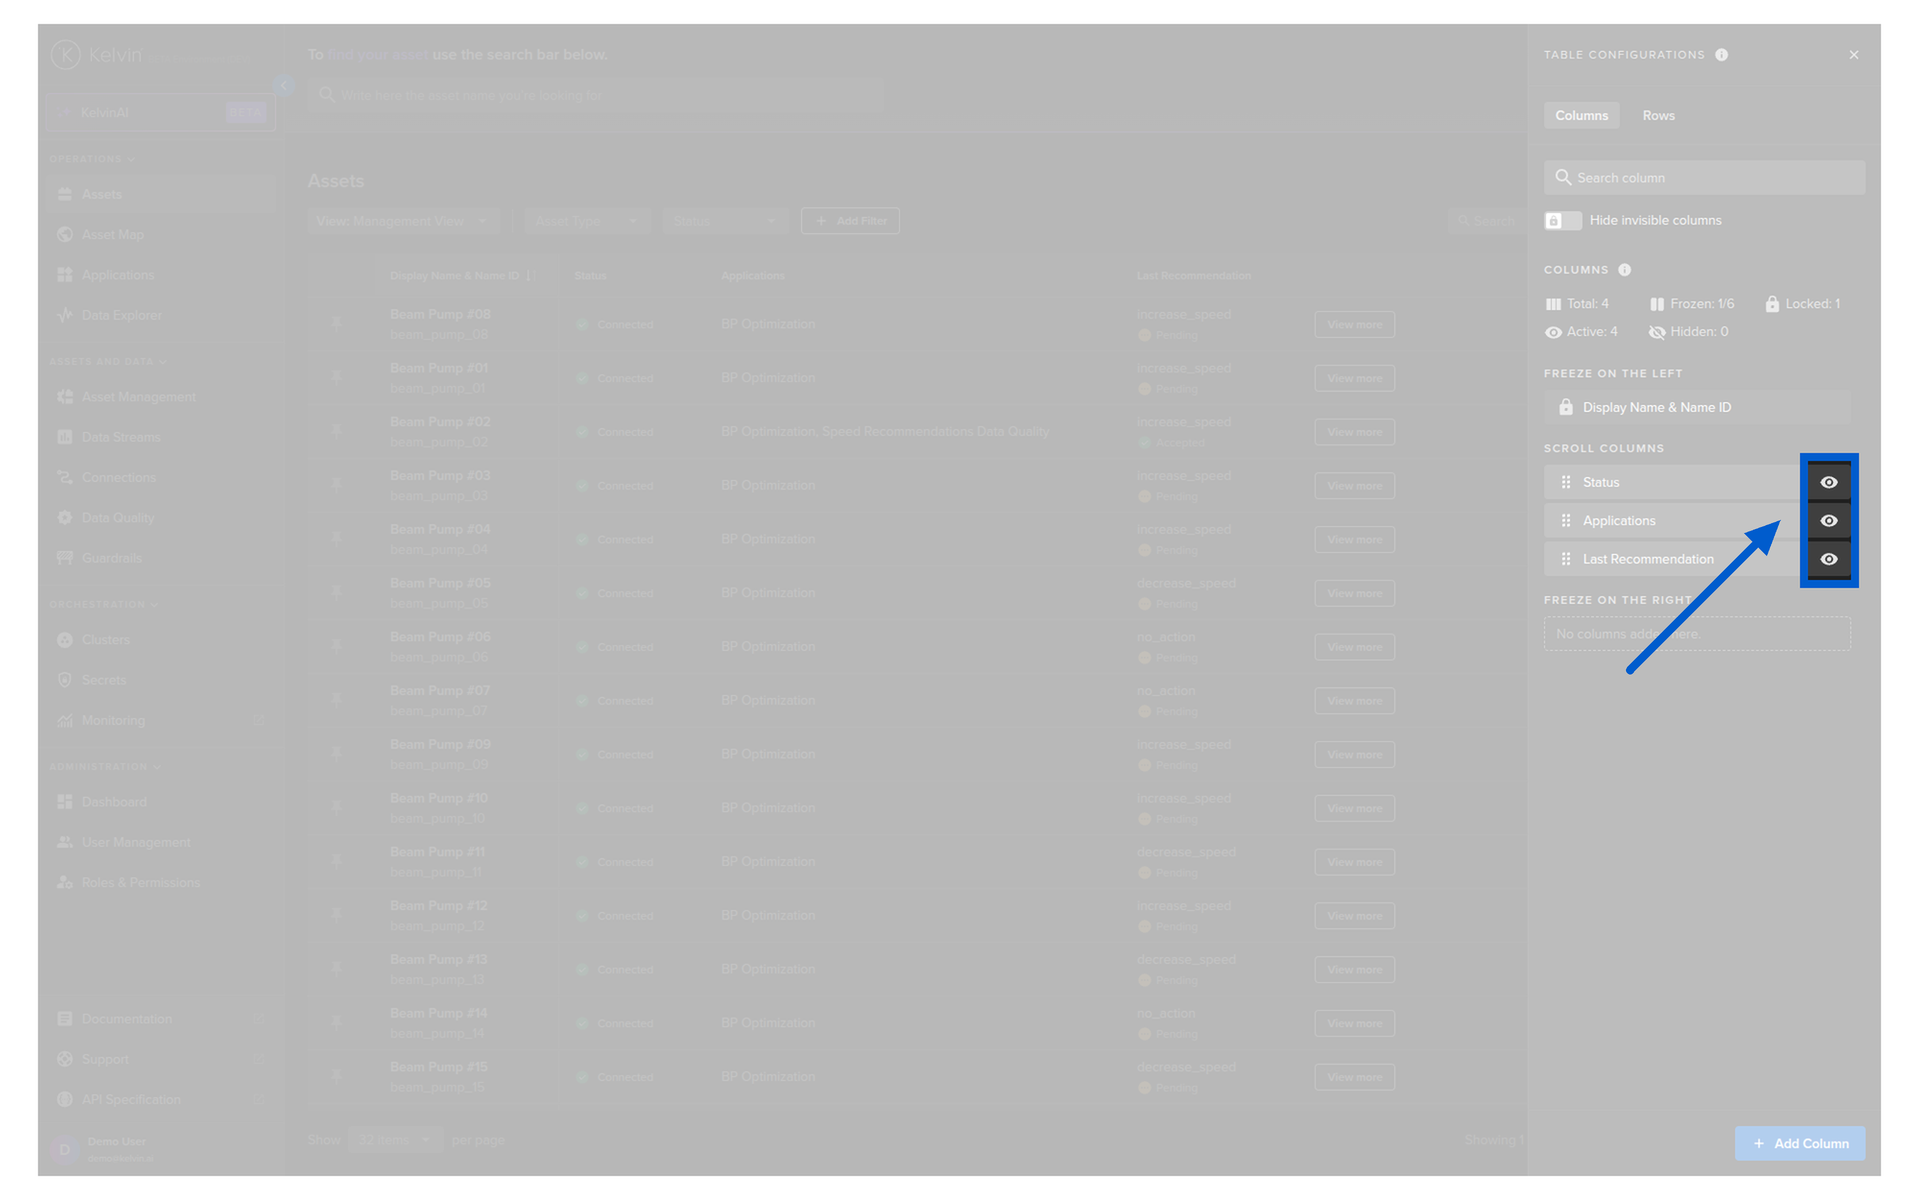
When you are inside the column settings you can show or hide columns to ensure you only see what you need to see.
When you are inside the column settings you can see an overview of the columns available and showing.
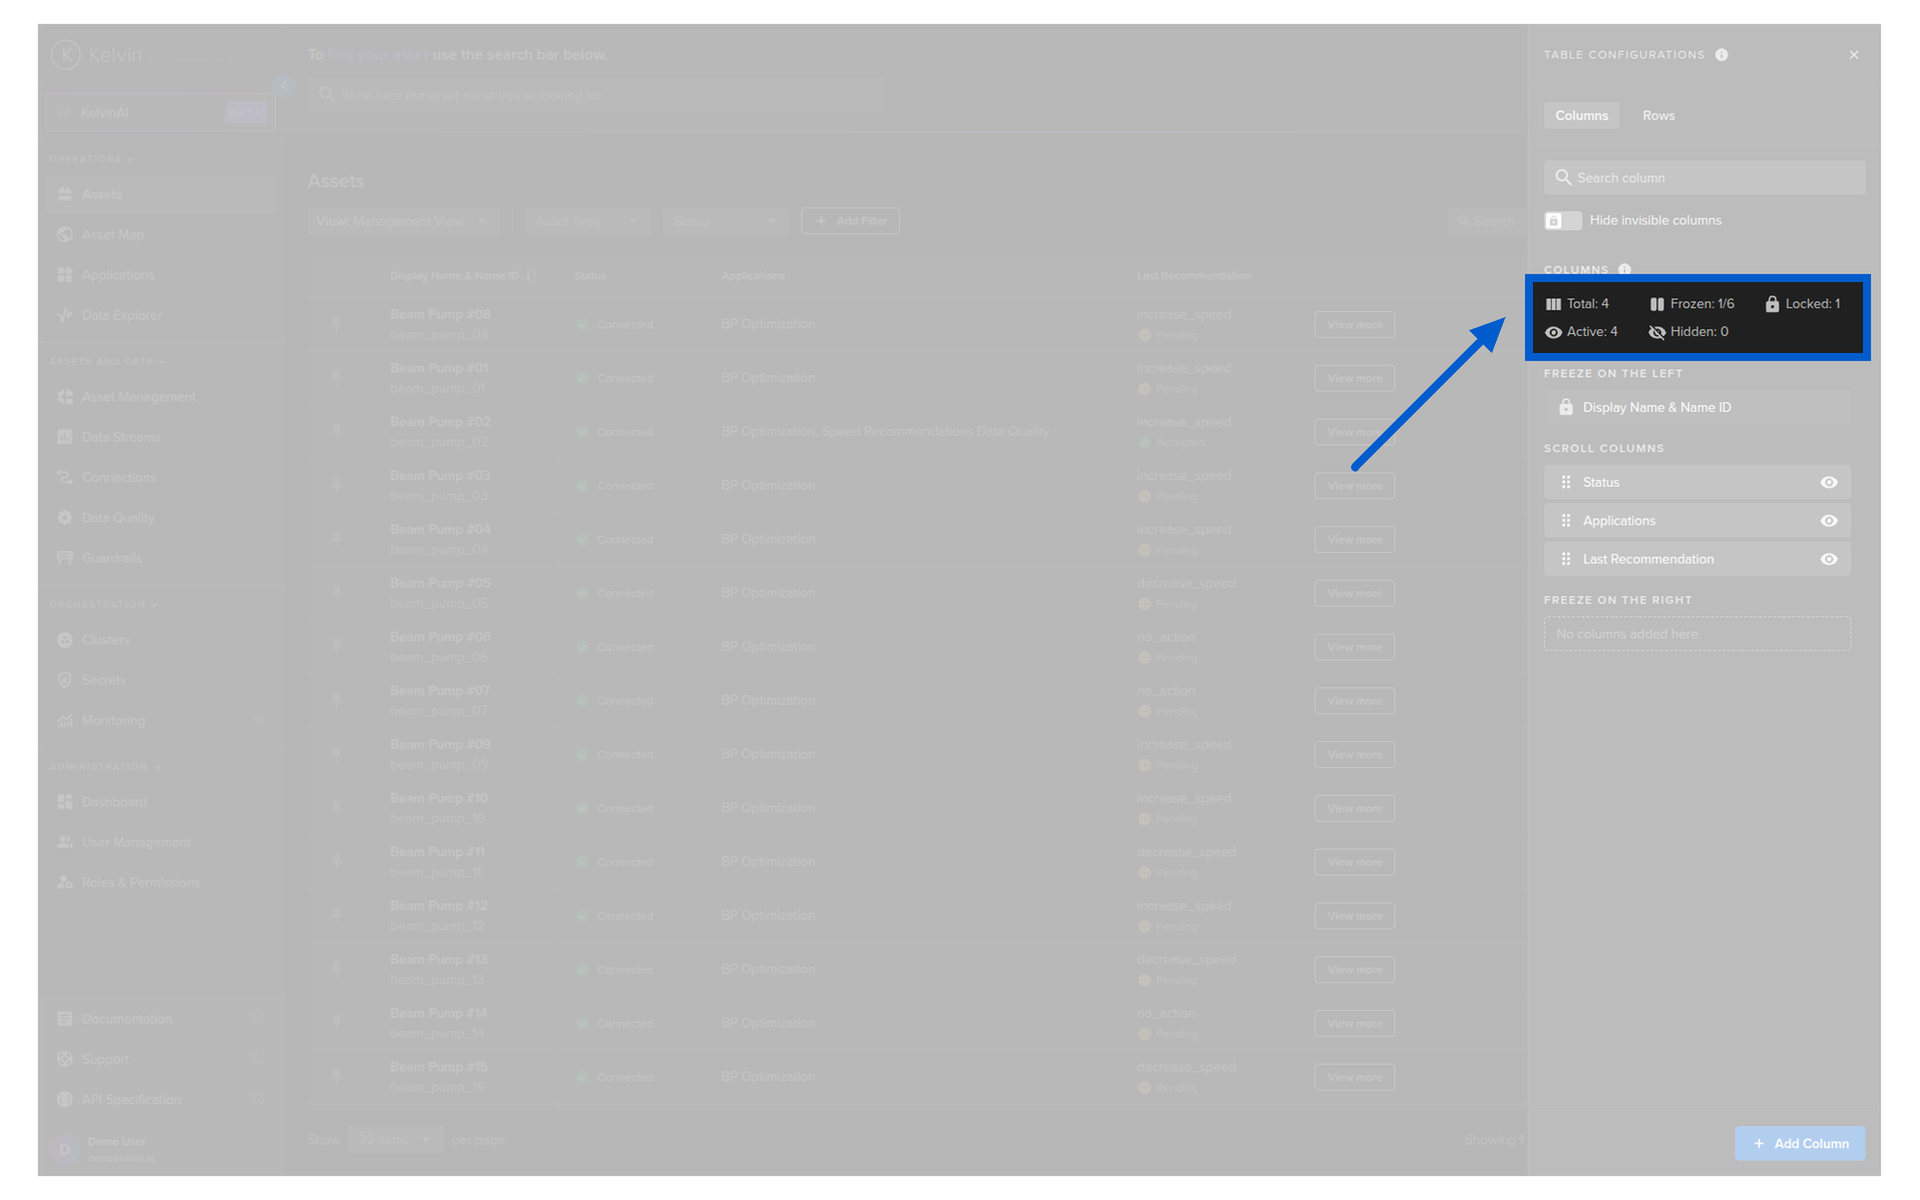
| Item | Description |
|---|---|
| Total | Total number of columns available (both active and hidden) |
| Frozen | Total number of columns that are in the left or right freeze positions out of a total number of columns that can be moved to the frozen sections |
| Locked | Total number of columns that can not be moved or edited |
| Active | Total number of columns that will be shown on the table |
| Hidden | Total number of columns that will not be shown on the table |
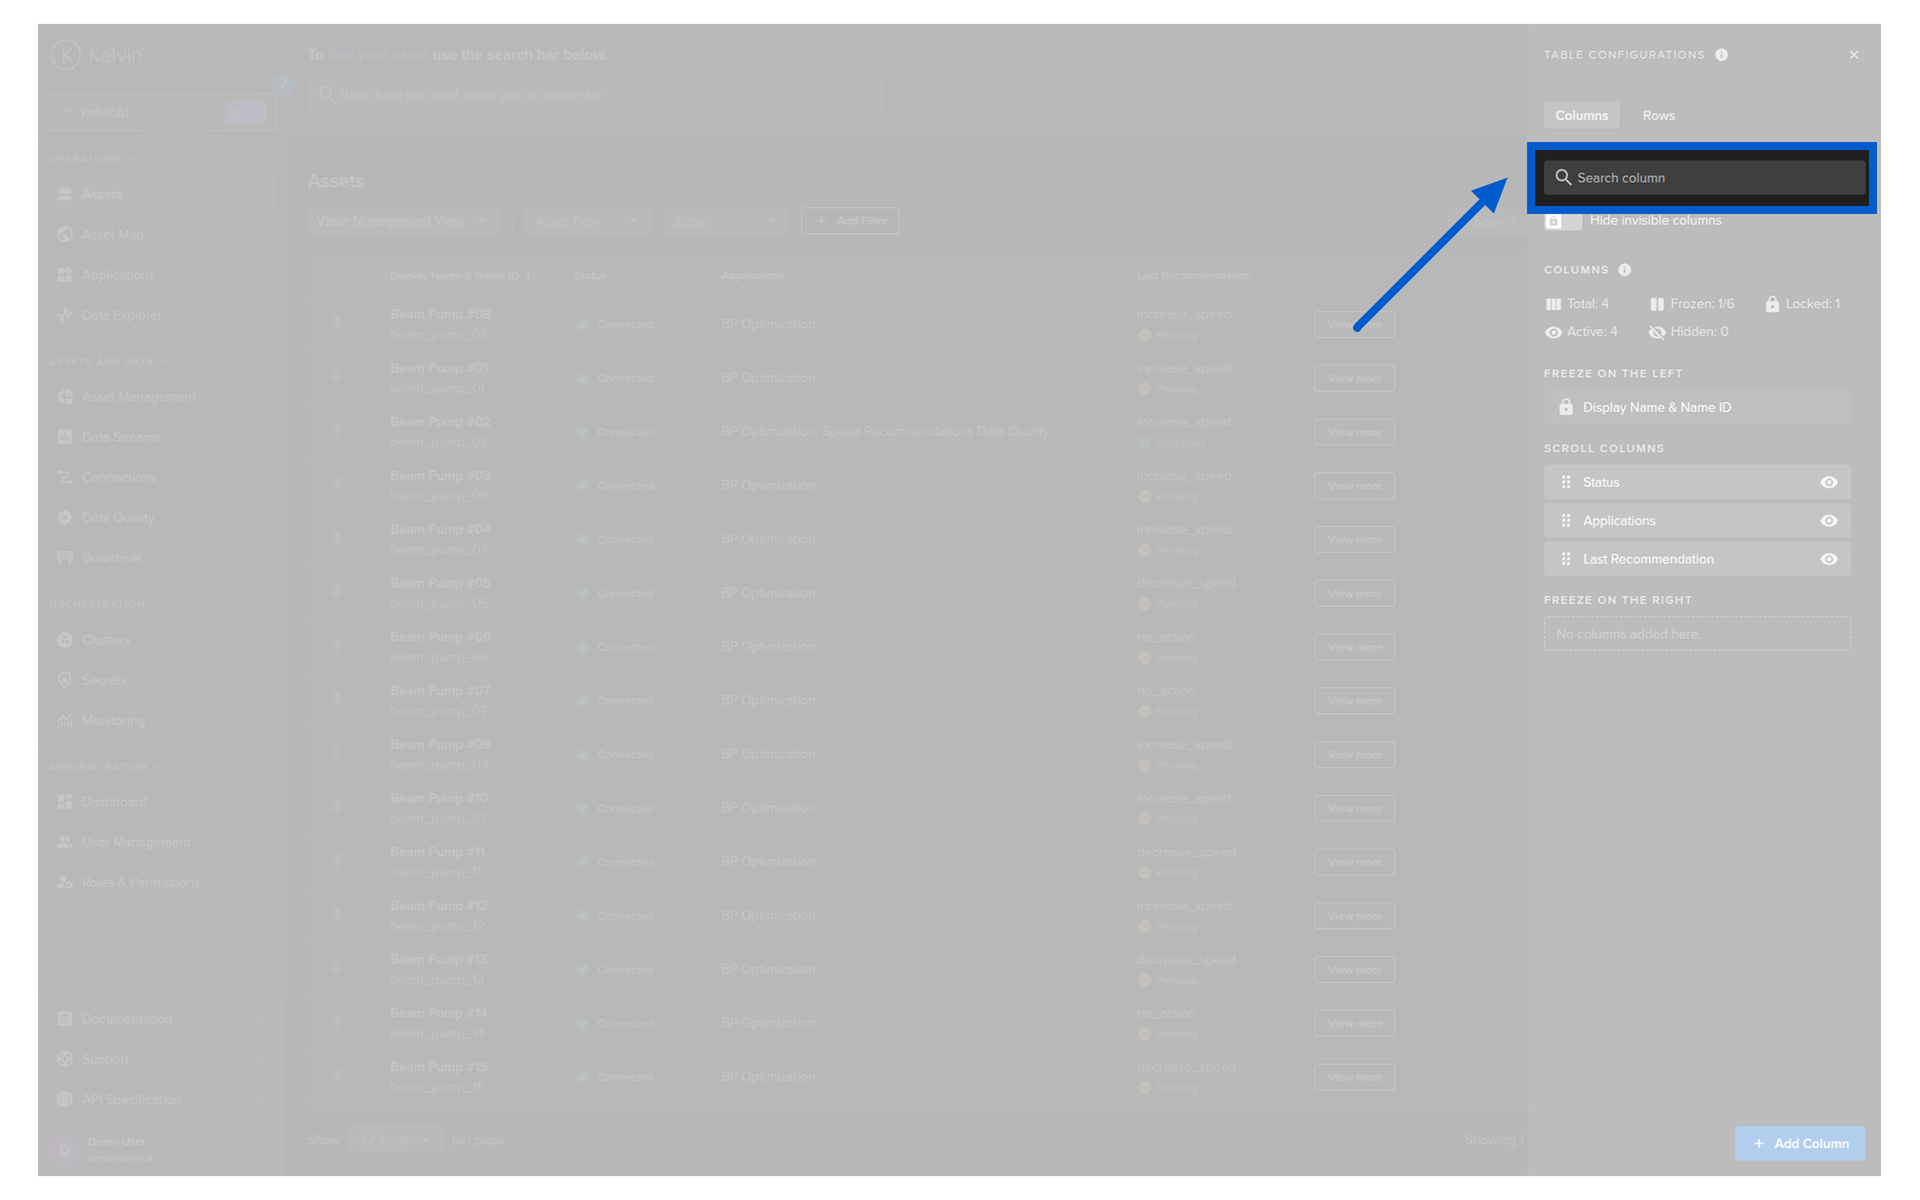
When you are inside the column settings with a large number of columns, this feature is useful to find columns and to hide the hidden columns from the list to make it easier to see what is relevant.
Asset State
Asset State is a special column that shows the health of an Asset based on the current value of a monitored Data Stream. The color of the LED indicator changes depending on the conditions defined for that Asset Type in Platform Administration.
Note
Asset State cannot be deleted or moved. You can show or hide it like any other column.
Warning
Asset State is not related to data quality or guardrails. It is set up in the Asset Types section of Platform Administration and is associated with a single Data Stream per Asset Type.
How the indicator appears in the column depends on the display mode selected. There are four options:
- Full display -- shows the LED indicator, a state label, and the current Data Stream value
- Indicator and label -- shows the LED indicator with a state label
- Indicator and value -- shows the LED indicator with the current Data Stream value
- Indicator only -- shows just the LED indicator
To edit what you see, click on the Asset State name in the column settings list.
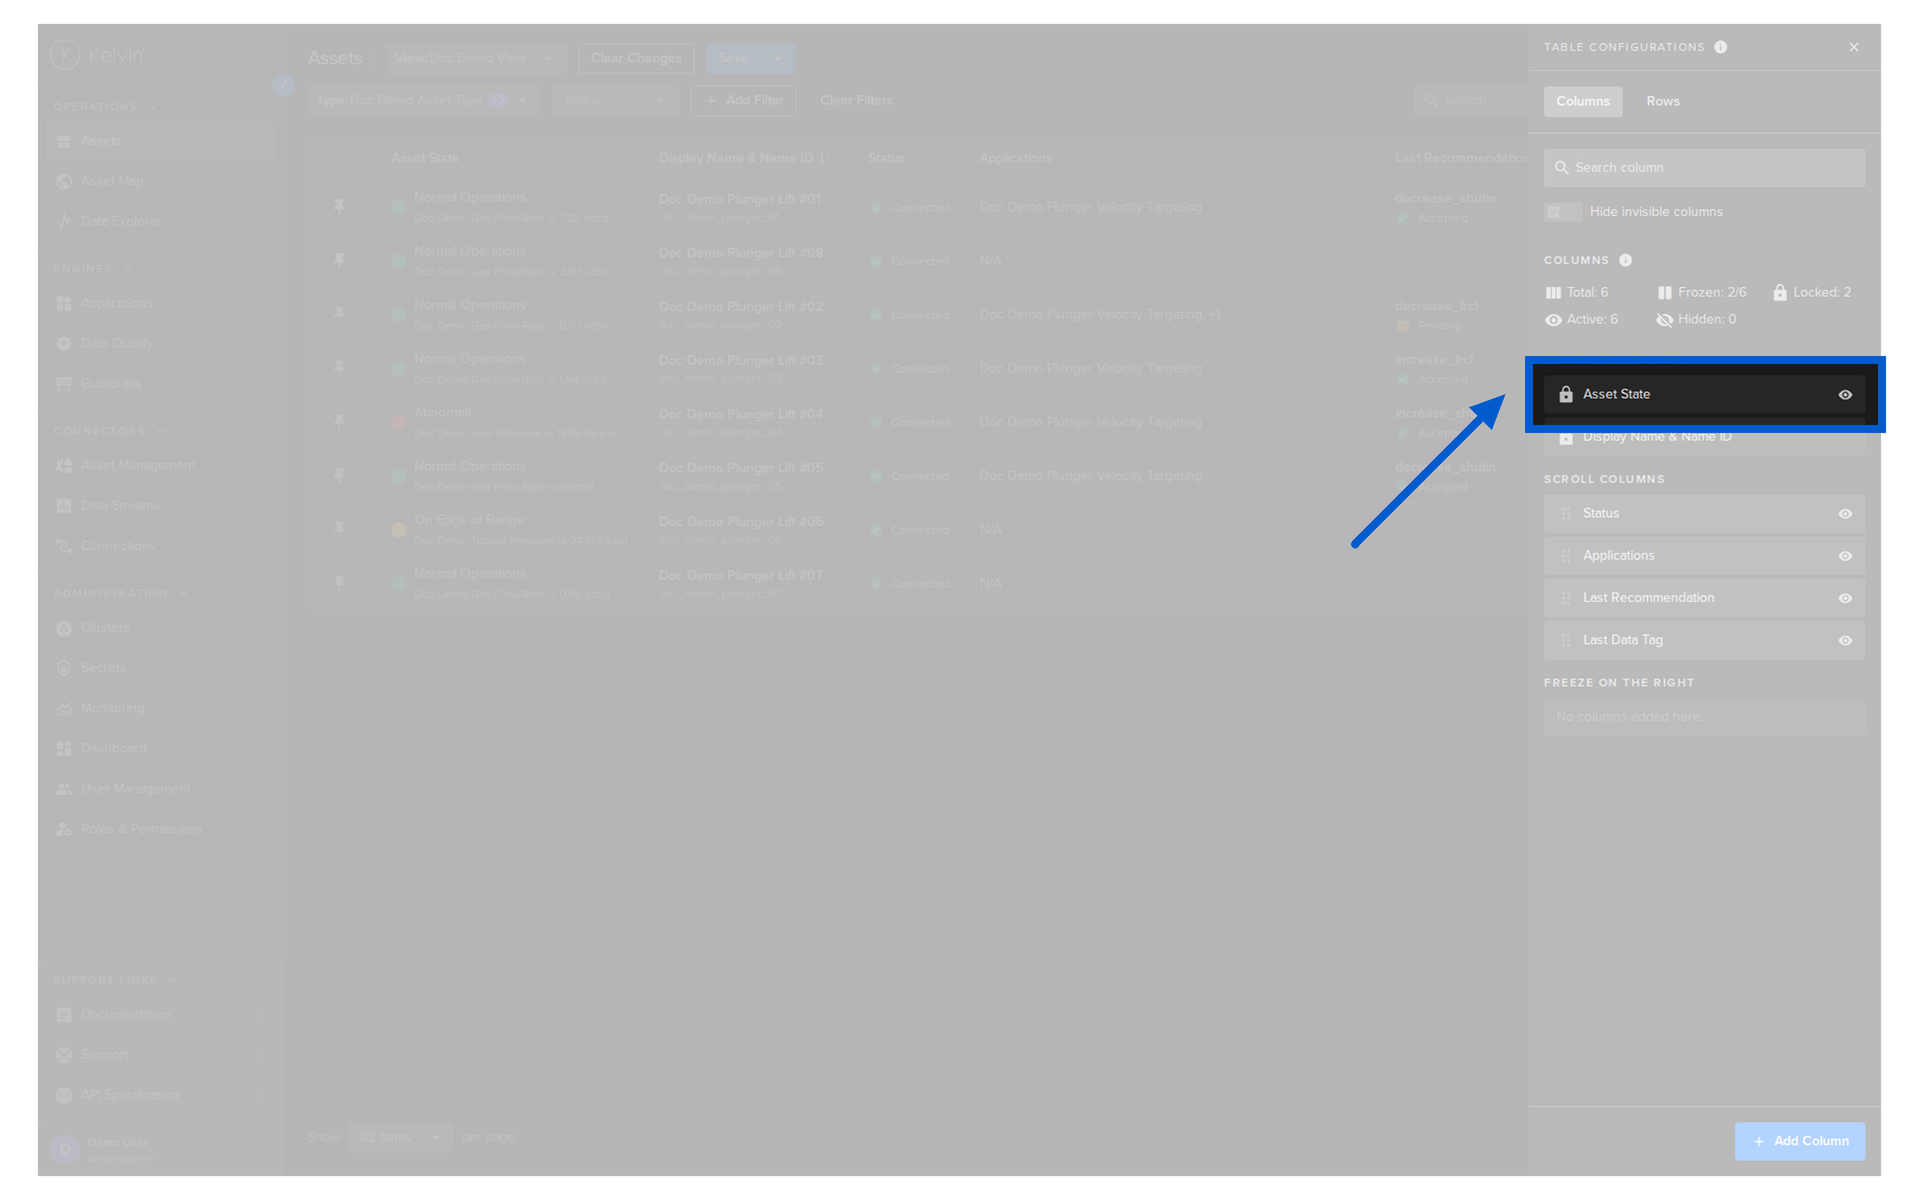
Here you will see all the options available for the Asset State column.

The most important option is Indicator Type. This controls which of the four display modes is used for the column. Click on the Indicator Type dropdown and select how you want to display the Asset State information in this column.

Add Custom Columns
You can add a number of customizable columns to the Asset Table list.
Each type you select can be customized to only the information that you required. This is especially useful if you want to have the same content type in multiple columns showing different types of information.
For example, you can select Control Change, you can create separate columns for Pending, Success and Failure counts to easily get a picture of where Infrastructure problems can be occurring.
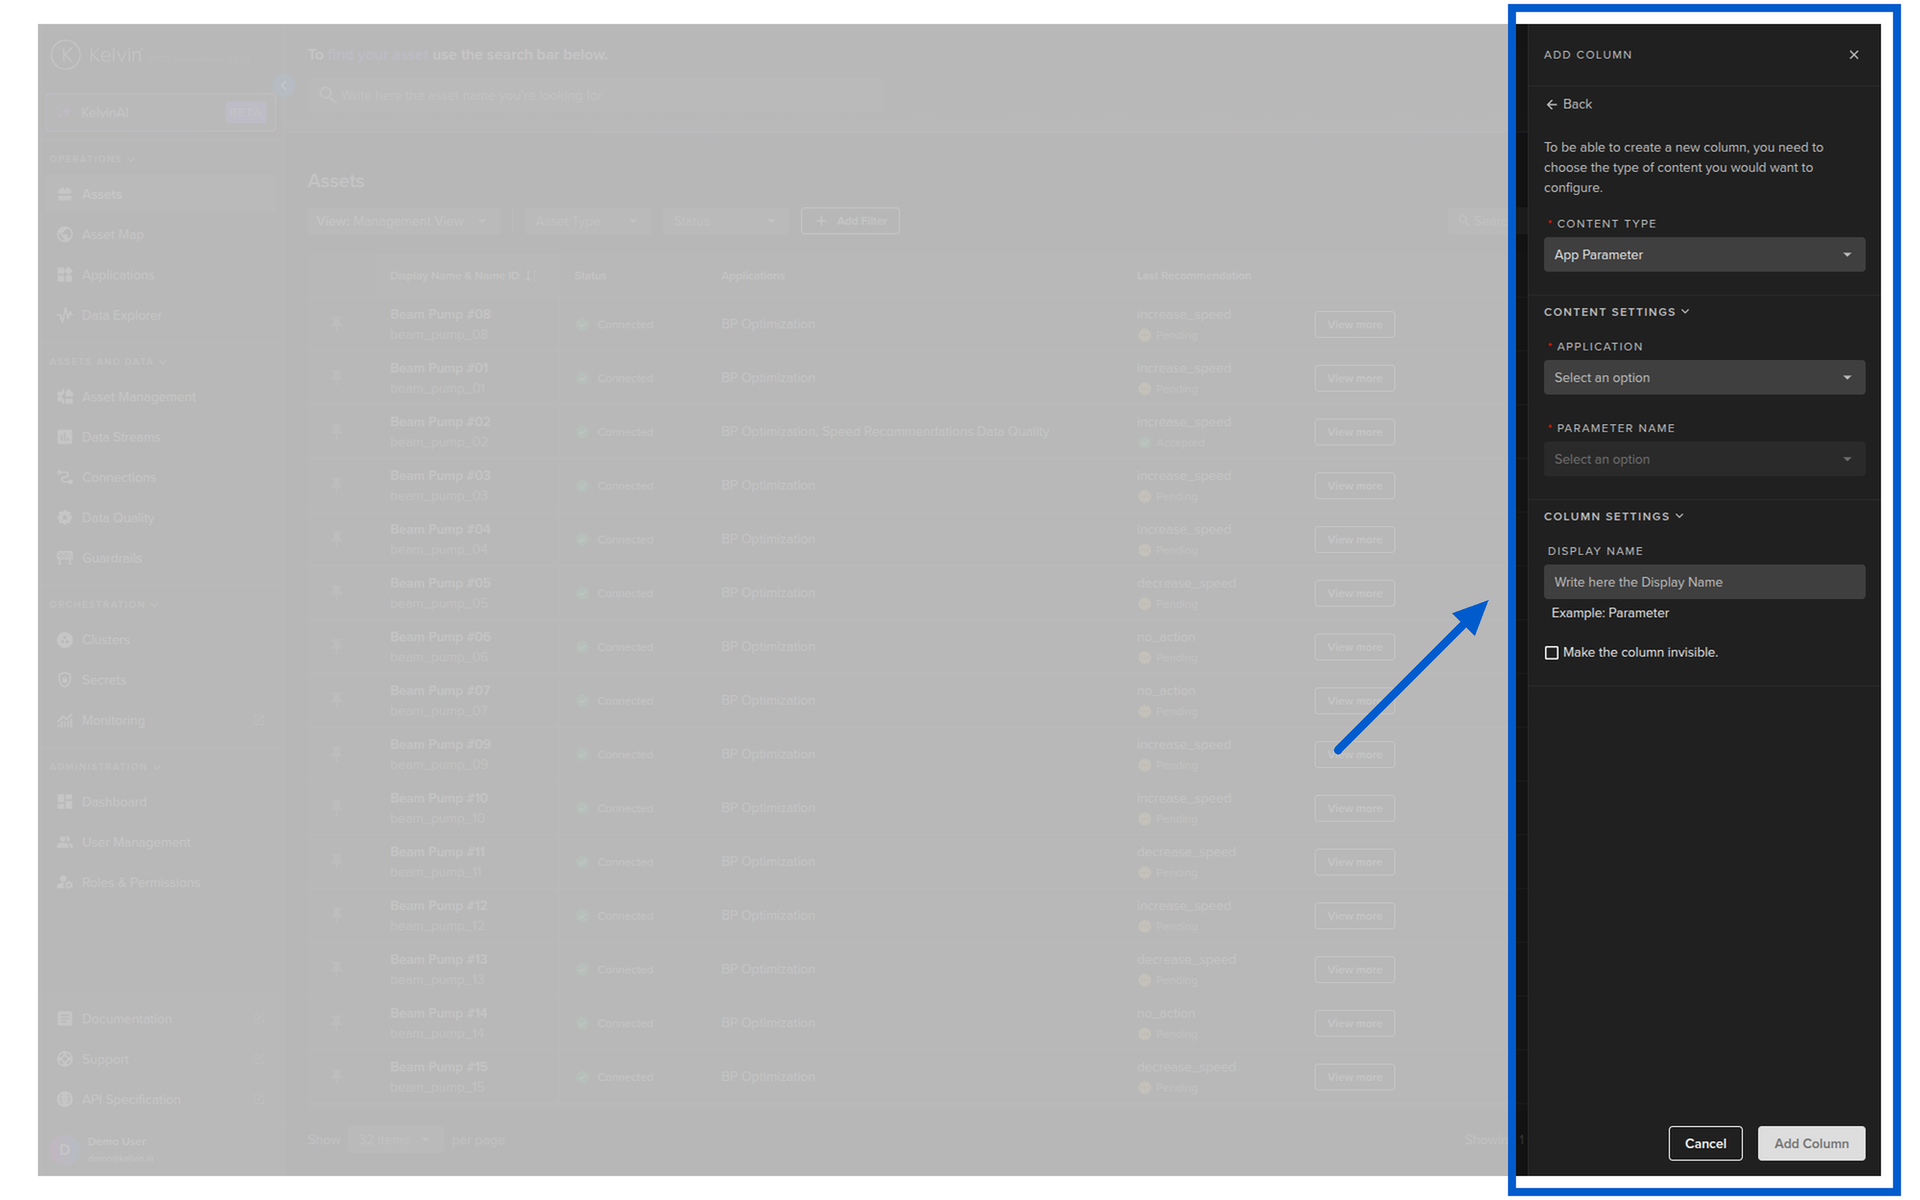
App Parameters
When Assets are added to a Kelvin SmartApp™, the associated App Parameters become available.
On the table the App Parameters are read only. If you want to change an App Parameter, you need to go to the Asset Details page or to Kelvin SmartApps™ page to change them.
| Option | Description |
|---|---|
| Application | This is the name of the Kelvin SmartApp™ that the App Parameters are linked to. You can only pick one Kelvin SmartApps™ per column. |
| Parameter Name | Options available will depend on which Kelvin SmartApps™ is selected. |
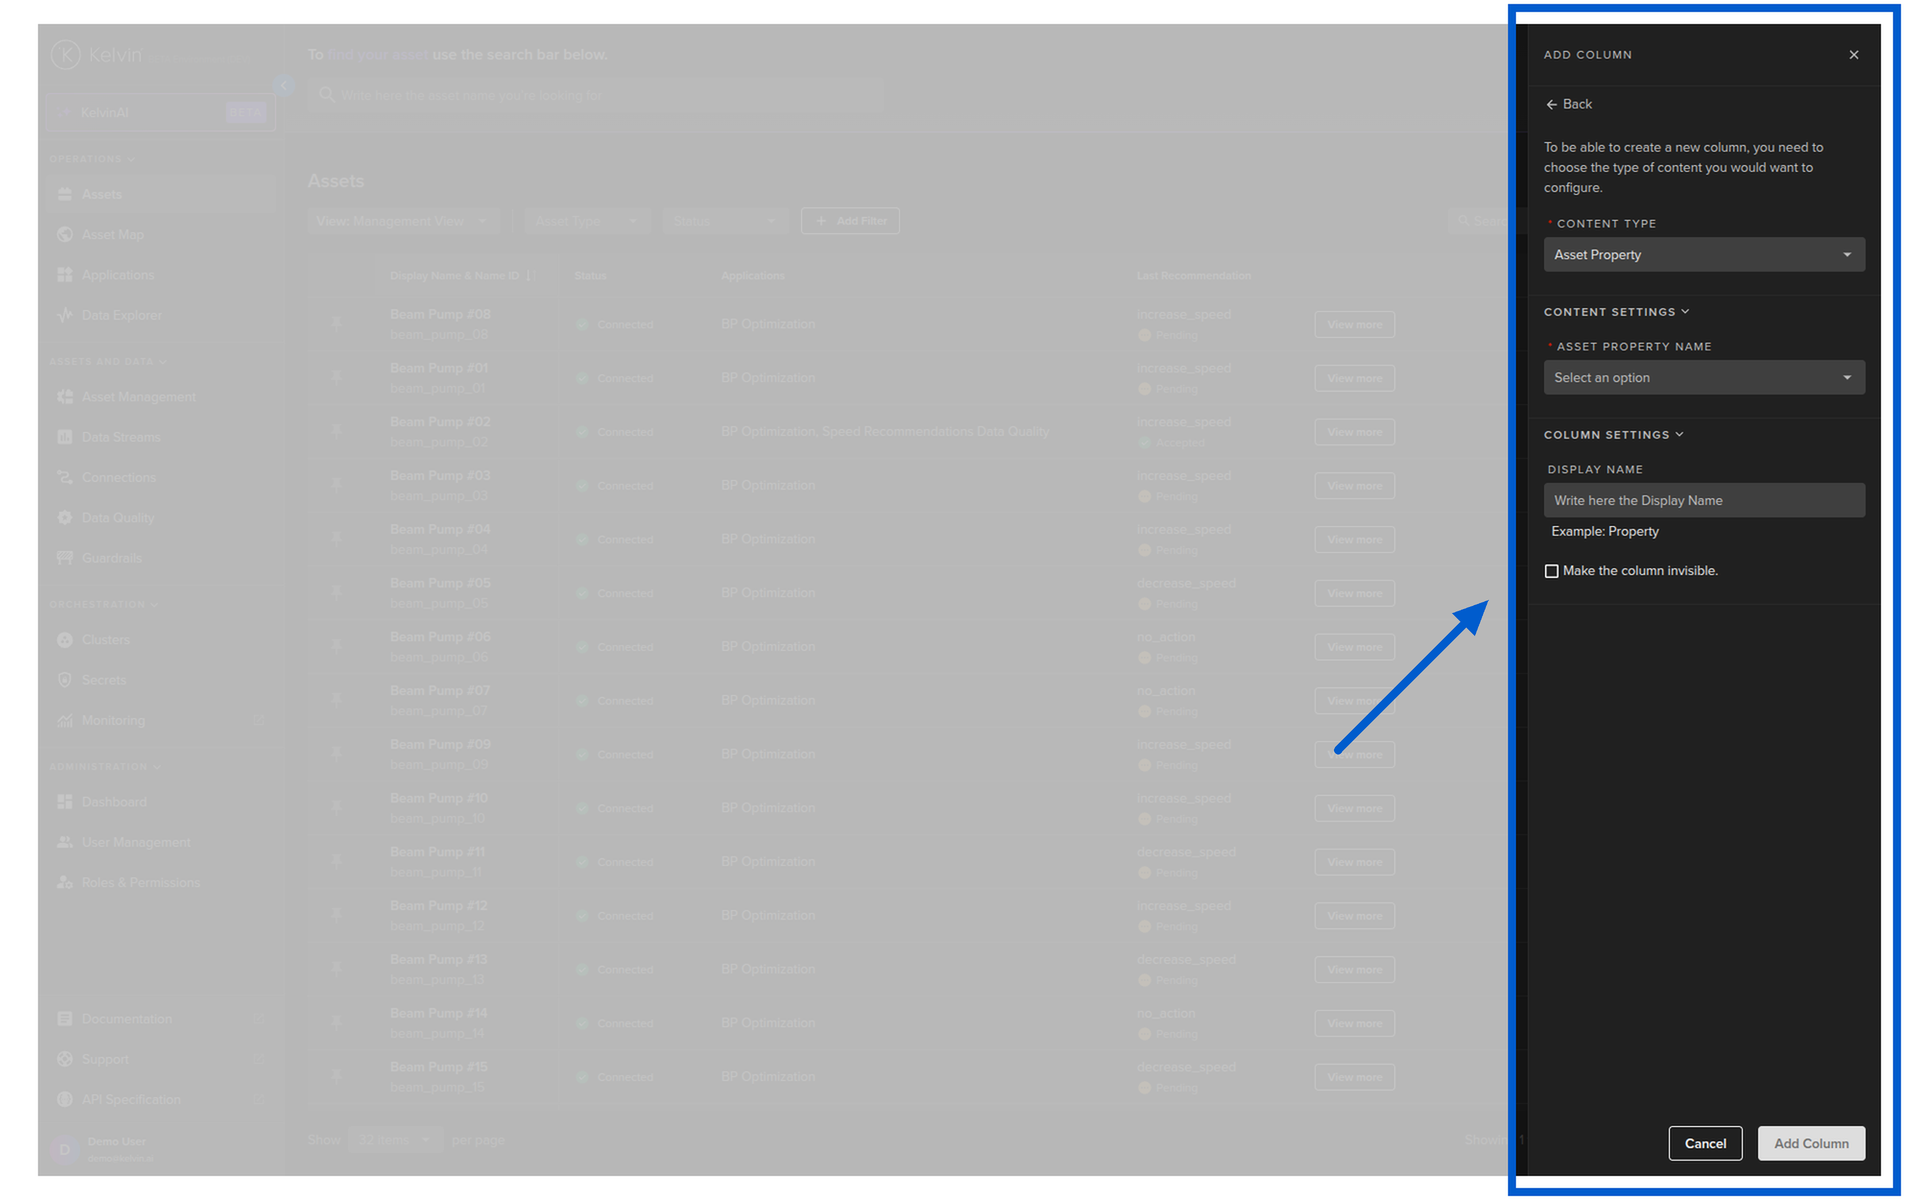
Asset Properties
Assets have a special section called Asset Properties.
This is a client custom configuration that can hold any type of information useful for clients. It does not affect Kelvin in any way.
In this setting, you can select the properties to show in the column. This is a list of all property names available across all Assets.
| Option | Description |
|---|---|
| Asset Property Name | This is the name of the Asset Property Name to display its value for each Asset in the column. If this property does not exist for an Asset, then it is left blank in the row. |
Relationships
There is one special Asset Property called relationships. This property is used by Kelvin to connect different assets together that are related.
When an Asset has a relationships property defined, the related Assets are shown connected with a line on the Asset Maps view.
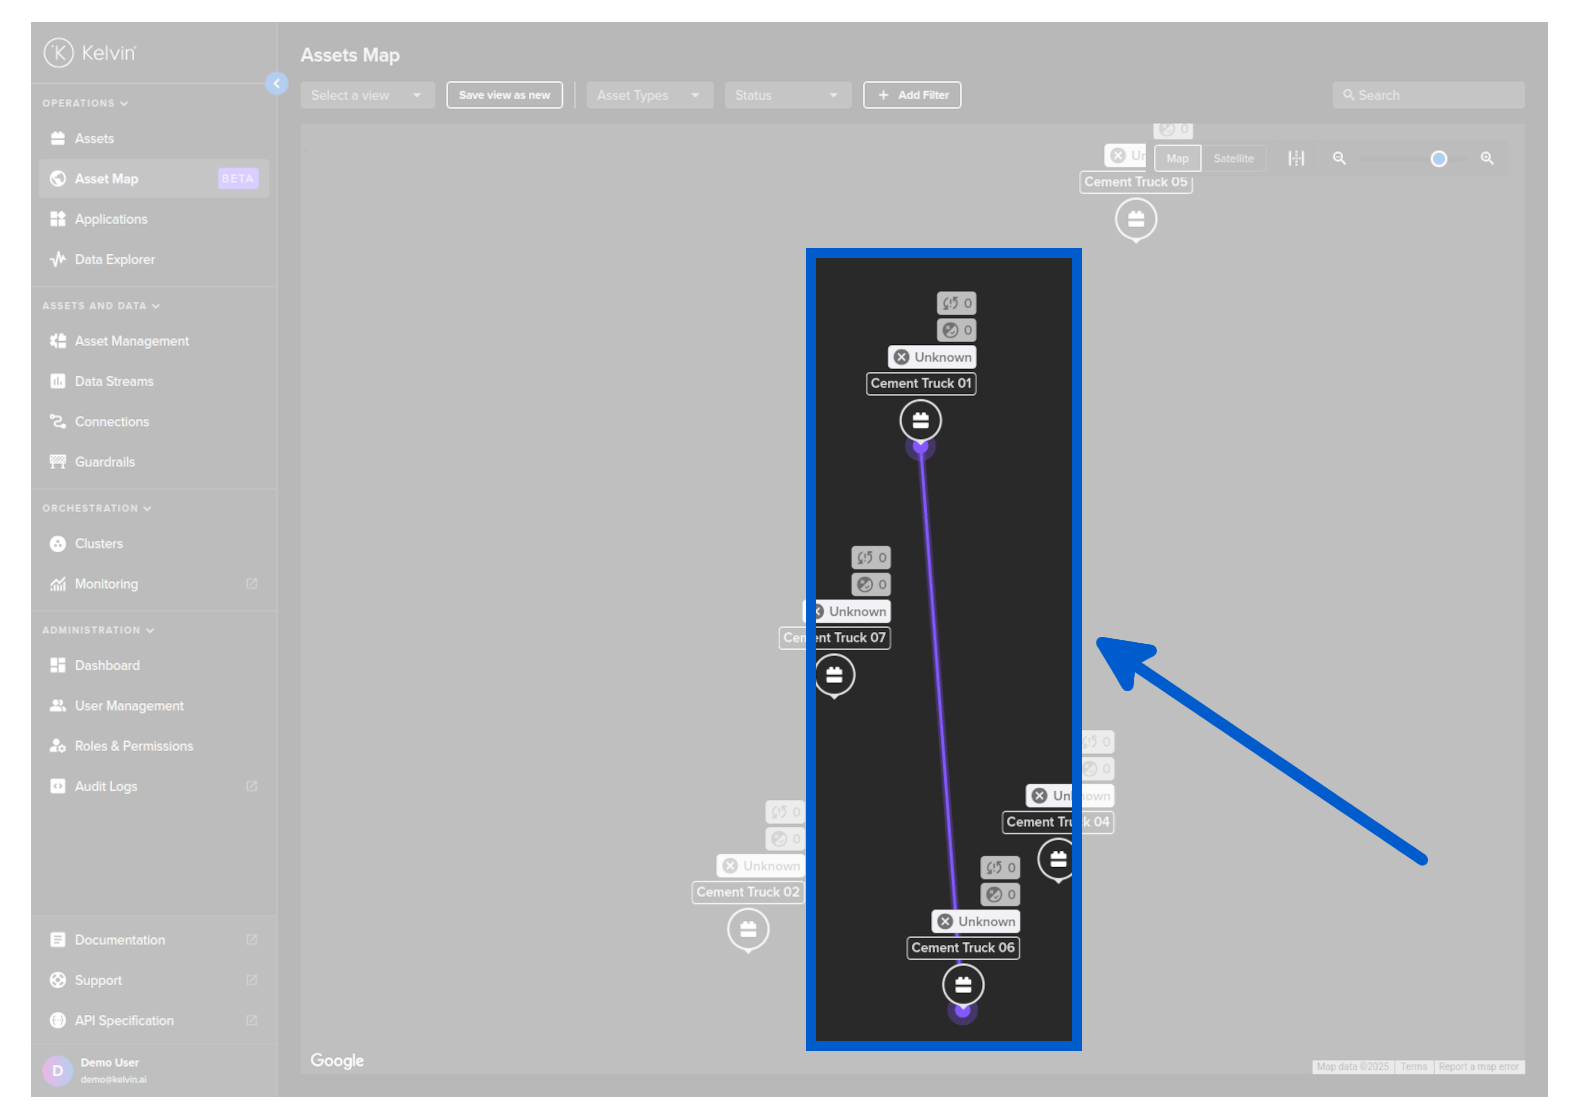
When you select the relationships property as a column, the column will display the names of the related Assets. Each Asset name is a clickable link that takes you directly to that Asset's details page.
To learn how to configure relationships between Assets, see the Asset Relationships documentation.
Data Stream
You can select a Data Stream to perform a number of different types of aggregation functions on the Asset / Data Stream pair.

| Option | Description |
|---|---|
| Data Stream Name | This is the name of the Data Stream to reference. You can only pick one Data Stream per column. When processing, this will pick relevant information that is associated with the Asset / Data Stream pair. |
| Aggregation Function | Options are; Count, Mean, Sum, Max, Min, Last This is what information will be displayed. Each one is self explanatory and will be associated with the Time Range option to produce the required information for the column. |
| Time Range | Optional. Options are from Last 5 minutes to Last 7 days. This is the time range used to perform the aggregation function above. If not set, the last recorded value is shown regardless of when it occurred. |
Last Action
You can select Last Action to be able to capture the last action sent to an asset and its status for each Asset.
Note
Last Action is related to Custom Actions which are defined by the Developer and can be anything.
Actions also include the builtin Control Change action.
You can also filter to only show certain statuses.
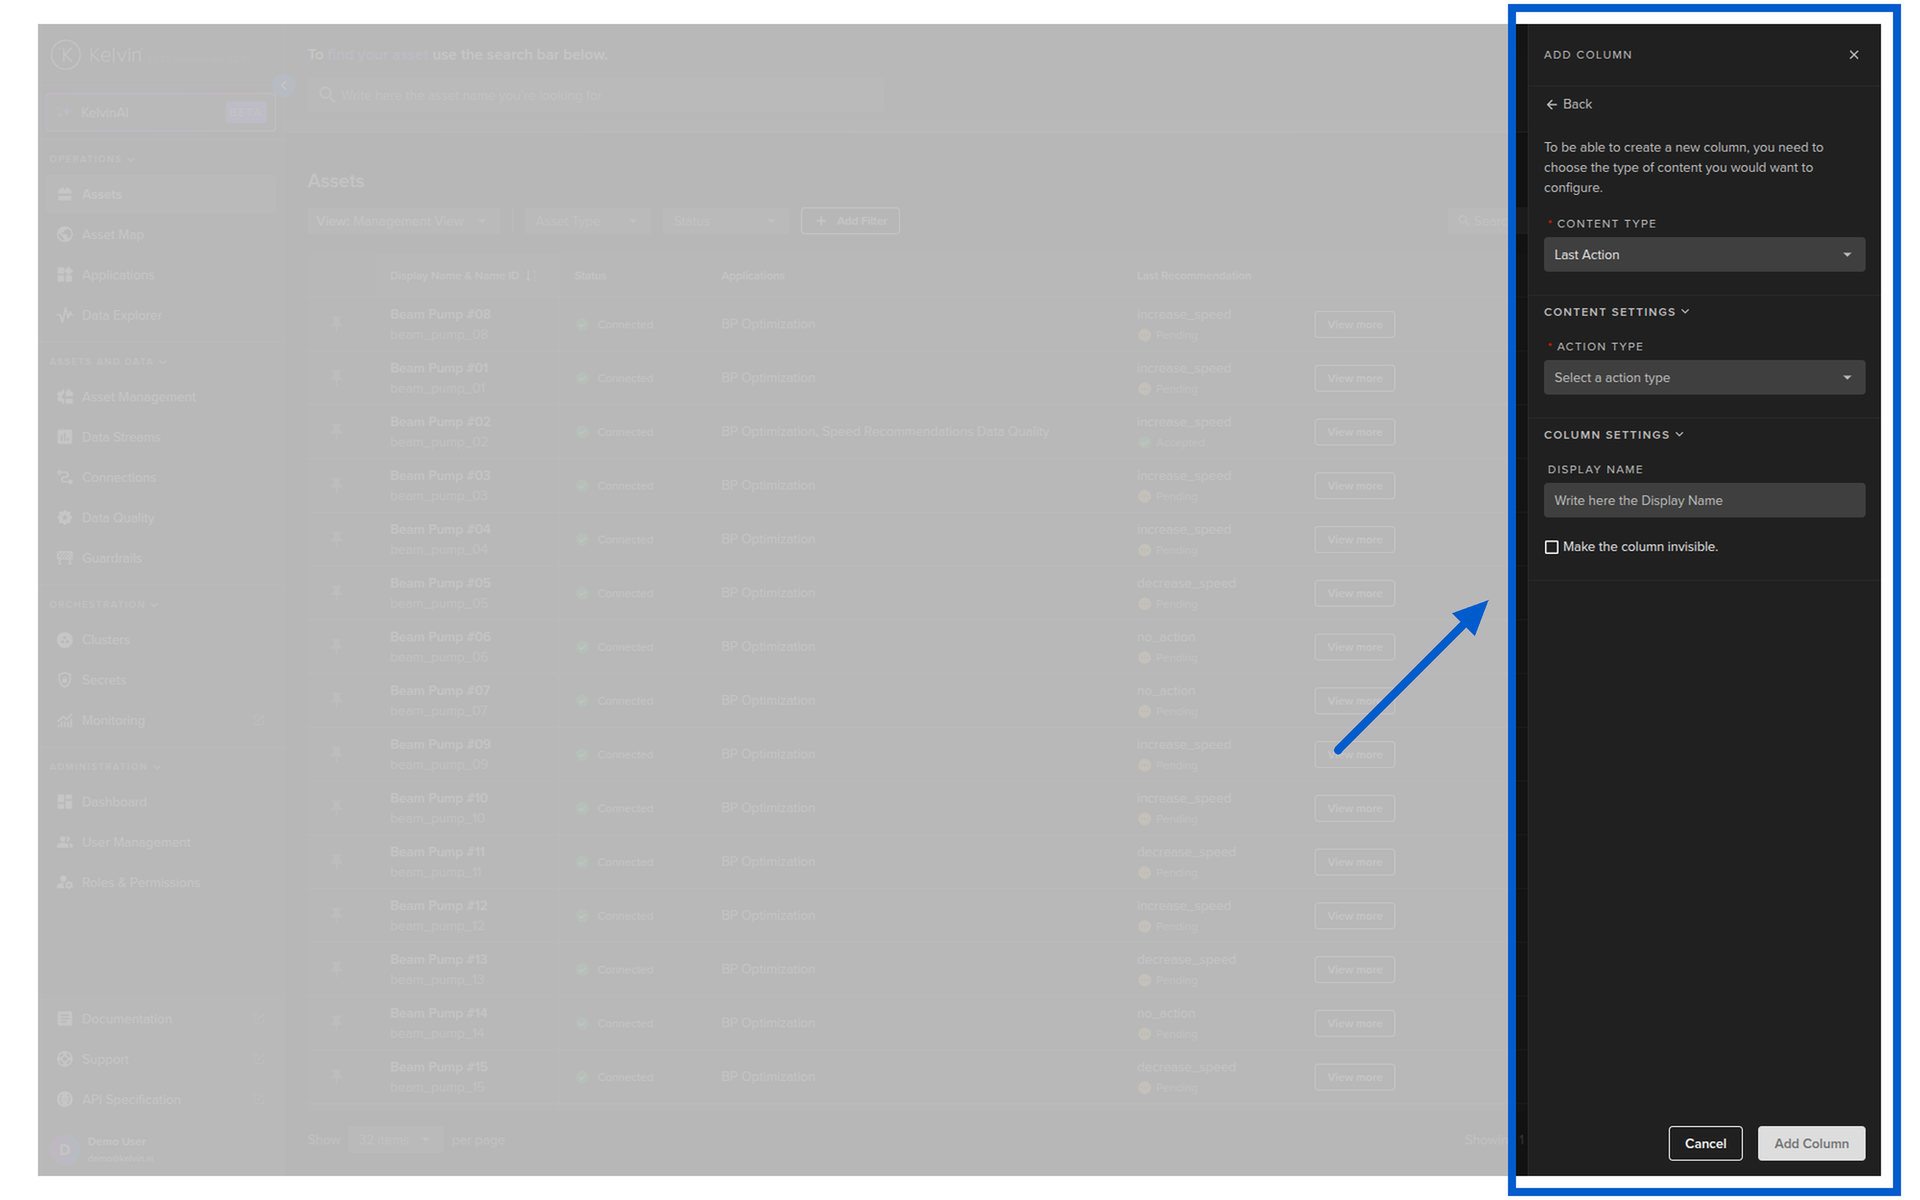
For all Last Actions you will have the filter options;
| Option | Description |
|---|---|
| Status | Options are; Pending, Ready, Sent, Processed, Applied and Failed. This is the status of any of the setpoints that you want to filter and display. |
| Time Range | Optional. Options are from last 5 minutes to last 7 days. If not set, the most recent action is shown regardless of when it occurred. |
For the builtin special case of a Control Change action there are some additional filter options available;
All Setpoints option will produce the following other options;
| Option | Description |
|---|---|
| All Setpoints | This option will show the latest control change created for any Data Stream. |
Select Setpoints option will produce the following other options;
| Option | Description |
|---|---|
| Select Setpoints | This option will show the latest control changes created for the any of the selected Data Streams. |
| Setpoints | List of Data Streams to filter. |
Last Insights
You can select Last Insight to be able to capture the latest insight in the timeseries that meets the criteria for each Asset.
Tip
If you leave Tag Types or Sources unselected, the filter is ignored and all values are included.
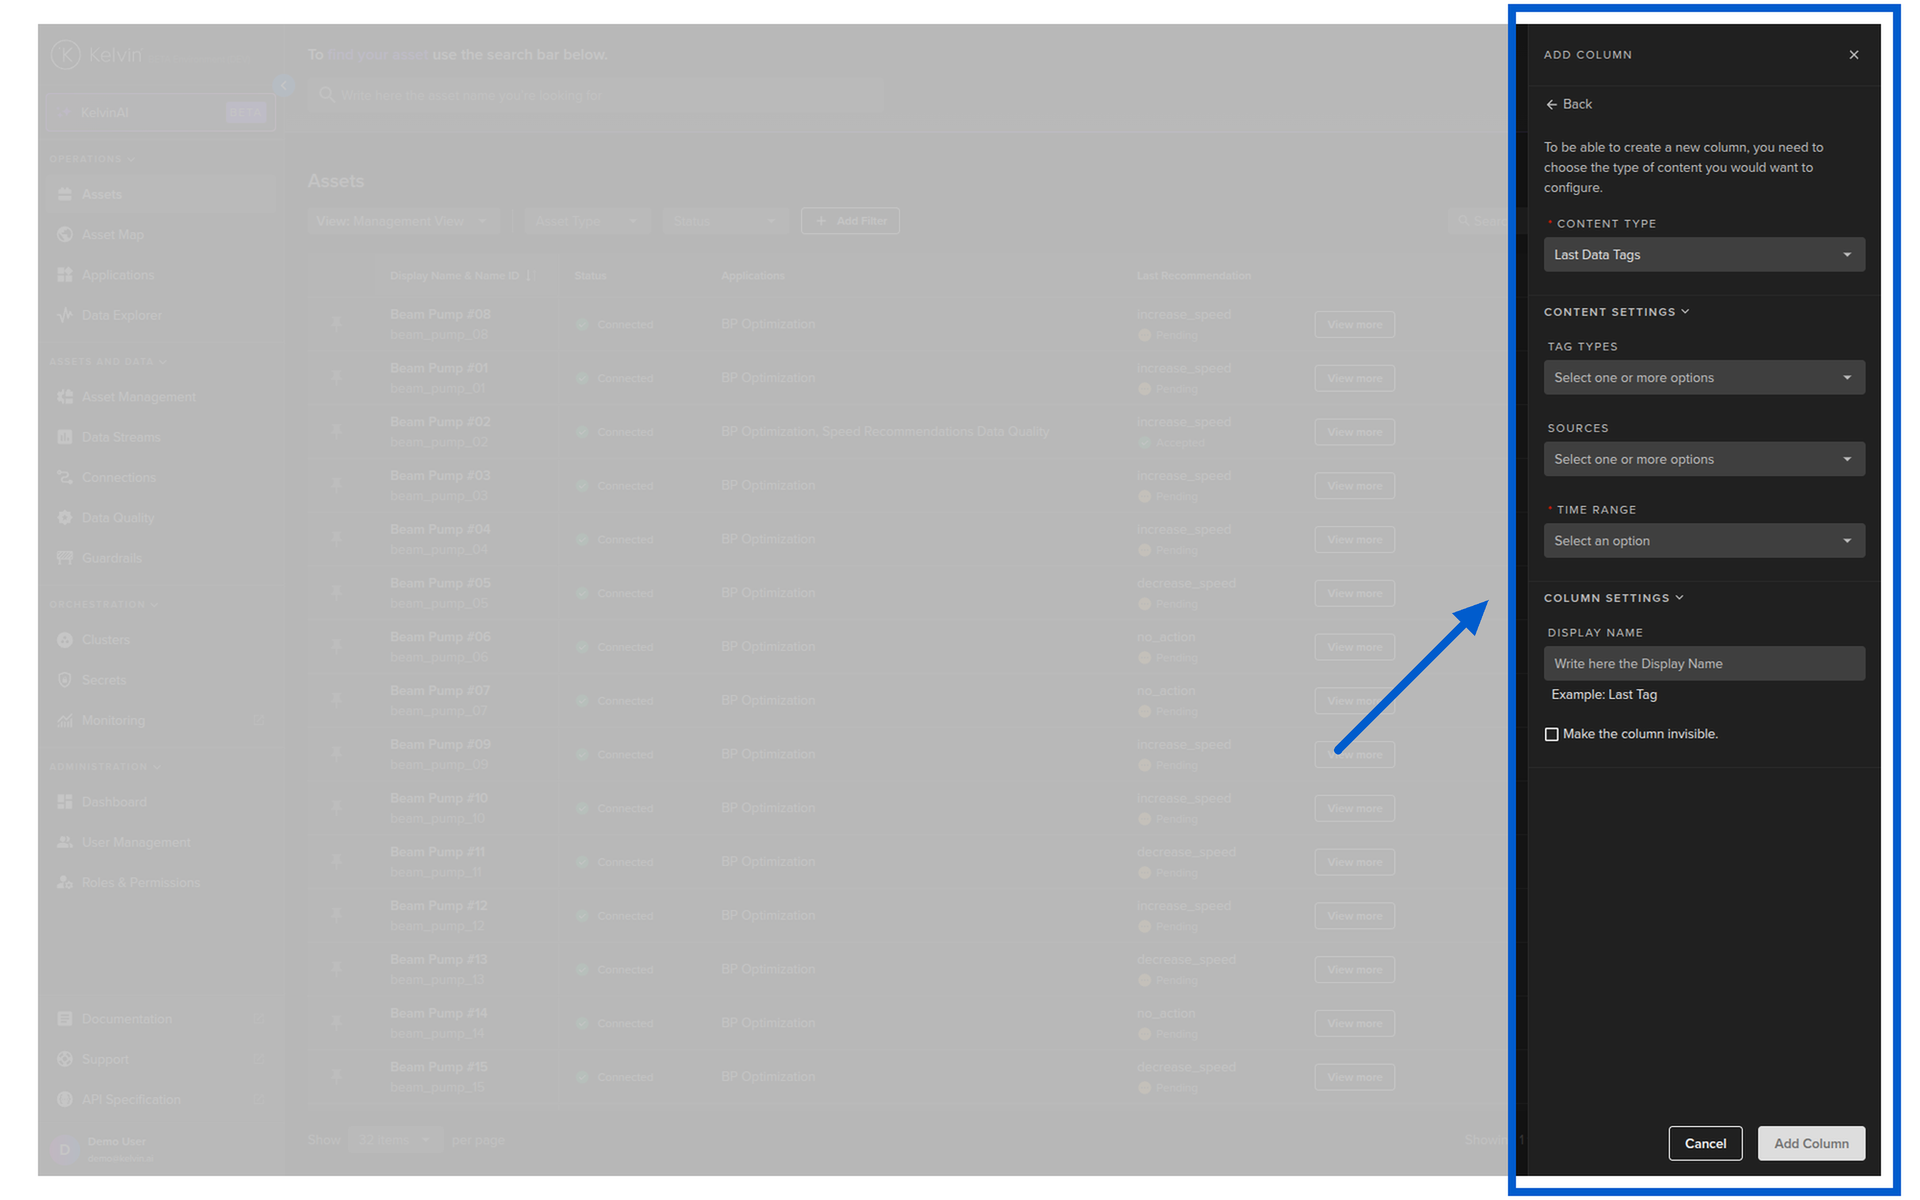
For Last Insights you will have the filter options;
| Option | Description |
|---|---|
| Tag Types | You can select one or more Insight names. Selecting multiple will be treated as OR, so any Insight in the selection will be shown |
| Sources | You can select one or more Sources who created the Insight. This can be a User, a Service or a Kelvin SmartApp™. Selecting multiple will be treated as OR, so any Insight in the selection will be shown |
| Time Range | Optional. Options are from last 5 minutes to last 7 days. If not set, the most recent insight is shown regardless of when it occurred. |
Last Recommendation
You can select which Recommendations associated with a Kelvin SmartApp™ over a defined period of time to be shown in the column for each Asset.
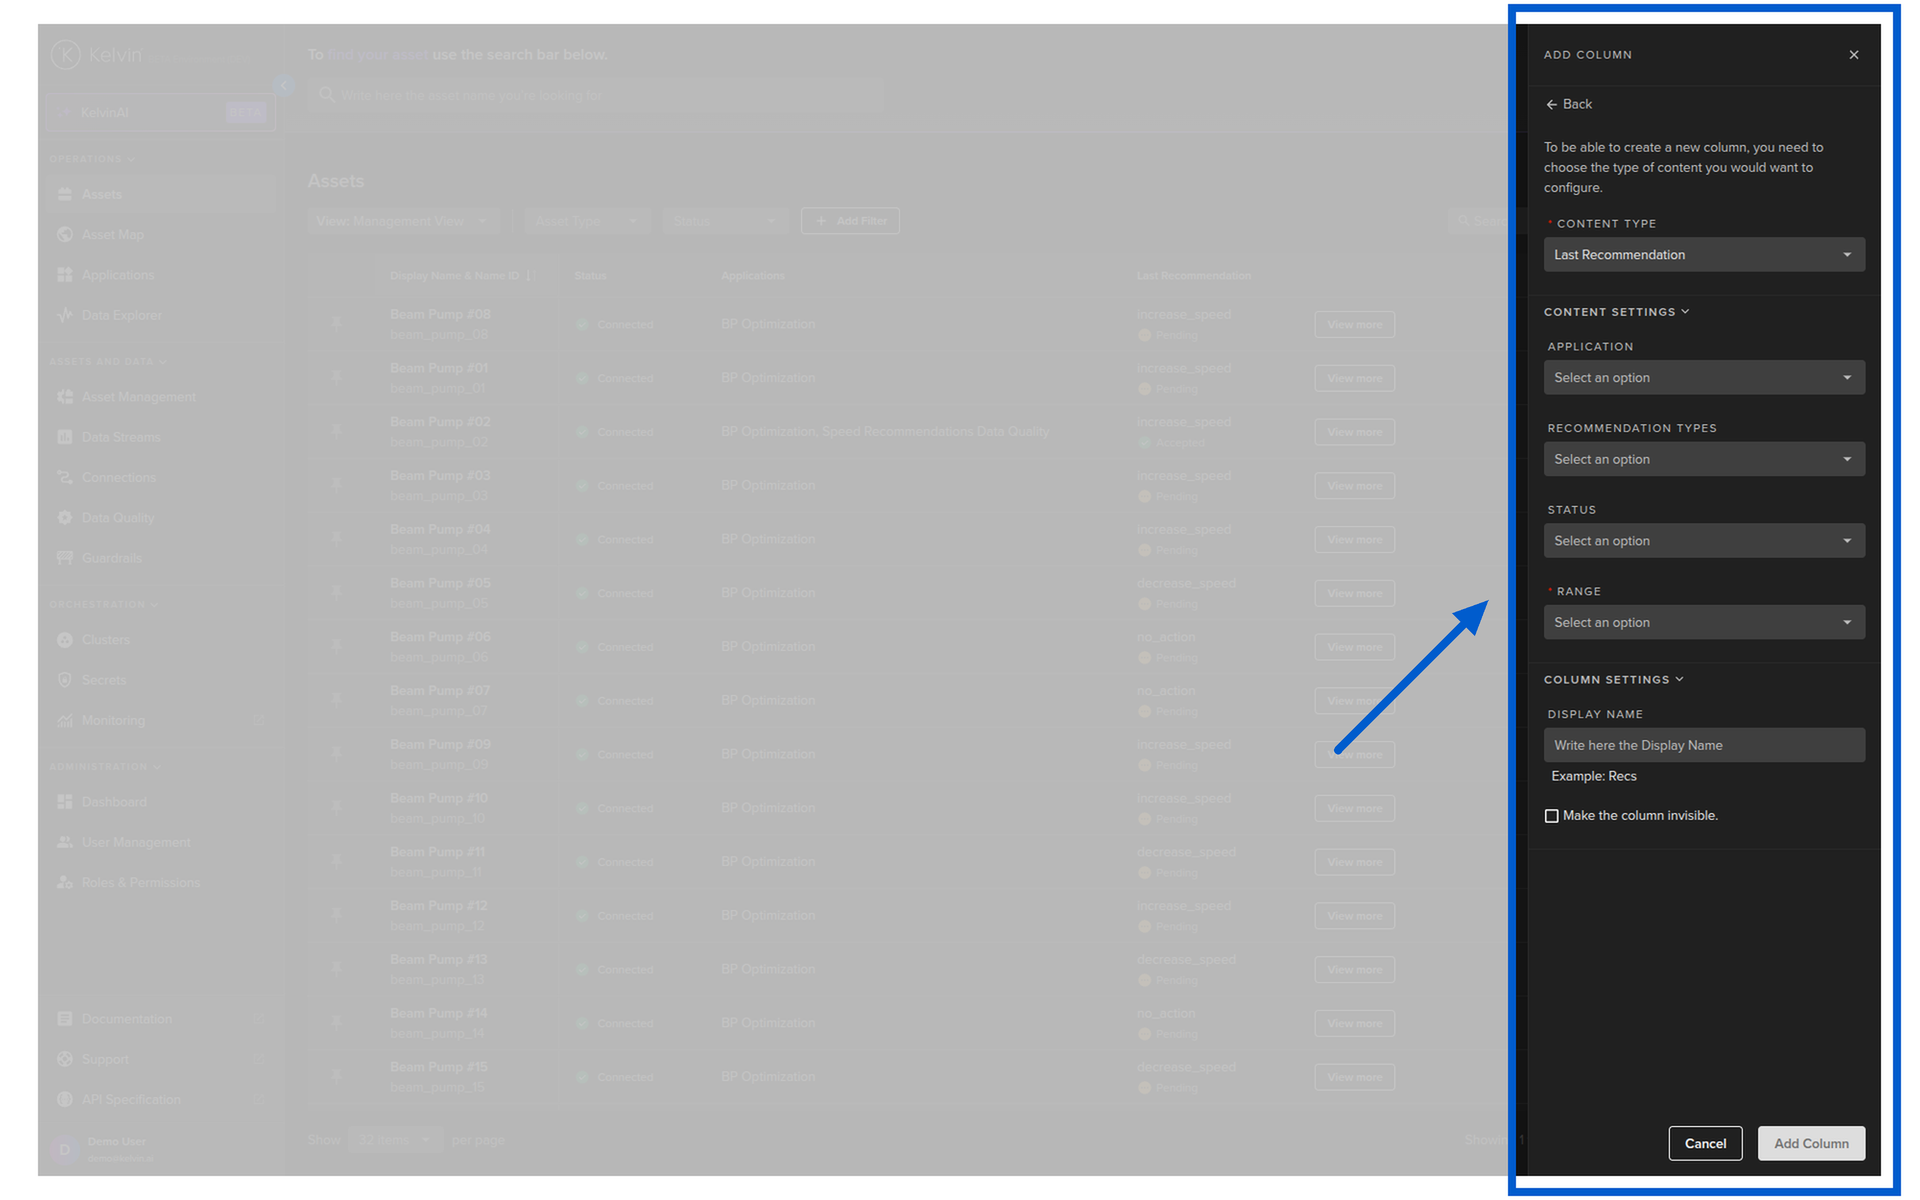
There are also a number of mandatory and optional filters you can select to focus the information shown in the column.
| Option | Description |
|---|---|
| Application | Options are; All Kelvin SmartApp™ in the App Registry. This looks for Recommendations that have been issued by a certain Kelvin SmartApp™ as the source. This option is optional and you can only select one Kelvin SmartApps™. |
| Recommendation Types | Options are; The recommendation types list (it is customizable by the client, so will be different for each Kelvin Instance. This will filter the Recommendations shown to only those that are selected here. This option is optional and you can multi-select many types. |
| Status | Options are; Pending, Accepted, Rejected and Expired. This will filter the Recommendations shown to only those that have a certain status. This option is optional and you can multi-select many status. |
| Time Range | Optional. Options are from 5 minutes to 7 days. If not set, the most recent recommendation is shown regardless of when it occurred. |
Schedule
You can select which upcoming Schedules over a defined period of time to be shown in the column for each Asset.
You can not see schedules in the past. These have already been converted into Control Changes and can be viewed with Control Change filters and columns.
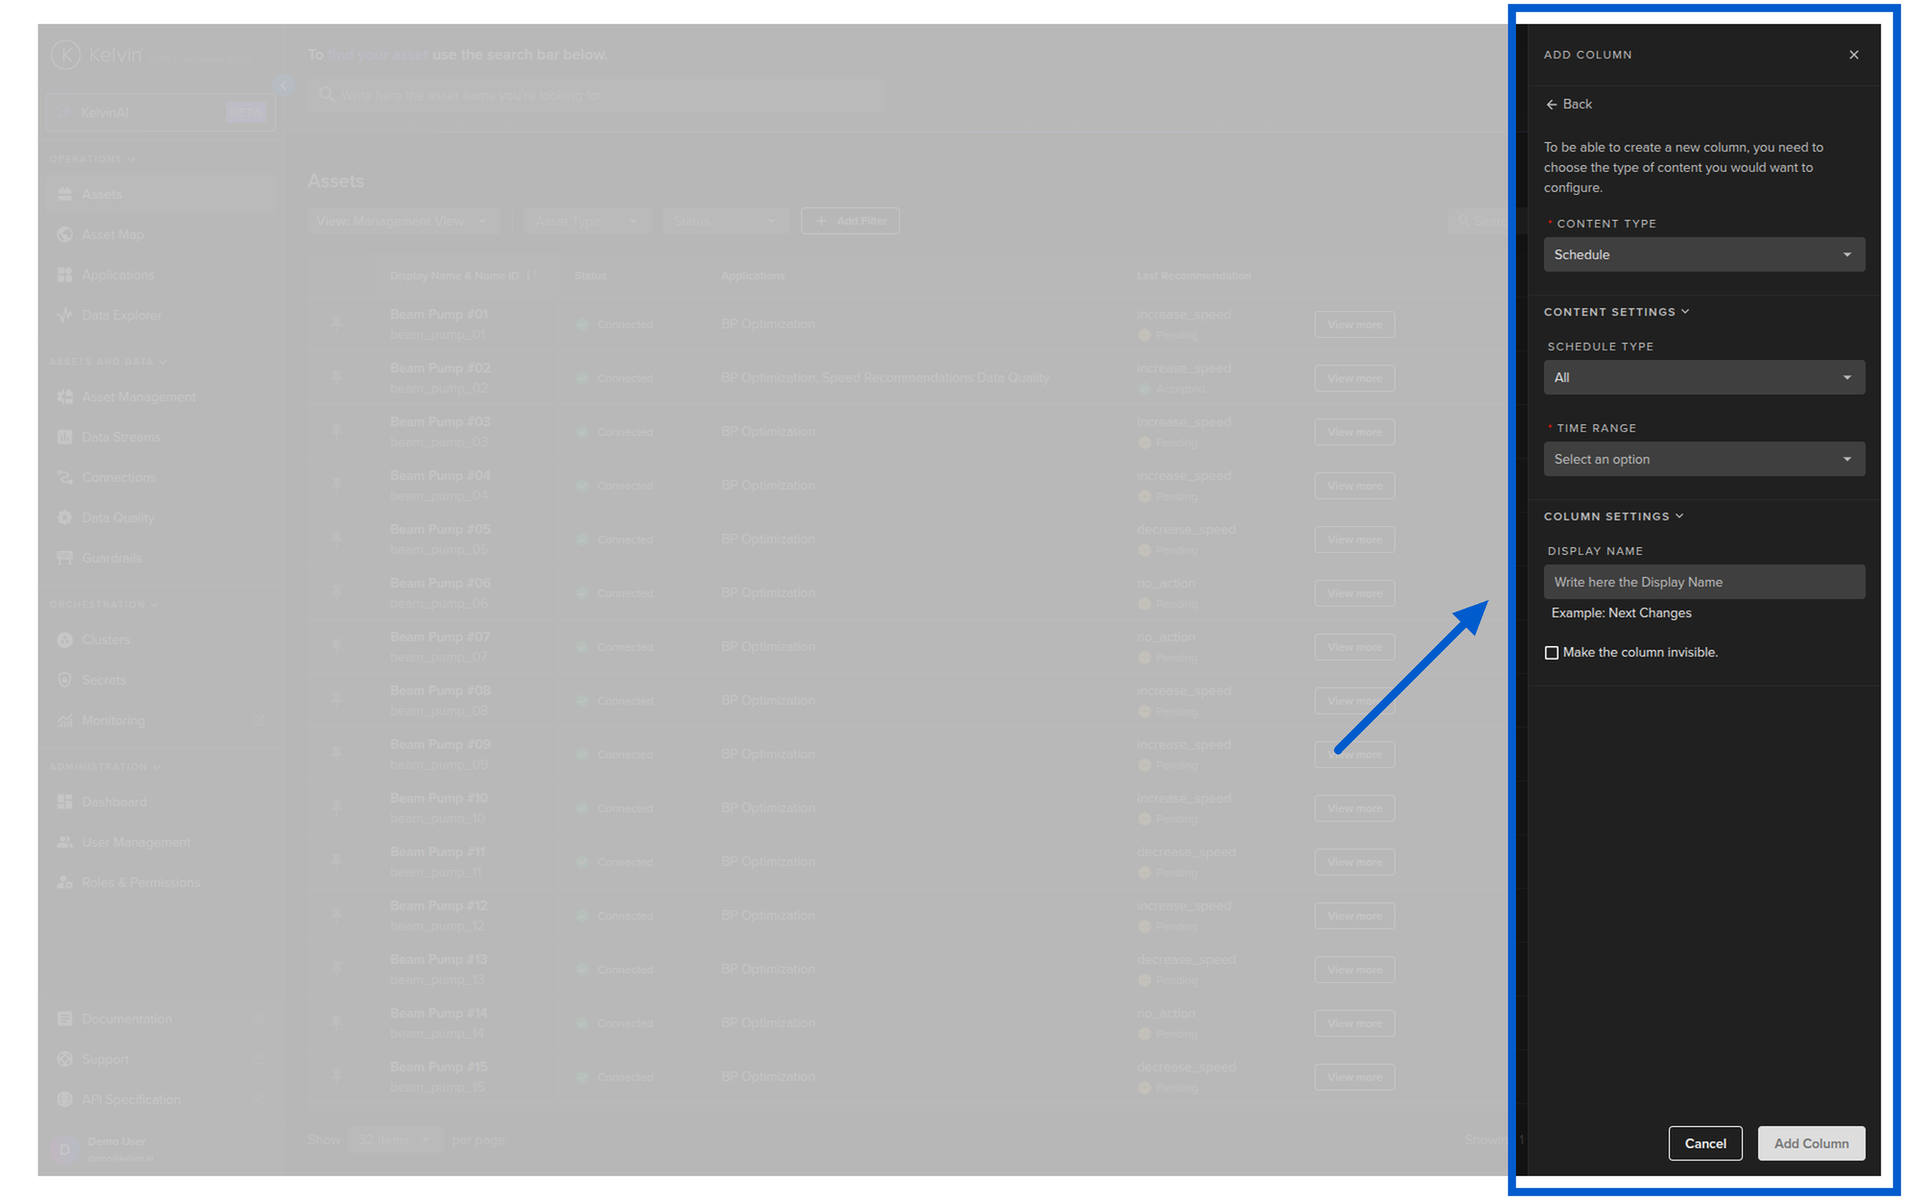
| Option | Description |
|---|---|
| Schedule Type | Options are; Change Once and Change and Revert. You can not view both in the same column. |
| Time Range | FIlter on time range from now to the future. Options are in hours and days. |