Add CSV Publisher Connection - How To
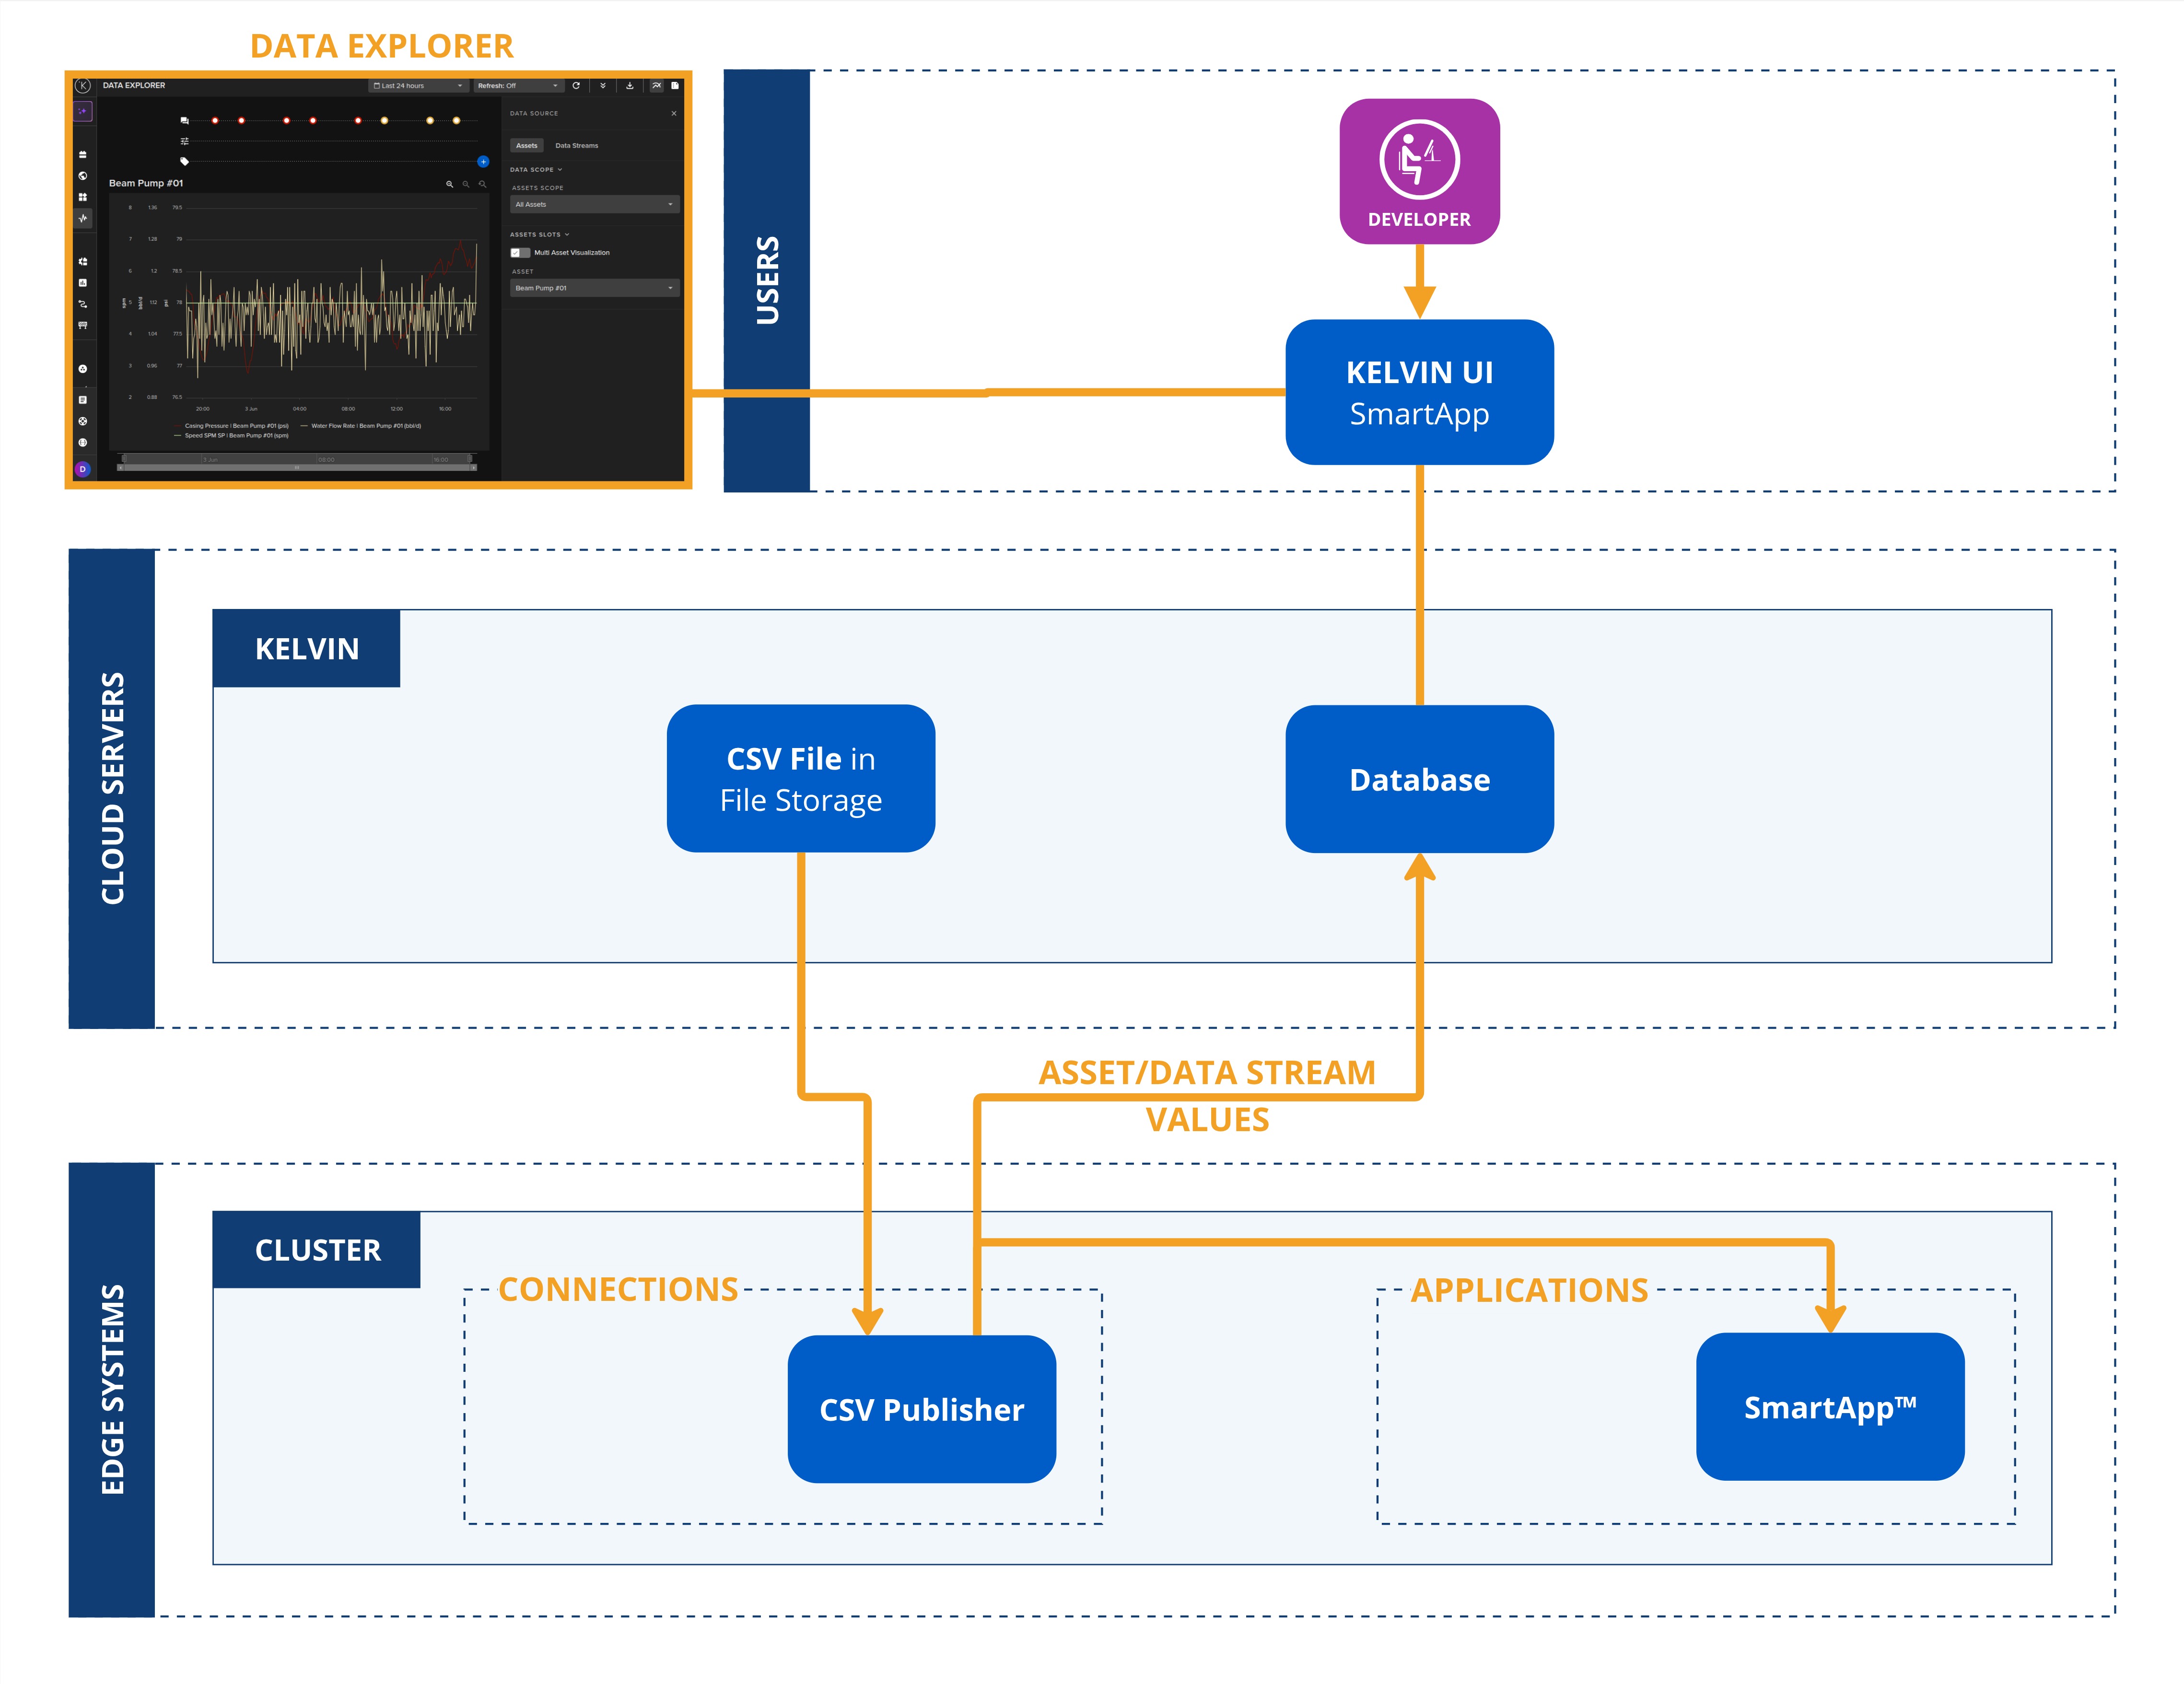
When developing or testing new Kelvin SmartApps™ there may be times when you have a set of data you want to test on your Kelvin SmartApp™.
You can easily achieve this by using this CSV publisher which will use a set of data in a CSV file and simulate a live Connection.
Connections can be deployed to both x86_64 and ARM64 devices.
Requirements
We first need to prepare the CSV file with data.
You can download a sample template in Step 3 of Creating a Connection in the Kelvin UI, or you can simply create your own CSV file as there are only three main rules for the CSV file;
- The first row is the header where each column name is a Data Stream name.
- Optionally the first column of the header can be named
timestampwhich is used to control when data is released to the Asset / Data Stream pairs. - Each following row is one set of data to be sent to the Asset / Data Stream pairs.
The headers are referencing the Data Stream name which must be lowercase alphanumeric without spaces. If you use a different name, you will still have opportunity to manually connect the header name with the correct Data Stream in kelvin UI during Step 4.
Deploy
Once you have created this file, which for these examples we have called publisher-example.csv, then proceed with one of these methods to deploy the Connection.
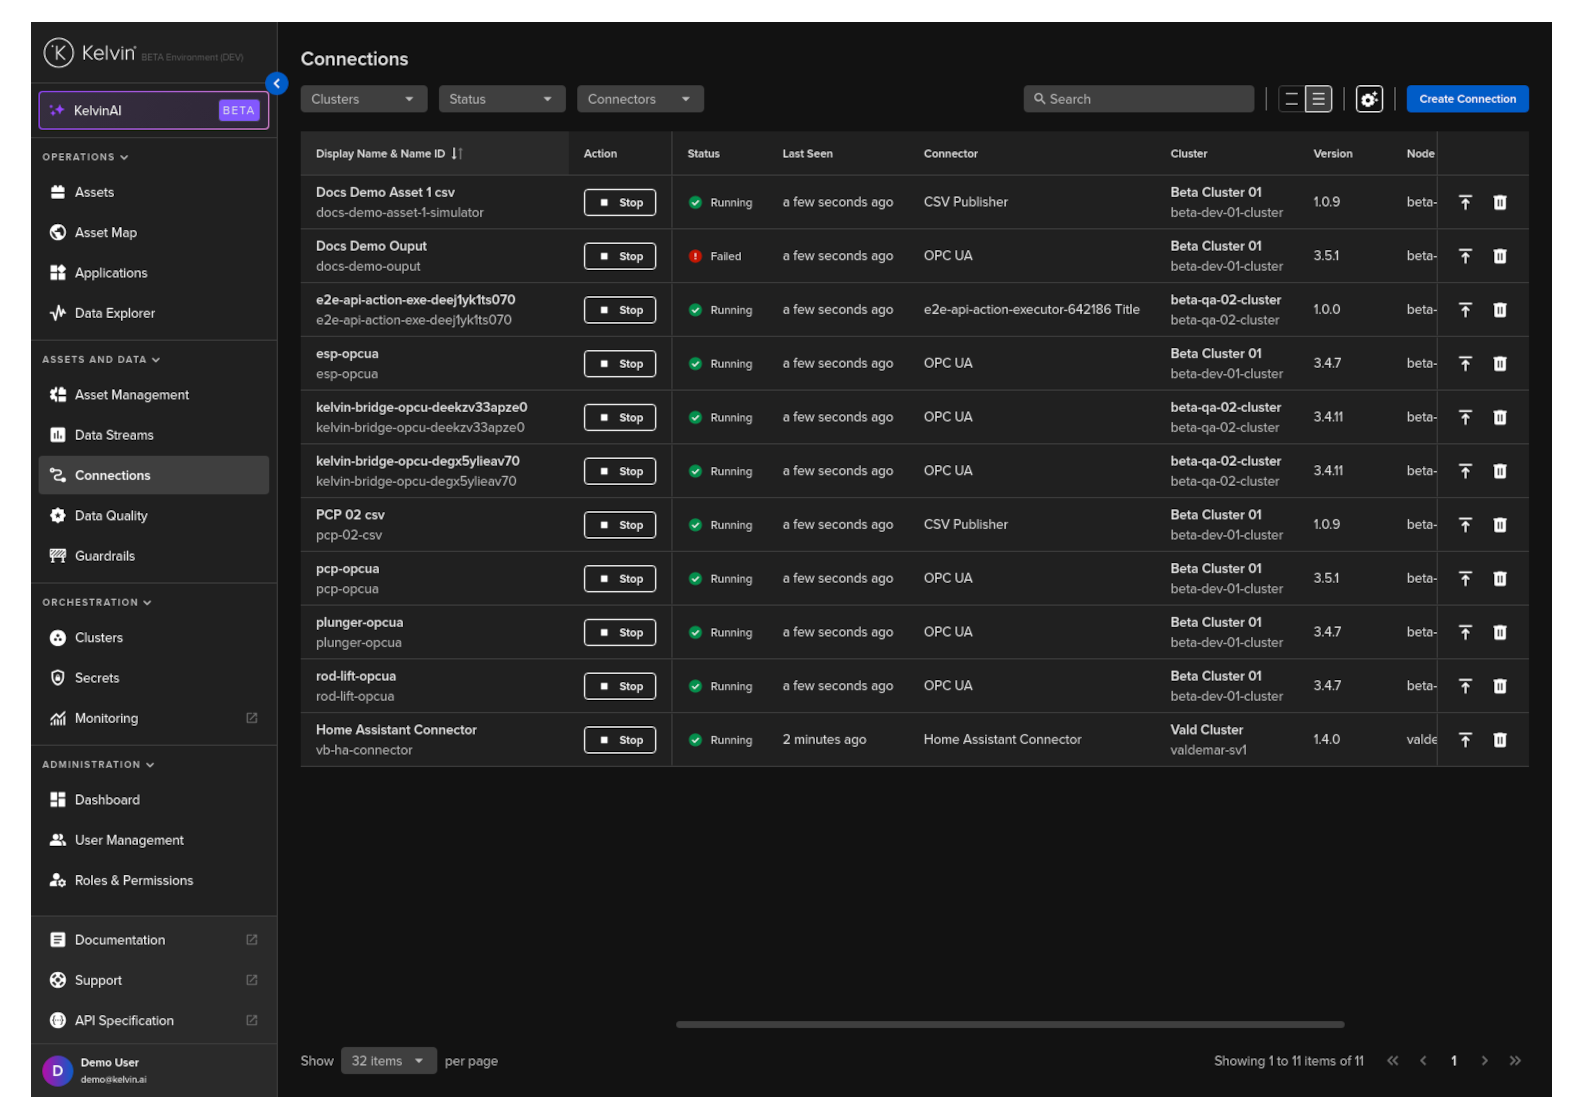
To start click on the Connections menu option from the left side bar menu.
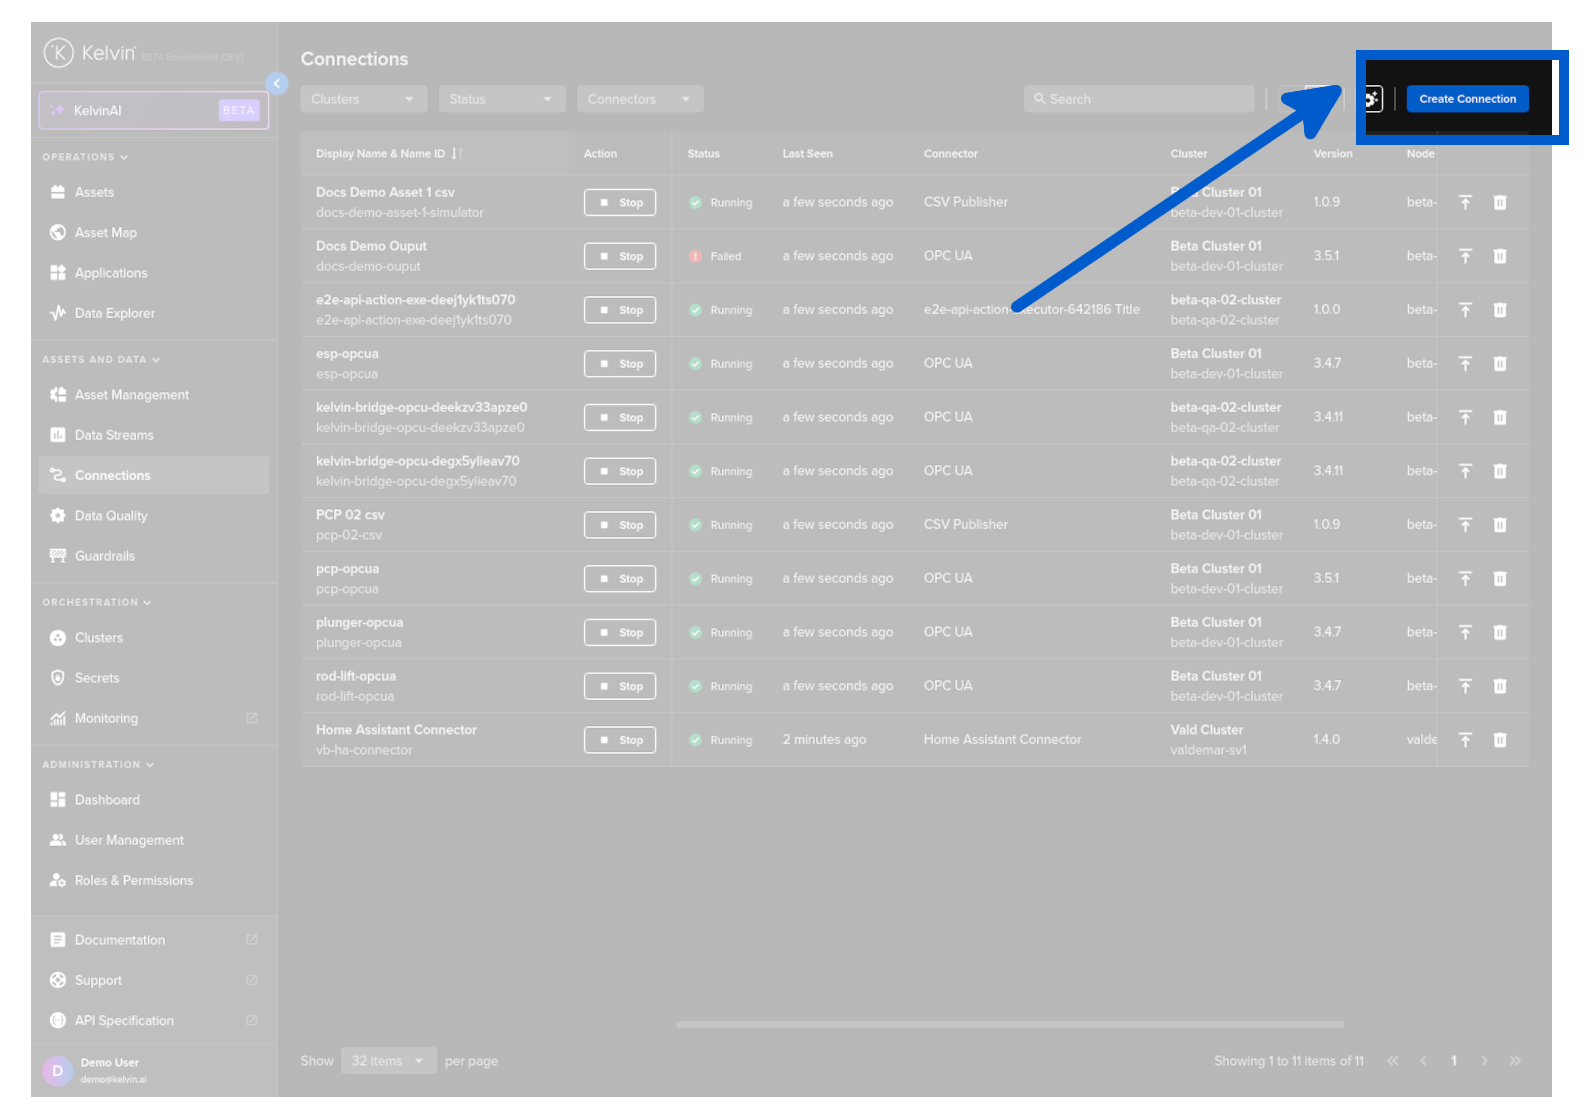
click on the Create Connection button.
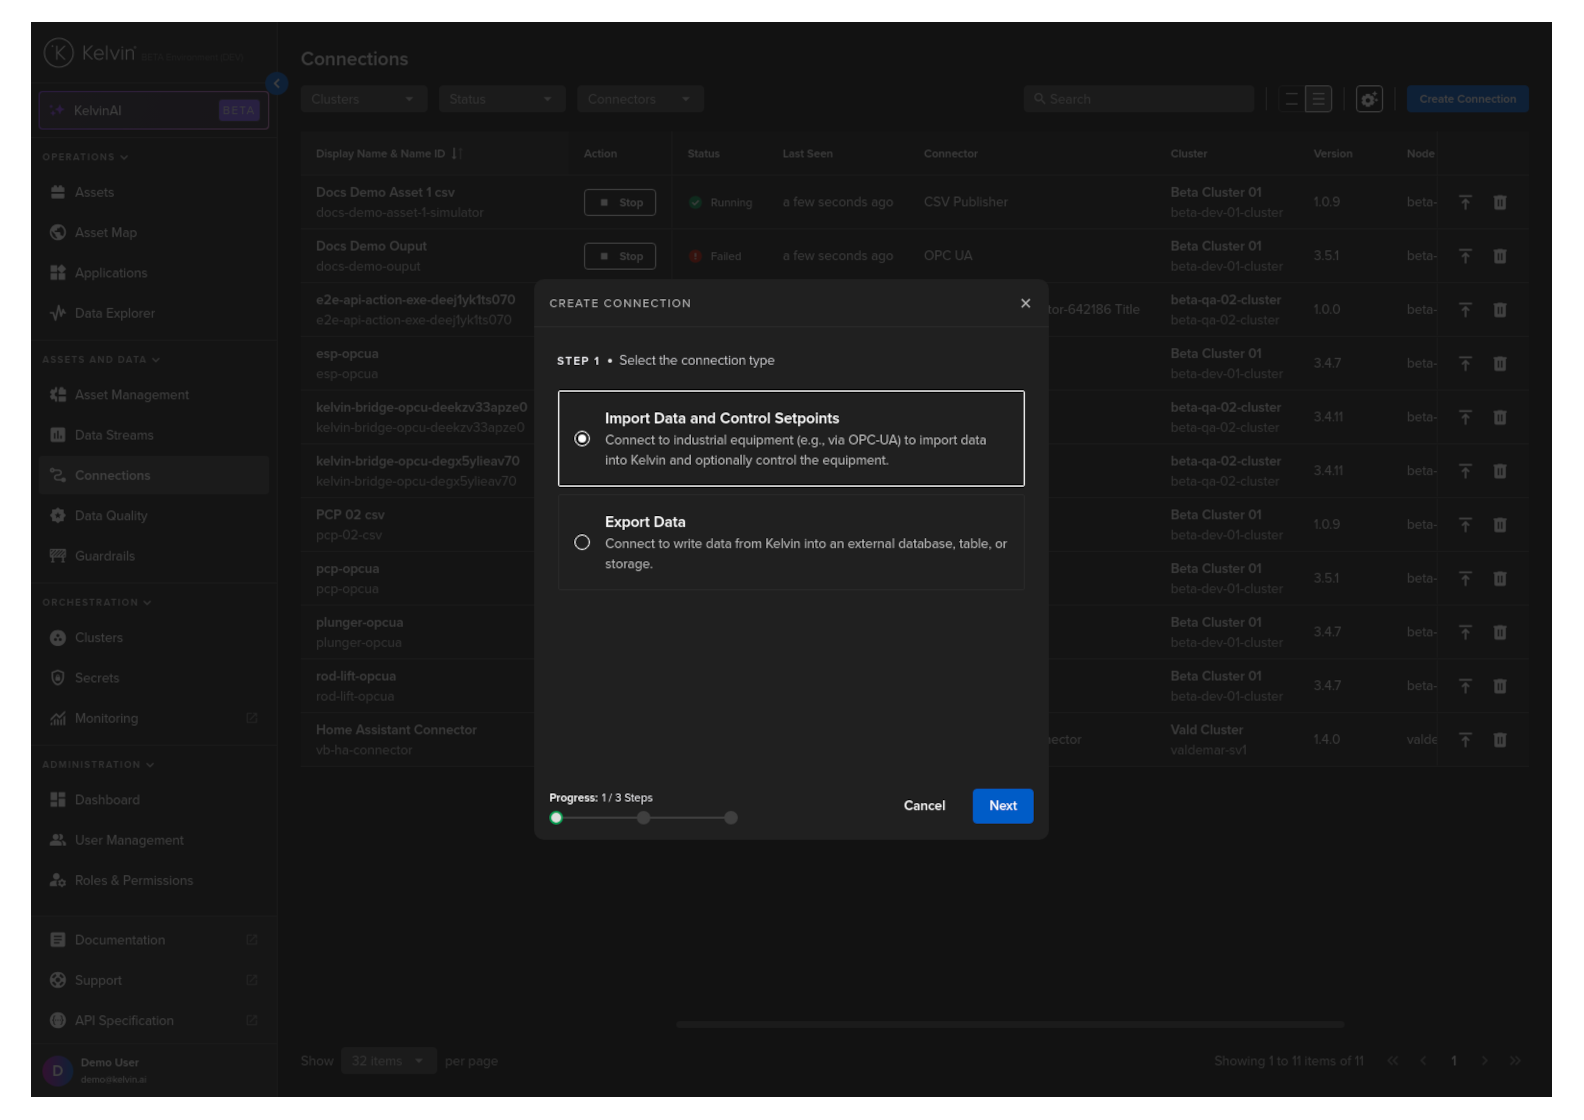
Step 1
Select Import Data and Control Setpoints and click Next.
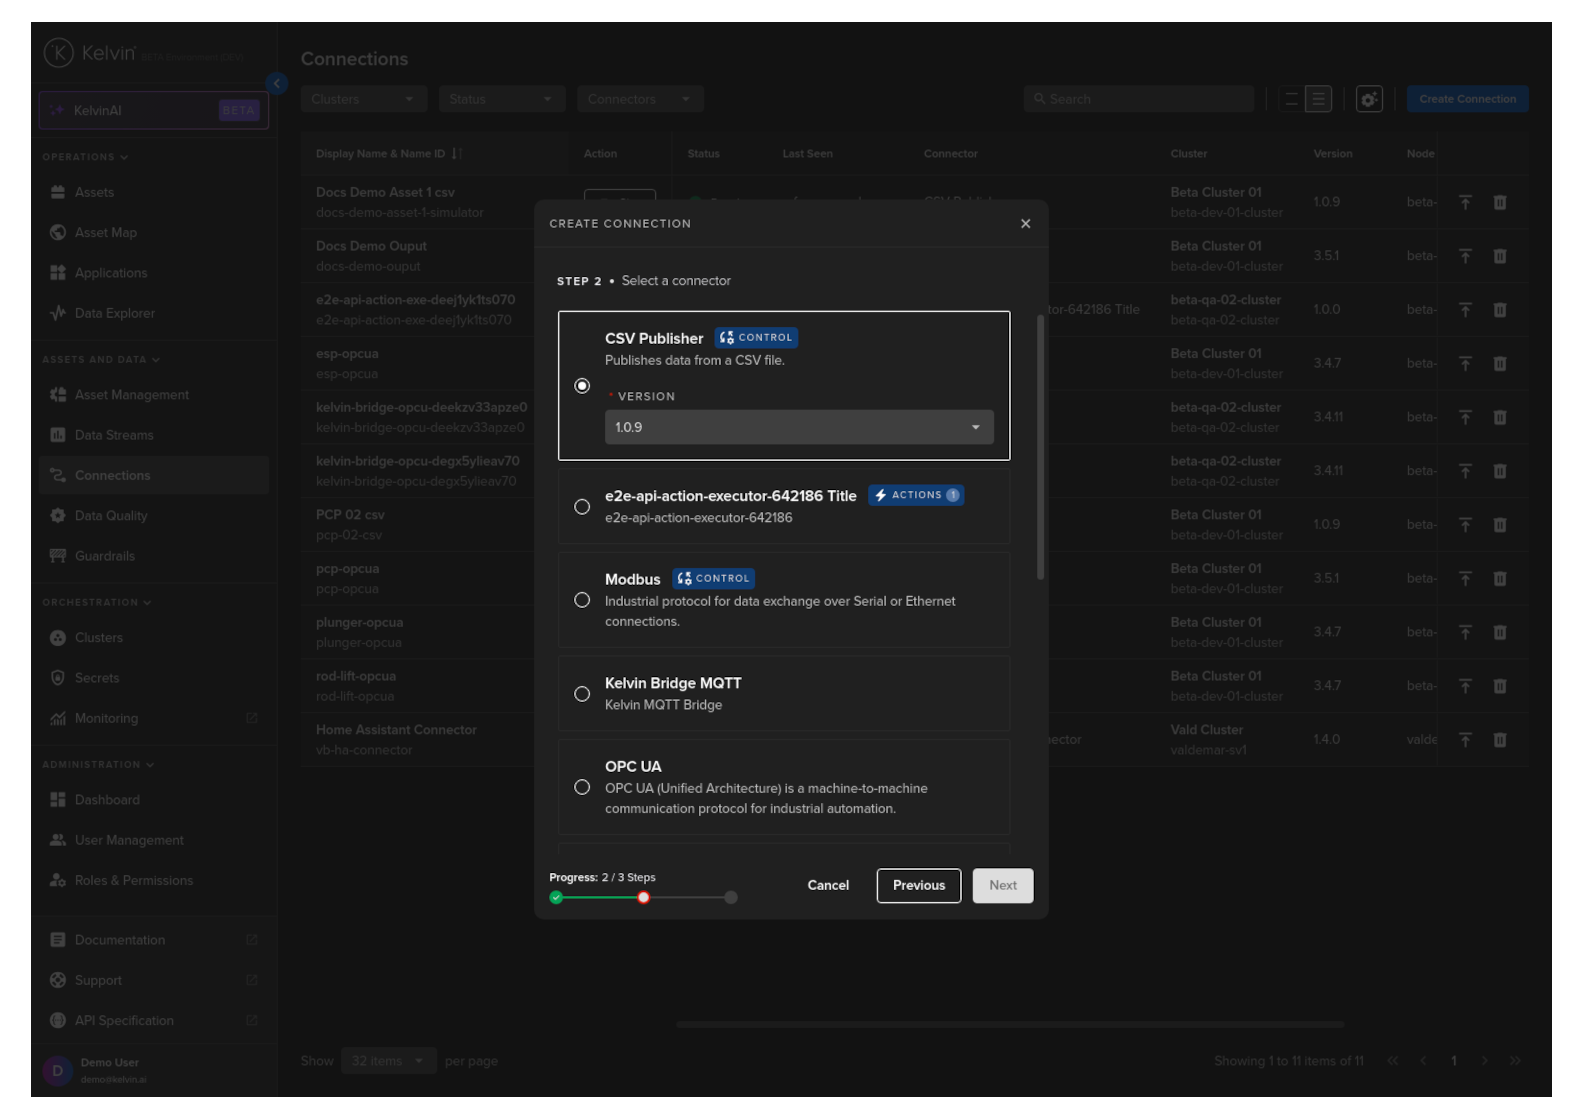
Step 2
Here you will see a list of Import Connection Applications available in the App Registry.
Select the Kelvin CSV Publisher Connector option, select a Version and click Next.
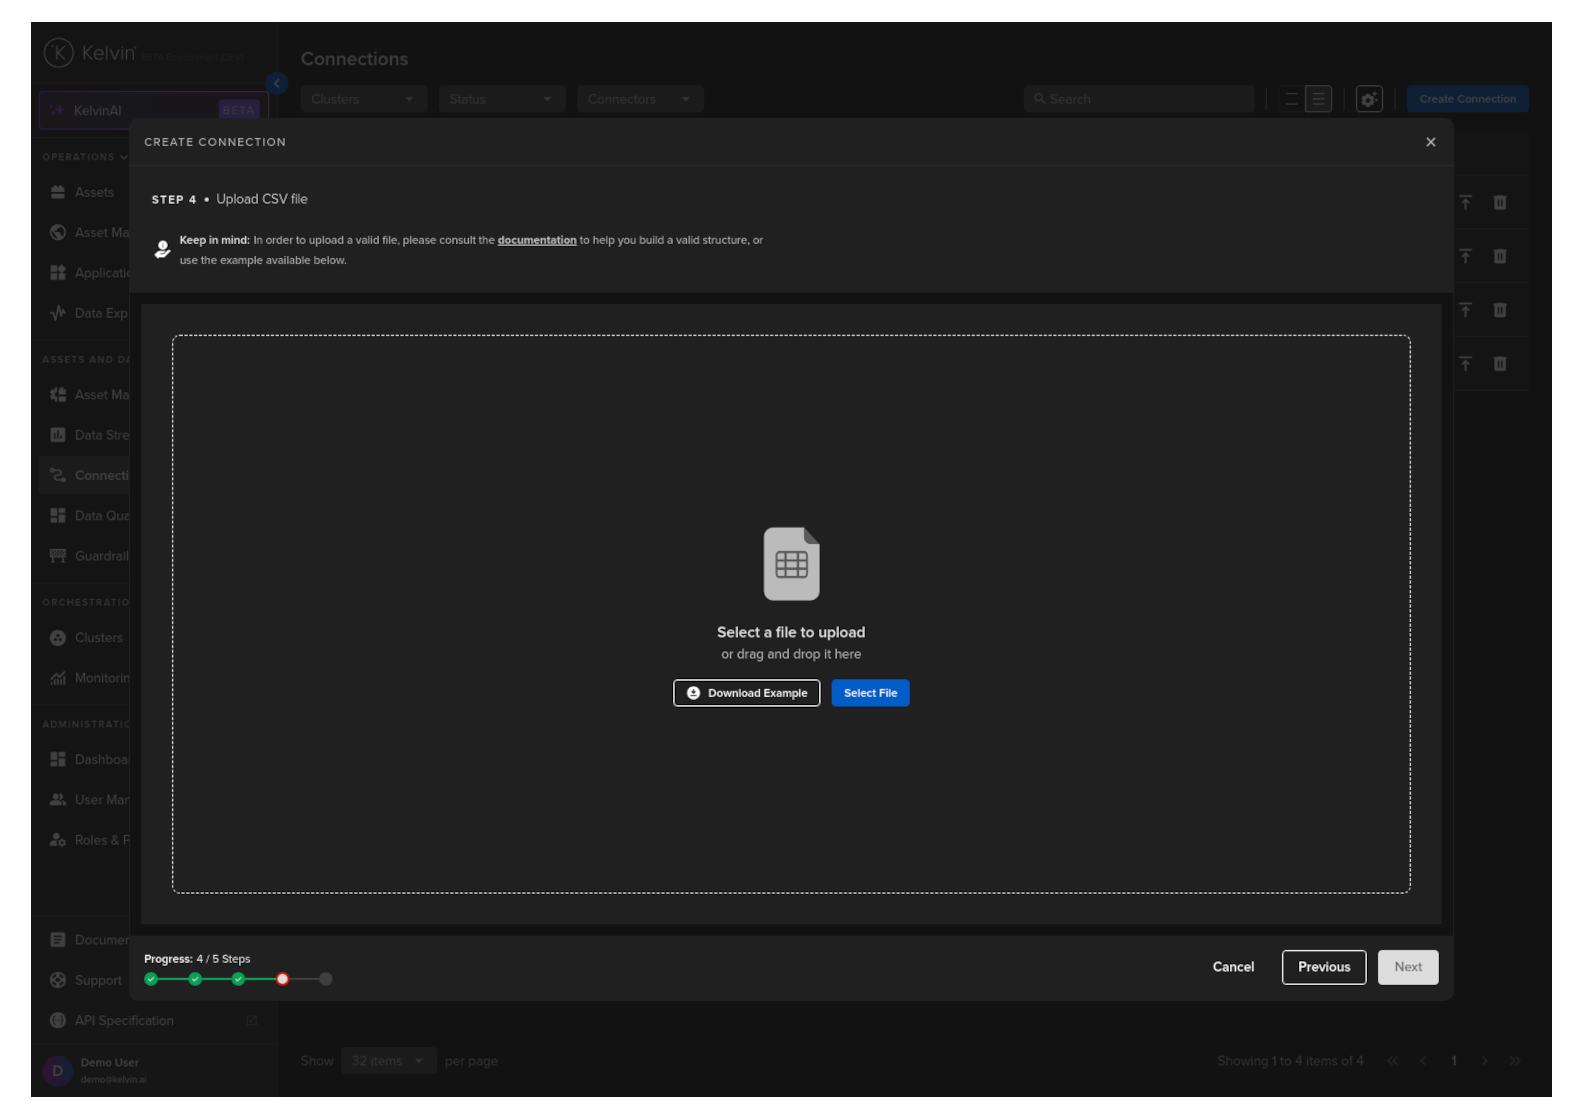
Step 3
Drag and drop or select your file to upload.
At this stage you can also download a sample template for reference on how to create a valid publishing CSV file.

When you have selected the file, it will be validated before the Next button is activated.
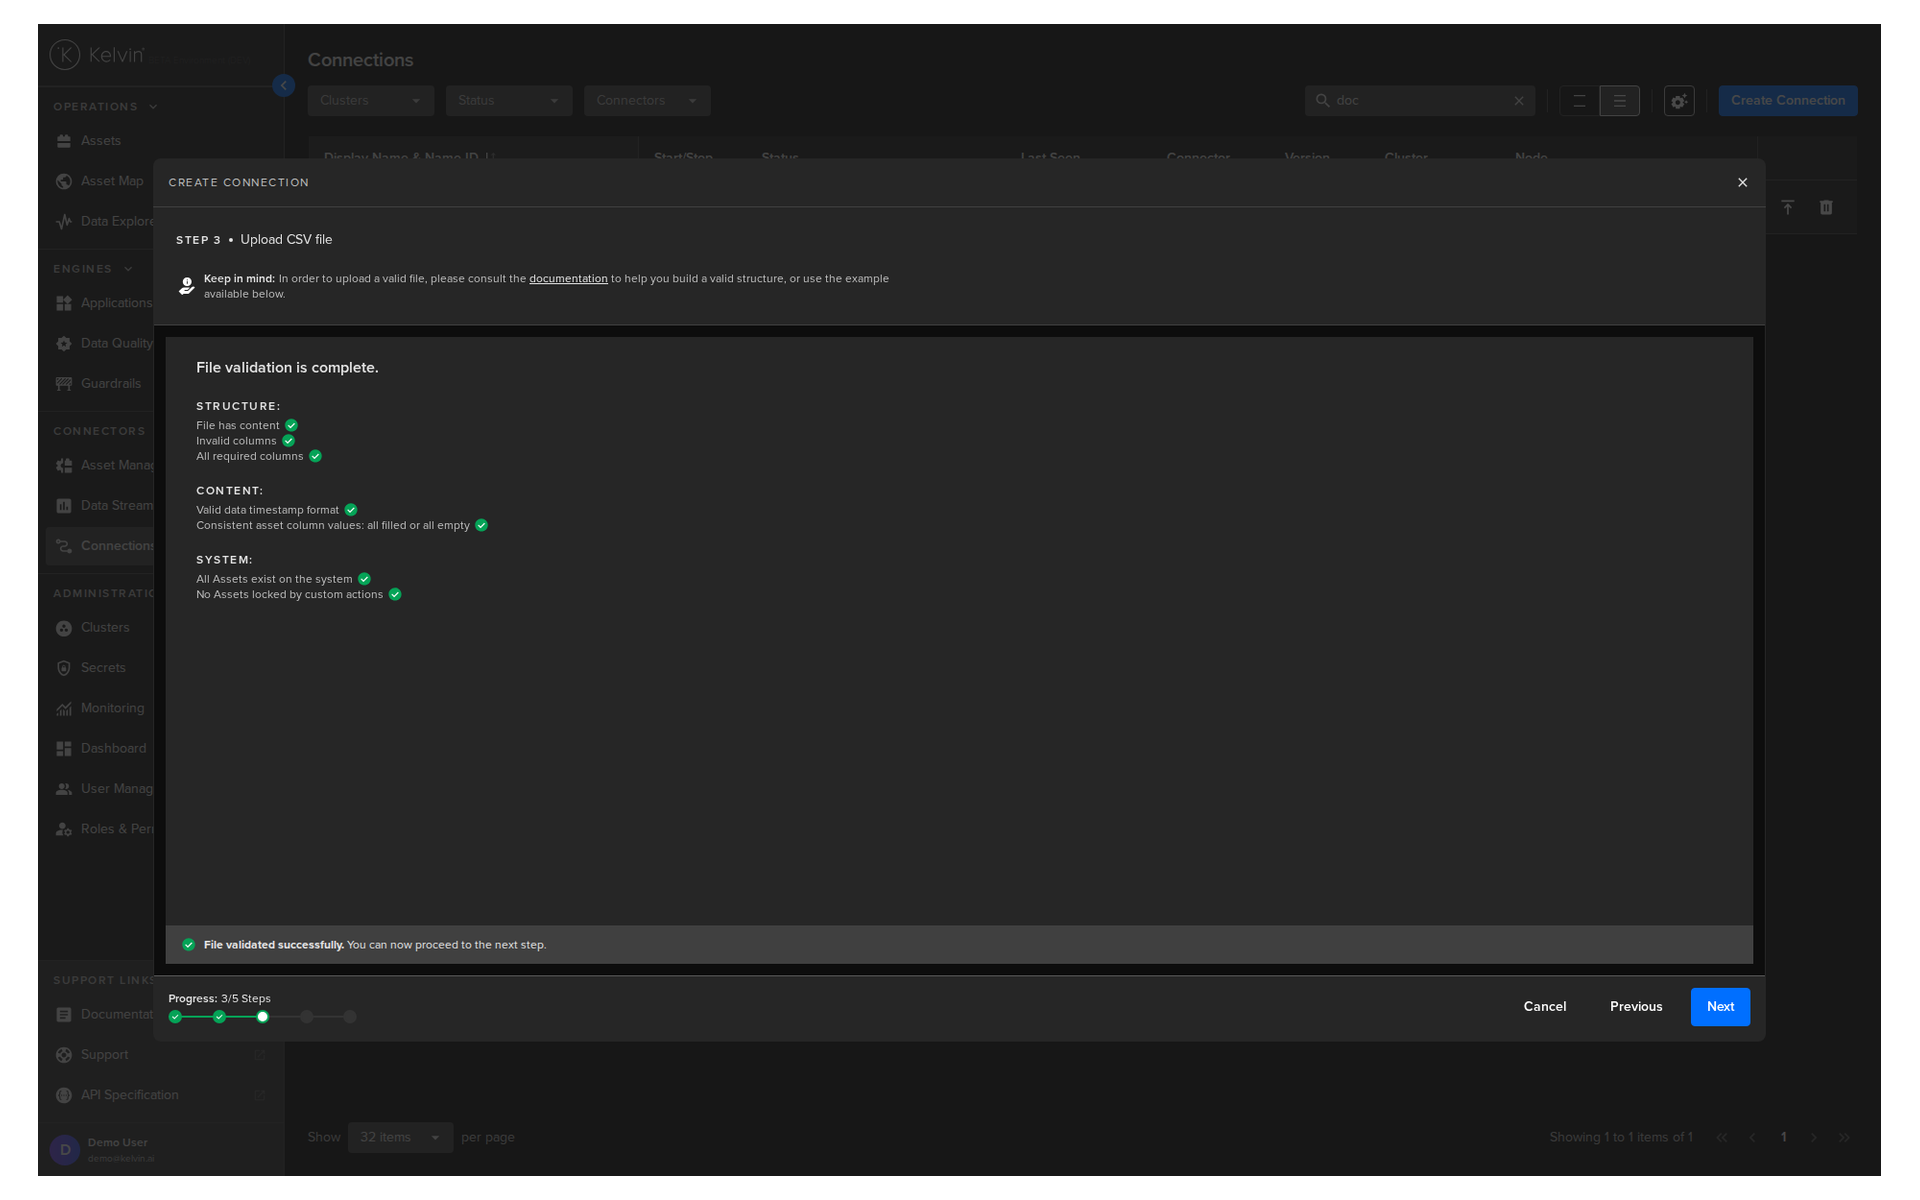
Once validated you can click Next.
Step 4
Use the checkbox on the left to select one or more Assets where the data will be sent to.
When ready click Next.
Step 5
In Step 5 you have a range of options available.
Note
You will only be able to deploy your workload once all options have a green check ![]() .
.
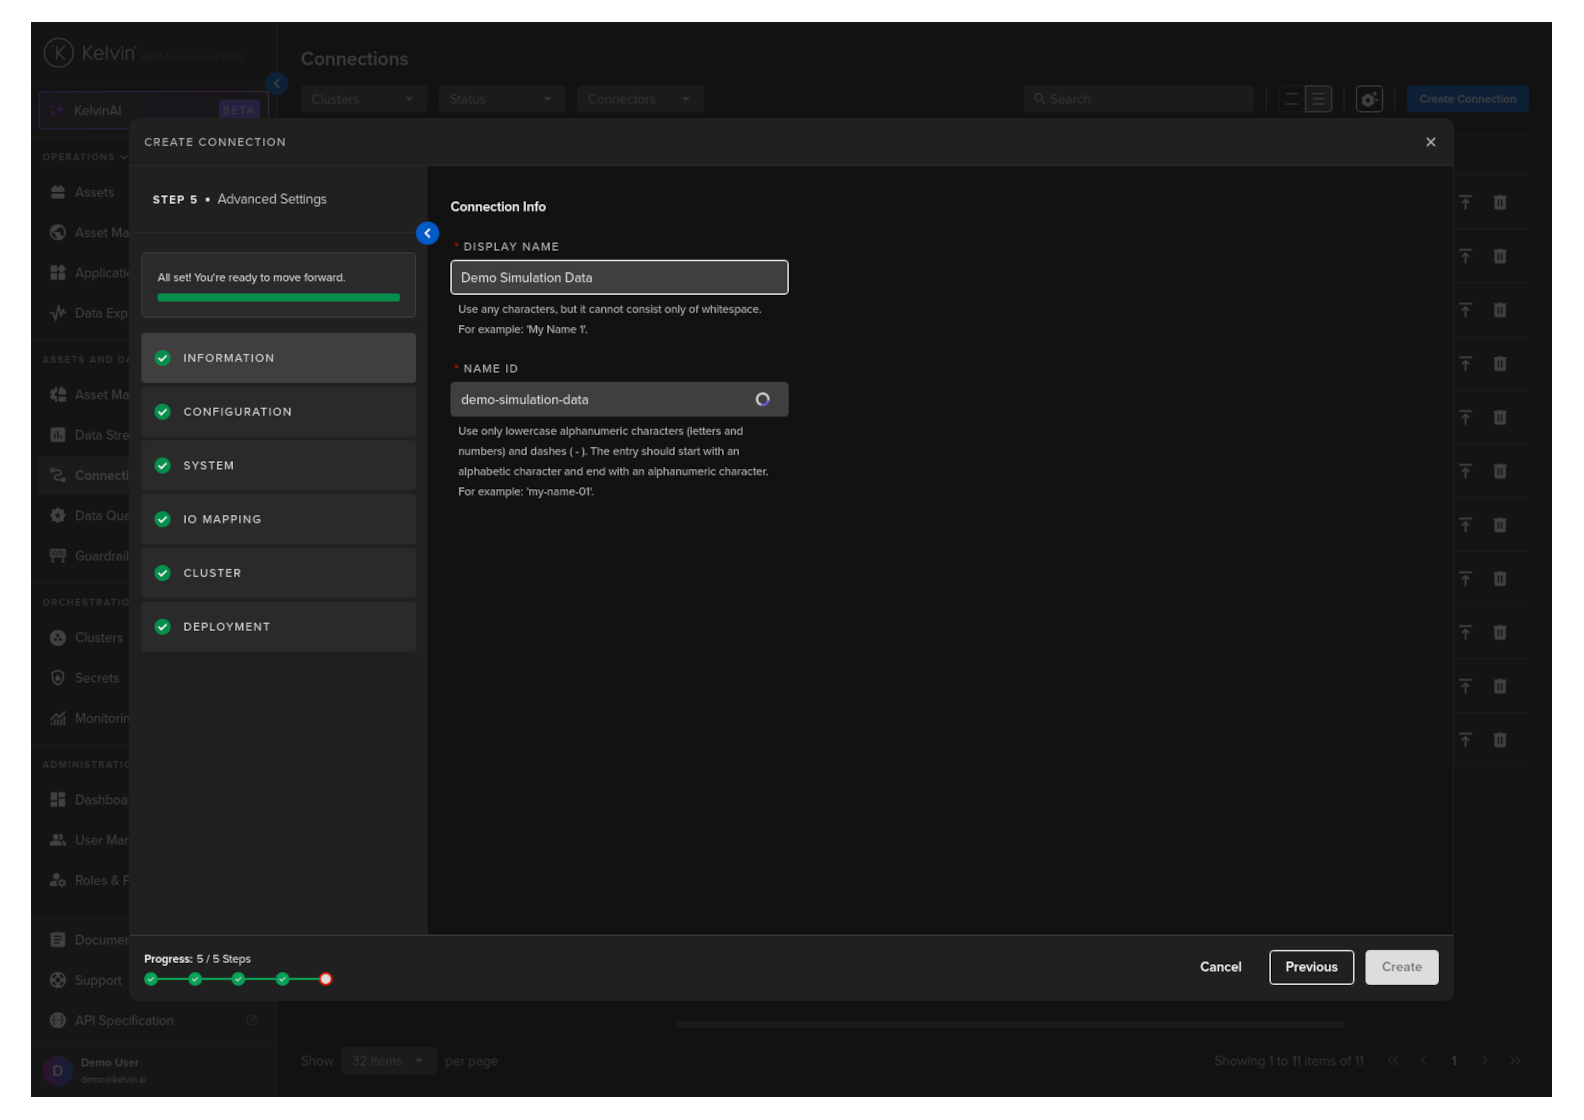
Information
Type in a memorable name in the Display Name text input. You can use any letters, numbers and special characters.
The Connection Name text input will be automatically converted and filled in as you type in the Display Name section. The conversion ensures the Connection Name only contains lowercase alphanumeric characters and ., _ or - characters.
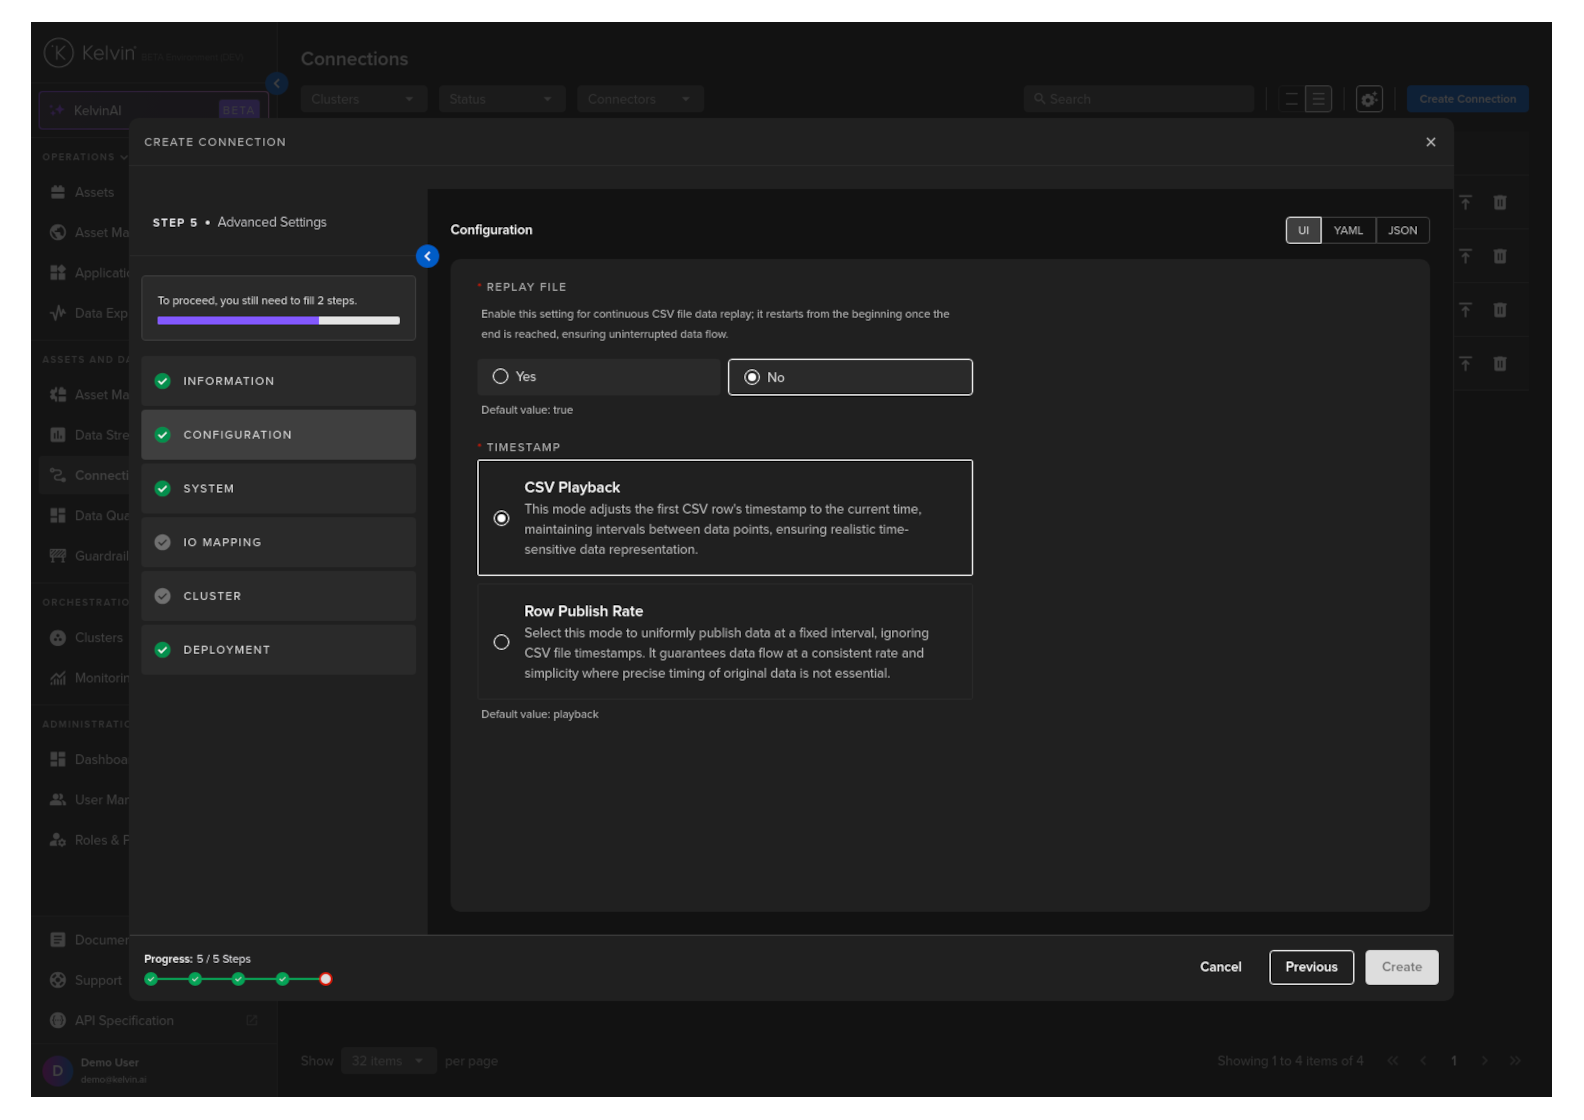
Configuration
Configure the CSV Publisher connection for the asset. There are a number of mandatory parameters to fill in.
Info
You can choose to use the UI view, or work directly in YAML or JSON format.
For the optional parameters, if you do not fill in any values, the default values will be used.
| Parameter | Options | Description | Default | Mandatory |
|---|---|---|---|---|
| Replay File | Yes or No | Loops the data to produce an infinite amount of data. | No | Yes |
| Timestamp | CSV Playback or Row Publish Rate |
Time interval to use to send data to the Asset / Data Stream pairs. | CSV Playback |
Yes |
CSV Playback
This option uses the timestamp information in the timestamp column of the CSV file on when to release the data.
The timestamp of the first data row is used as the starting point reference and each consecutive row will be sent based on the time difference of the first row and next row to be sent.
Row Publish Rate
This option will send each row of data at a fixed interval and ignore any timestamp column in the CSV file.
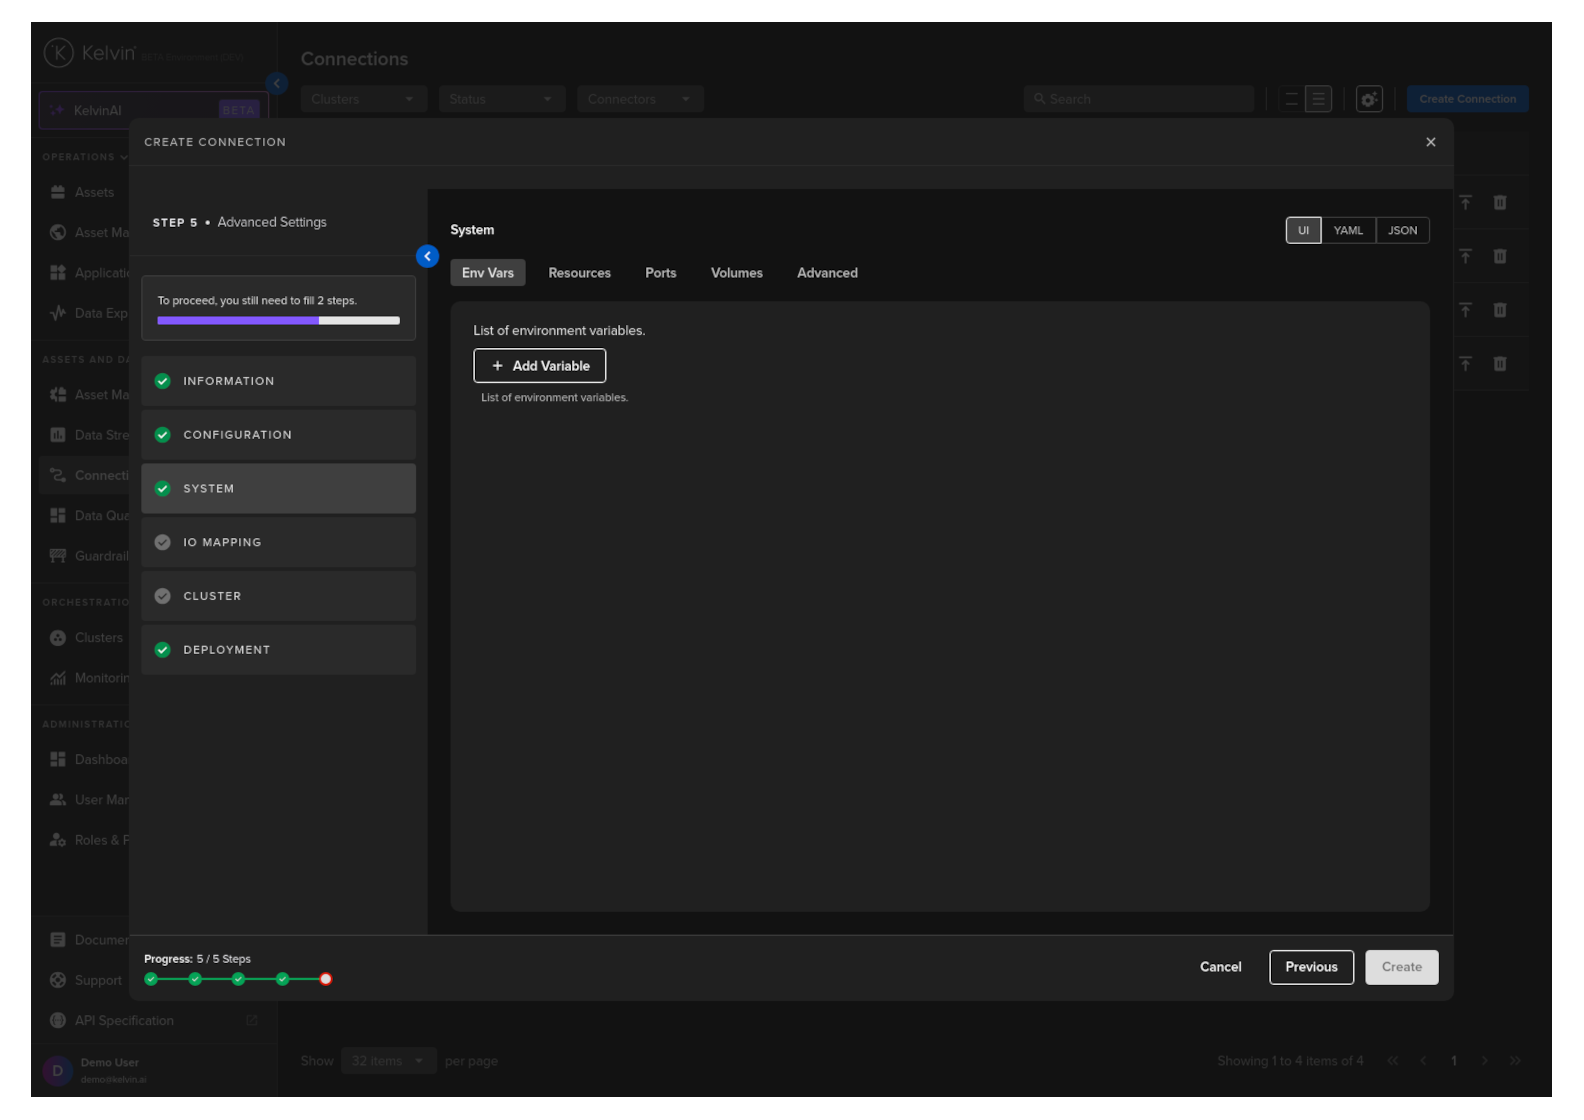
System
Here you will be able to tune all the system variables that are present in the app.yaml file of the Application.
You can choose to edit it using a UI or directly on the YAML or JSON.
Note
Using YAML or JSON is very useful for fast application of settings if you have preset configurations and want to copy/paste them into here.
Env Vars
Here will be shown the list of default Environment Variables and the default values that were set in the app.yaml file of the Application during development.
You can edit these and change both the environment name or value. You can also add additional Environment variables.
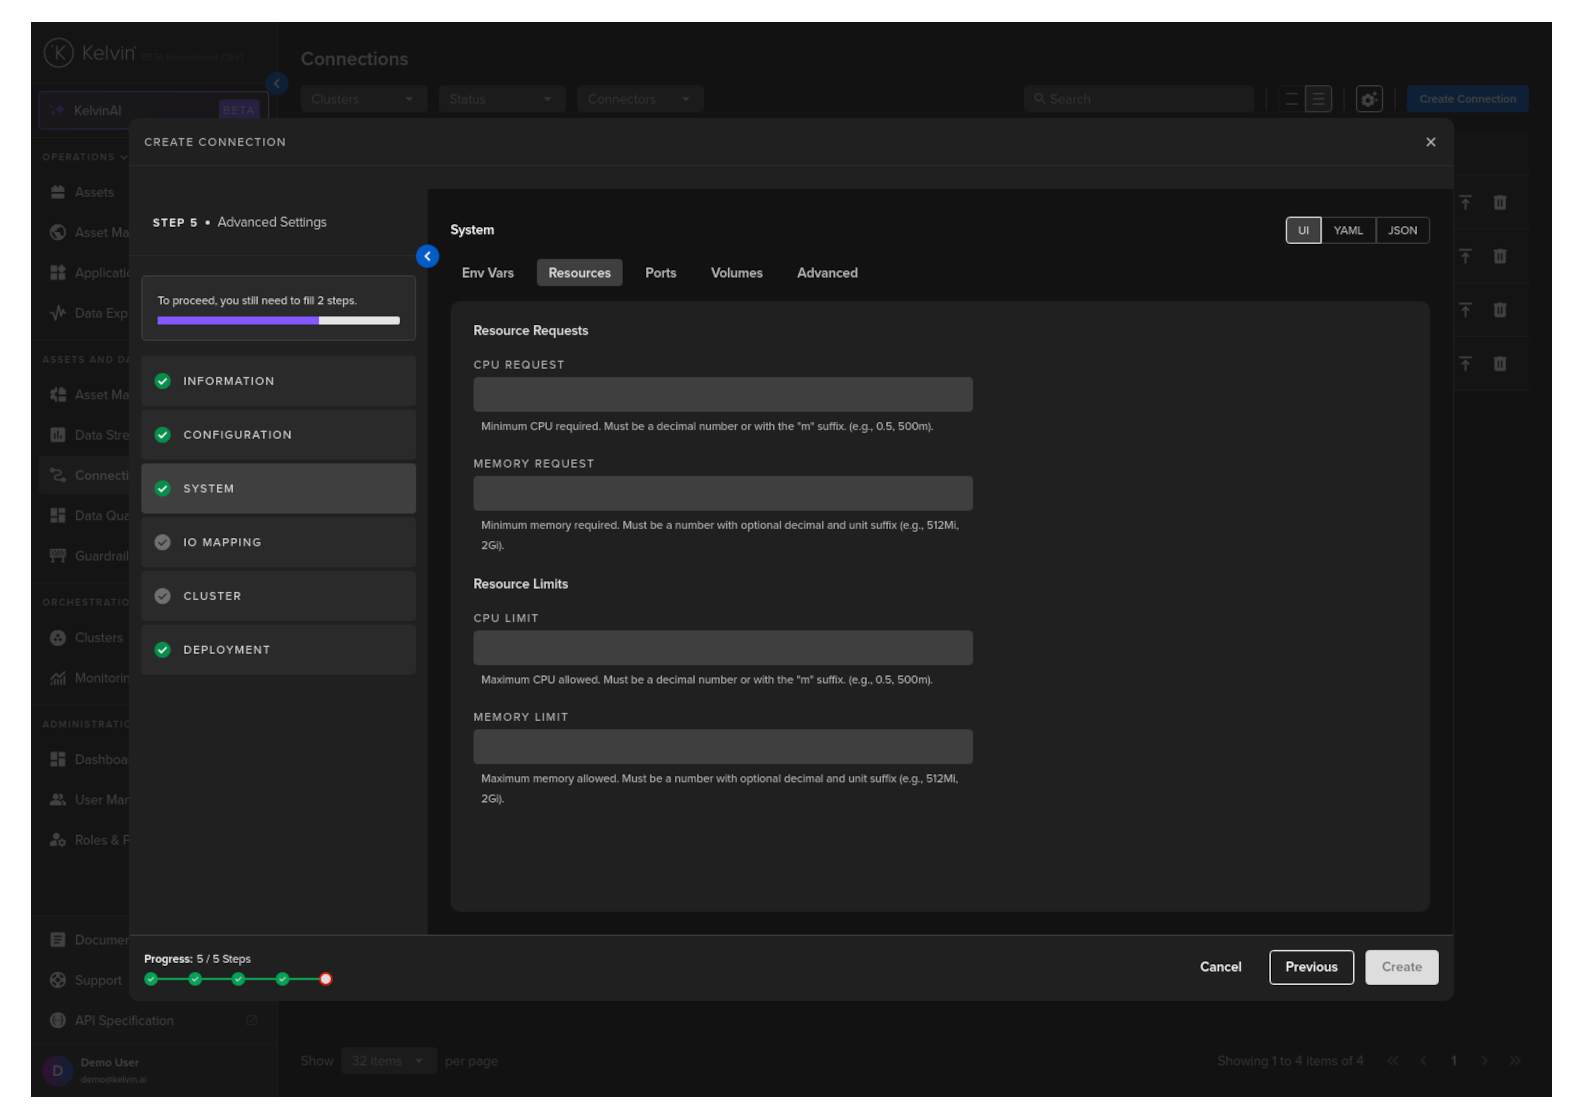
Resources
Apply resources available for the Workload.
See Set CPU/Memory Limits for detailed documentation on this section.
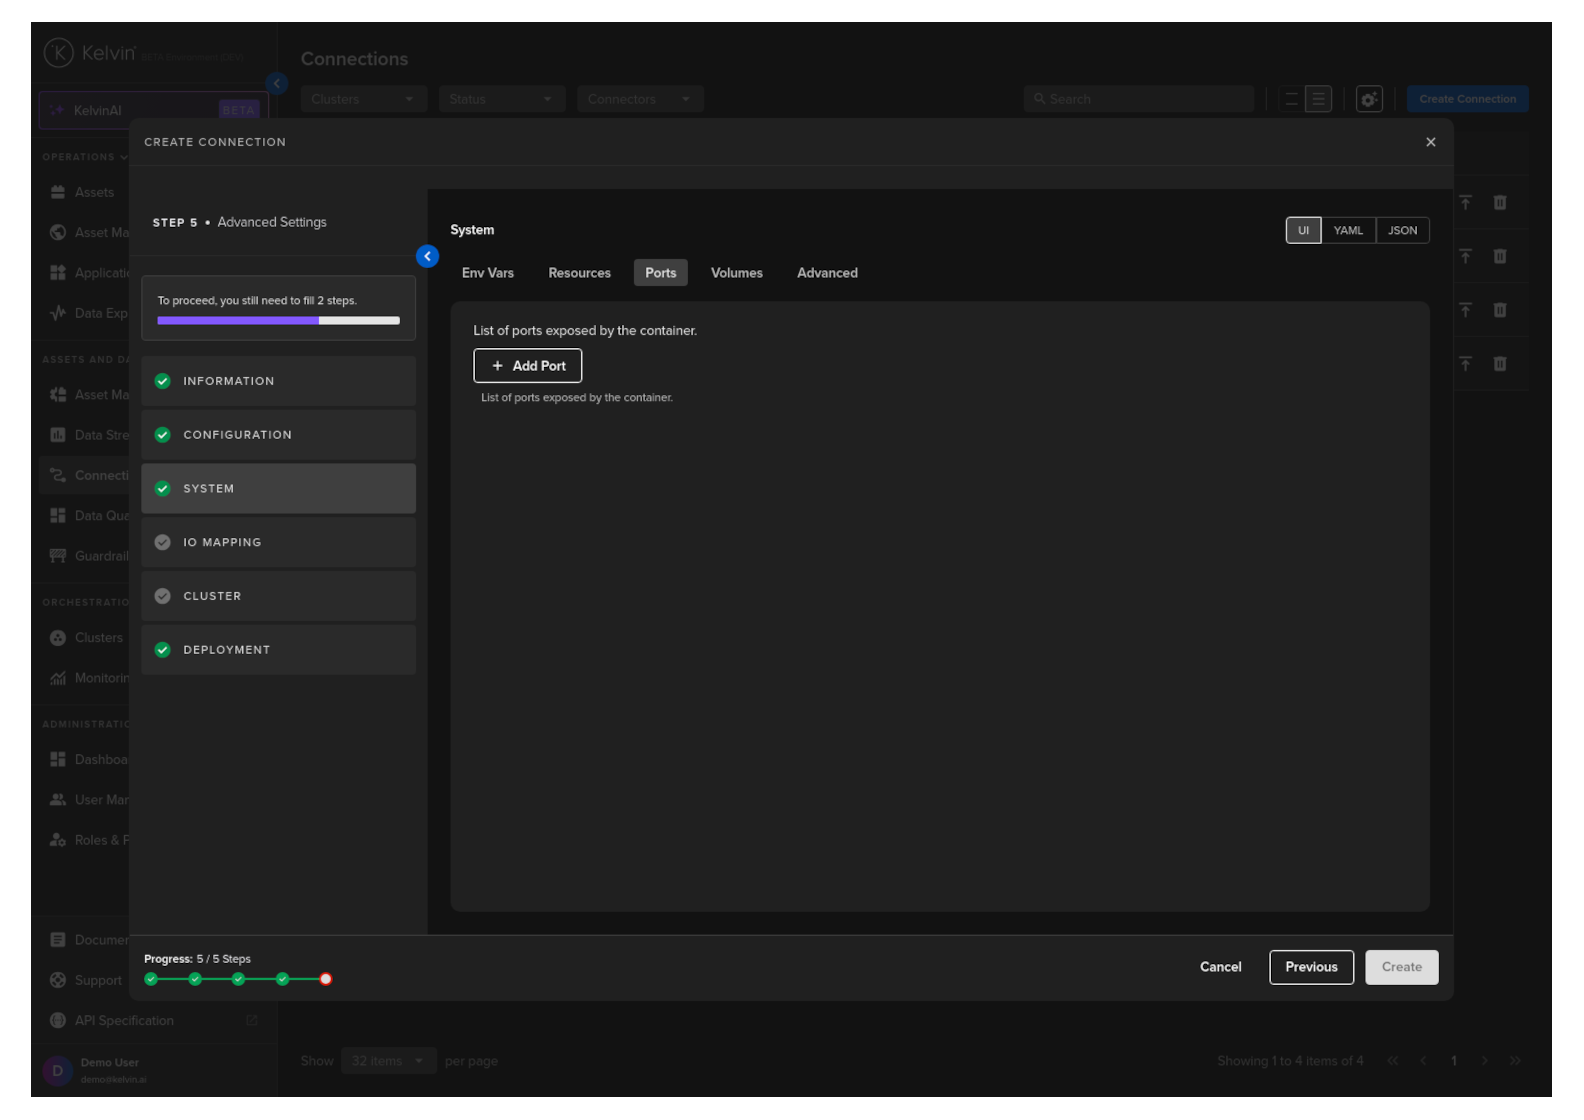
Ports
Open ports to your Workload.
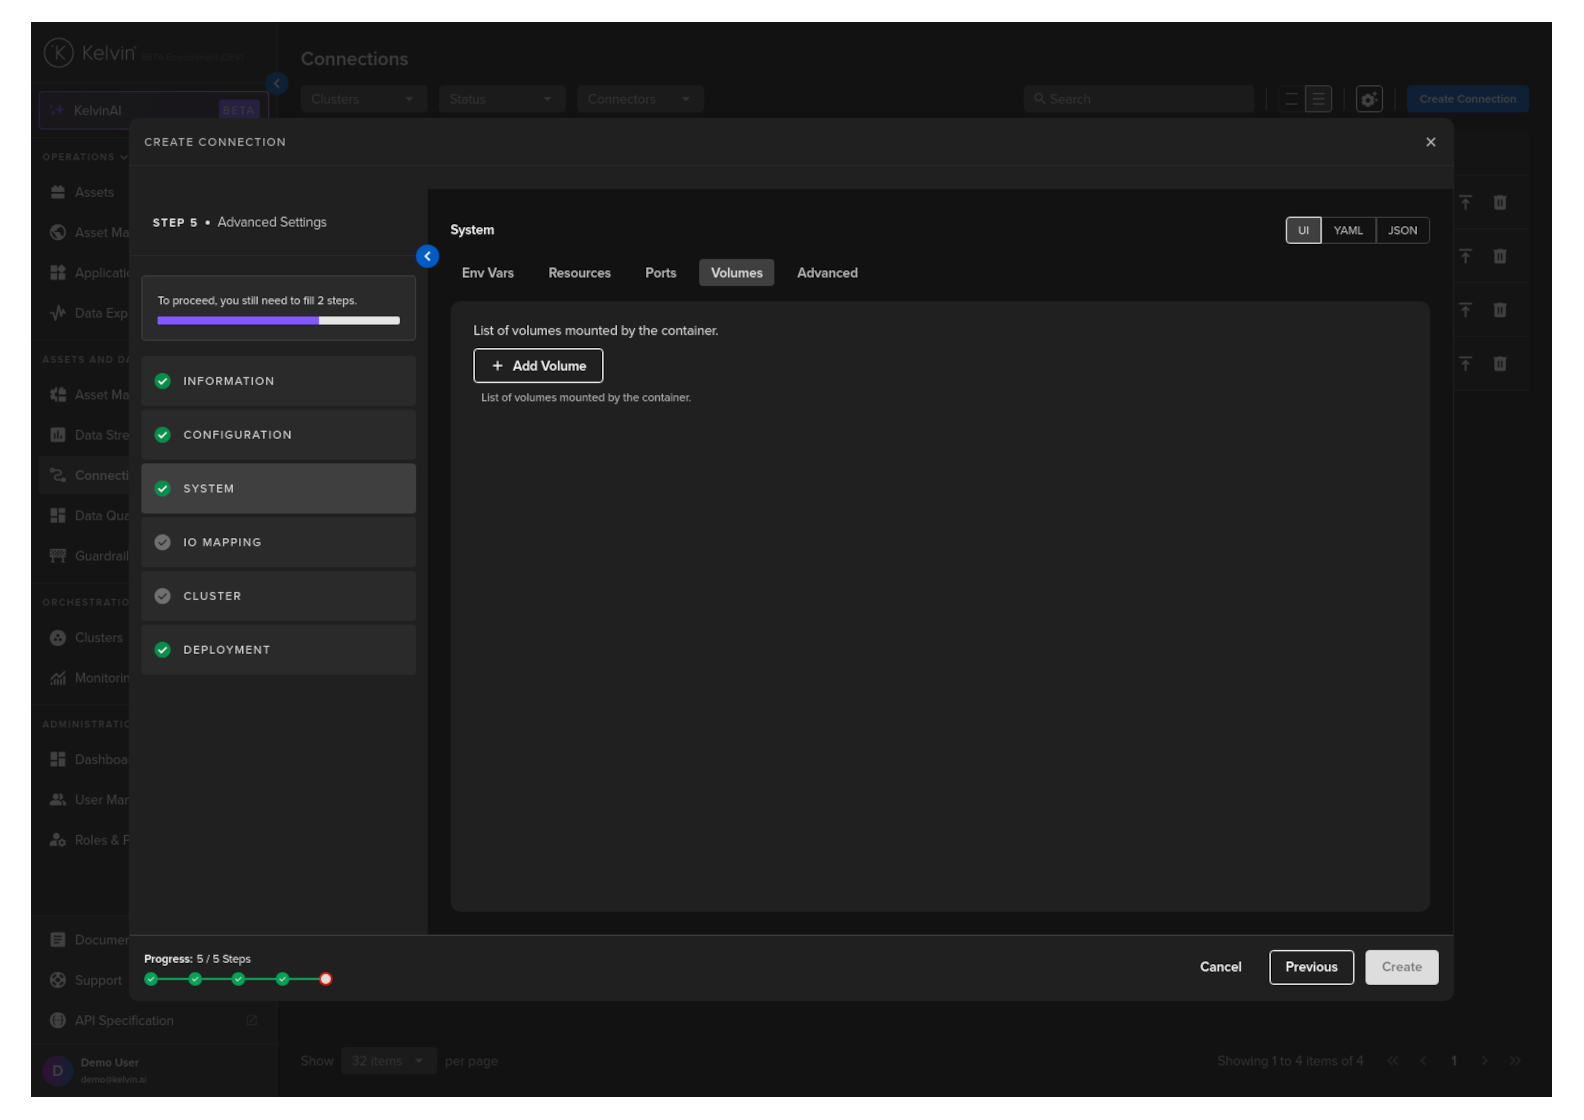
Volumes
Mount volumes to your Workload.
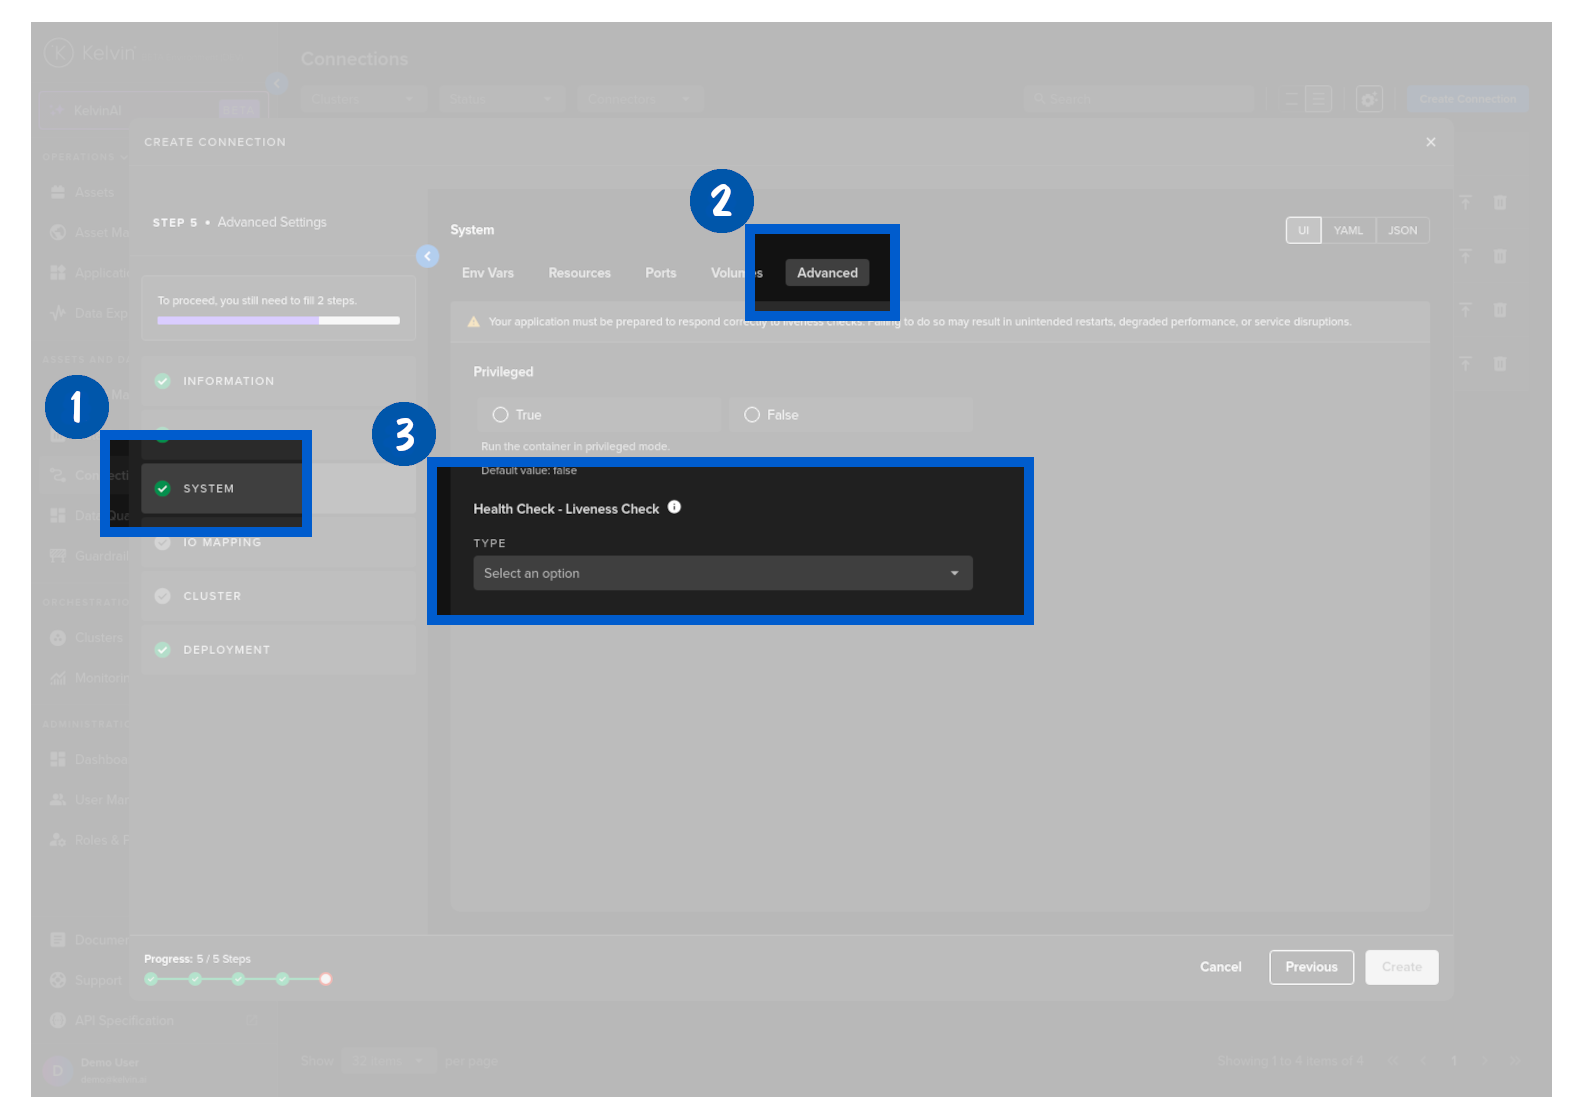
Advanced
Choose if you would like to add Privileged mode to the Workload
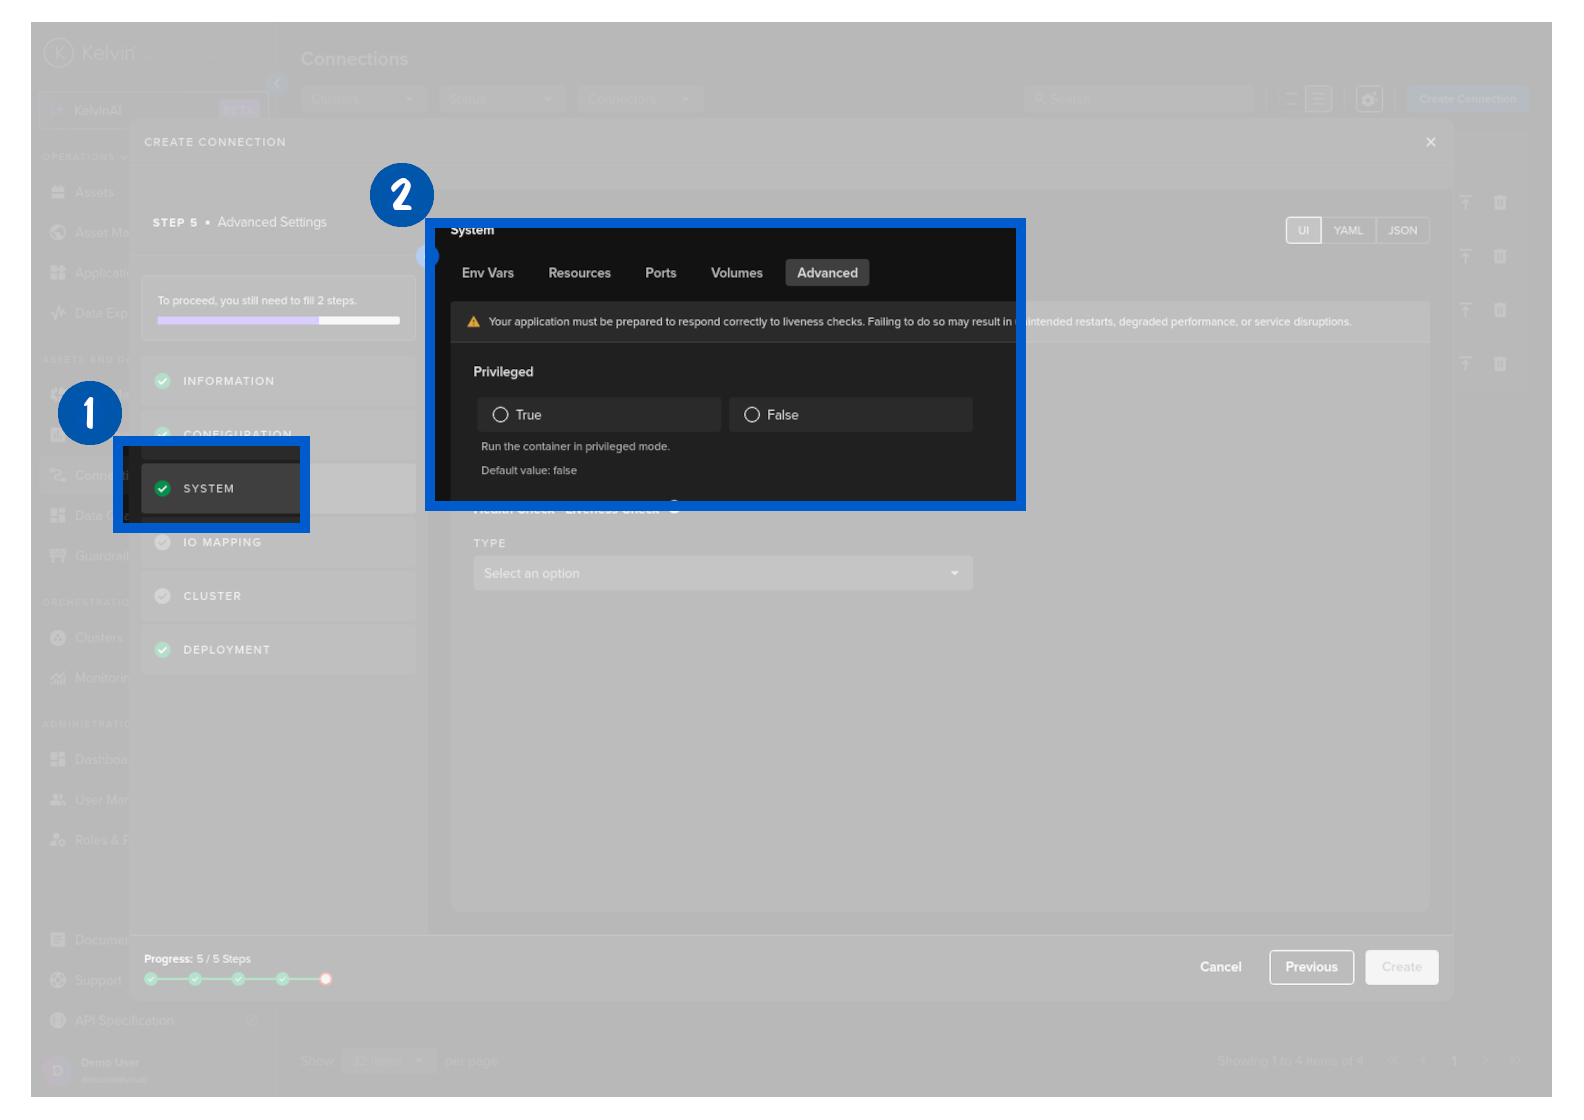
Optionally choose a health check service for your Workload. These are Kubernetes liveness probes and detailed information can be found on the Kubernetes Website.
Warning
If you use a Health check option, make sure you add code to respond to the liveness probe requests.
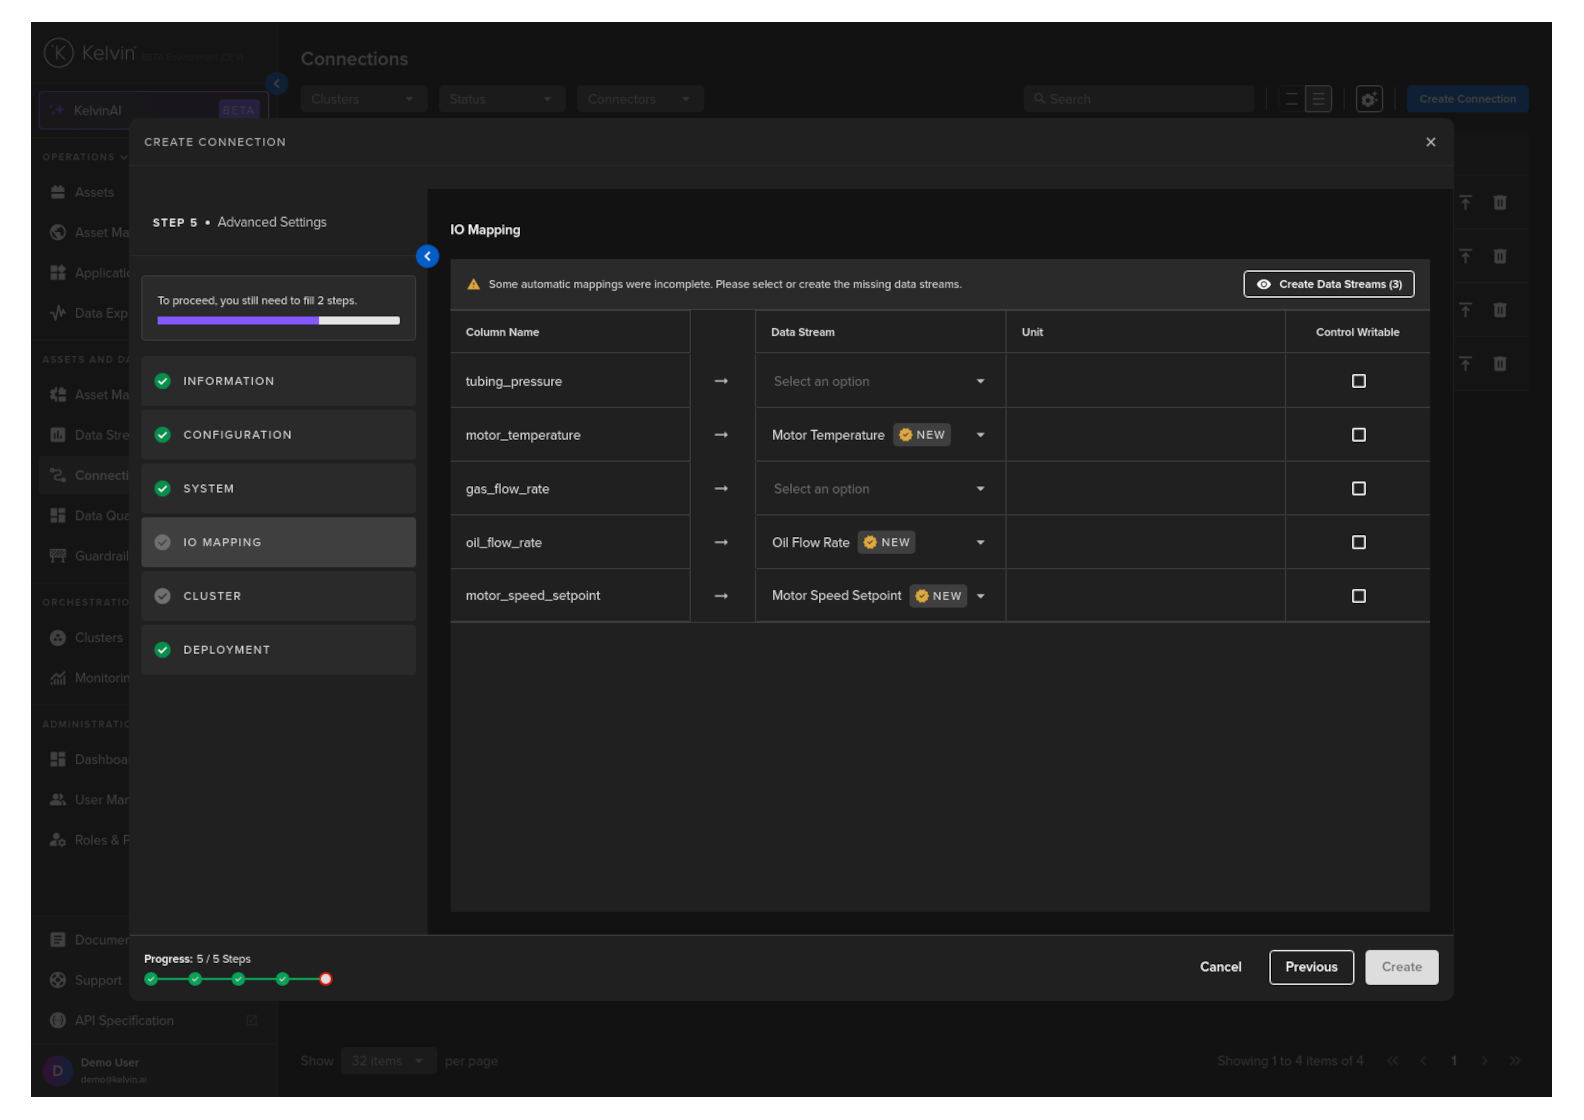
IO Mapping
For each Data Stream column name in the uploaded file, select the Data Stream on the Kelvin Platform where the data in the rows will be sent.
You can also set the Data Stream as Control Writable where Data Streams can be updated from an Application.
Note
Kelvin will try and automatically match the Name of the Columns with an equivalent Kelvin Data Stream.
If it can not, then you can manually select the correct Data Stream to use.
If a Data Stream does not exist, then you can create it here without leaving Create Connections.
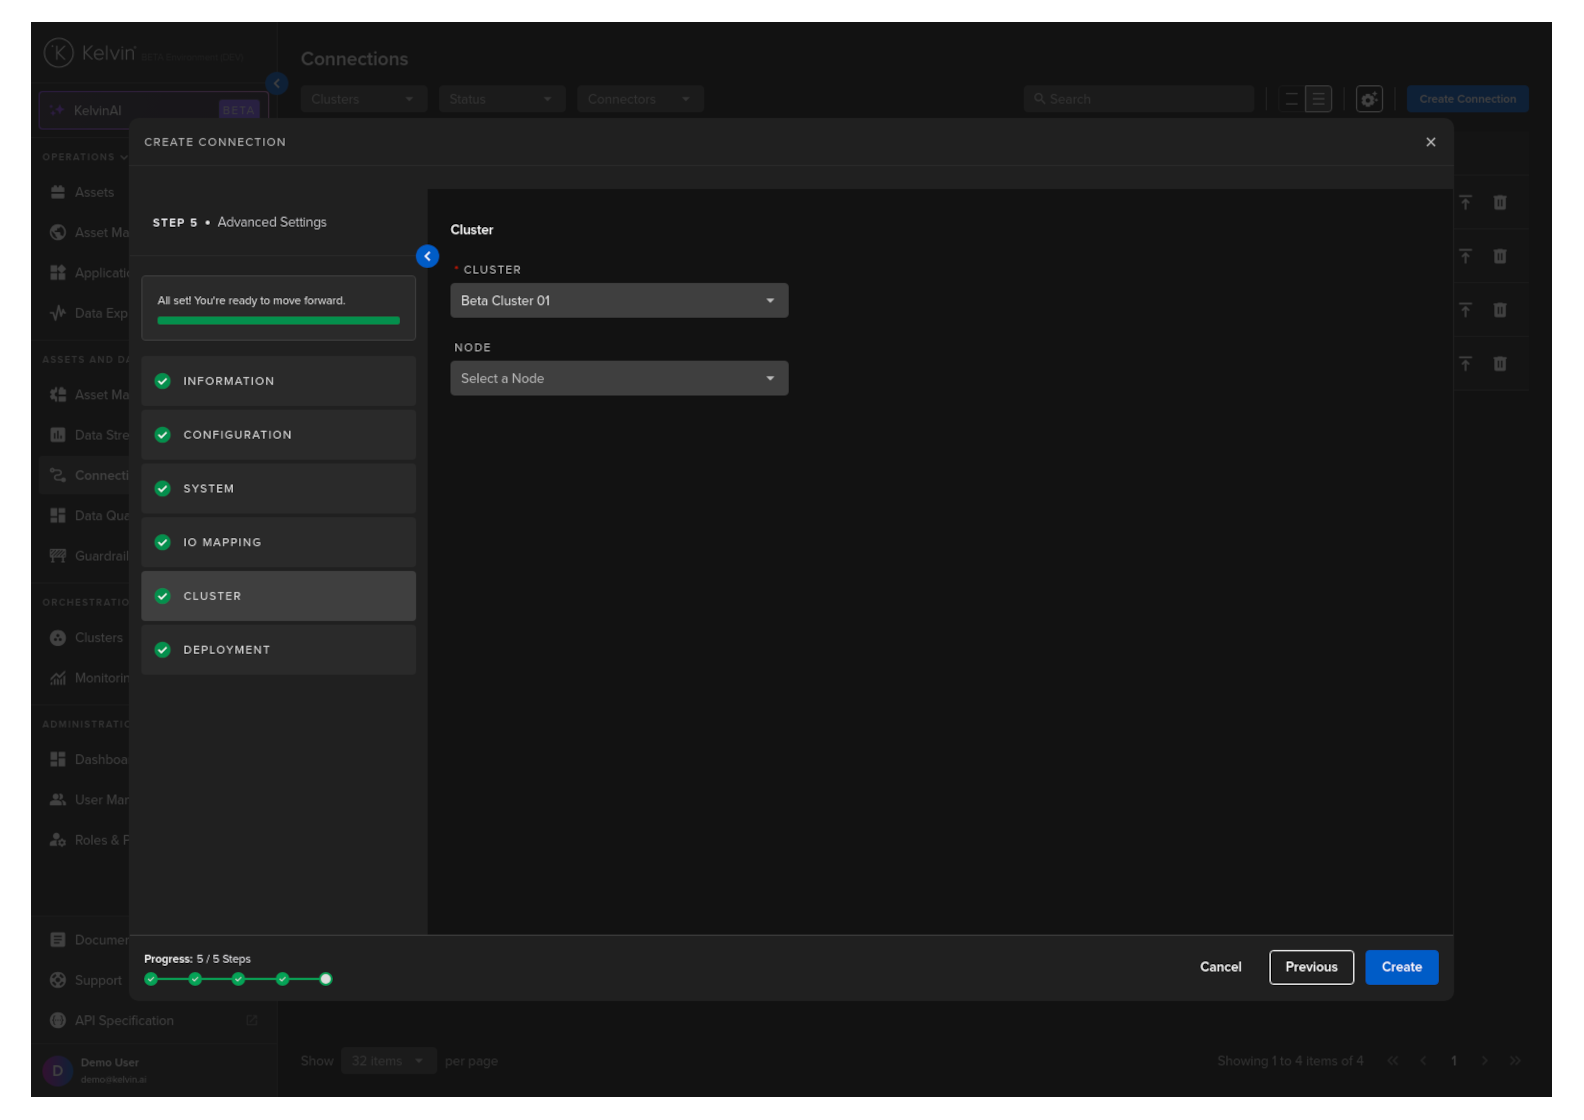
Cluster
Then select which Cluster to deploy the new Connector to.
Optionally you can also select the Node in the Cluster. If you do not then the system will automatically assign the Node.
It is important that the asset is reachable from the selected Cluster and Node.
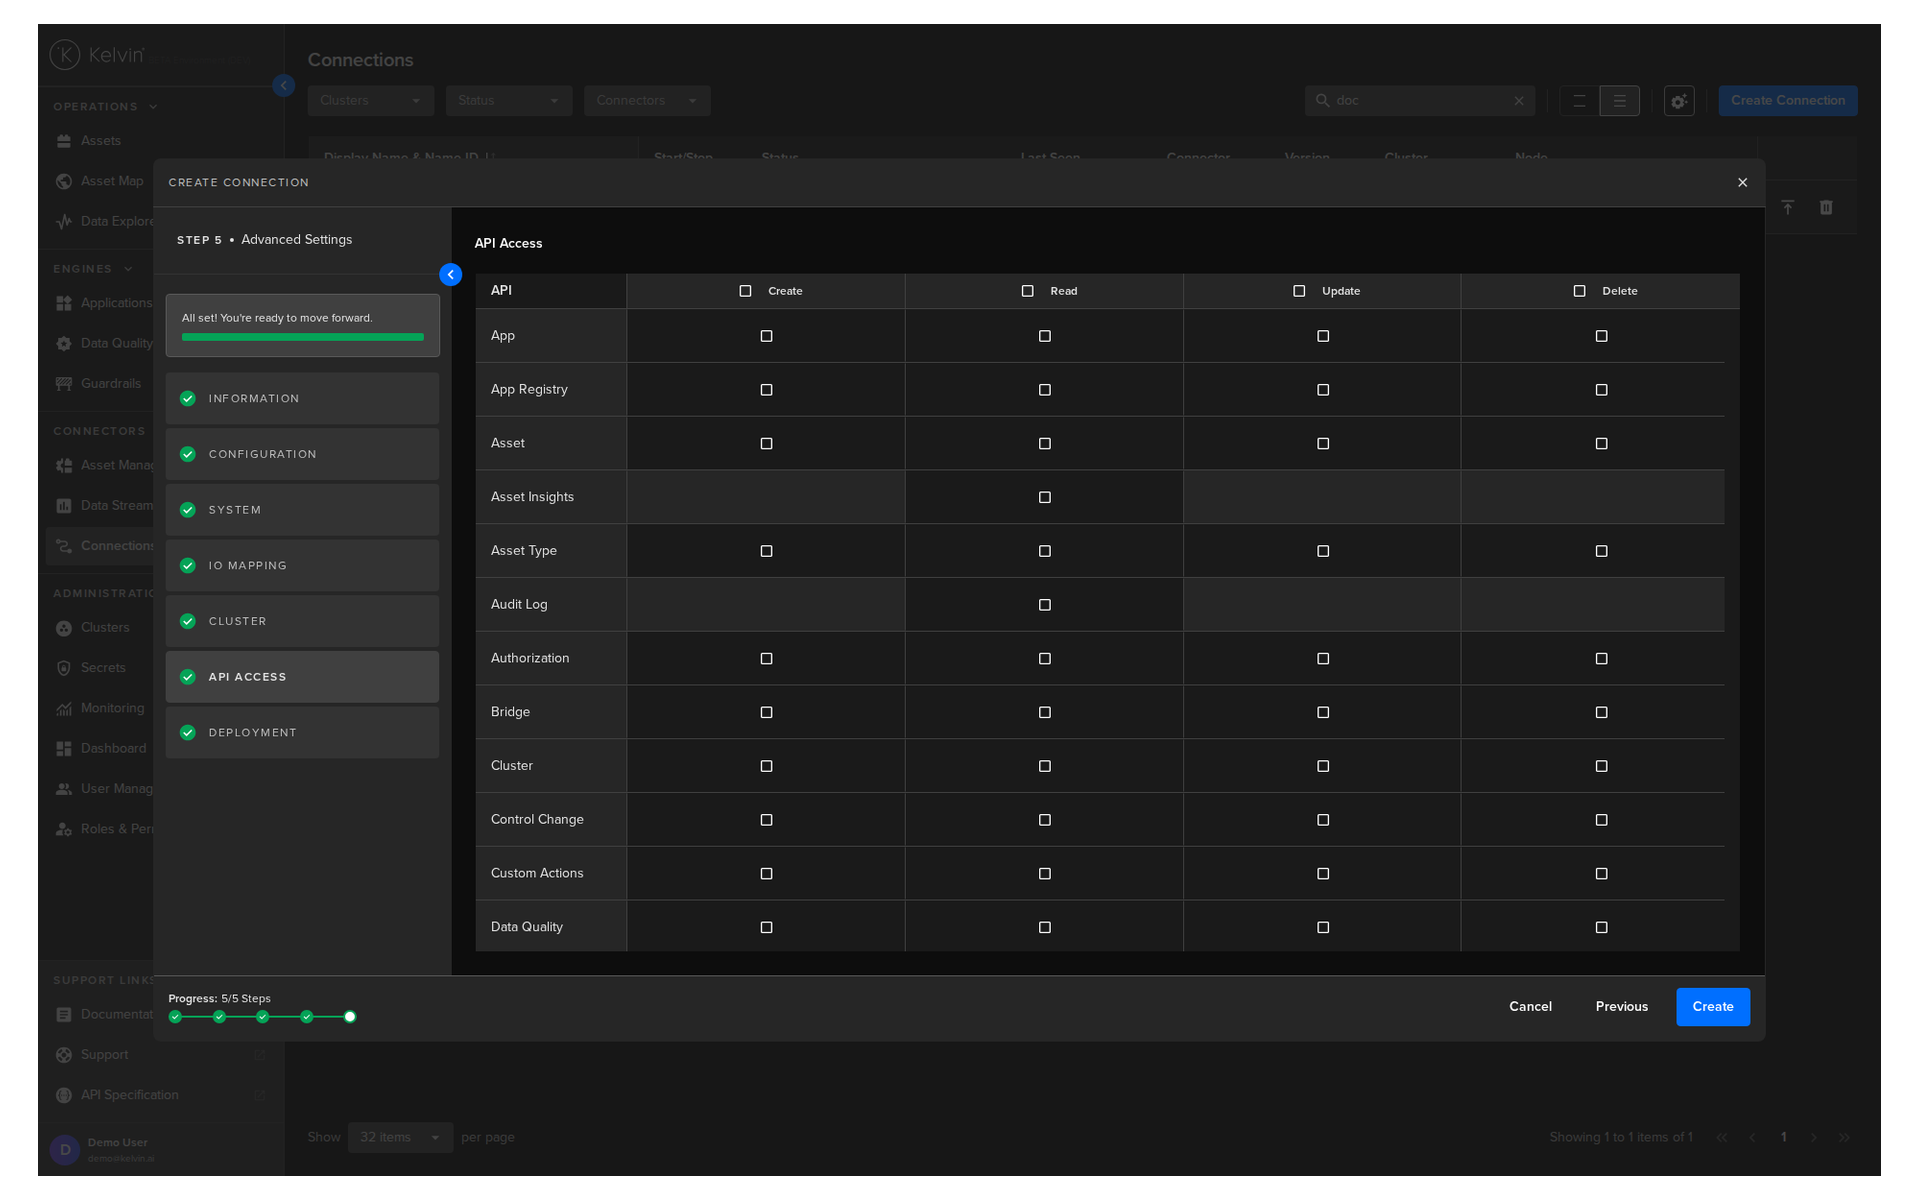
API Access
Define the API access permissions for the connection. This allows you to specify exactly which API endpoints the connection is authorized to use, improving security by granting only the permissions required to run the application.
Warning
The API Access selection can NOT be changed once the connection has been deployed.
To alter the API Access settings, you must delete and redeploy the connection.
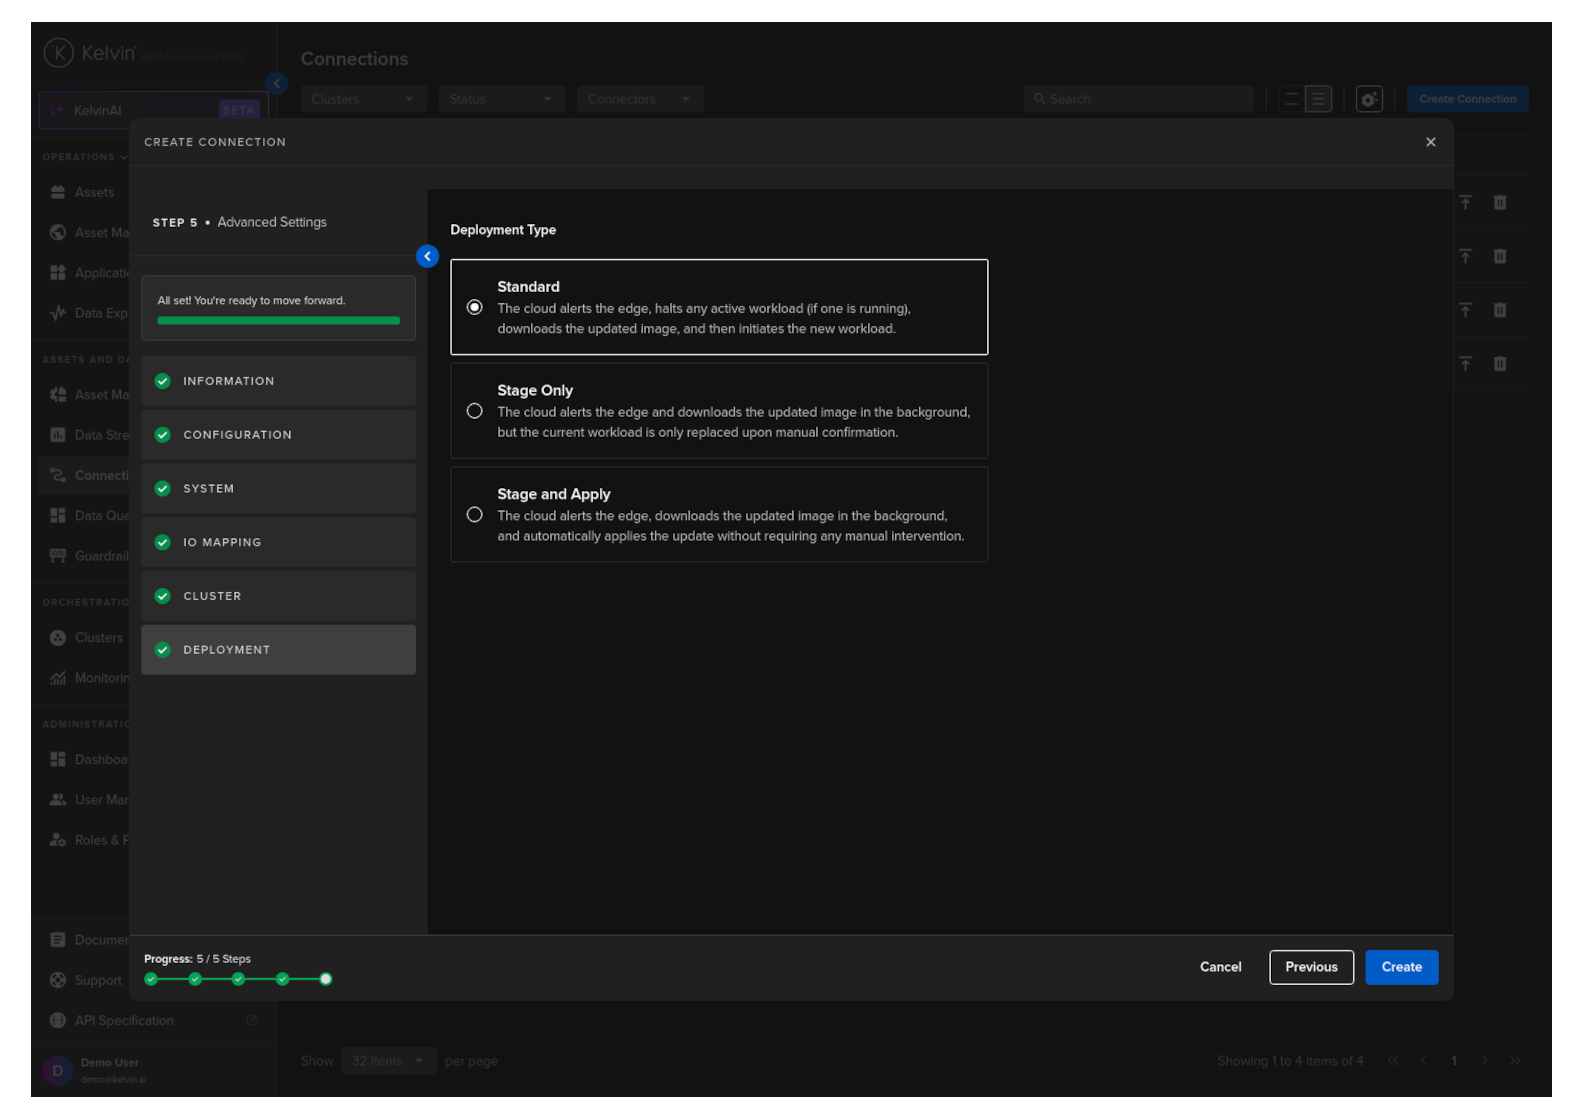
Deployment
For a standard Workload deployment, choose the Standard option.
Note
Stage Only and Instant Apply are covered in a different documentation section.
When completed and all sections are green, then you can click on the Create button.
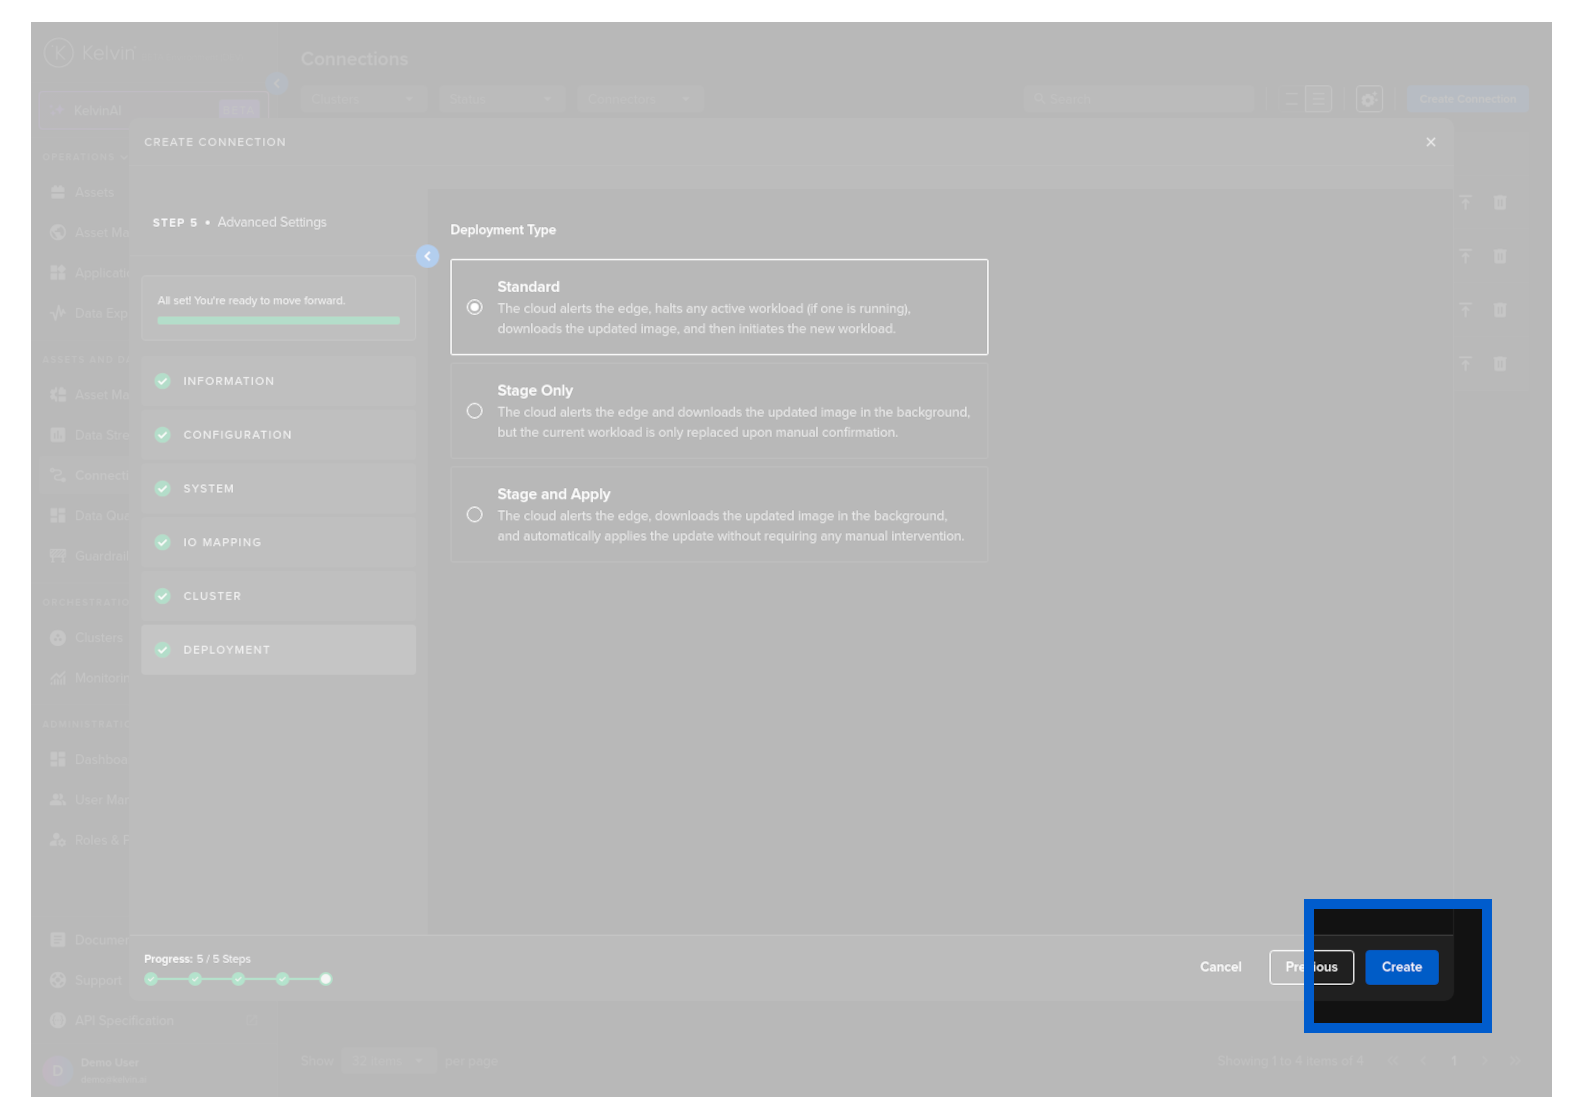
Congratulations, you have now deployed a CSV Publisher Connection which will start immediately to send data to your Asset / Data Streams from the CSV file.
Before deploying a CSV Publisher Connection using the Kelvin API you will need to upload the CSV file to File Storage first and get the reference ID.
The response will look like this;
You can now deploy the CSV Publisher connection
You will need to note the file_id which will be used as part of the csv_url in the Connection as reference to the data to be published.
The column header in the csv file and the data stream name in metrics_map does not need to be the same.
It is only important that the column name exists in the csv file and the data stream name exists in Kelvin.
You will get a response similar to this;
And after a while the state will change from pending_deploy to running.
You will need to first upload a file to the file storage on Kelvin. This file holds all the data used for serving as the simulation data.
You can learn more how to upload and manage files in the file storage on Kelvin here.
The column header in the csv file and the data stream name in metrics_map does not need to be the same.
It is only important that the column name exists in the csv file and the data stream name exists in Kelvin.