Control Panel Tab
When you view the details of an Asset, one of the tab options is Control Panel.
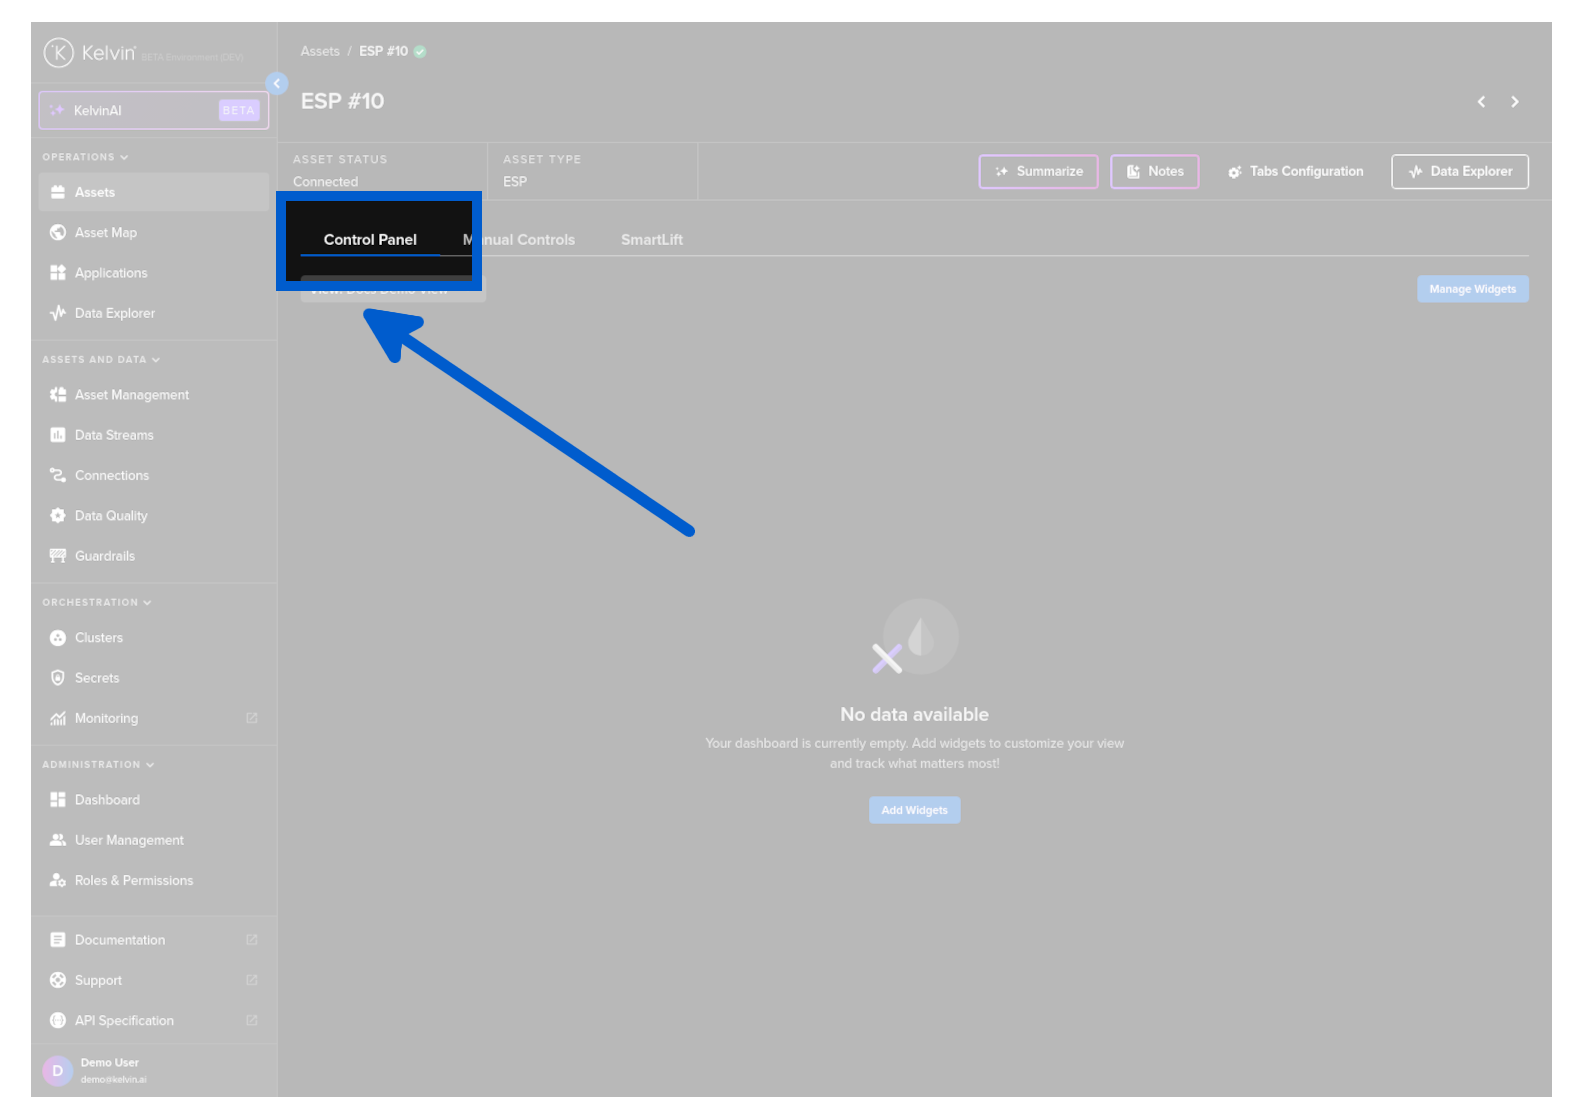
This is a powerful dashboard for you to customize the tools and views you want to see for this Asset.
Note
Any setup you create here will be duplicated to all Assets with the same Asset Type.
This makes it easy for you to set up a group of Assets with a specific Control Panel layout to suit your requirements.
Setup
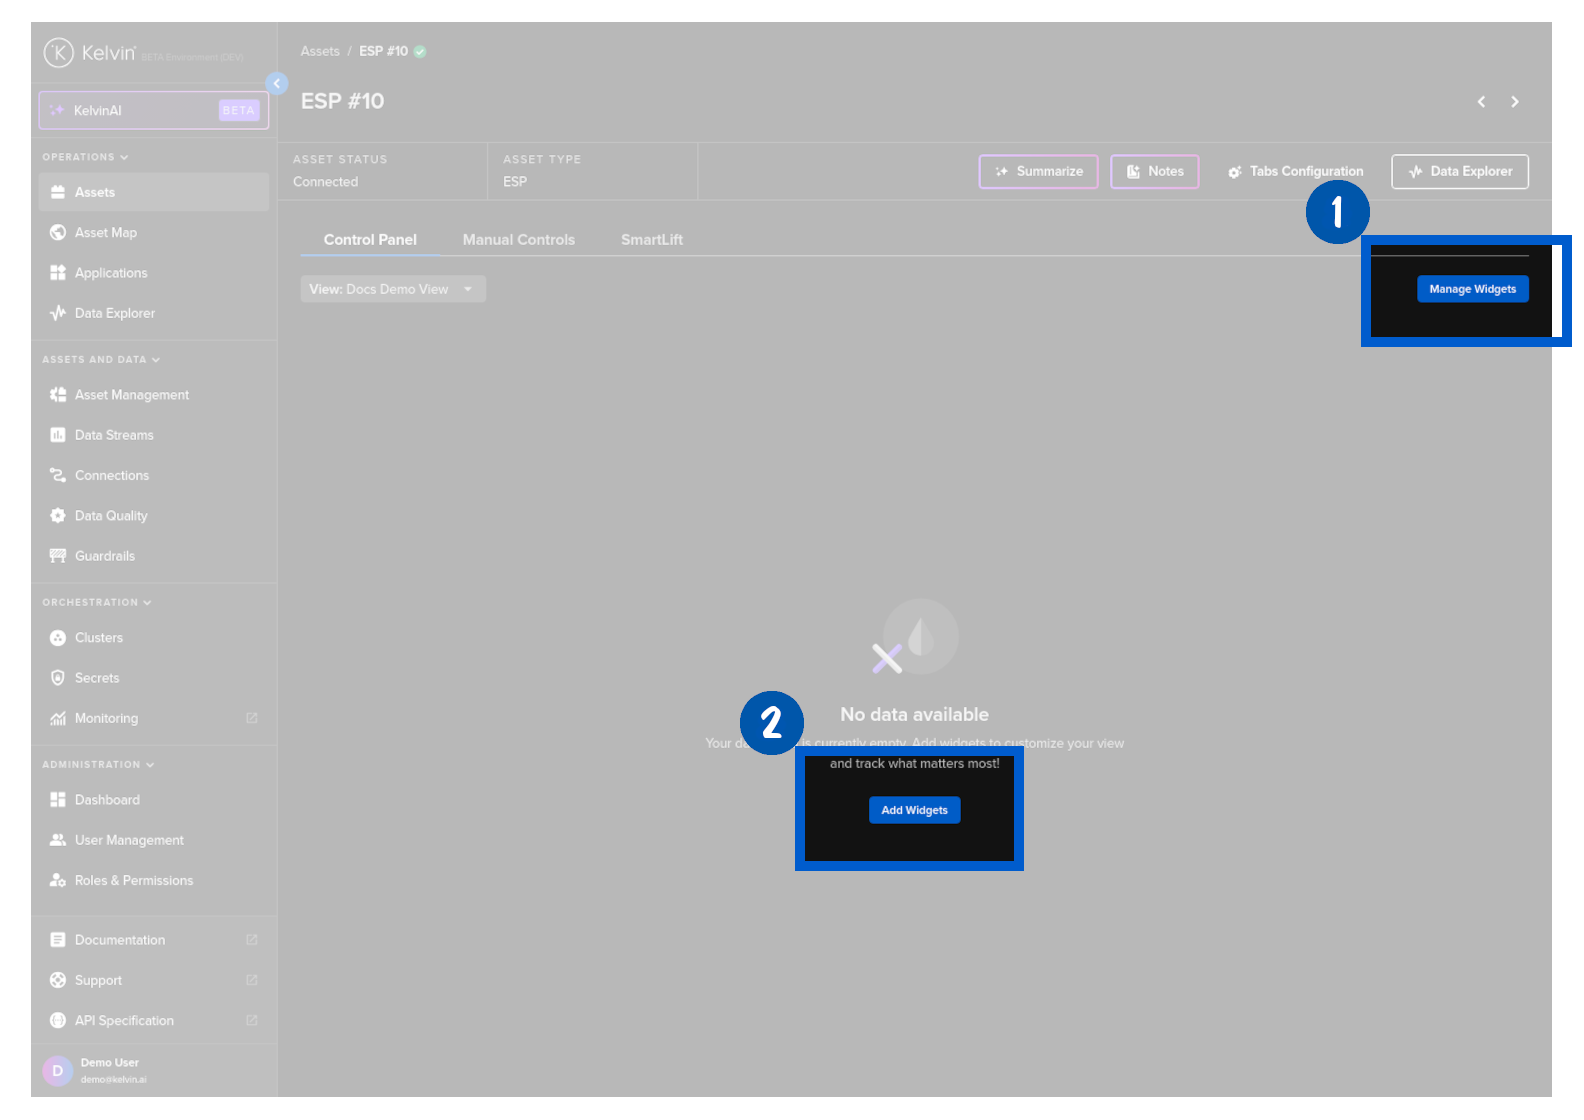
When you first view an Asset there will be no widgets shown.
![]()
To start click on Add Widgets or Manage Widgets button.
In the Manage Widgets window, you can click on the arrow of each widget to understand what they do.
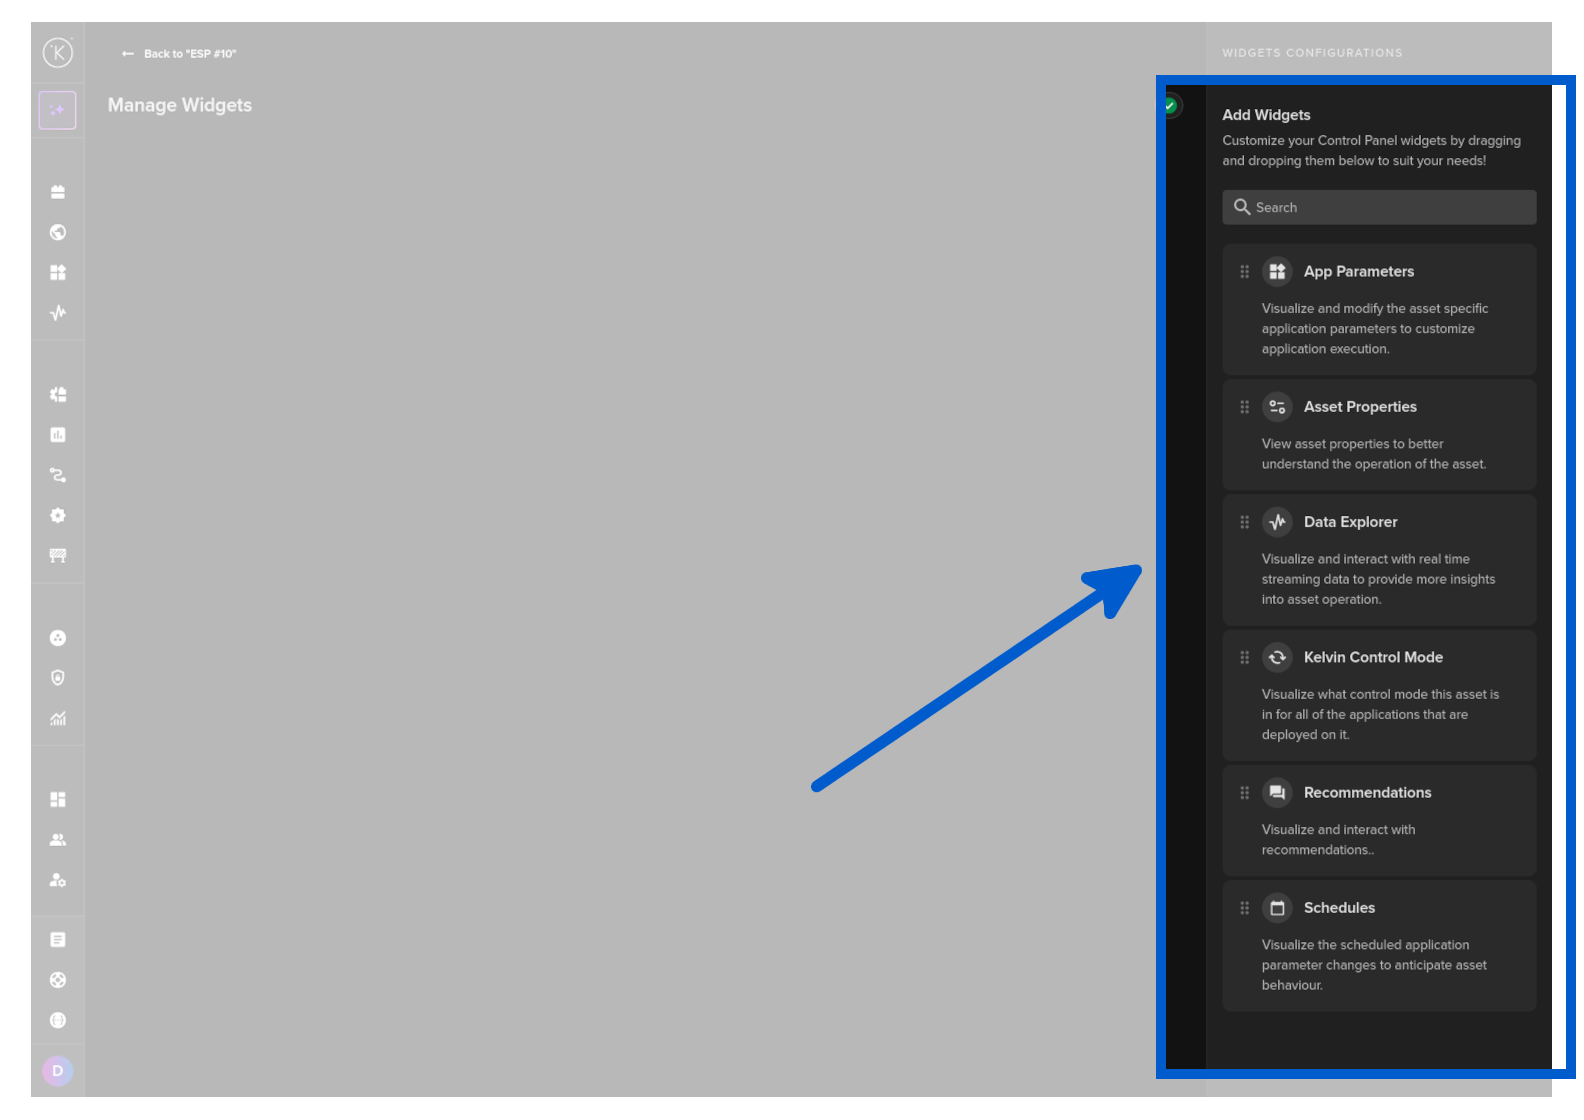
To start, simply click and drag a widget on the screen.
Success
You can drag it anywhere on the screen and resize it.
On the right sidebar you will see the widget options available.
Here you can set up the options and views you want in the widget.
Note
In the top right corner dropdown menu you can also reset the widget to default settings or delete it.
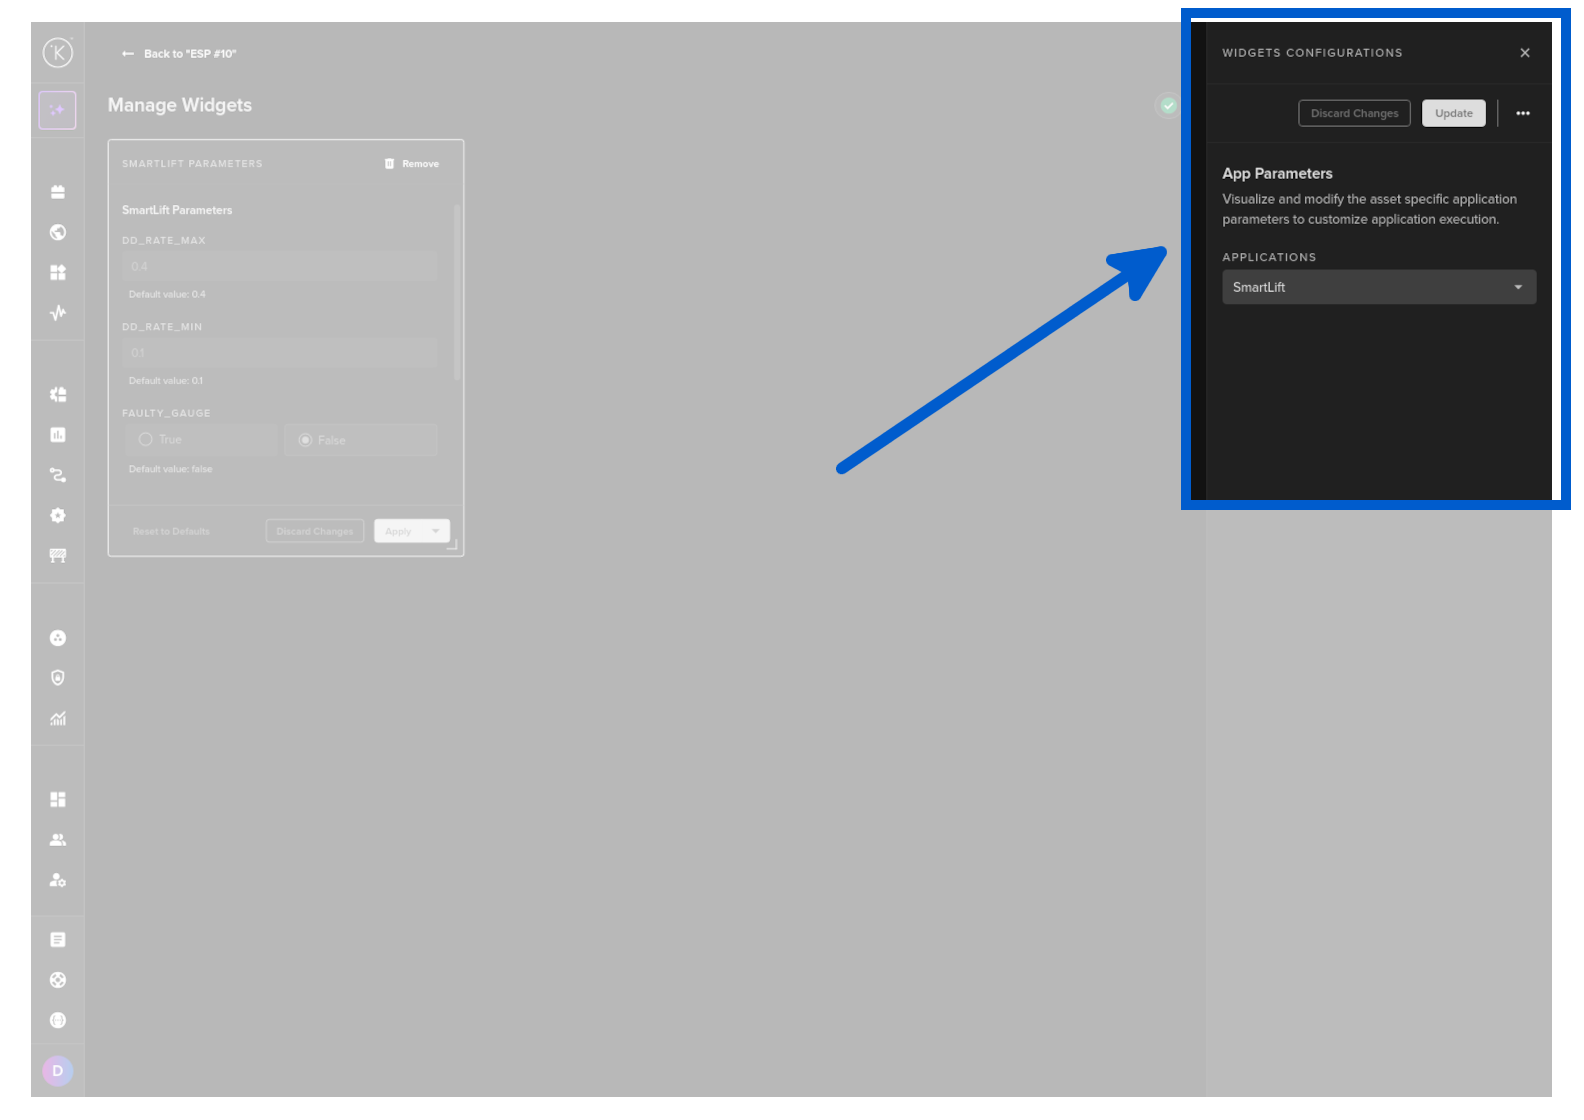
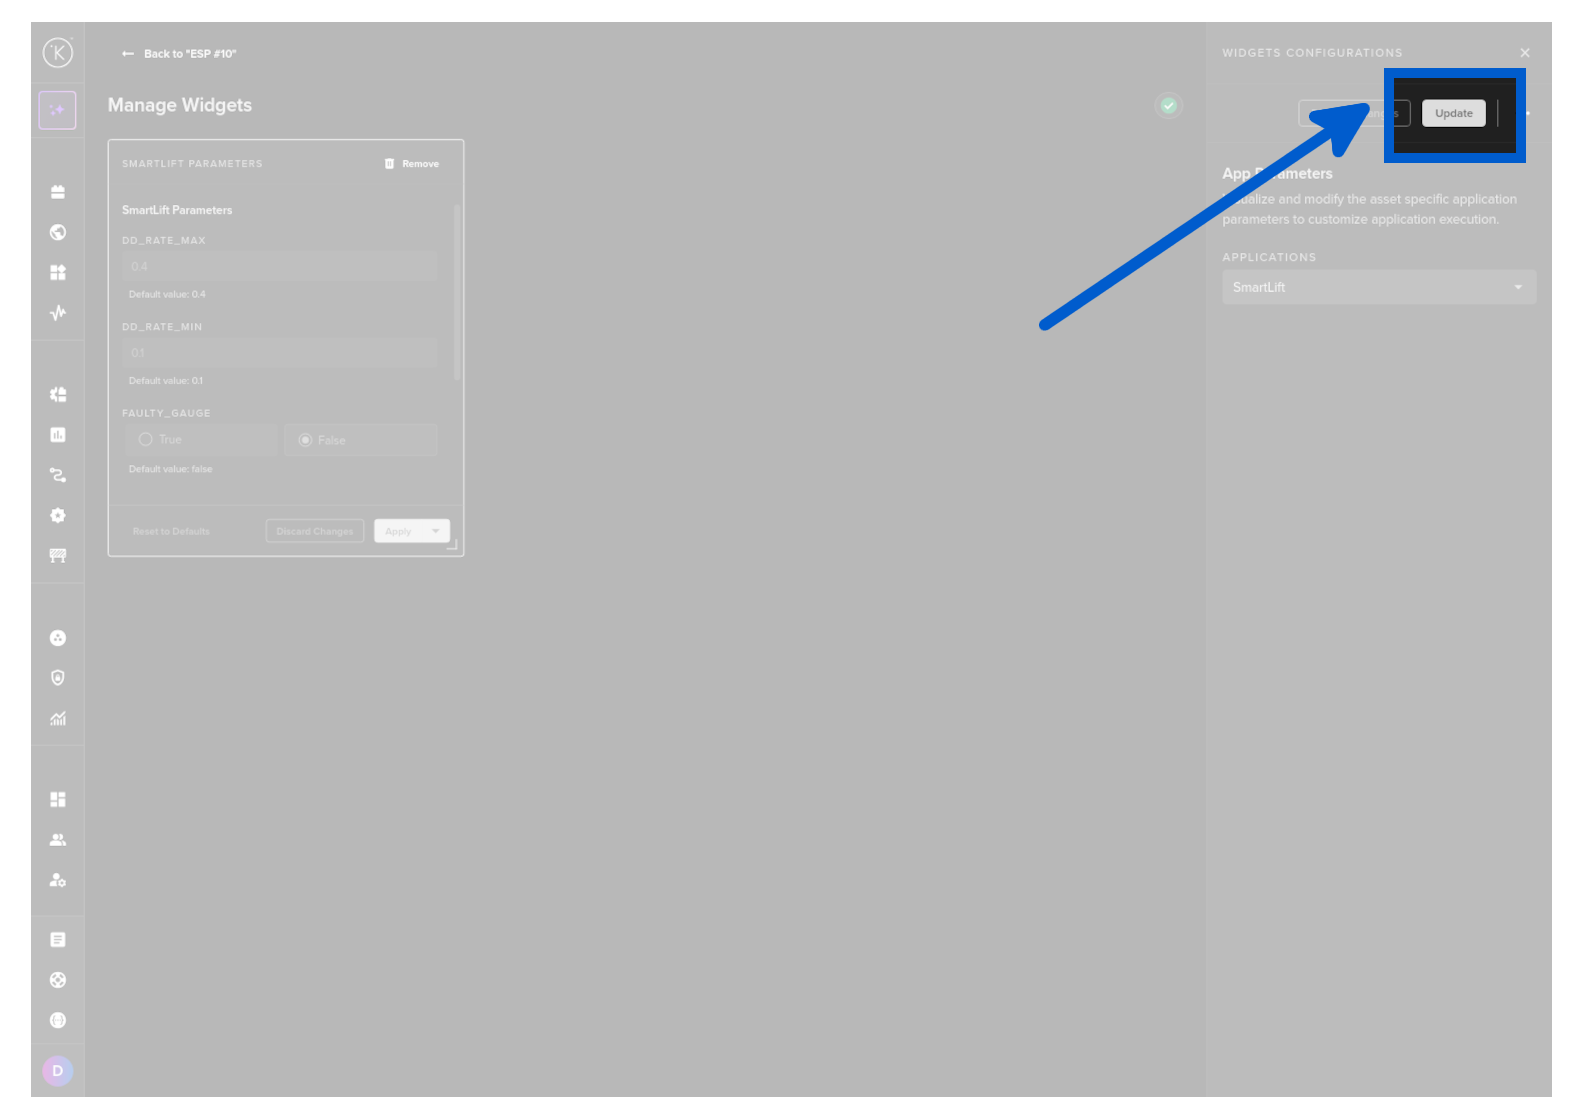
When ready, you can click the Update button or if you have not done any changes then the Update button will be gray, so you can just click the close icon (x).
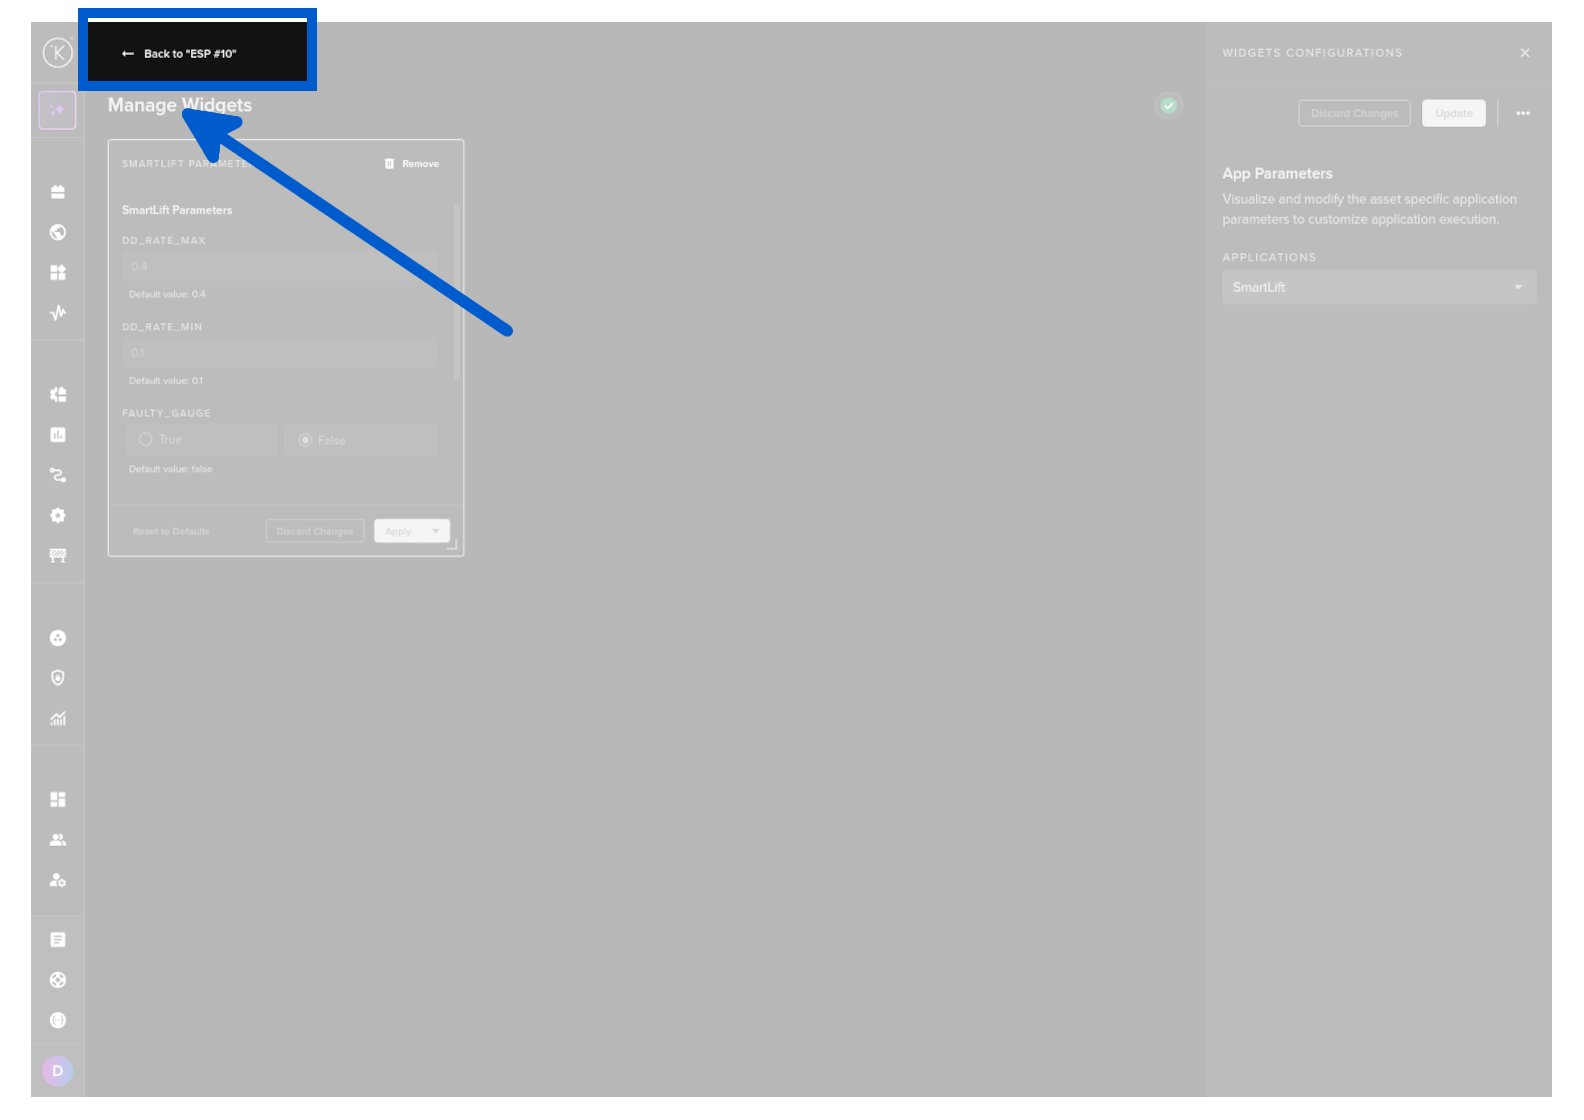
When you have setup the Control Panel to your satisfaction, then you can click on the Back to
Widgets
There are six widgets you can choose from.
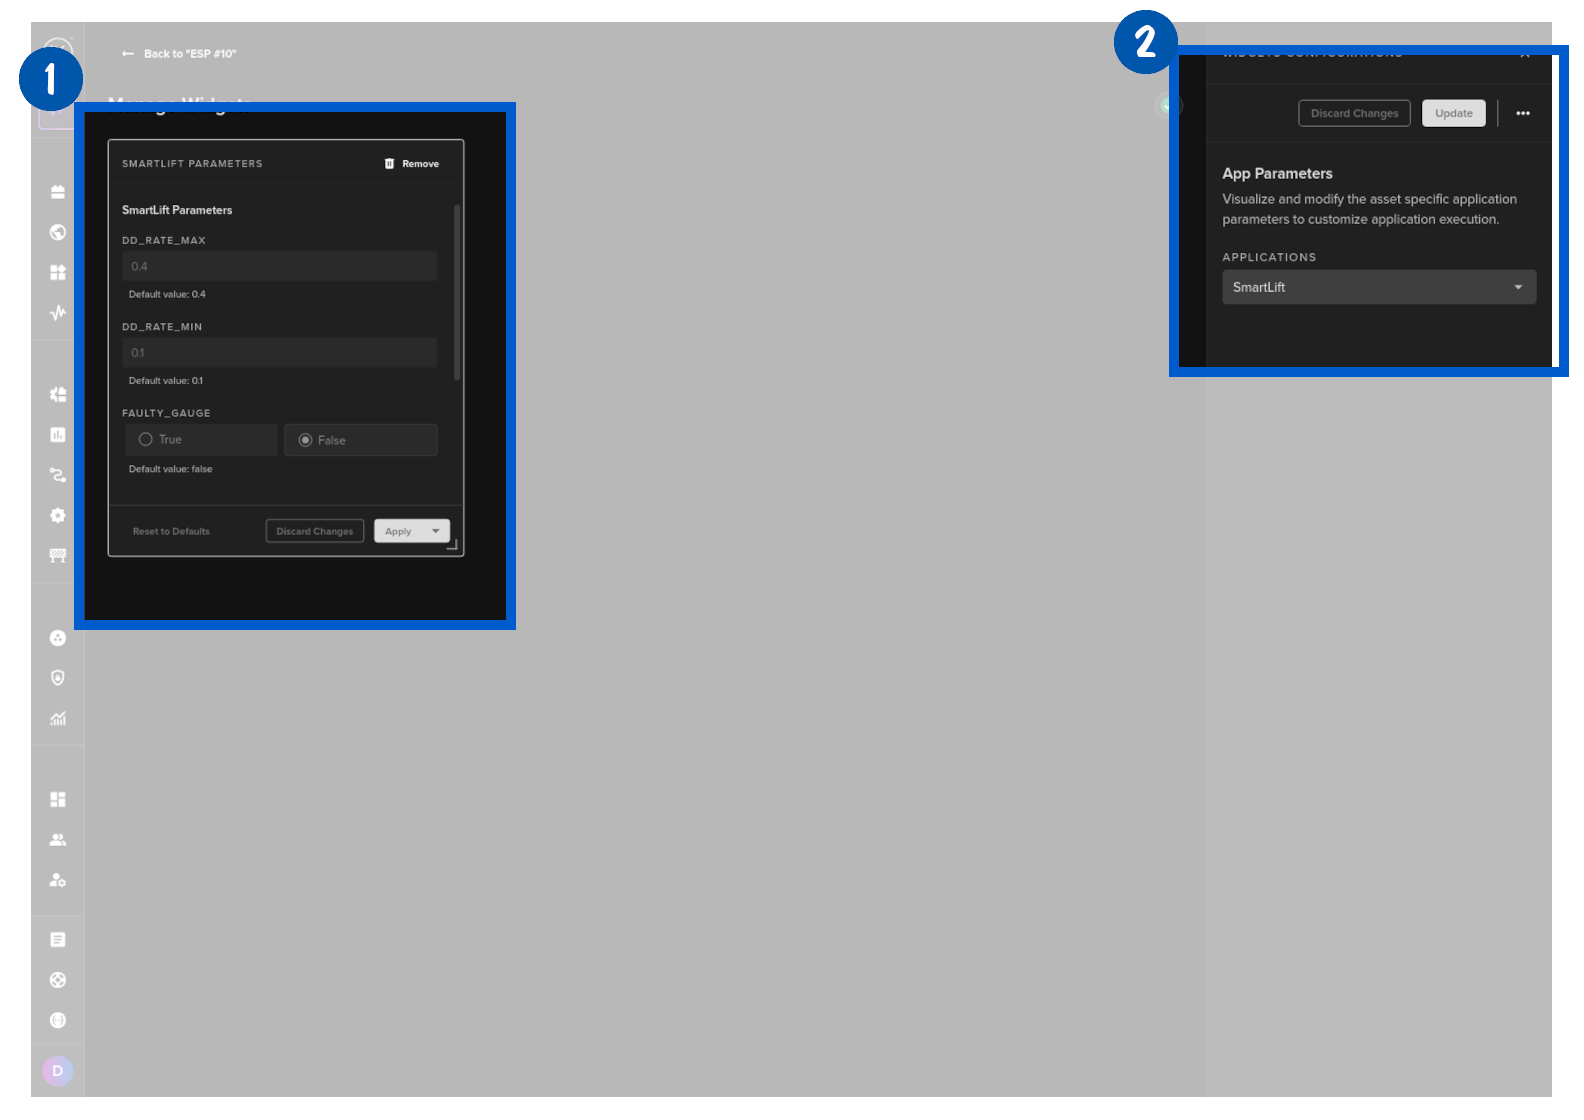
App Parameters
This visualizes the Asset specific App Parameters.
You can choose which applications are available in this widget.
Note
If you select more than one Application, then they will be displayed in the widget in tabs.
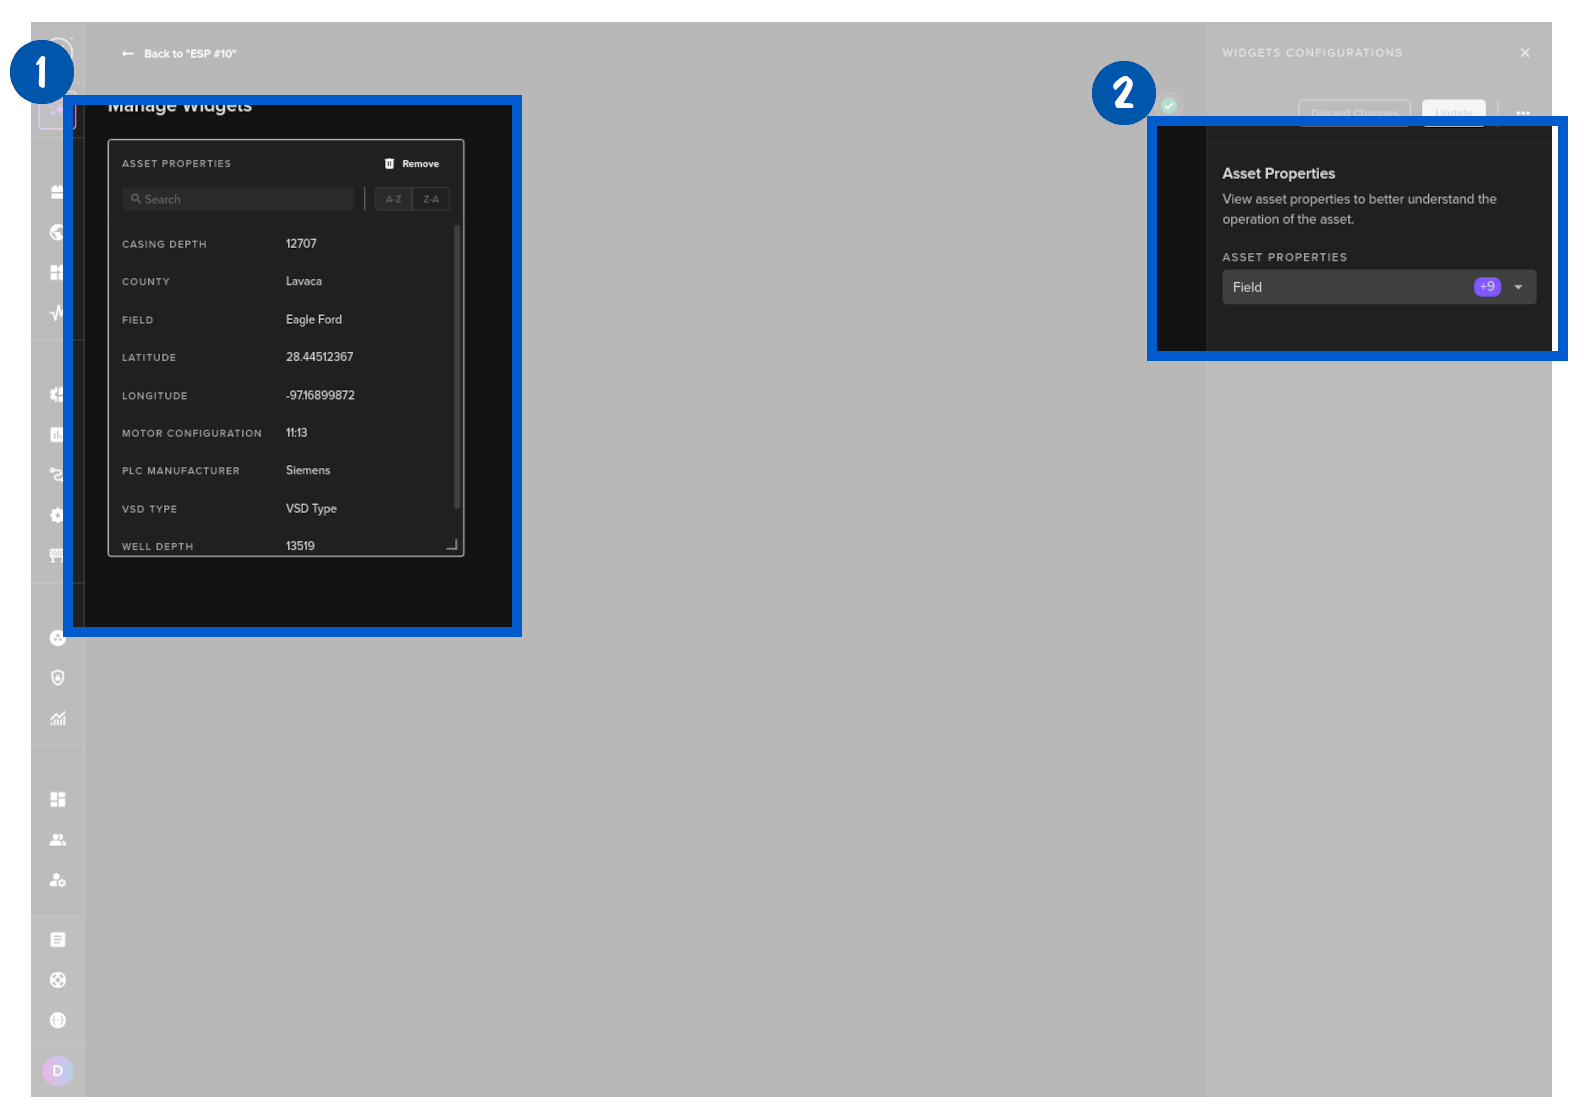
Asset Properties
This visualizes Asset Properties.
Note
You can not change them here. You will need to go to the Asset Management to update any Asset Property values.
You can choose which Asset Properties are shown here.
Data Explorer
This embeds the Data Explorer Light version into a widget.
Note
Data Explorer Light gives you many of the features in Data Explorer.
You can only see data for this Asset. It is not possible to have multiple Asset / Data Streams available on this widget.
Note
If you click on the Data Explorer button to go to the full Data Explorer page, it will also copy all your current view settings in this widget such as the time range to the Data Explorer page and ignore the default setting.
This creates a seamless experience switching between the widget and the full Data Explorer views.

| Option | Description |
|---|---|
| Time Range | Select four time ranges to be shown on the widget as quick-select buttons. |
| Default Time Range | Choose which of the four time ranges will be selected by default when the widget is first displayed. |
| Y-Axis | Controls how the Y-axis scale is displayed. Unit — Data Streams that share the same unit are grouped on a common Y-axis; different units get separate Y-axes on the left. Datastream — Each Data Stream gets its own independent Y-axis on the left. Single — All Data Streams share one Y-axis range. |
| Data Streams | Select which Data Streams to display in the widget. |
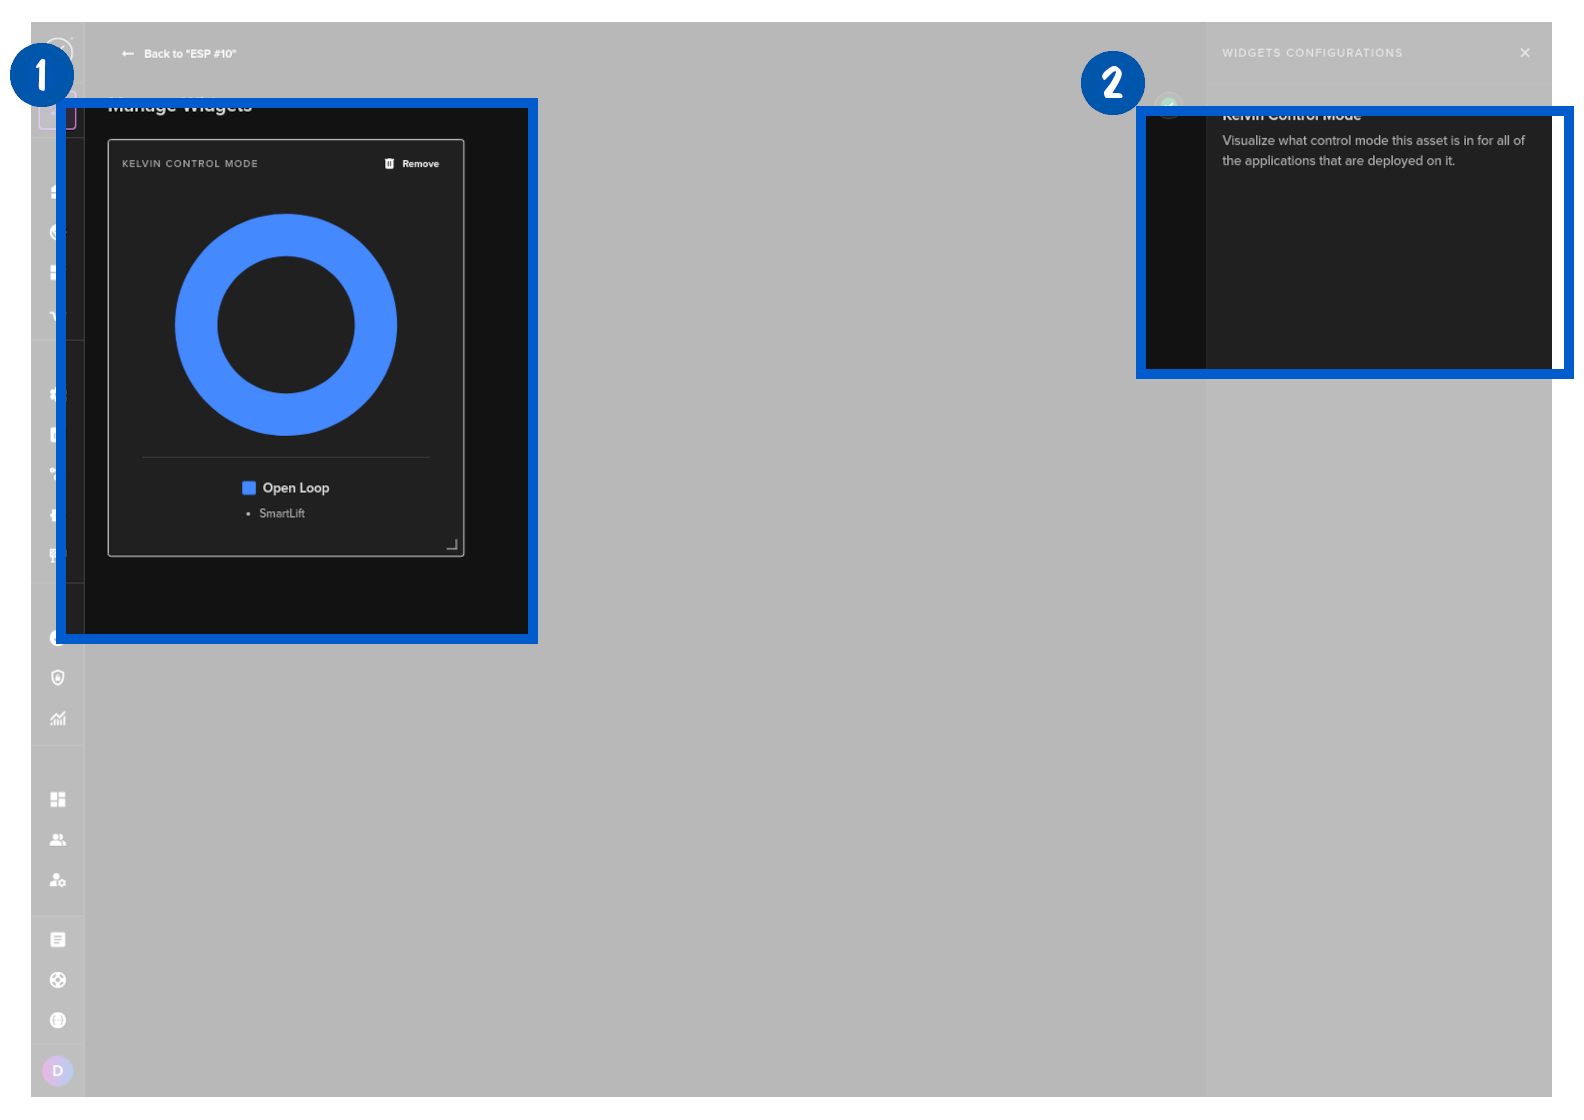
Kelvin Control Mode
If any Application that is running this Asset has a Control Mode option, then you will be able to set it in Open or Closed Loop mode from this Widget.
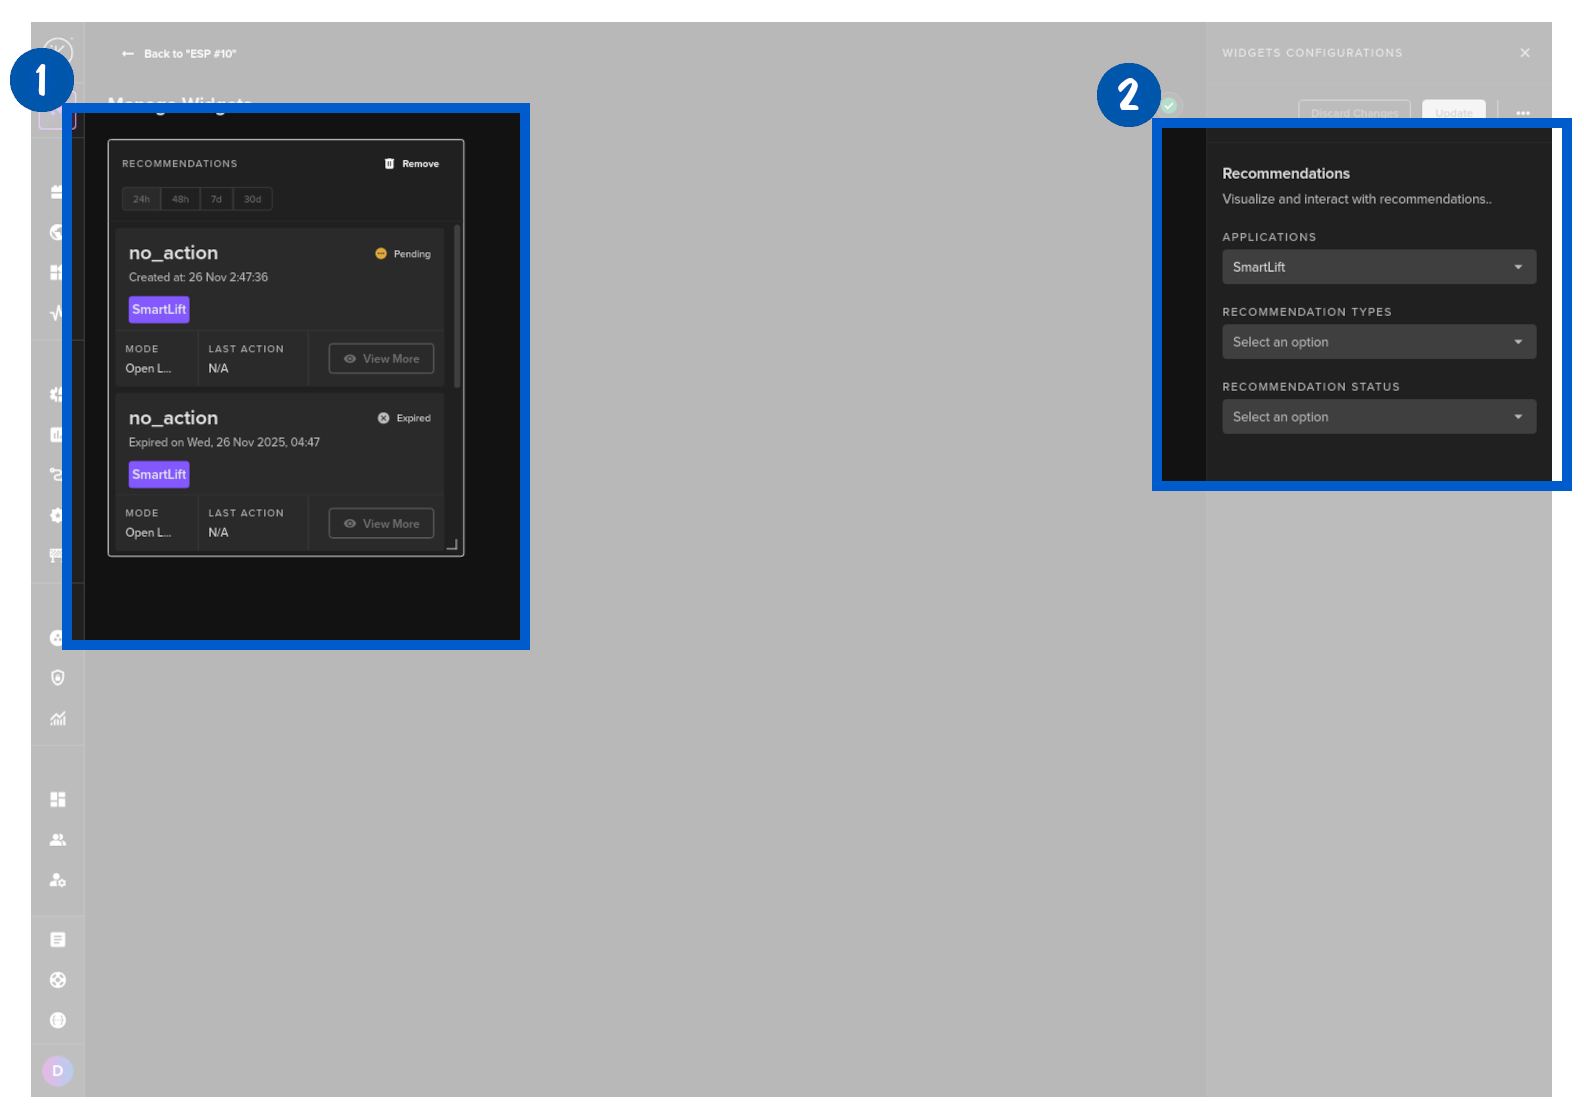
Recommendations
You can show any recommendations in this widget for this Asset.
Note
You also have the option to filter the Applications, Recommendation Types and Status to limit what Recommendations are shown in this widget.
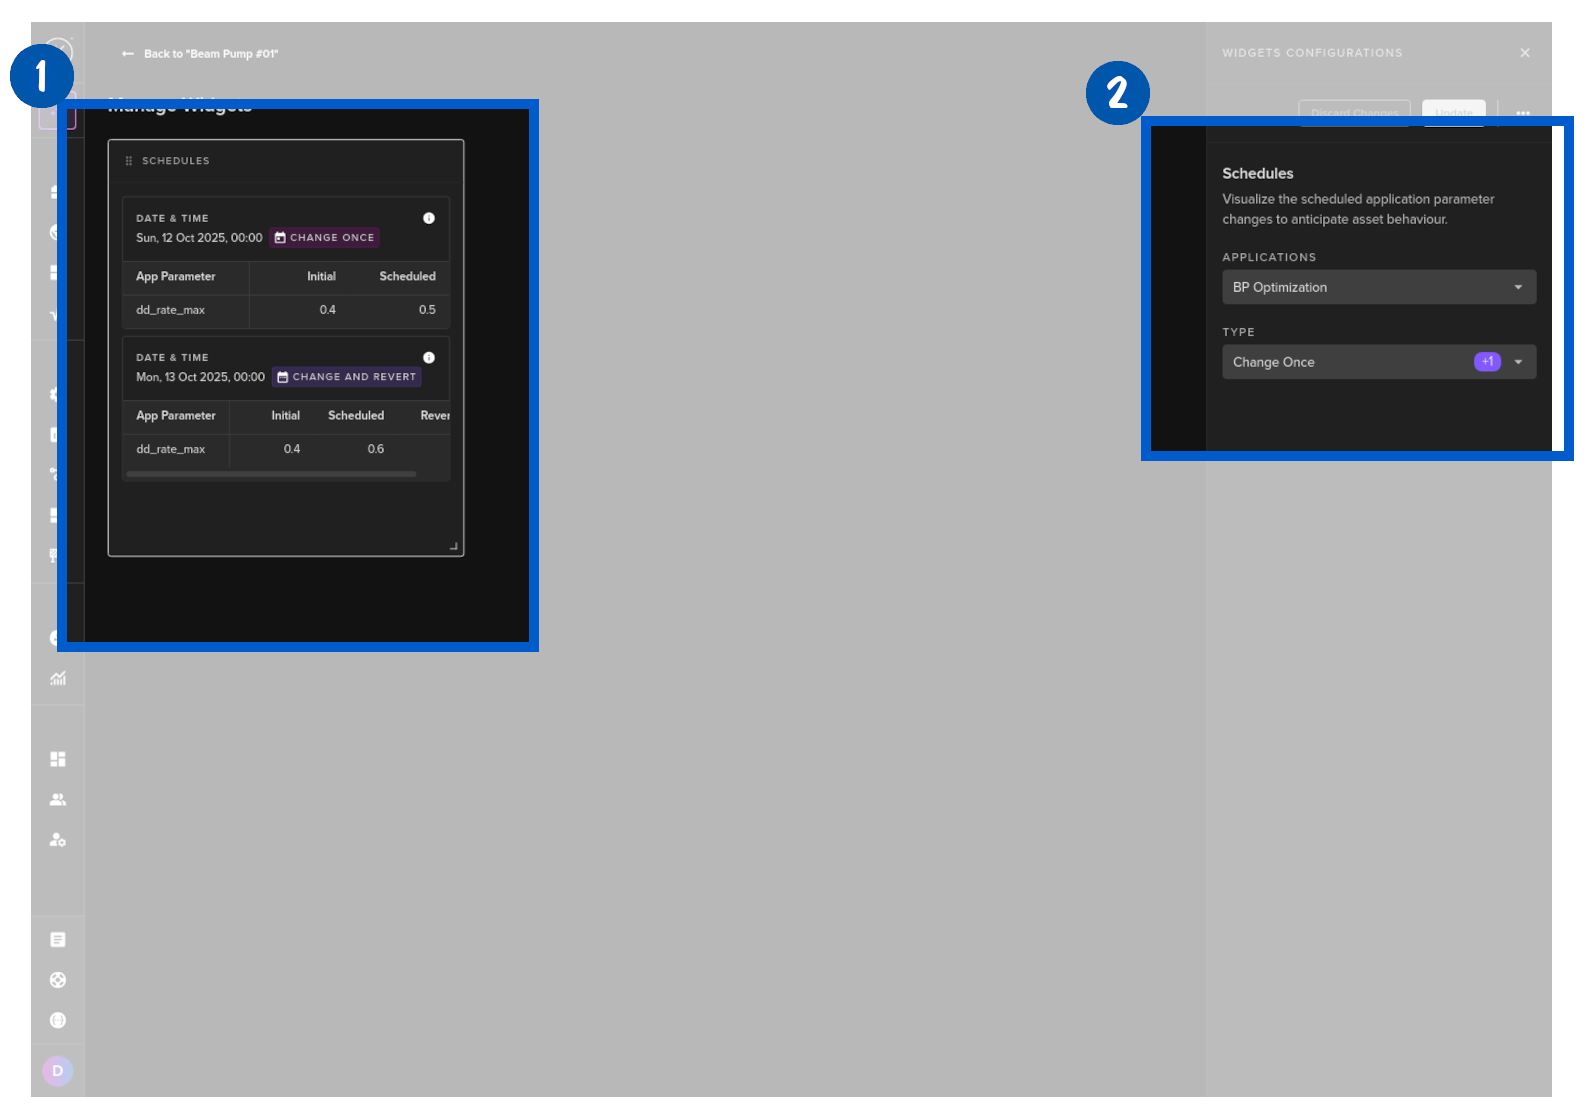
Schedules
You can show in this widget any schedules that are set for this Asset.
Note
You also have the option to filter the Applications and Schedule Type to limit what Schedules are shown in this widget.
Custom Views
You can create multiple Control Panel setups and save them as different views.
Success
This allows you to quickly switch between different Control Panel setups for monitoring different types of operations.
Note
Administrators can also create views that are accessible to all users.
Create New View
To create a new view, click on the Manage Widgets button.
Setup the control panel as required.
You can read the documentation above on how to setup your widgets here.
Note
As you change the layout, the Control Panel layout will be automatically saved.
But for a widget's configuration, you must click on the Update button to save the changes.
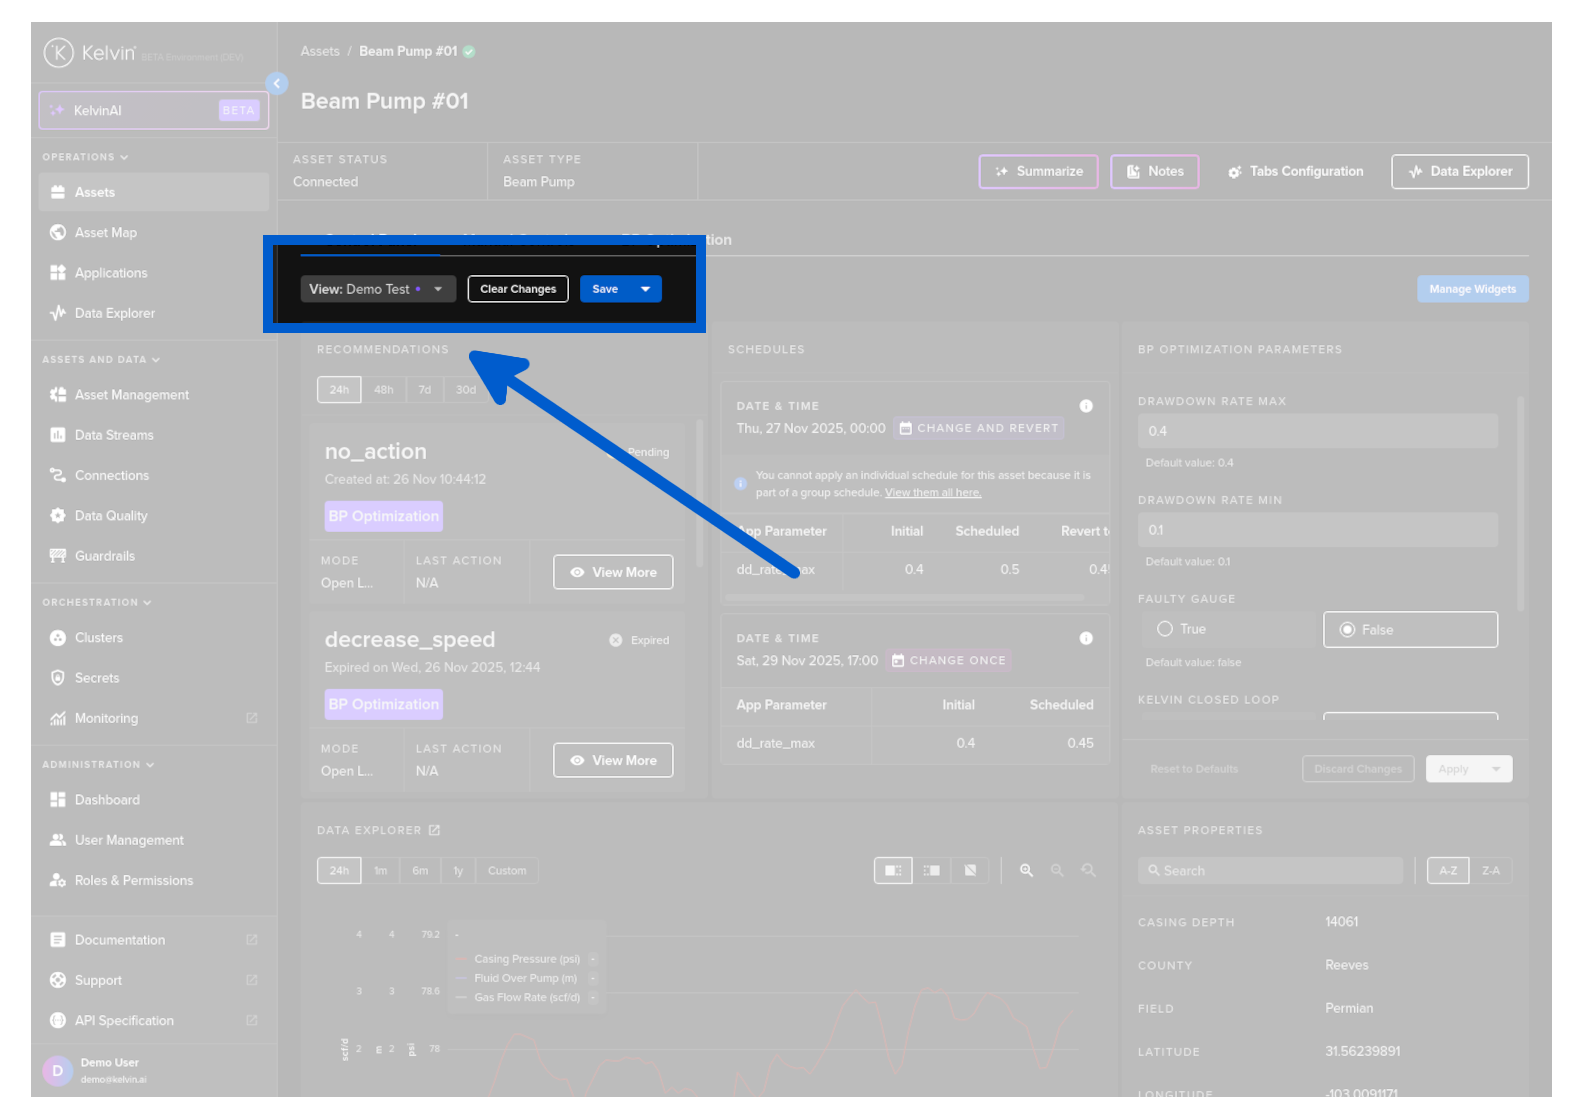
When satisfied with the new Control Panel layout and features, click on the Back to text in the top left corner.
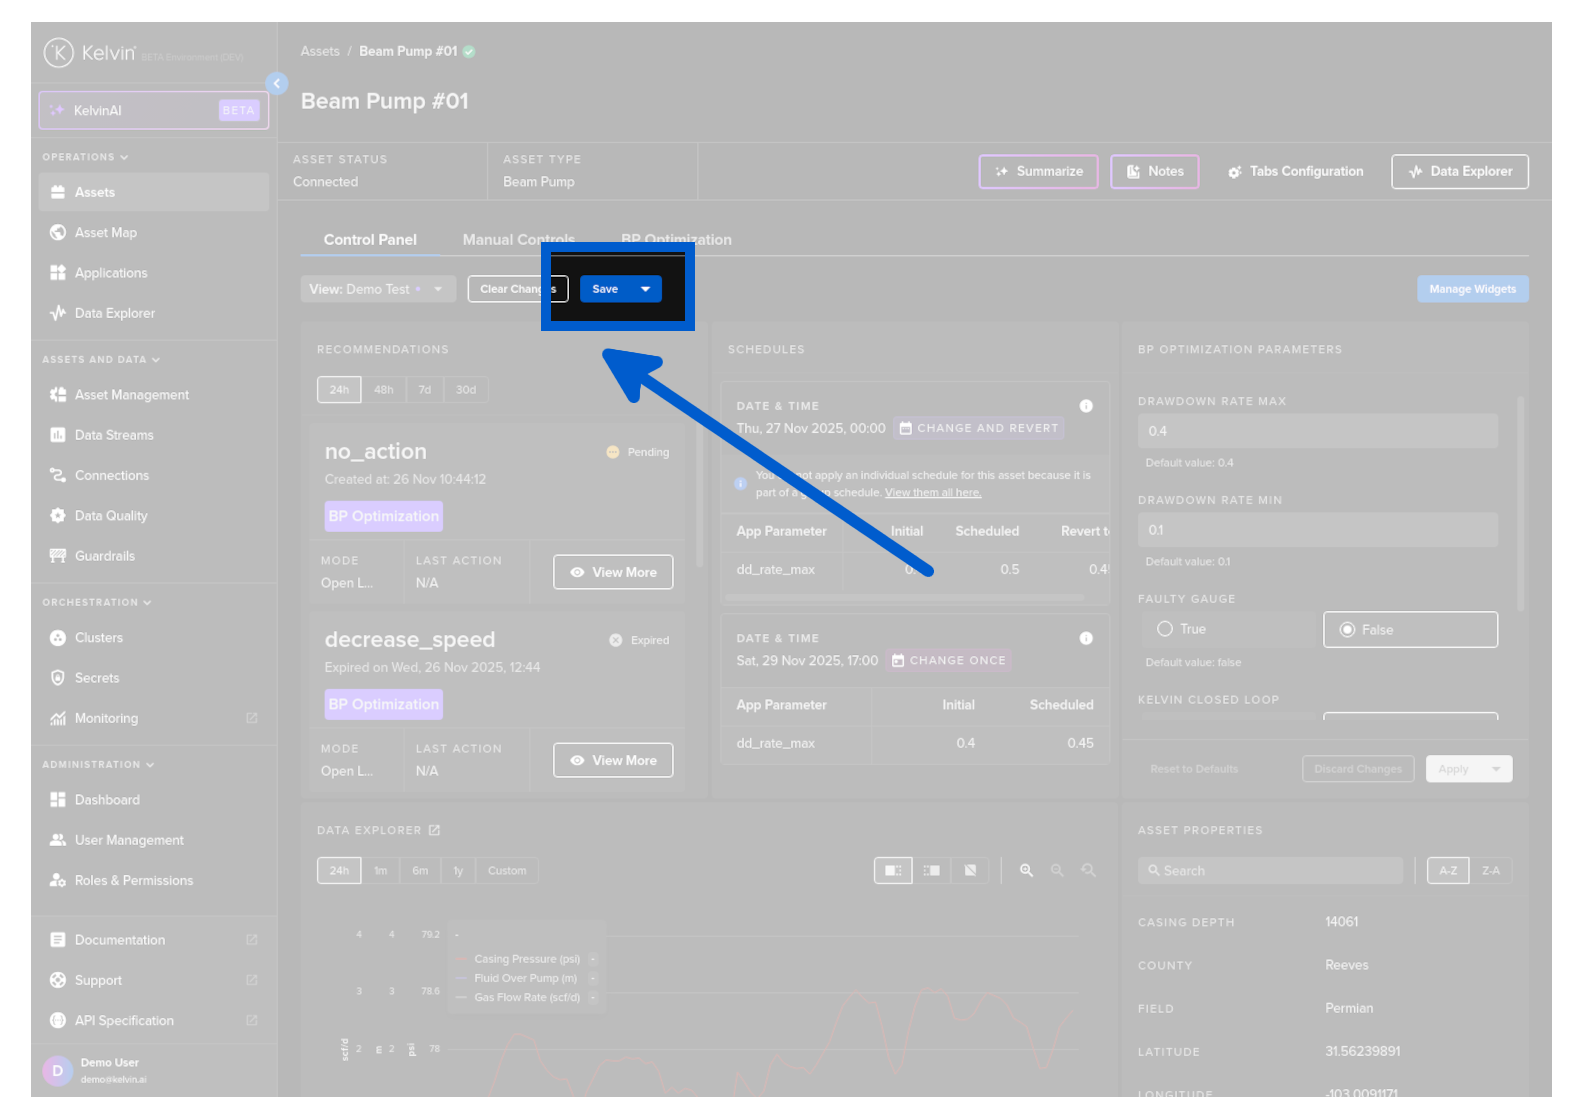
You will now see two buttons next to the view dropdown list.
Overwrite Current View
Click on the save button to overwrite the current view's Control Panel layout.
Note
You can not overwrite global views set by the Administrator.
Only an Administrator can update any global views.
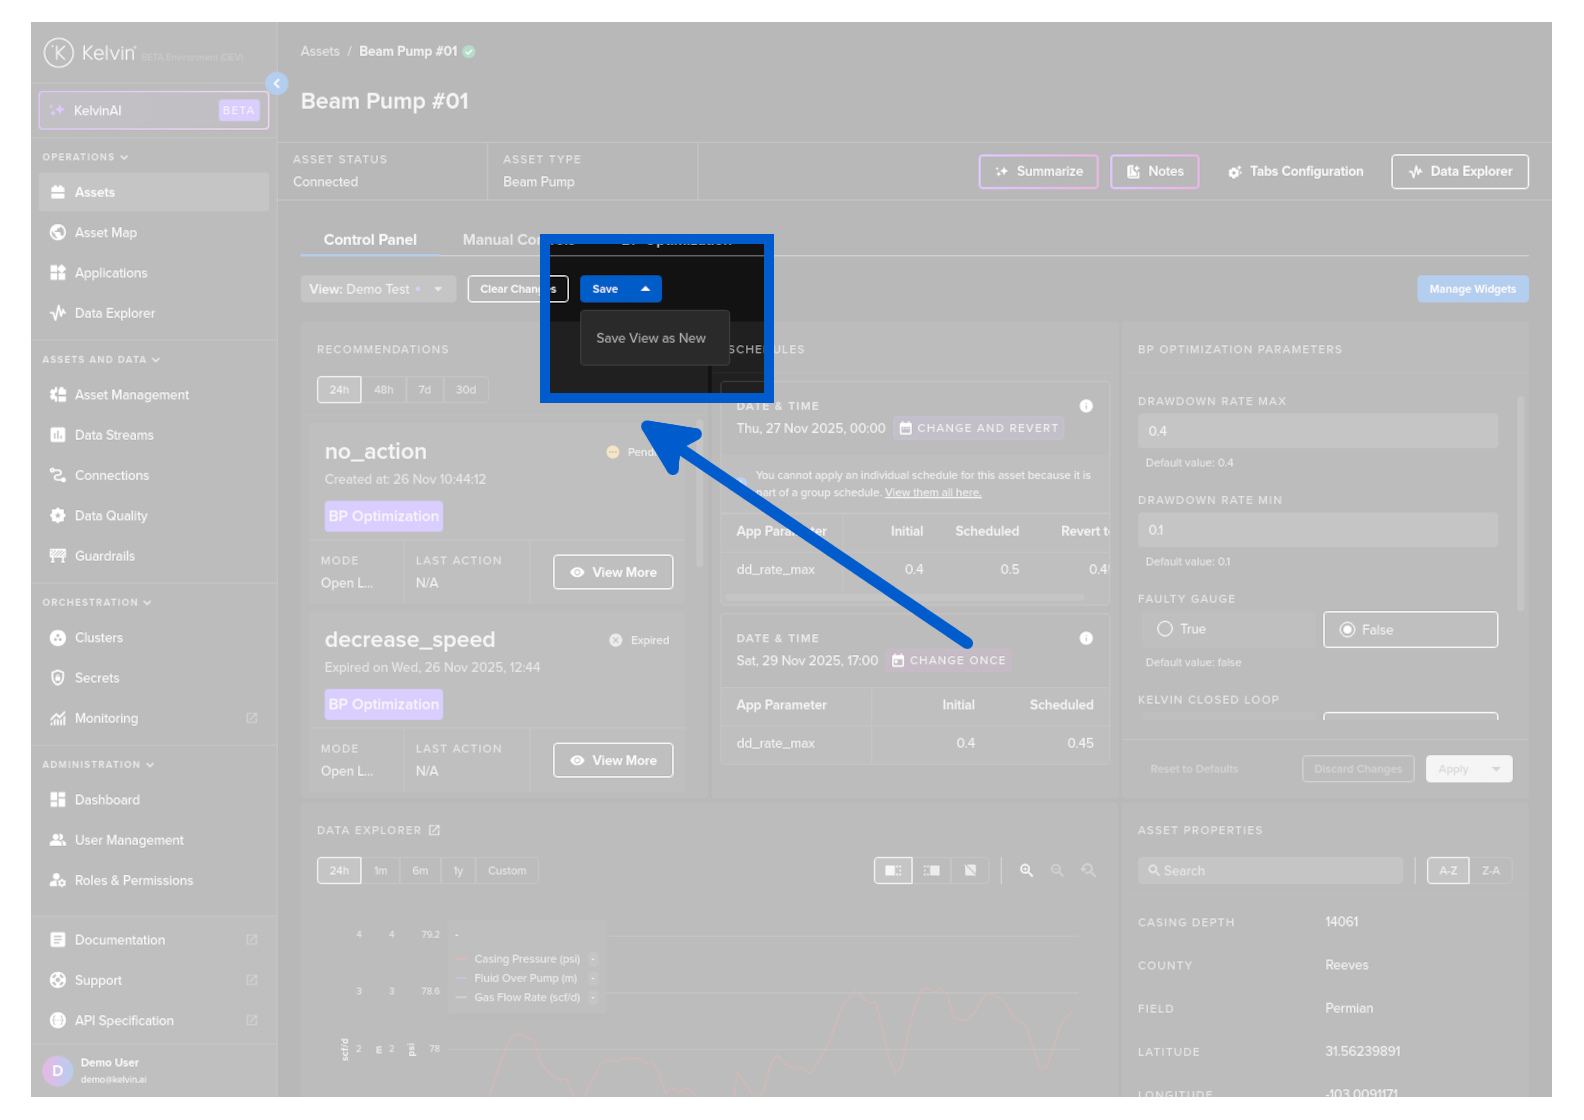
Save as New View
Click on the drop down arrow to the right of the save text and click on Save View as New.
You can then give a name for your new Control Panel view.
Note
If you are an administrator, you will also have the option to make this Control Panel view available to all users.
Custom Views List
Customized views will retain any changes in the Manage Widgets page.
Success
Even if you do not save your Custom View you will not lose your view setup when you navigate away and return.
But we do advise you save it if you want to work with multiple types of views.
This allows you to easily switch between different custom views you have created.
You can see all your saved views in this drop down menu.
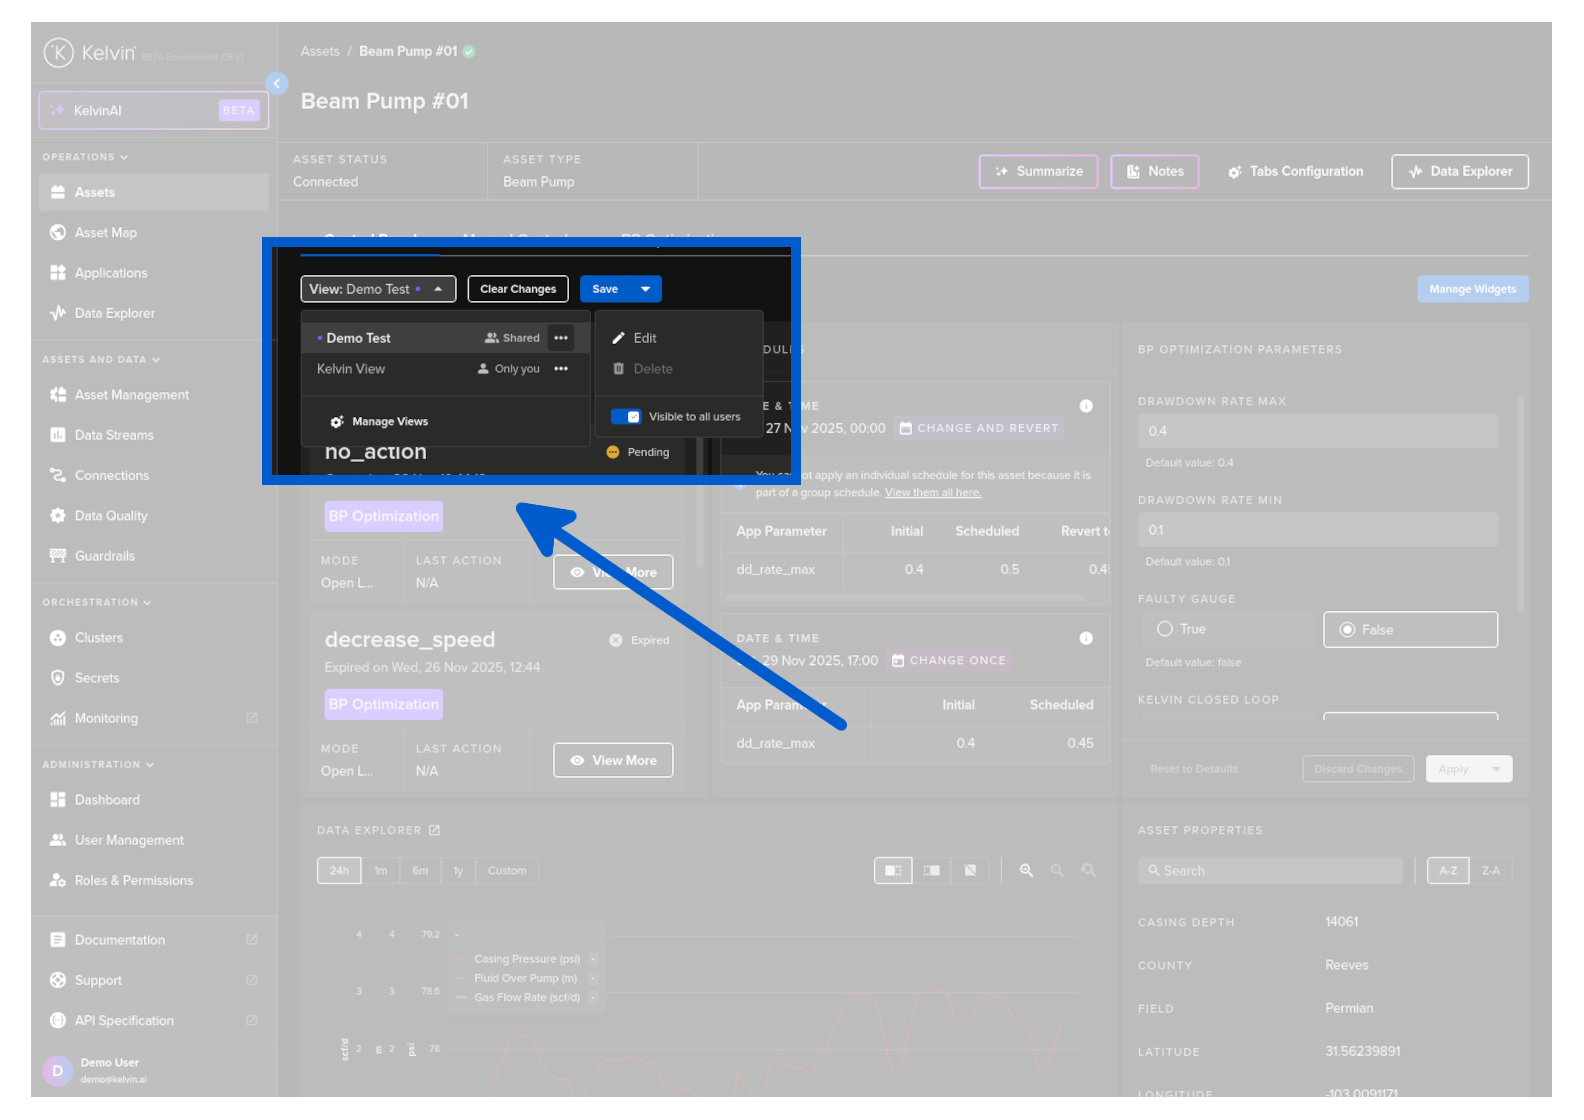
Note
If you click on the meatball menu item ![]() , there is an option for the View to be Visible to all users.
, there is an option for the View to be Visible to all users.
This option is only available if you are an administrator.
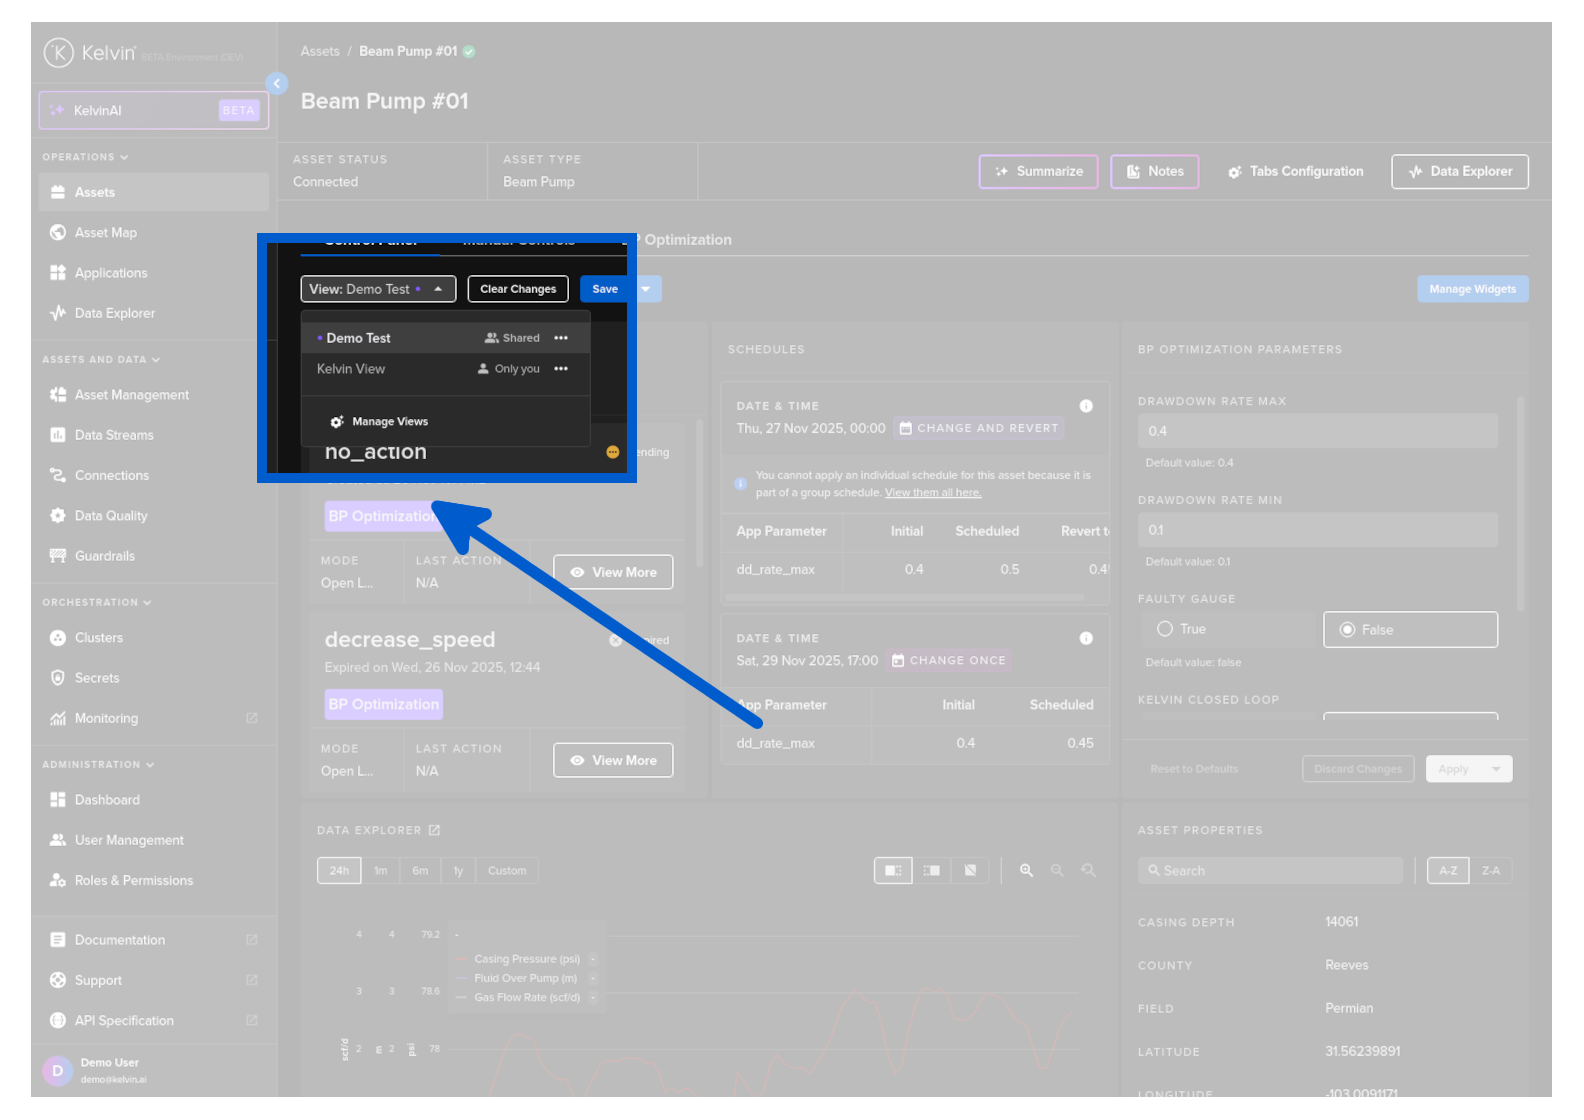
There are some default views that will be displayed. These are set by the Administrator and can not be modified.
Edit Custom View
To edit the name of a view, on the list you can click on the meatball menu item ![]() and select Edit option.
and select Edit option.
Note
You can not edit default view that are set by the Administrator.
You can make changes to a default view and save it as a new View name.
Delete Custom View
To delete a view, on the list you can click on the meatball menu item ![]() and select Delete option.
and select Delete option.
Note
You can not delete any default views that are set by the Administrator.
Manage Custom Views
Note
This option is only available to Administrators
You can manage all your views easily in a popup. Click on the Manage Views Option.
And a popup will appear.
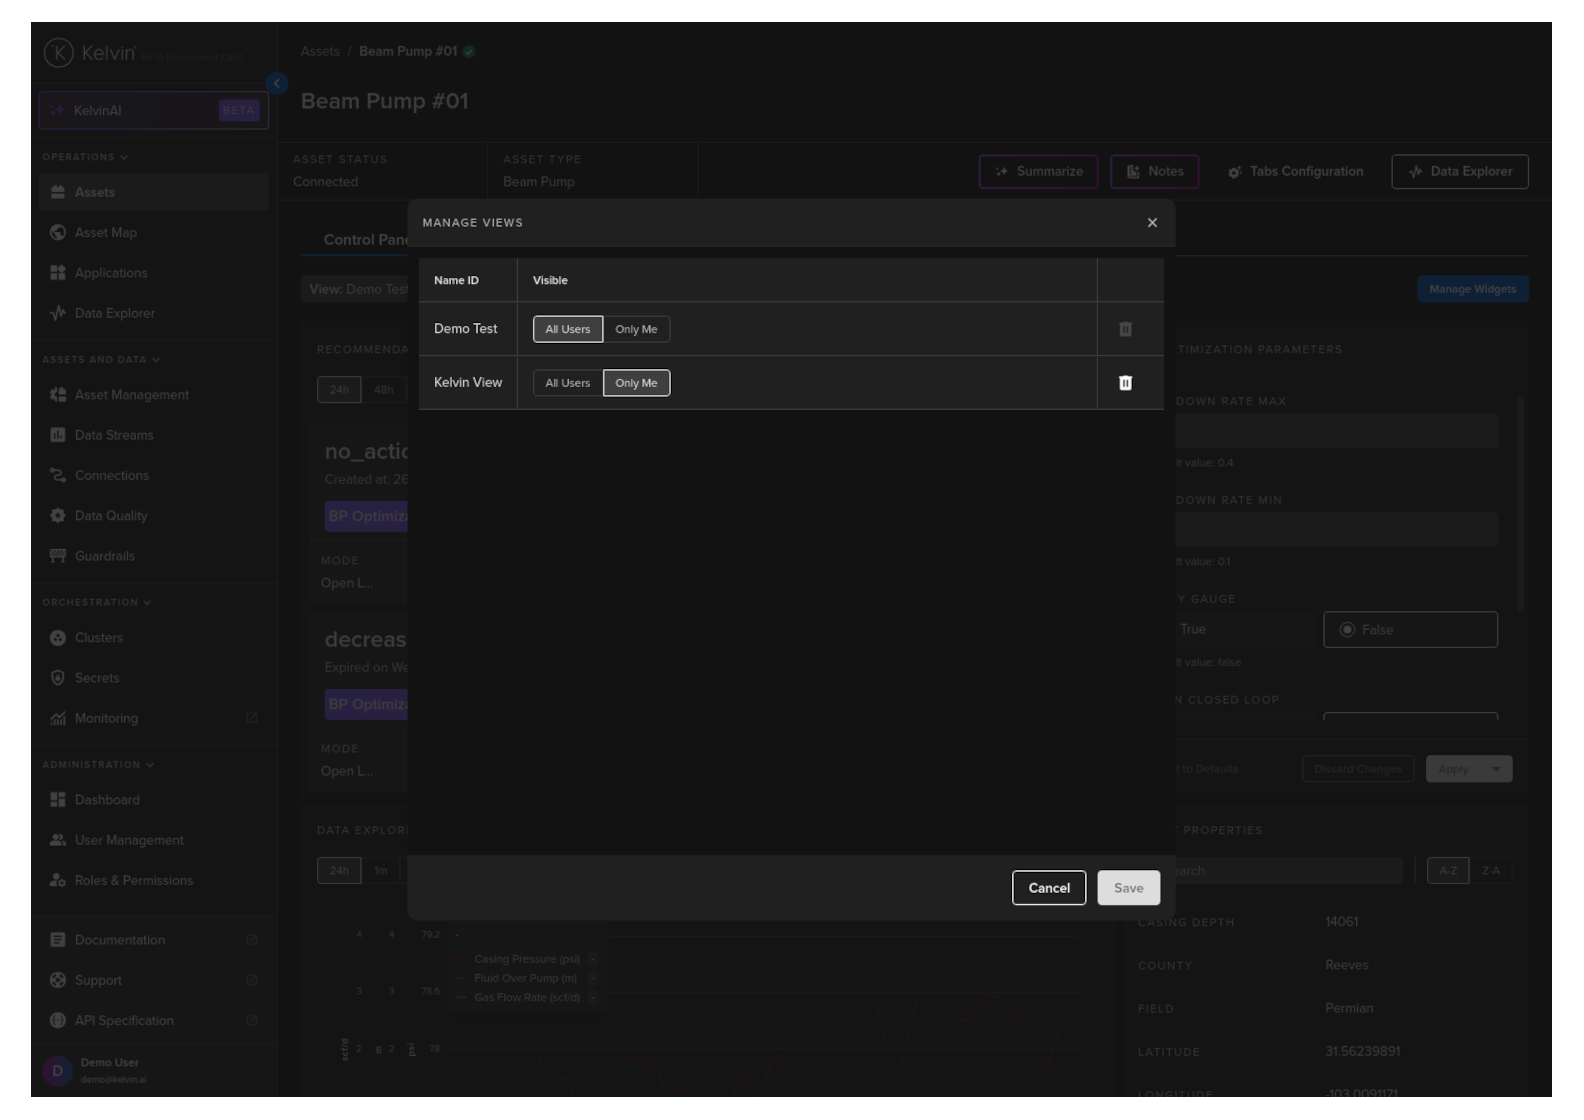
In the scope you can select the views that will be available to all users on the Kelvin Platform.
Note
Any global views are not editable by the user and can not be deleted.
Users can use the global views, change it to their requirements and save it as a new view.
Save Custom View
And when you change the Control Panel widget layout you will have the choice to overwrite the current view or save it to a new view.
Note
You can only save the widget layout to views.
Changing the settings inside a widget, for example change the recommendation time filter from 24 hours to 48 hours will not trigger the Save button to appear.