Managing Assets
On this page you get an overview of all Assets being managed by Kelvin. You can build custom views for the overview by using information like Data Streams, Kelvin SmartApps™ configurations, Recommendations, actions like last Control Change and more.
Overview
The Assets page is the first page you will see when you log into the Kelvin UI. You can also go there by clicking on the Asset option in the left sidebar.
Here you have a list of all Assets registered in Kelvin. From here you can see the Assets and associated information.
The first time you see this page it will only show the basic information; name, status, Kelvin SmartApps™, Asset Type and a link to the Data Explorer.
You will have many options to add columns in this list with Kelvin-specific information relevant to you. You can read more about it in the Customize Column page.
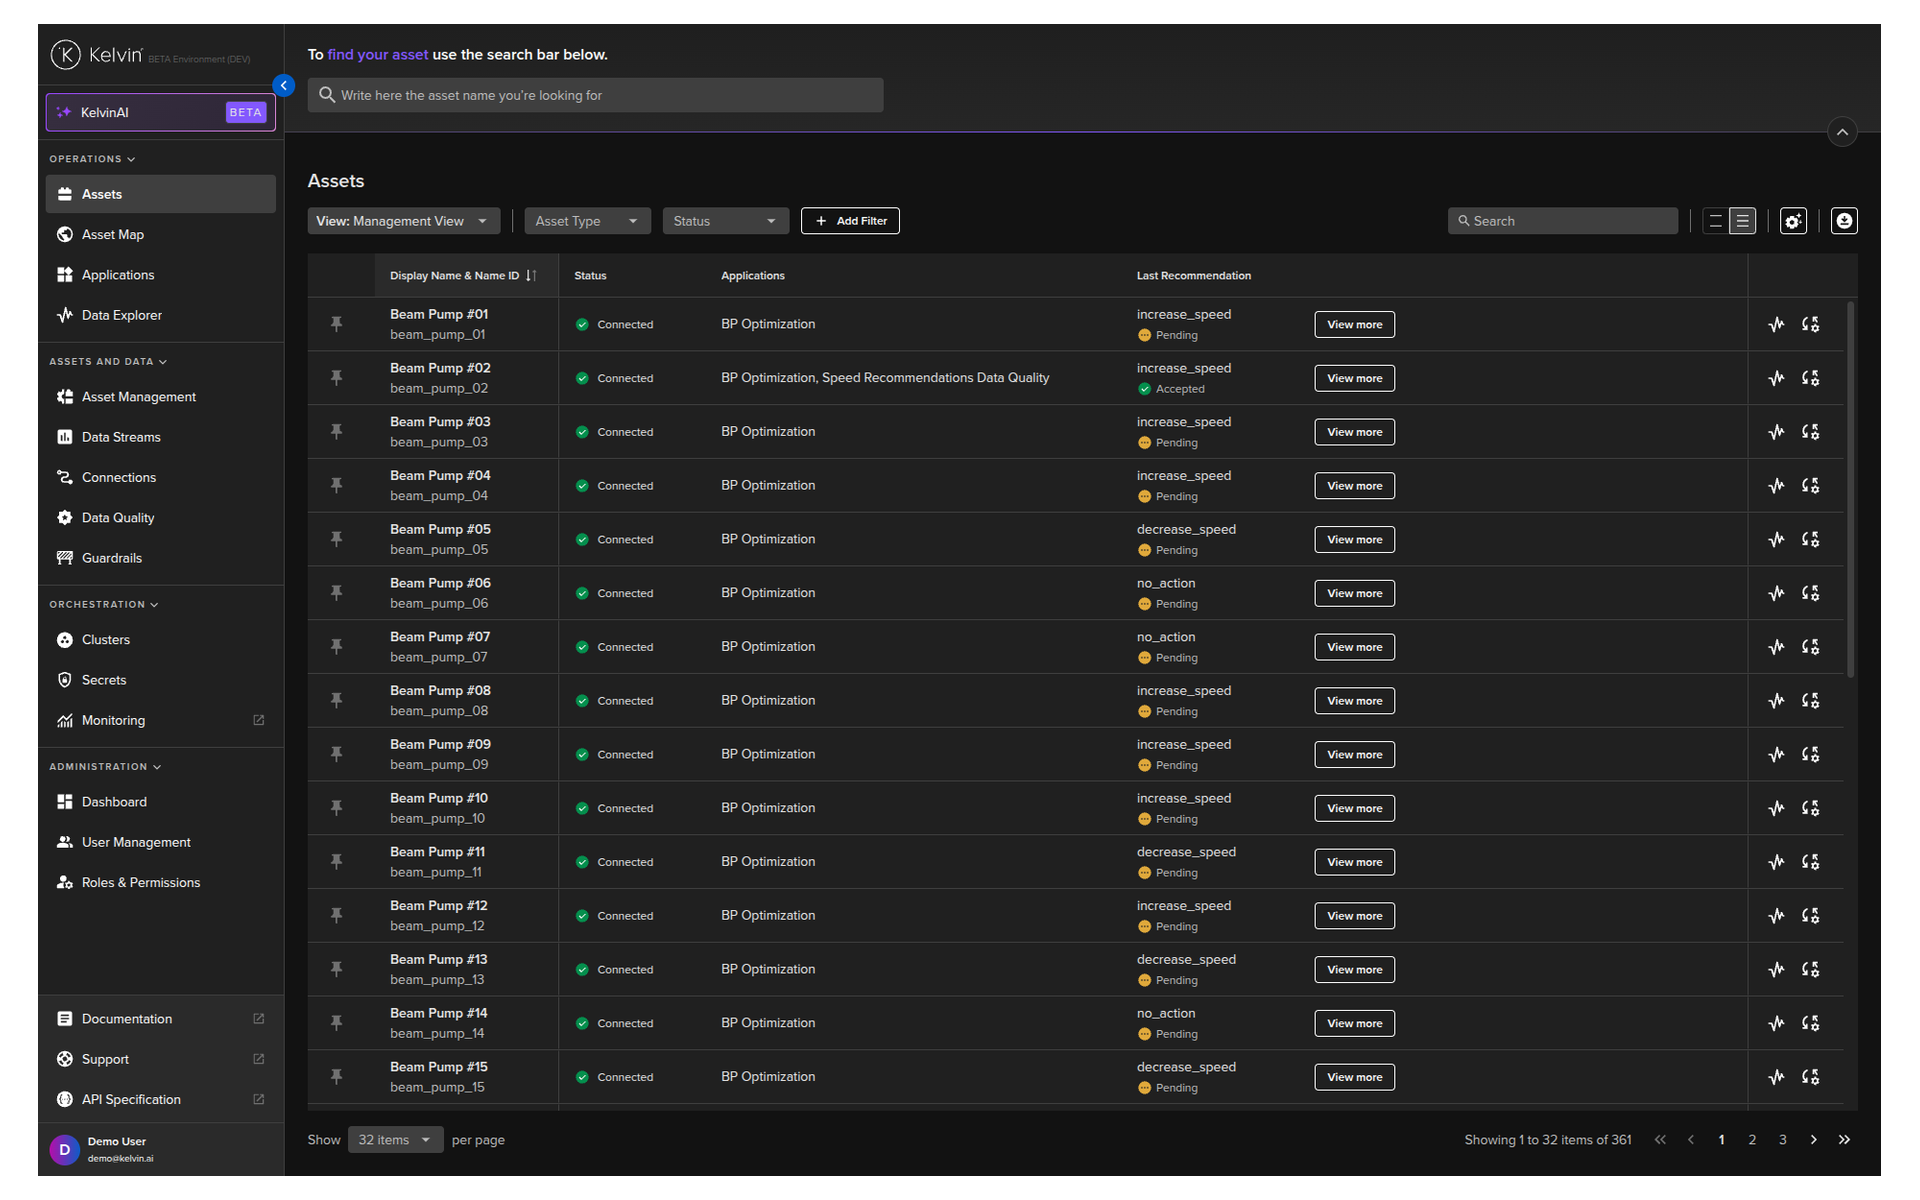
This uses the asset-centric table which is a highly optimized way to customize and view many Kelvin-centric information related to the Assets that are relevant to you.
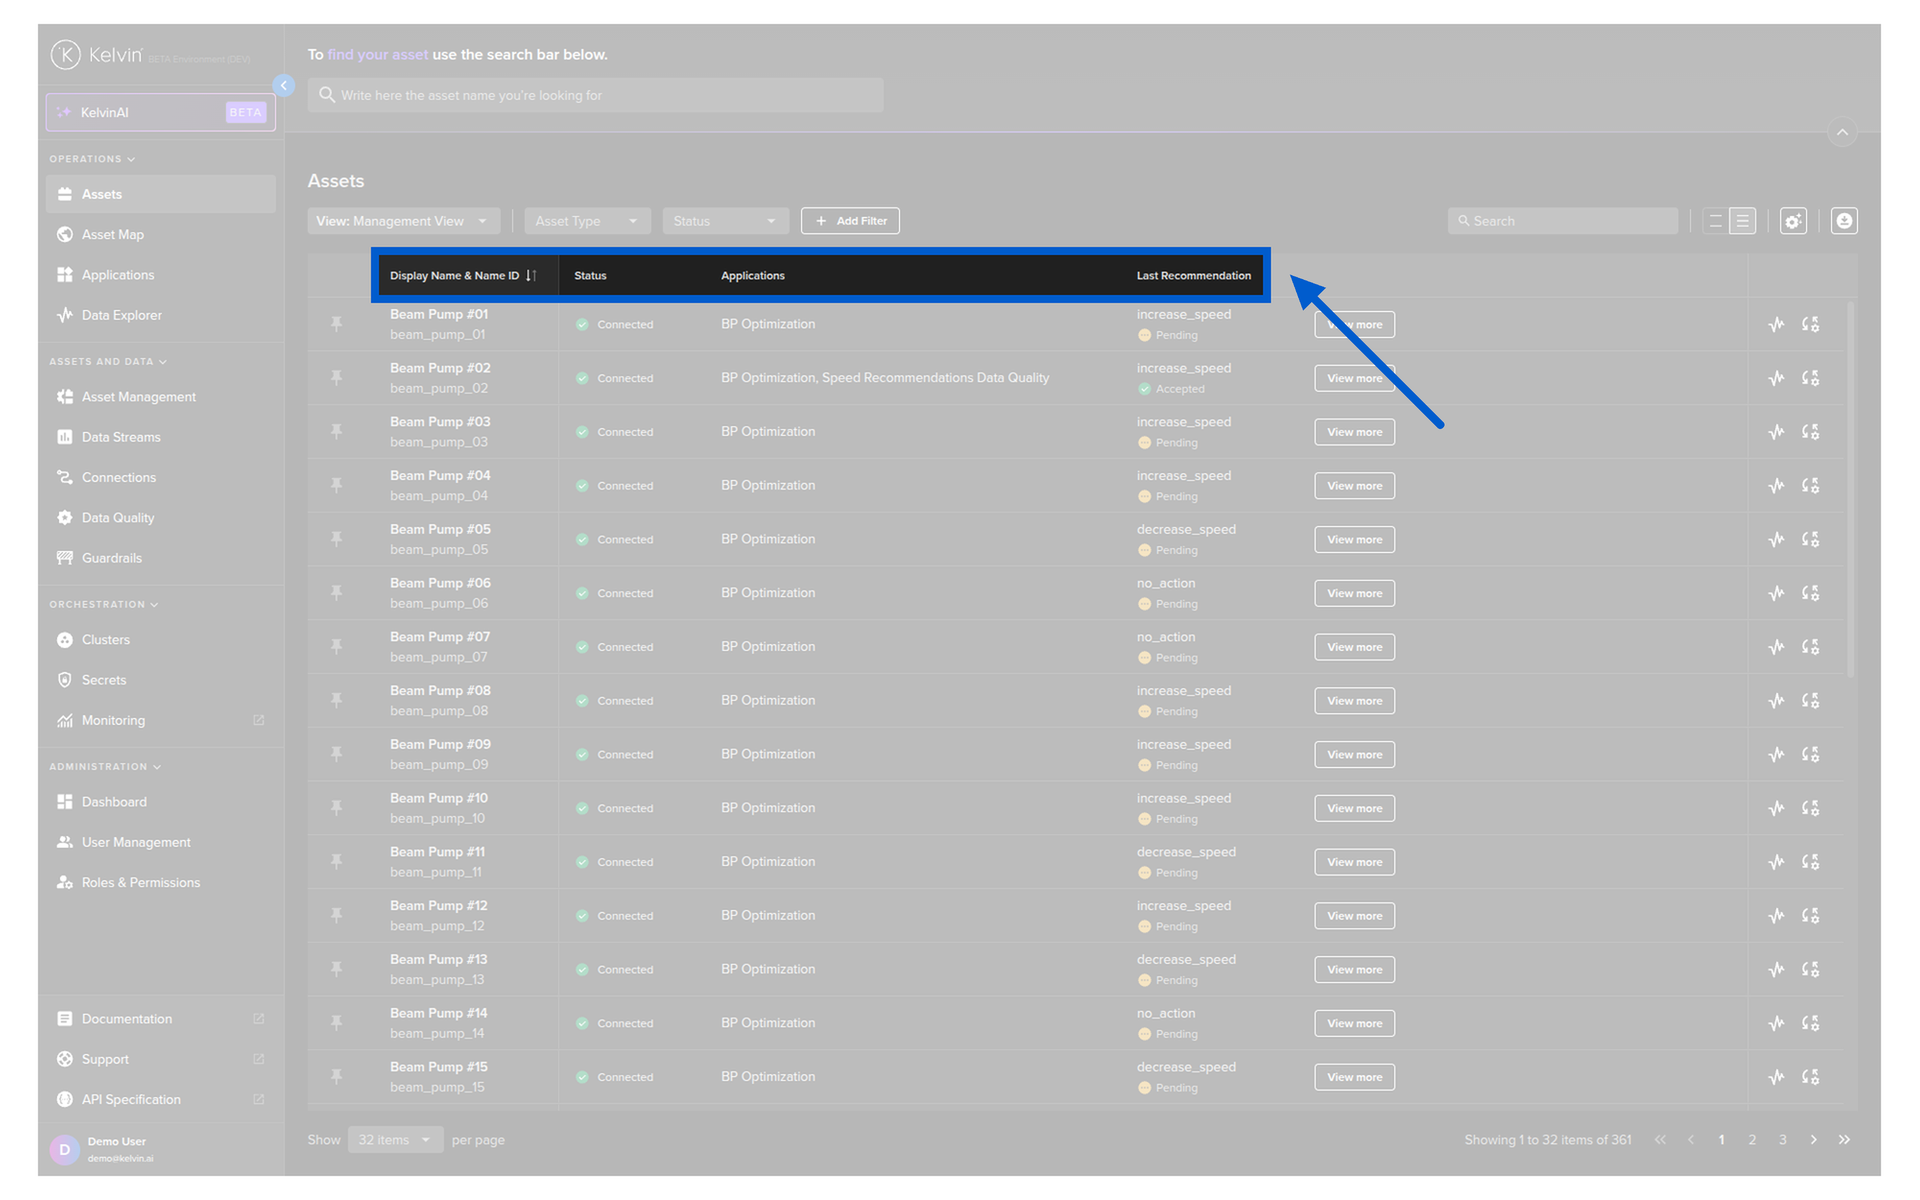
For example, here we have an example with Last Recommendations included as a column.
The View More button in the Recommendations column is a link that takes you directly to that recommendation to record a decision about that Recommendation.
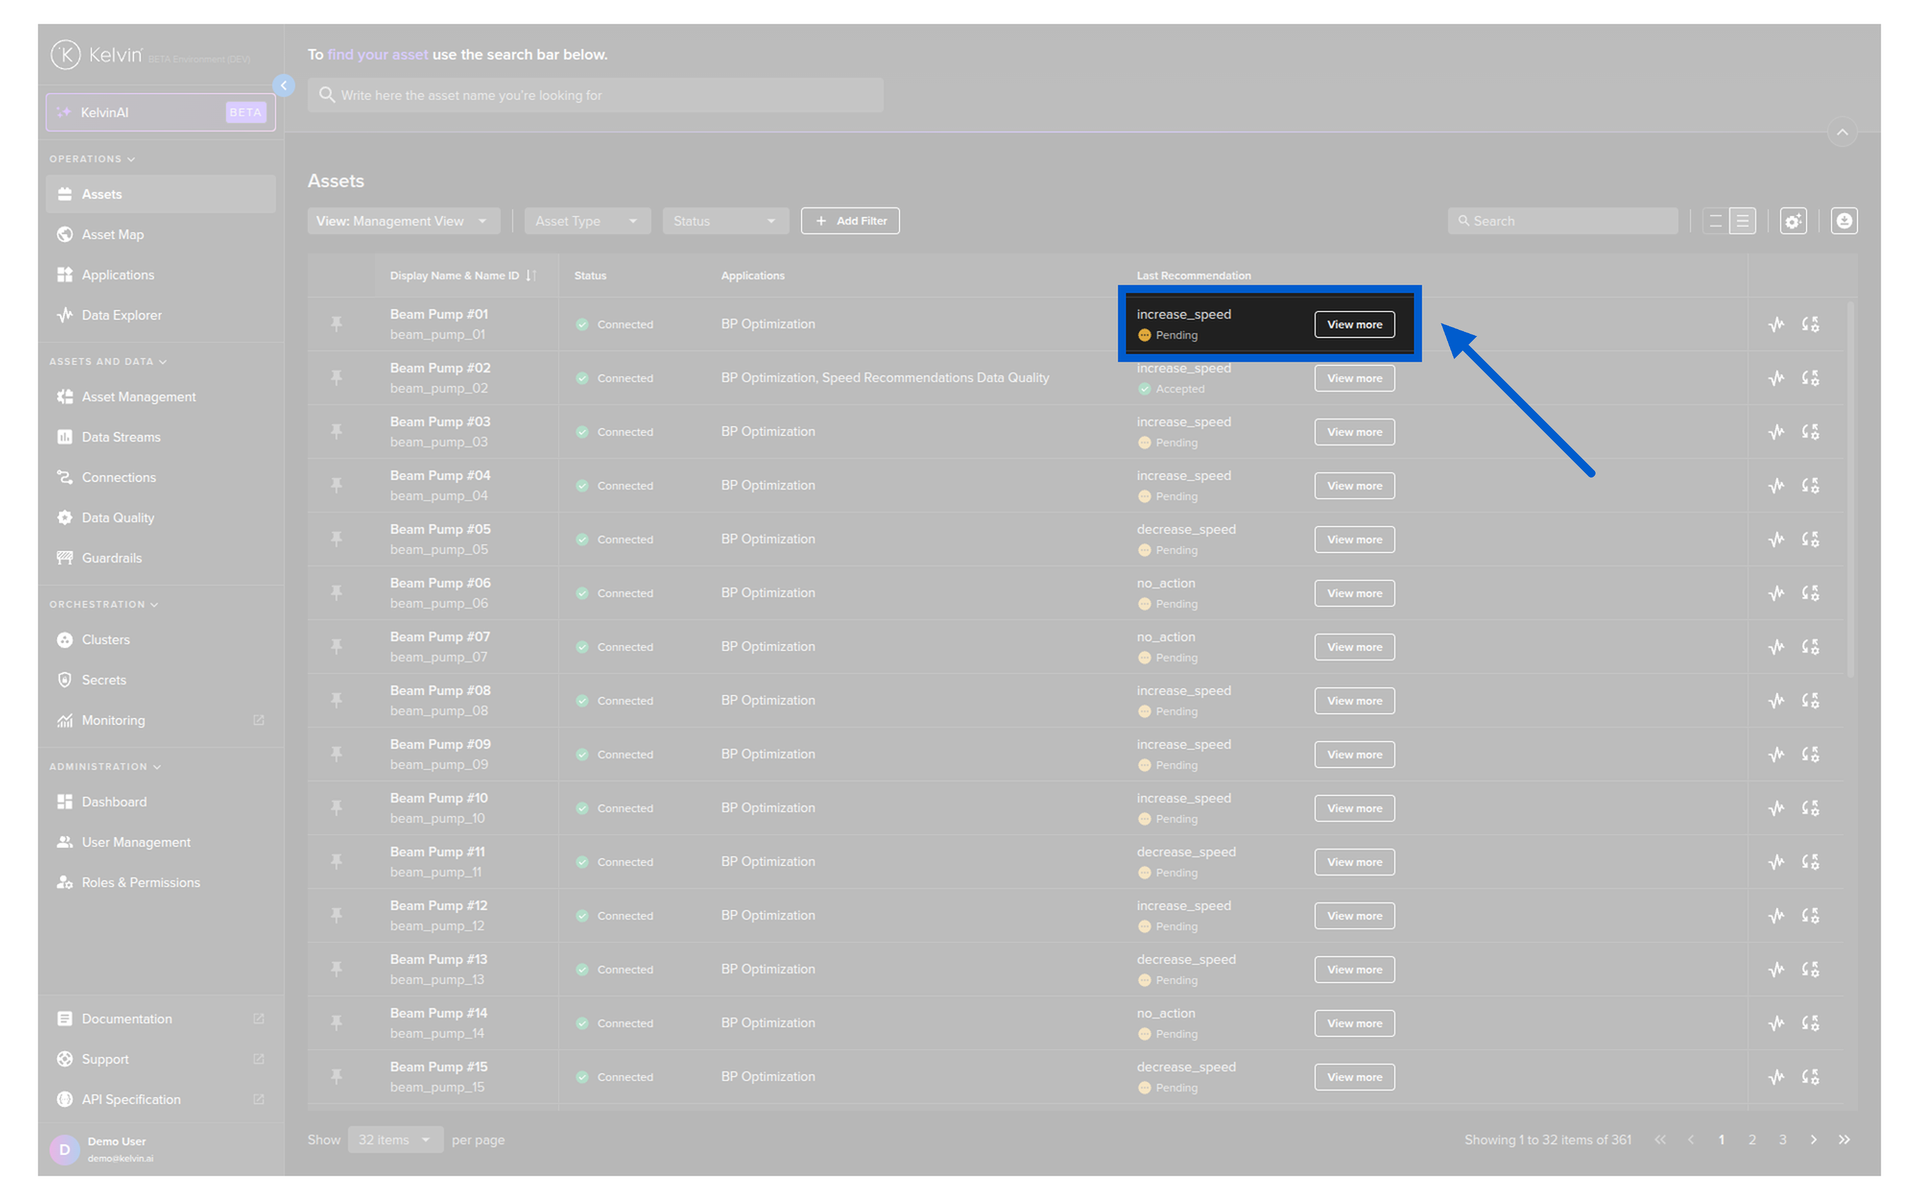
If you click on the View More button then you can see and take actions on the Recommendation.
You can also expand the Recommendation into a full popup where you can also leave comments related to the Recommendation.
Basic Features
On the overview page you have a number of common features that help you quickly navigate, find and filter the assets of interest.
Once you have configured and filtered your list, the list as you see it will be utilized as the reference list on the Asset Details page which we discuss in detail in the View Asset Details page, allowing for easier navigation and scrolling.
You can customize your column views and save them, allowing you to quickly change views for different operations.
Note
See more details about custom views below in Custom Asset View.
You can sort the table rows simply by clicking on the header name. Clicking it will cancel the other sorts in other headers and each click will rotate between ascending, descending and no sorting.
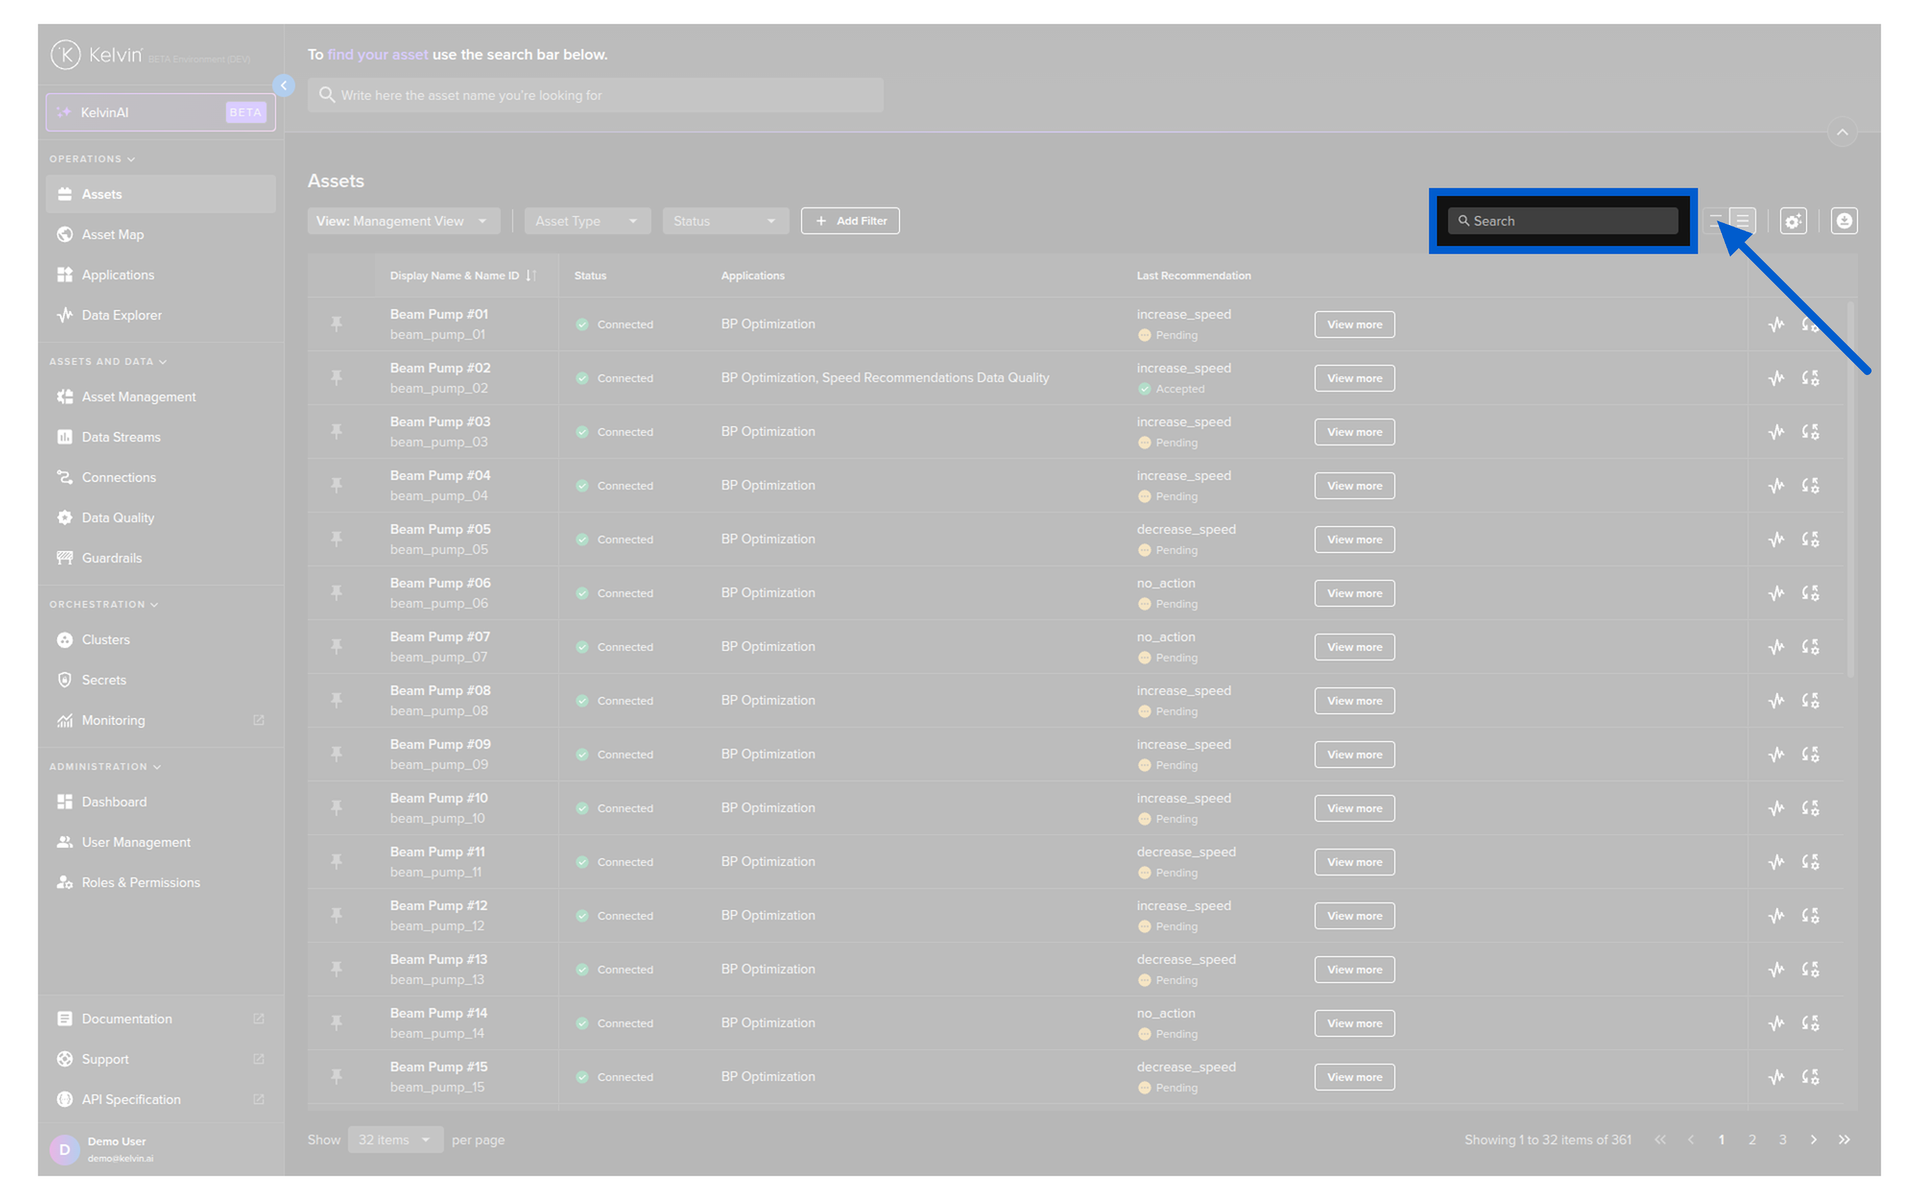
When dealing with large quantities of Assets, you can search for the Assets of interest.
This is dynamic and will update the list as you type.
The search feature is not case-sensitive and will search for any matches anywhere in the Asset name, i.e. it does not have to be at the beginning of the name.
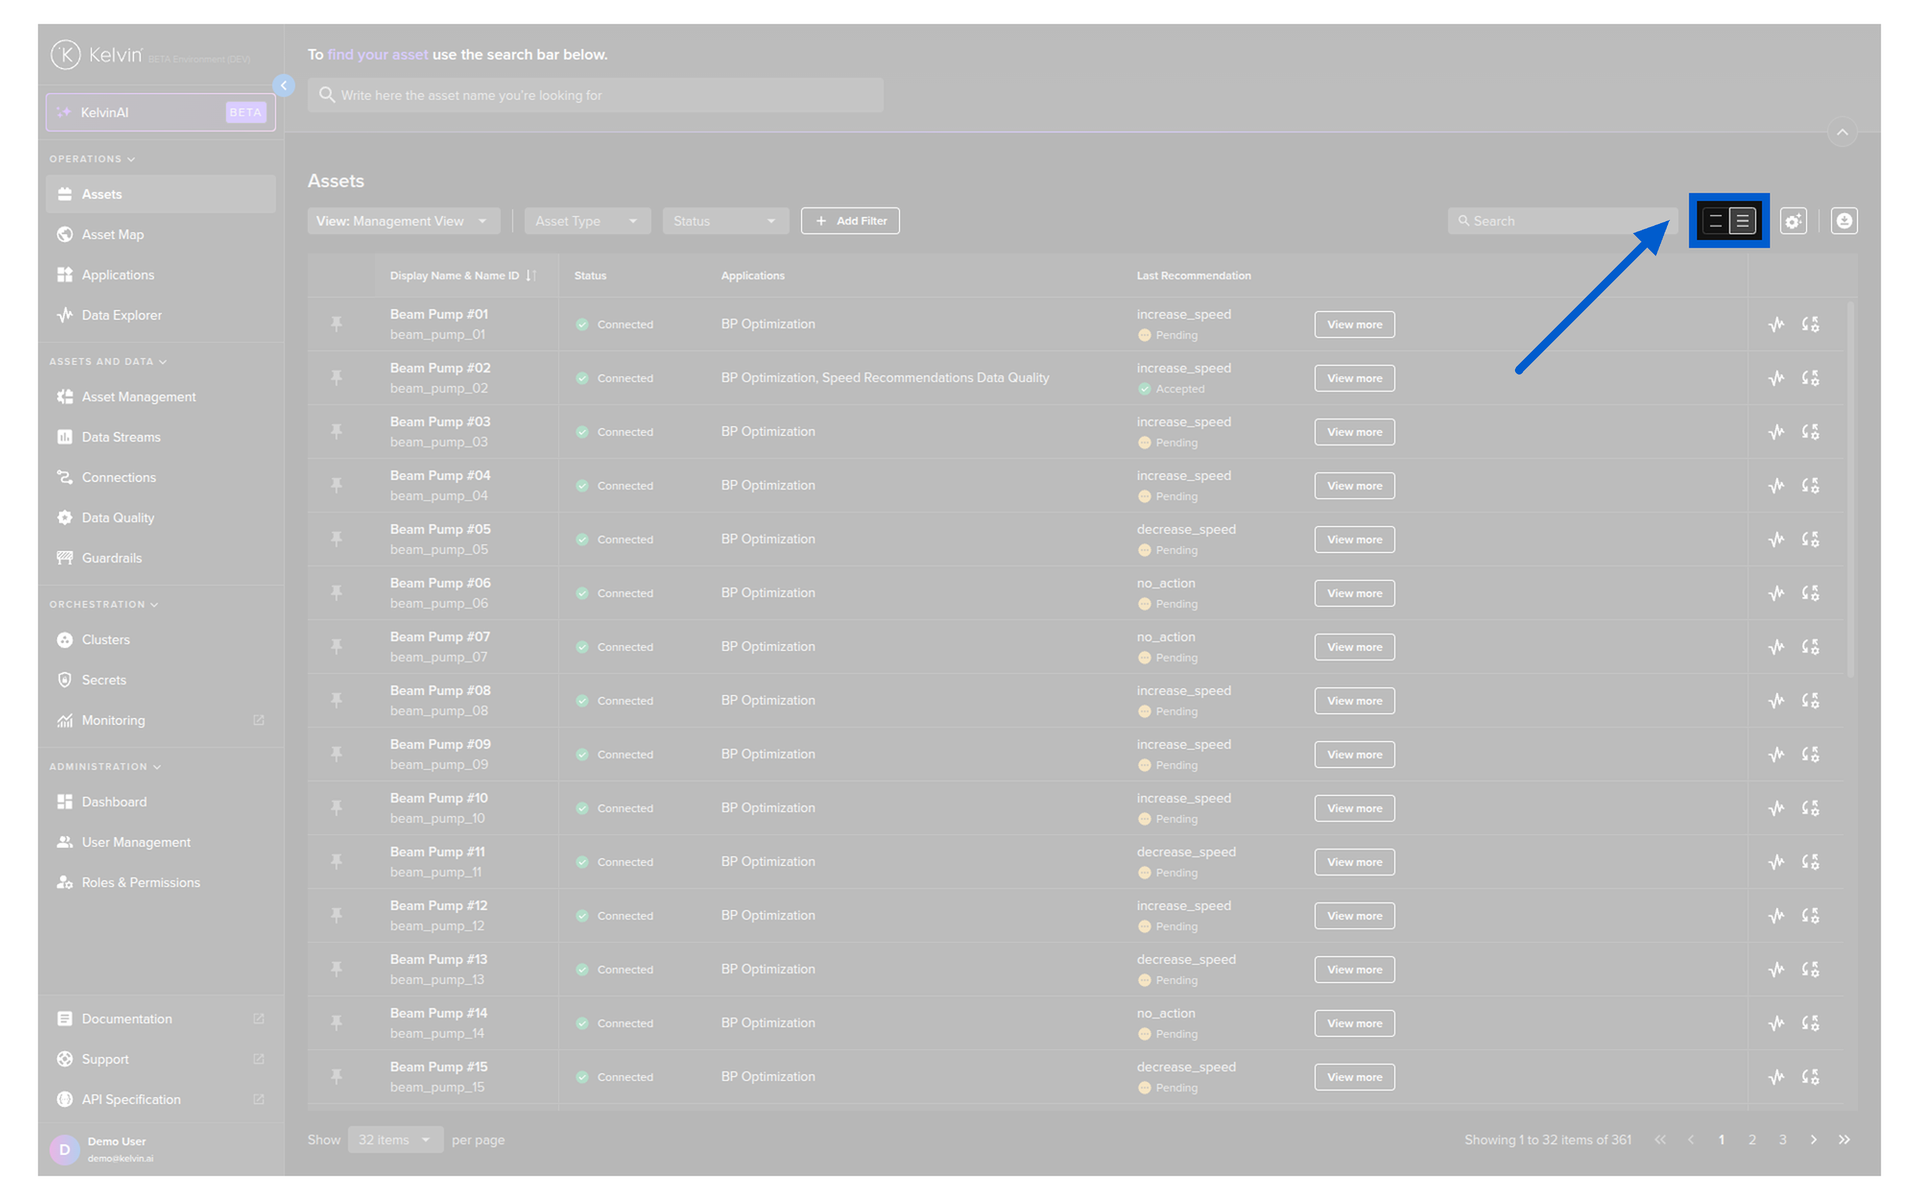
You can choose the height of the row to fit as many rows as possible on the screen, or space them out for easier readability.
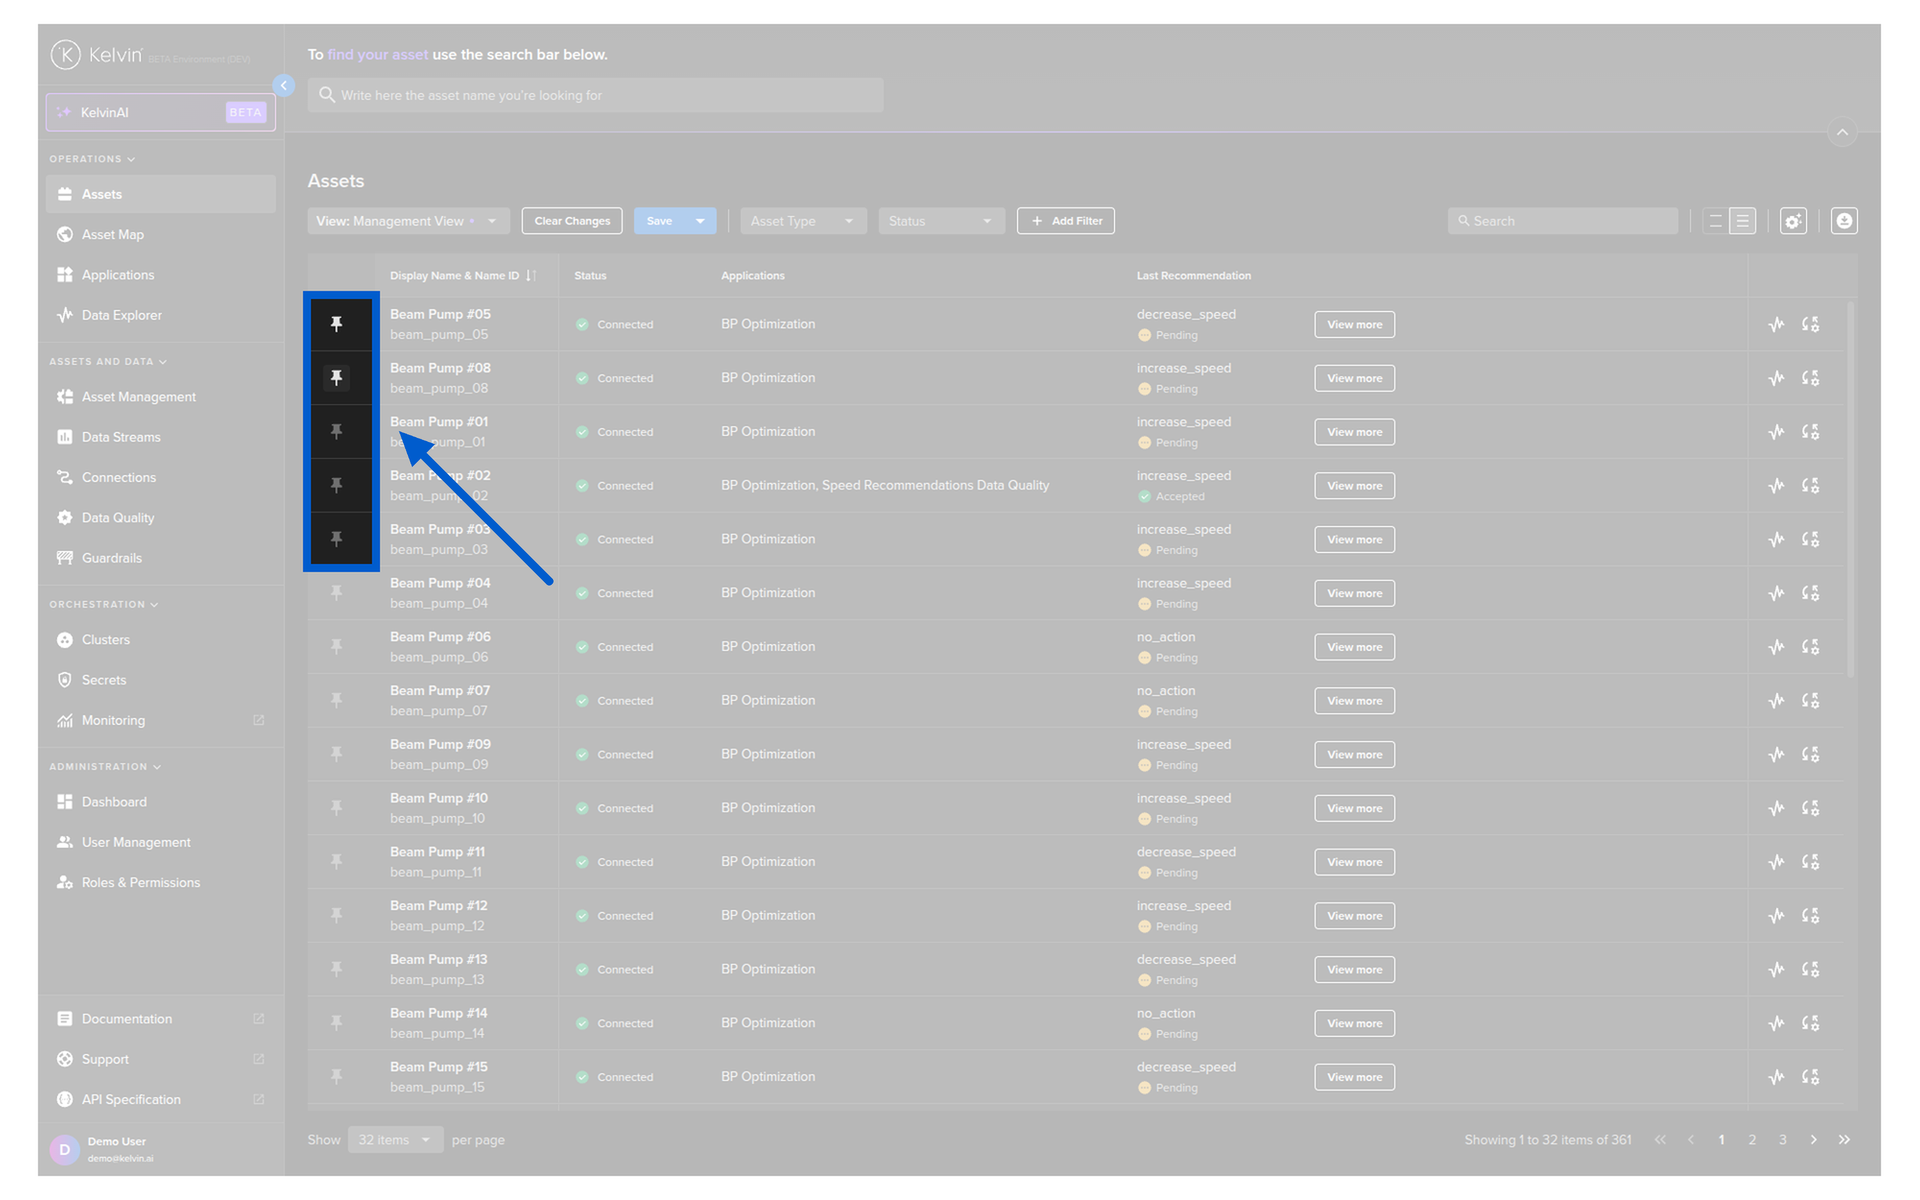
You can keep important Assets pinned to the top of the page simply by clicking on the pin icon.
The pinned Assets will show on the top of every page.
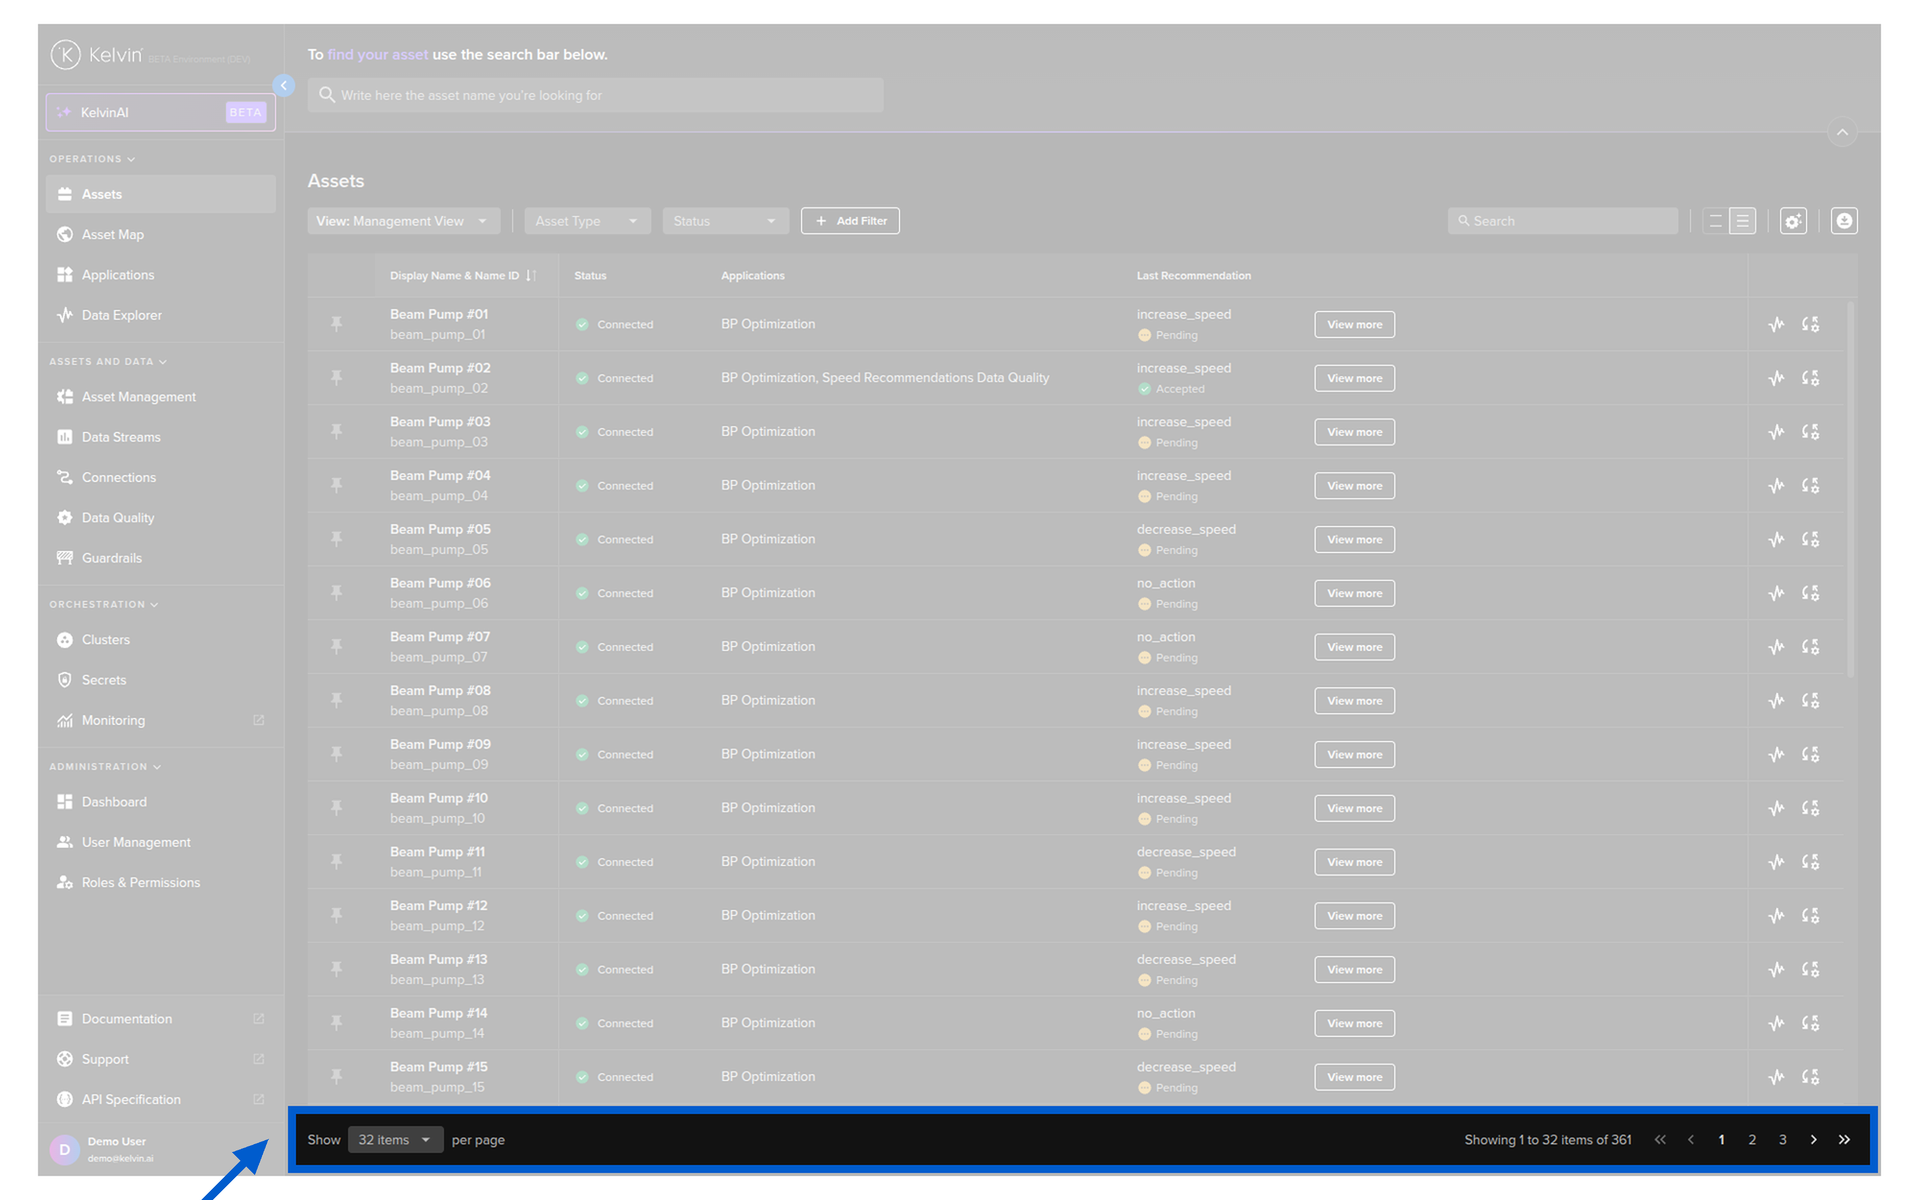
You can select the number of Assets to show on each page and the page number to view. This is especially useful to set the information available in one page based on your screen size.
There is a powerful filtering setup that can help configure the information you want to display.
All filters are persistent, so if you go to other pages or log out the filters will still be implemented when you return.
There are three types of filters you can apply;
- Quick filter on Asset Type
- Quick filter on current Asset status
- Advanced filtering on Asset Properties
- Advanced filtering on App Parameters in Kelvin SmartApps™
- Advanced filtering on Asset / Data Stream pairs aggregation of data
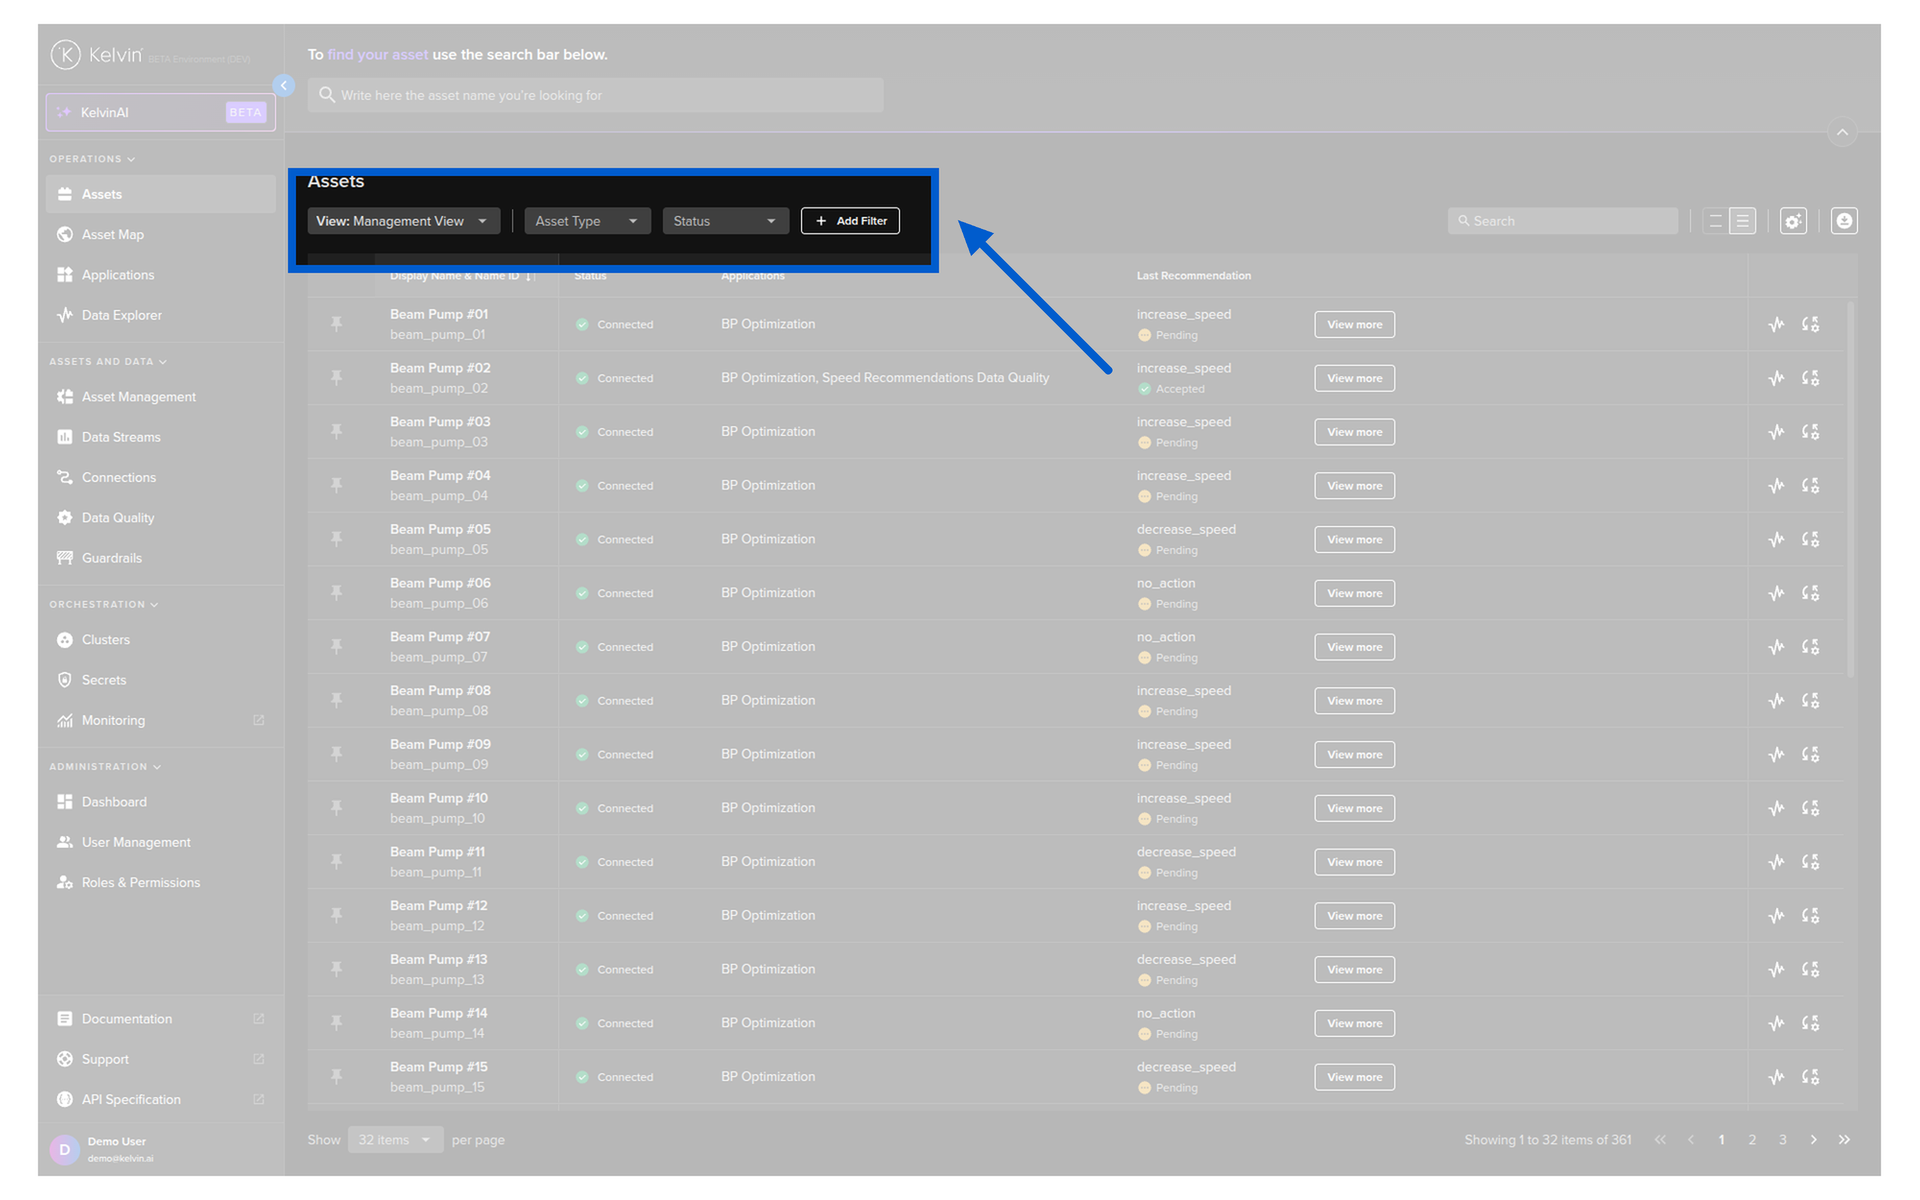
The Add Filter section allows you to create complex multi-criteria on any or mixture of the following;
- Asset Properties
- Kelvin SmartApps™
- Data Streams
- Insights
- Recommendations
- Control Changes
If your filter is complex, then it can take time for the rows to be initially updated, sometimes over 10 seconds or more.
If you update your filter conditions with extra conditions, it will not take so long the second time as it only applies the new filter conditions to the existing list.
Ask AI
You can use the Ask AI feature to quickly find the Assets of interest, so you can spend more time taking action on what matters instead of manually configuring filters.
Click on the Ask AI button.
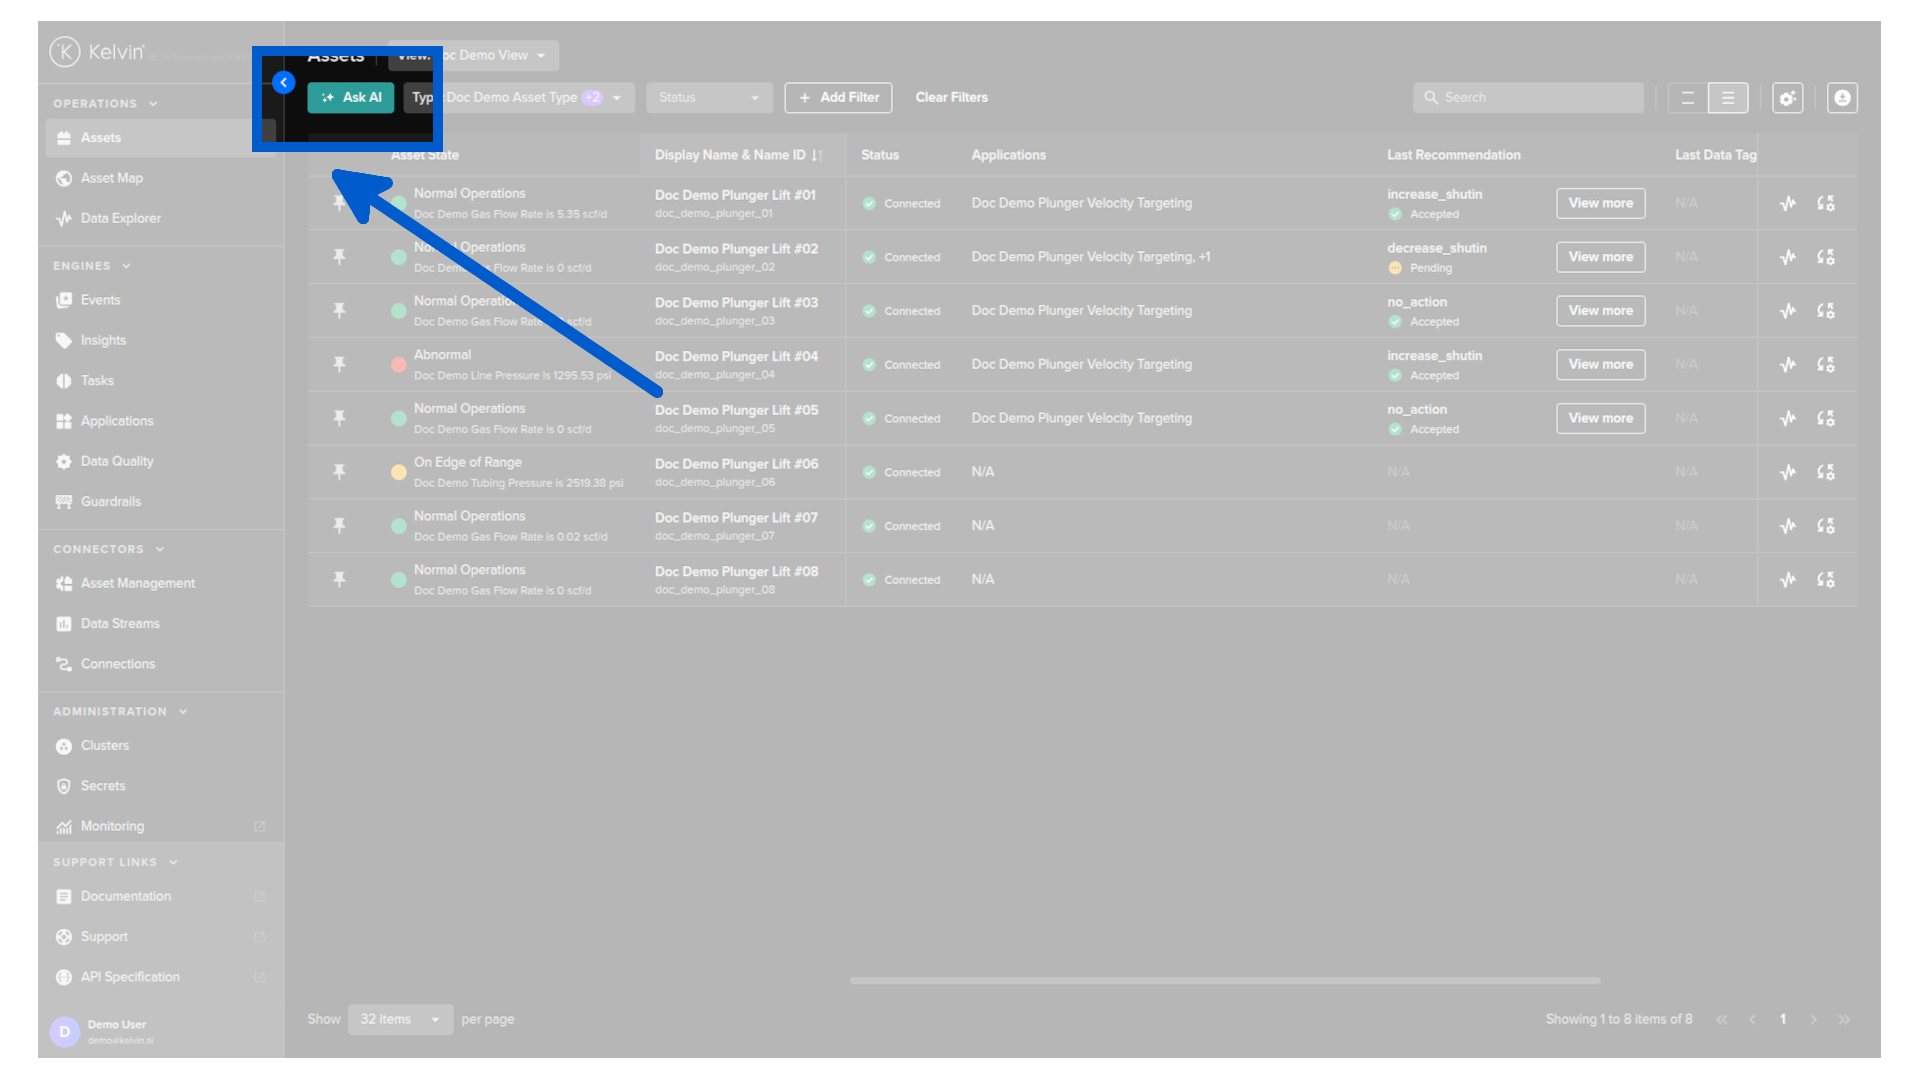
You can now use natural language to find relevant information in the Assets table or update the table to a specific view.
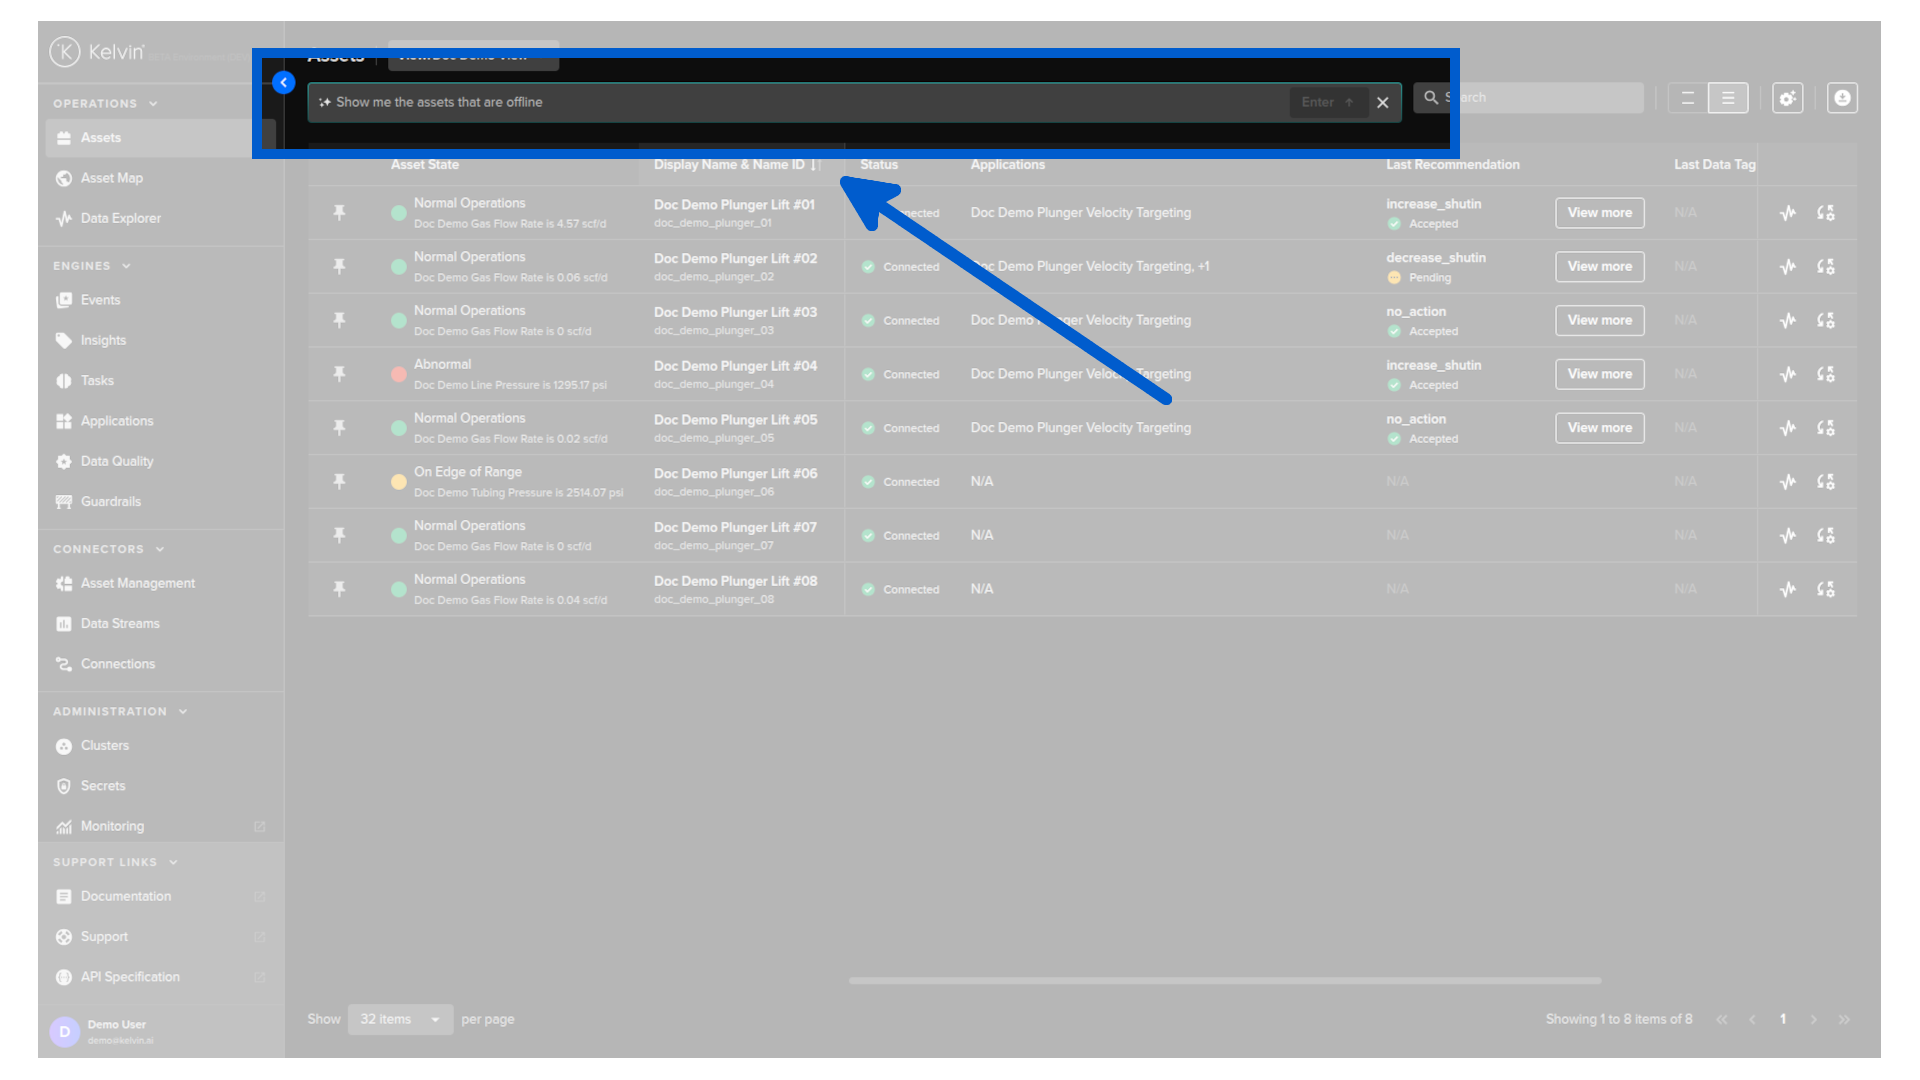
For example:
- "Show me the assets that are offline" will update the table with only offline Assets shown.
- "Which assets have pending recommendations" will show a list of the Assets with pending Recommendations.
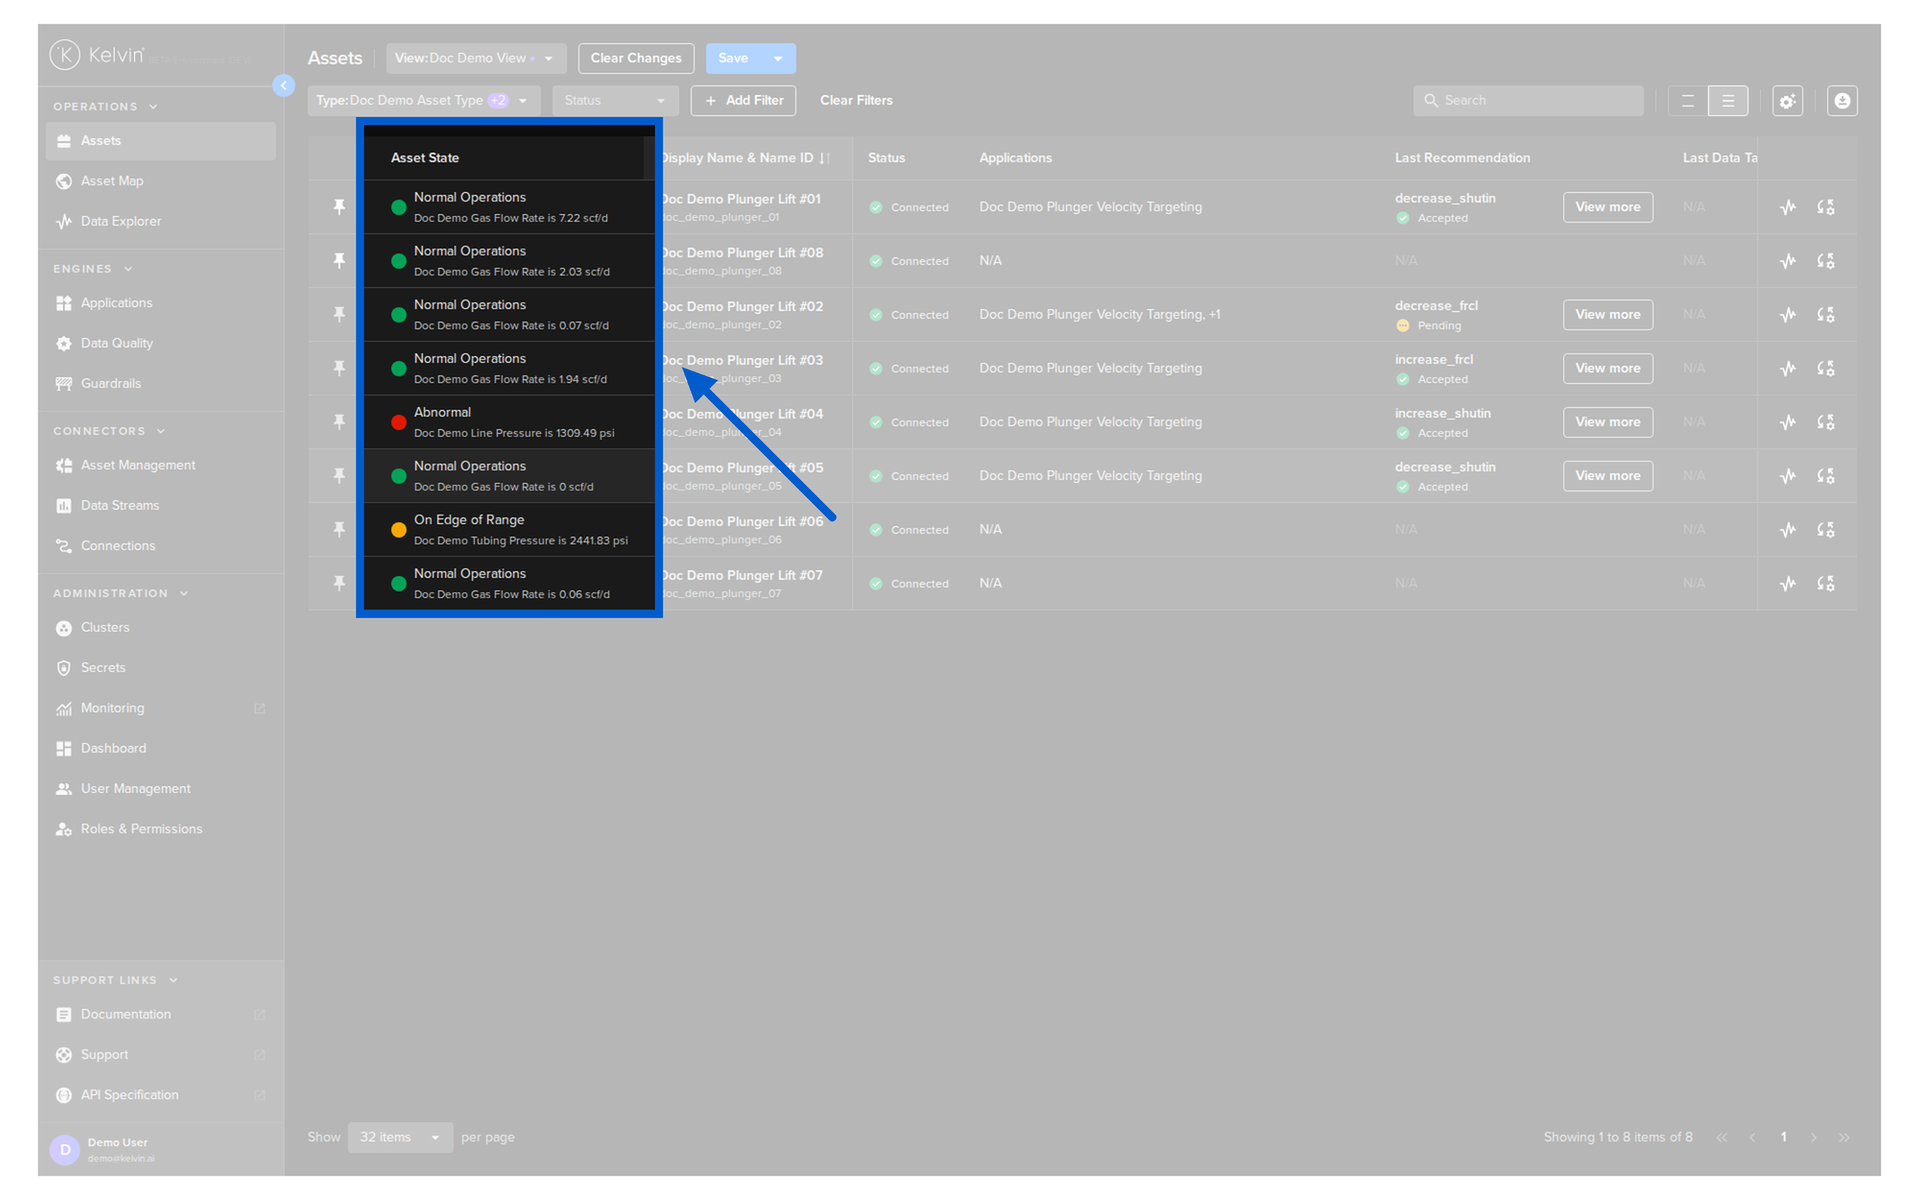
Asset State
Warning
Asset State is not related to data quality or guardrails.
The Asset State column displays a colored LED indicator that reflects the current condition of a monitored Asset / Data Stream based on rules defined in its Asset Type configuration. There are three possible states:
- 🔴 Red -- the monitored Asset / Data Stream meets a critical condition
- 🟠 Orange -- the monitored Asset / Data Stream meets a warning condition
- 🟢 Green -- the monitored Asset / Data Stream meets a normal or healthy condition
The row information shown in the table will change depending on what has been configured for that Asset Type.
Each Asset Type can be configured to monitor a single Data Stream and apply simple mathematical conditions (such as >, <, >=, <=, =) to determine which color LED to display. These conditions are defined in the Platform Administration settings for Asset Types.
It can also optionally show you the current value of the Asset / Data Stream.
Info
If no conditions have been set for an Asset Type, or the current Data Stream value does not meet any of the defined conditions, the Asset State column will be left blank for that Asset.
You can also change how this column is displayed between four options.
Note
You can adjust the display format in the Customize Columns settings.
- Full display -- shows the indicator, label, and current value and is what we show in our screenshot below.
- Indicator and label only
- Indicator and value only
- Indicator only
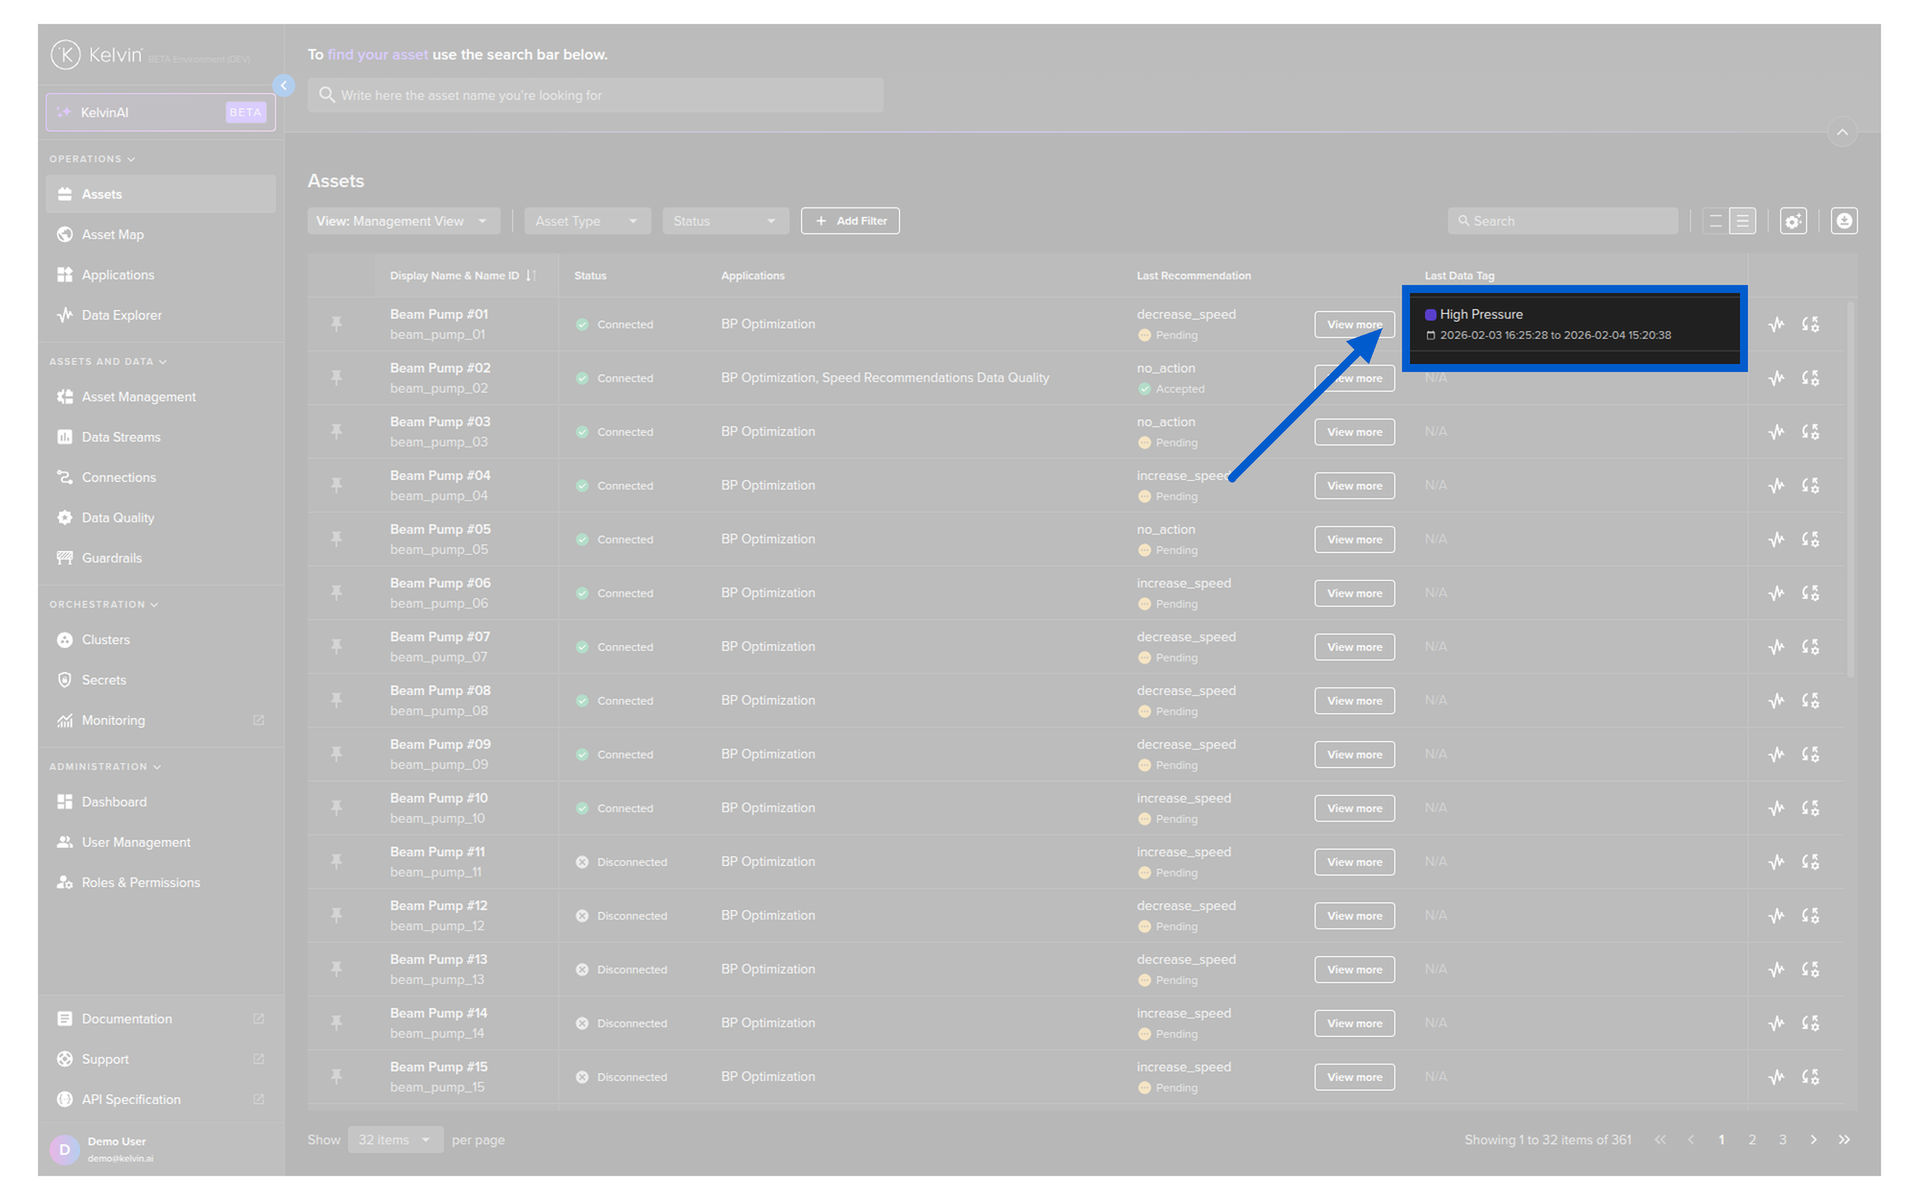
Inline Data Explorer
You can quickly see the Data Explorer in the table for an Asset without having to switch back and forth to the Data Explorer page.
Click on the Data Explorer icon ![]() ;
;
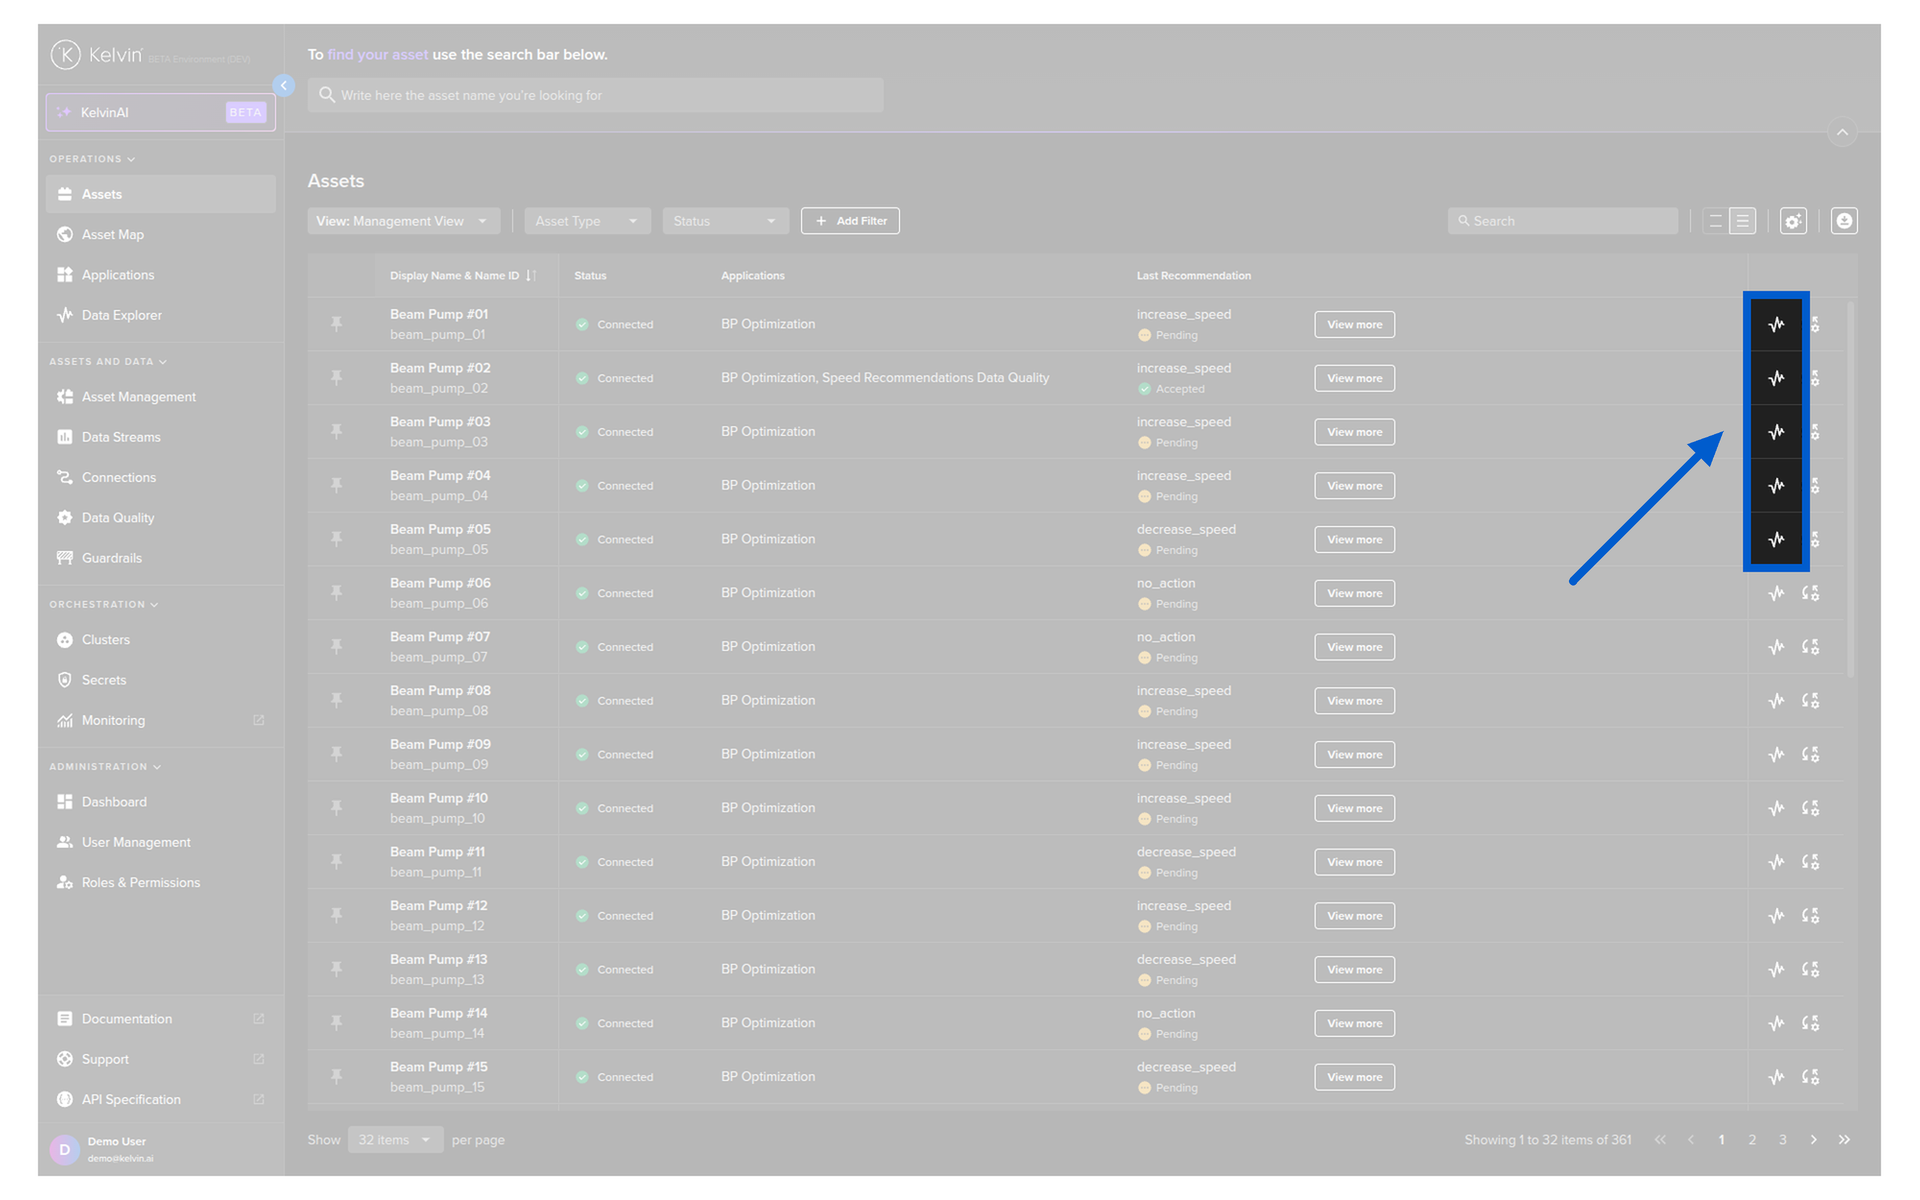
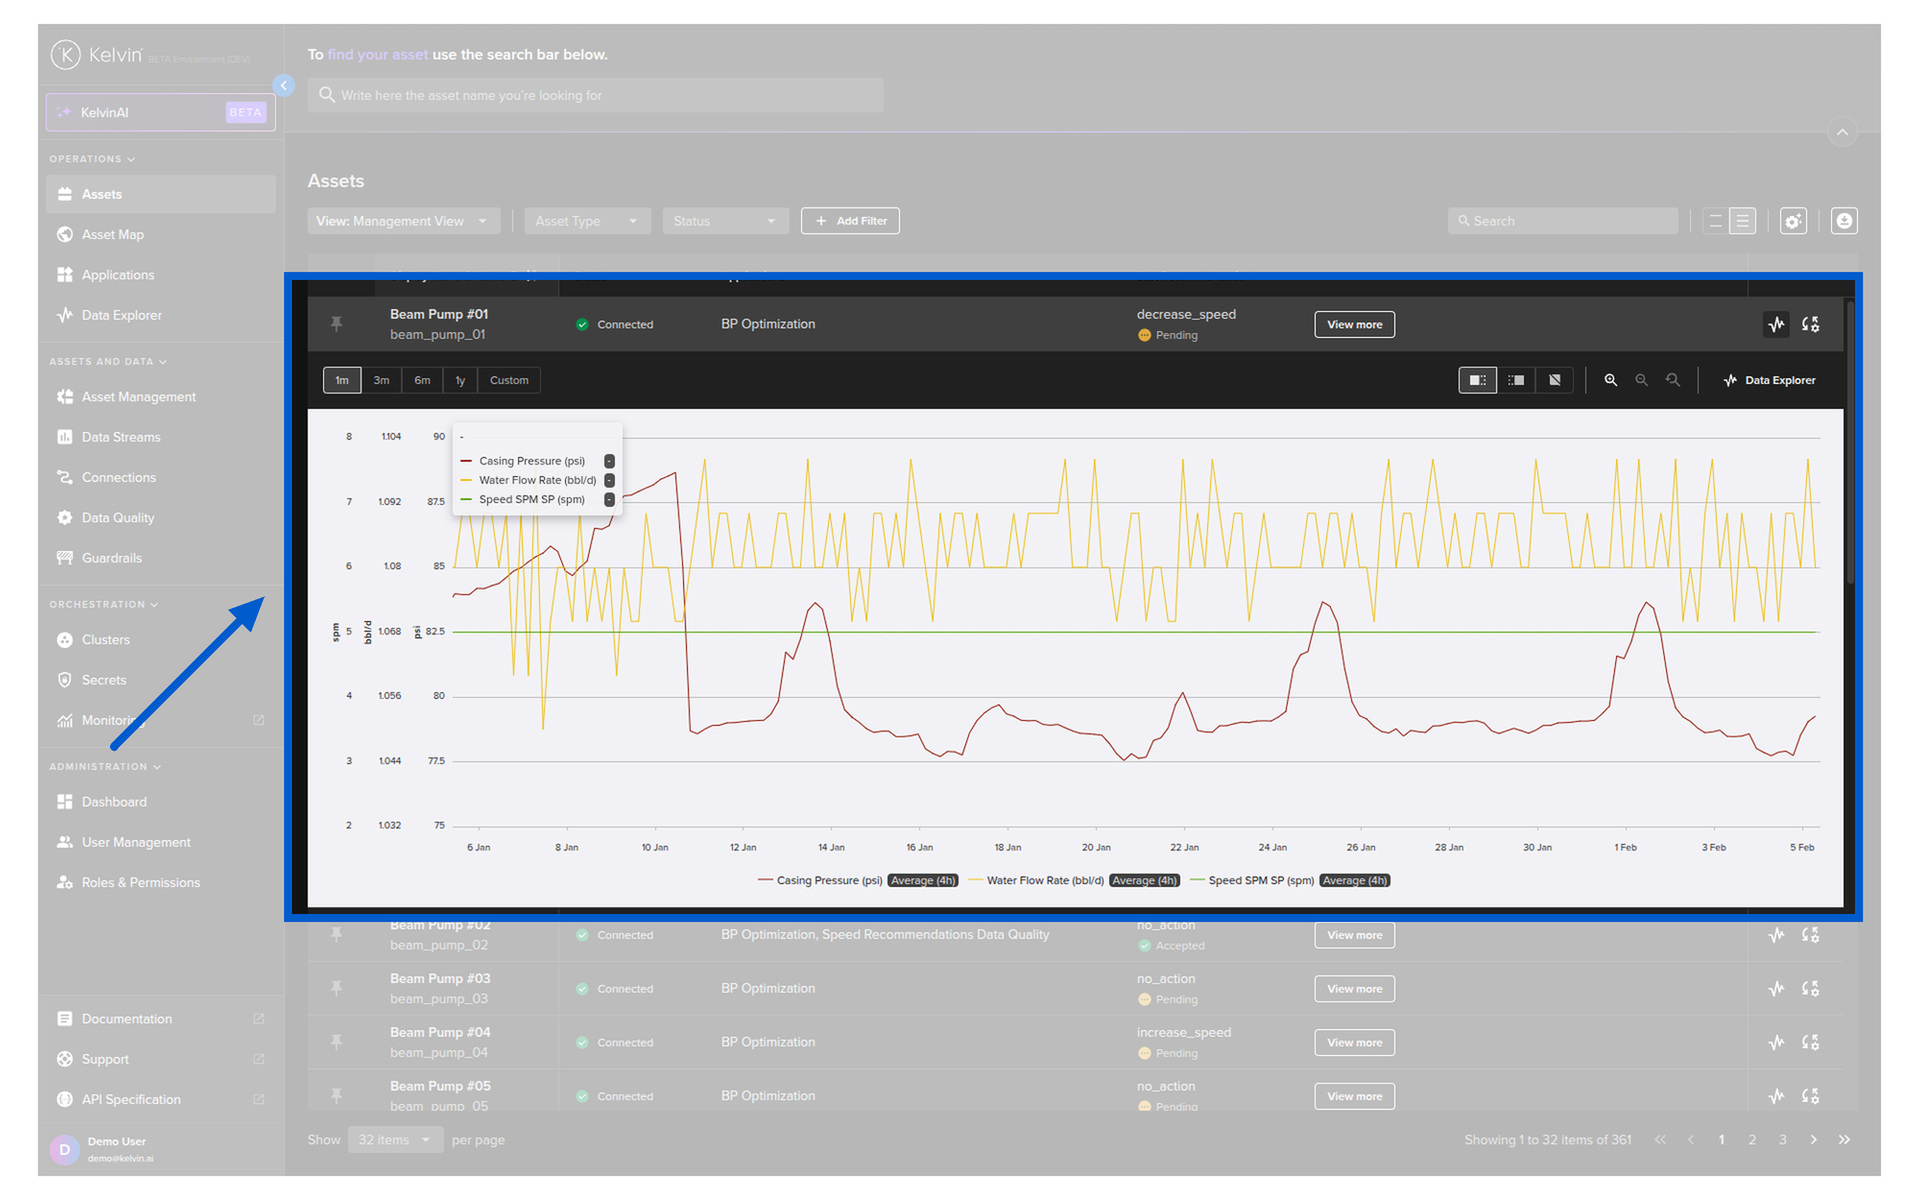
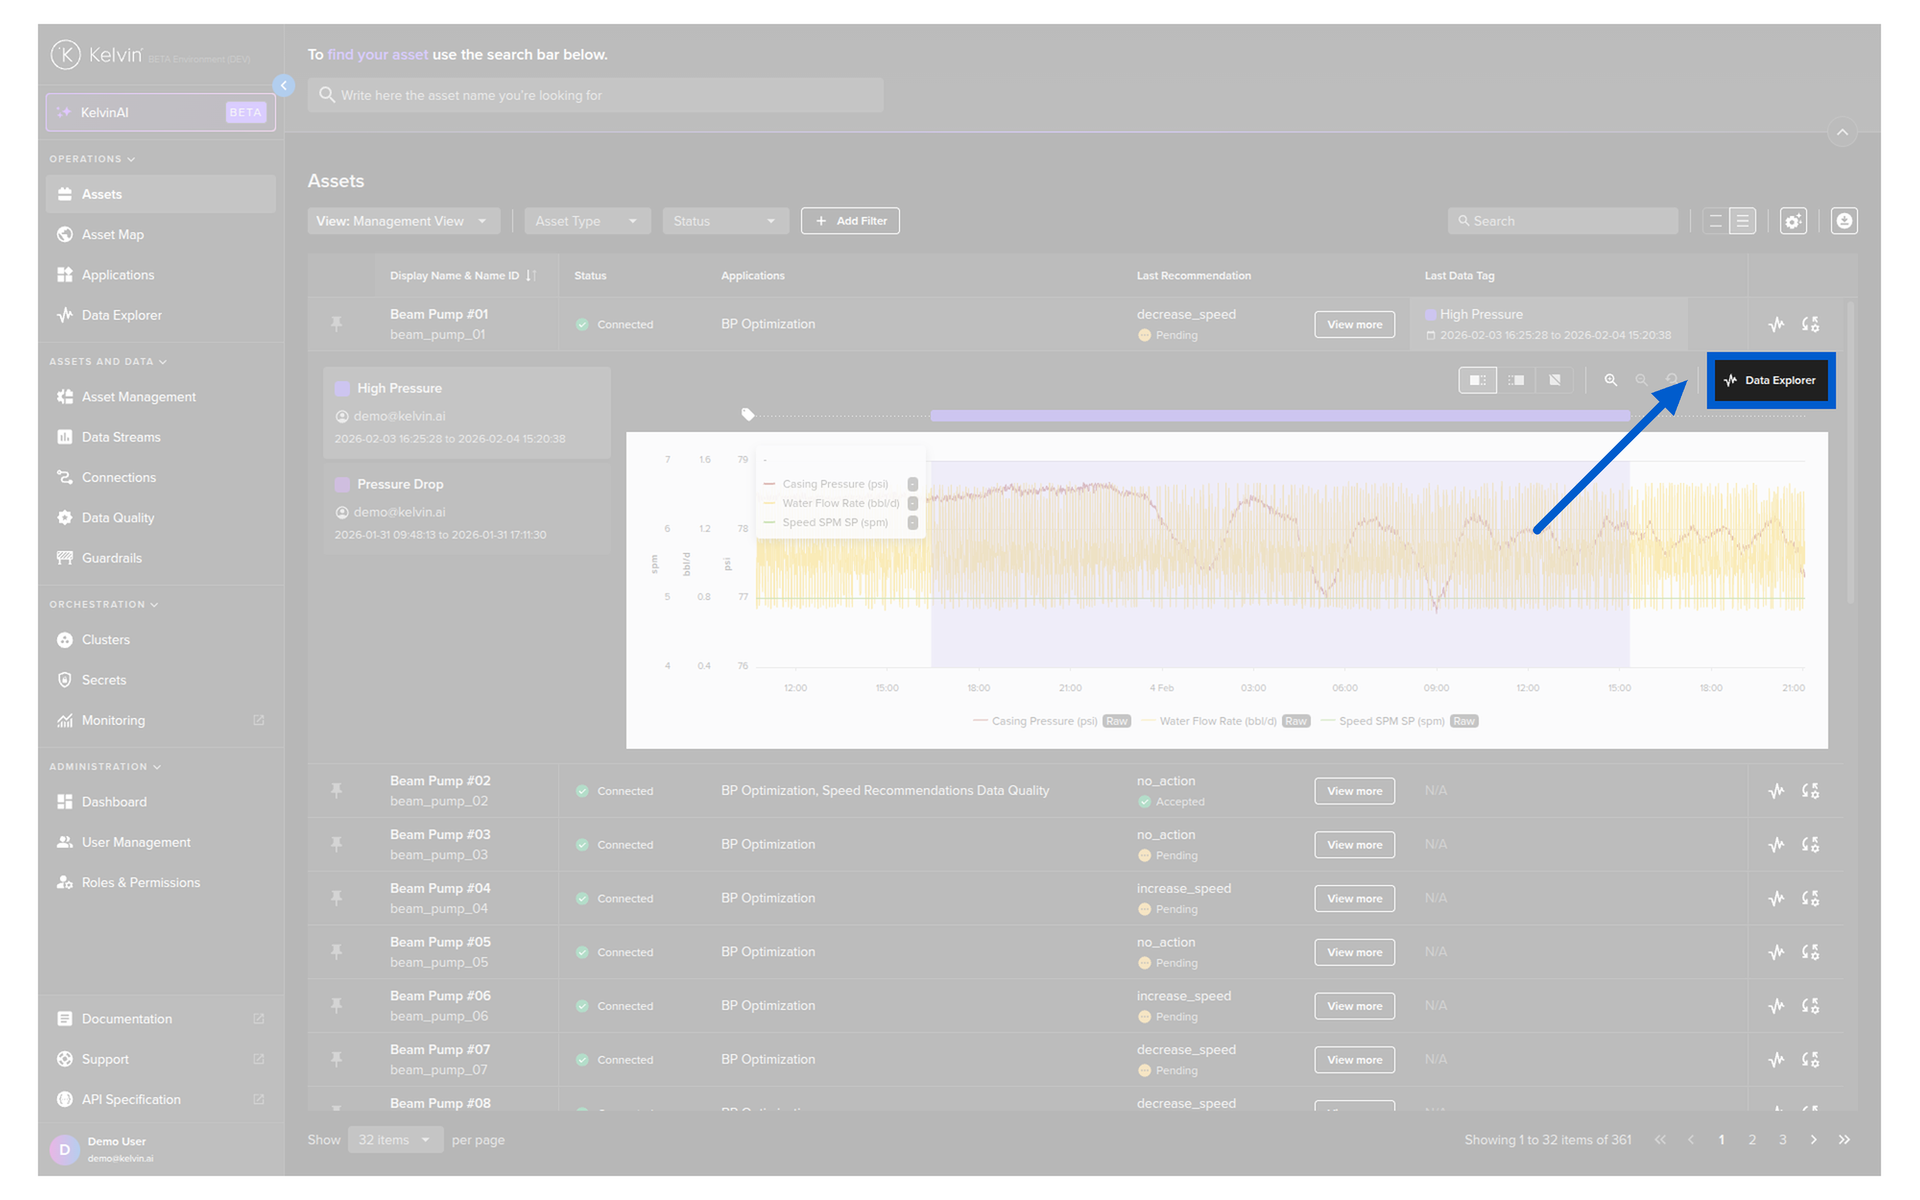
And the Data Explorer will appear inline below the Asset row.
Note
When you select another row's Data Explorer, then the previous inline Data Explorer will close.
If you need the full Data Explorer experience and features, click on the Data Explorer button to open the Data Explorer page.
Note
To maintain your analysis, the current view settings in the Inline Data Explorer and the Asset will be automatically populated in the Data Explorer page.
These view settings are not persisted in the Data Explorer.
Refreshing the Data Explorer page resets the view, including the time range, back to the original.

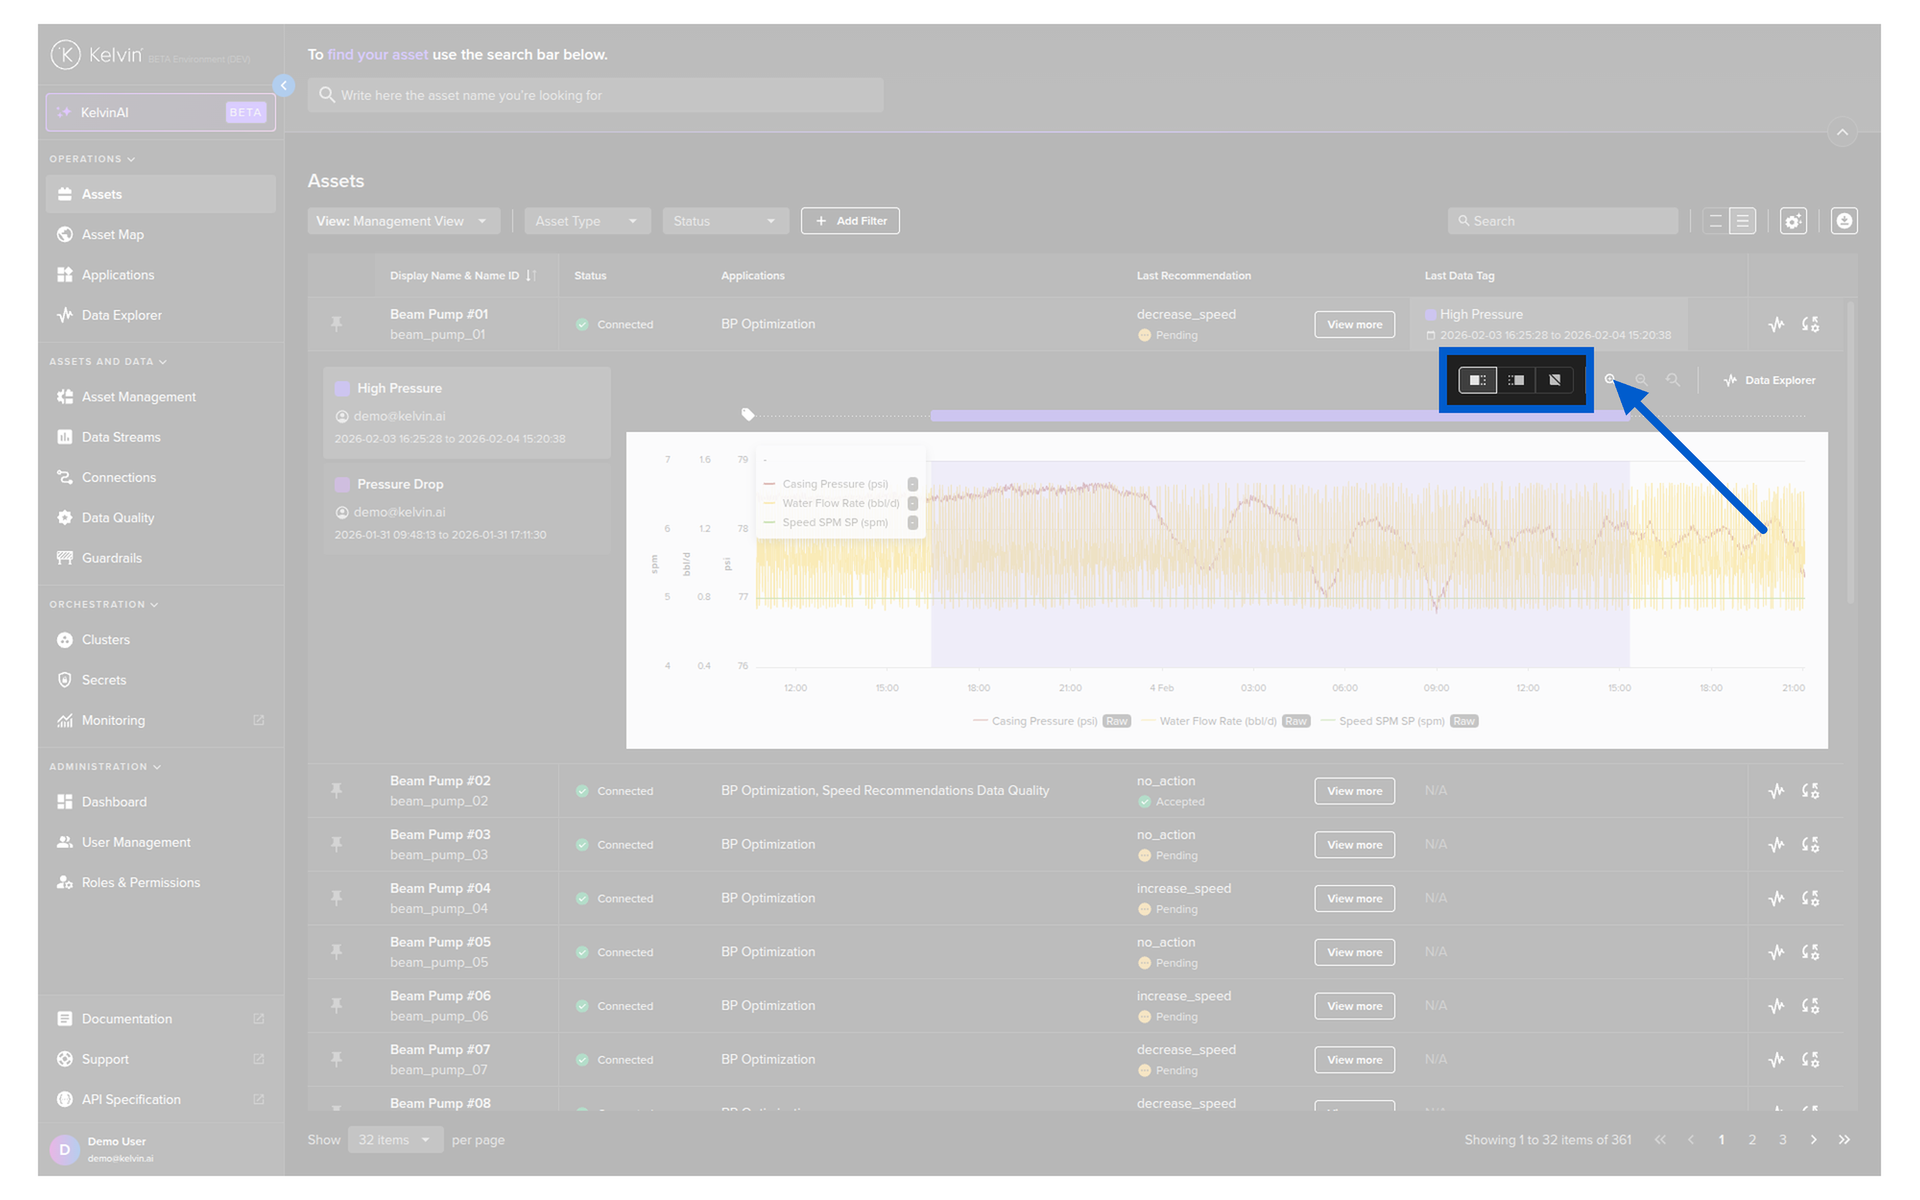
There are also a number of useful features available.
You can select a timescale for the chart.
Warning
To keep the chart responsive, the data may be automatically aggregated to reduce the amount of data that needs to be downloaded for the chart.
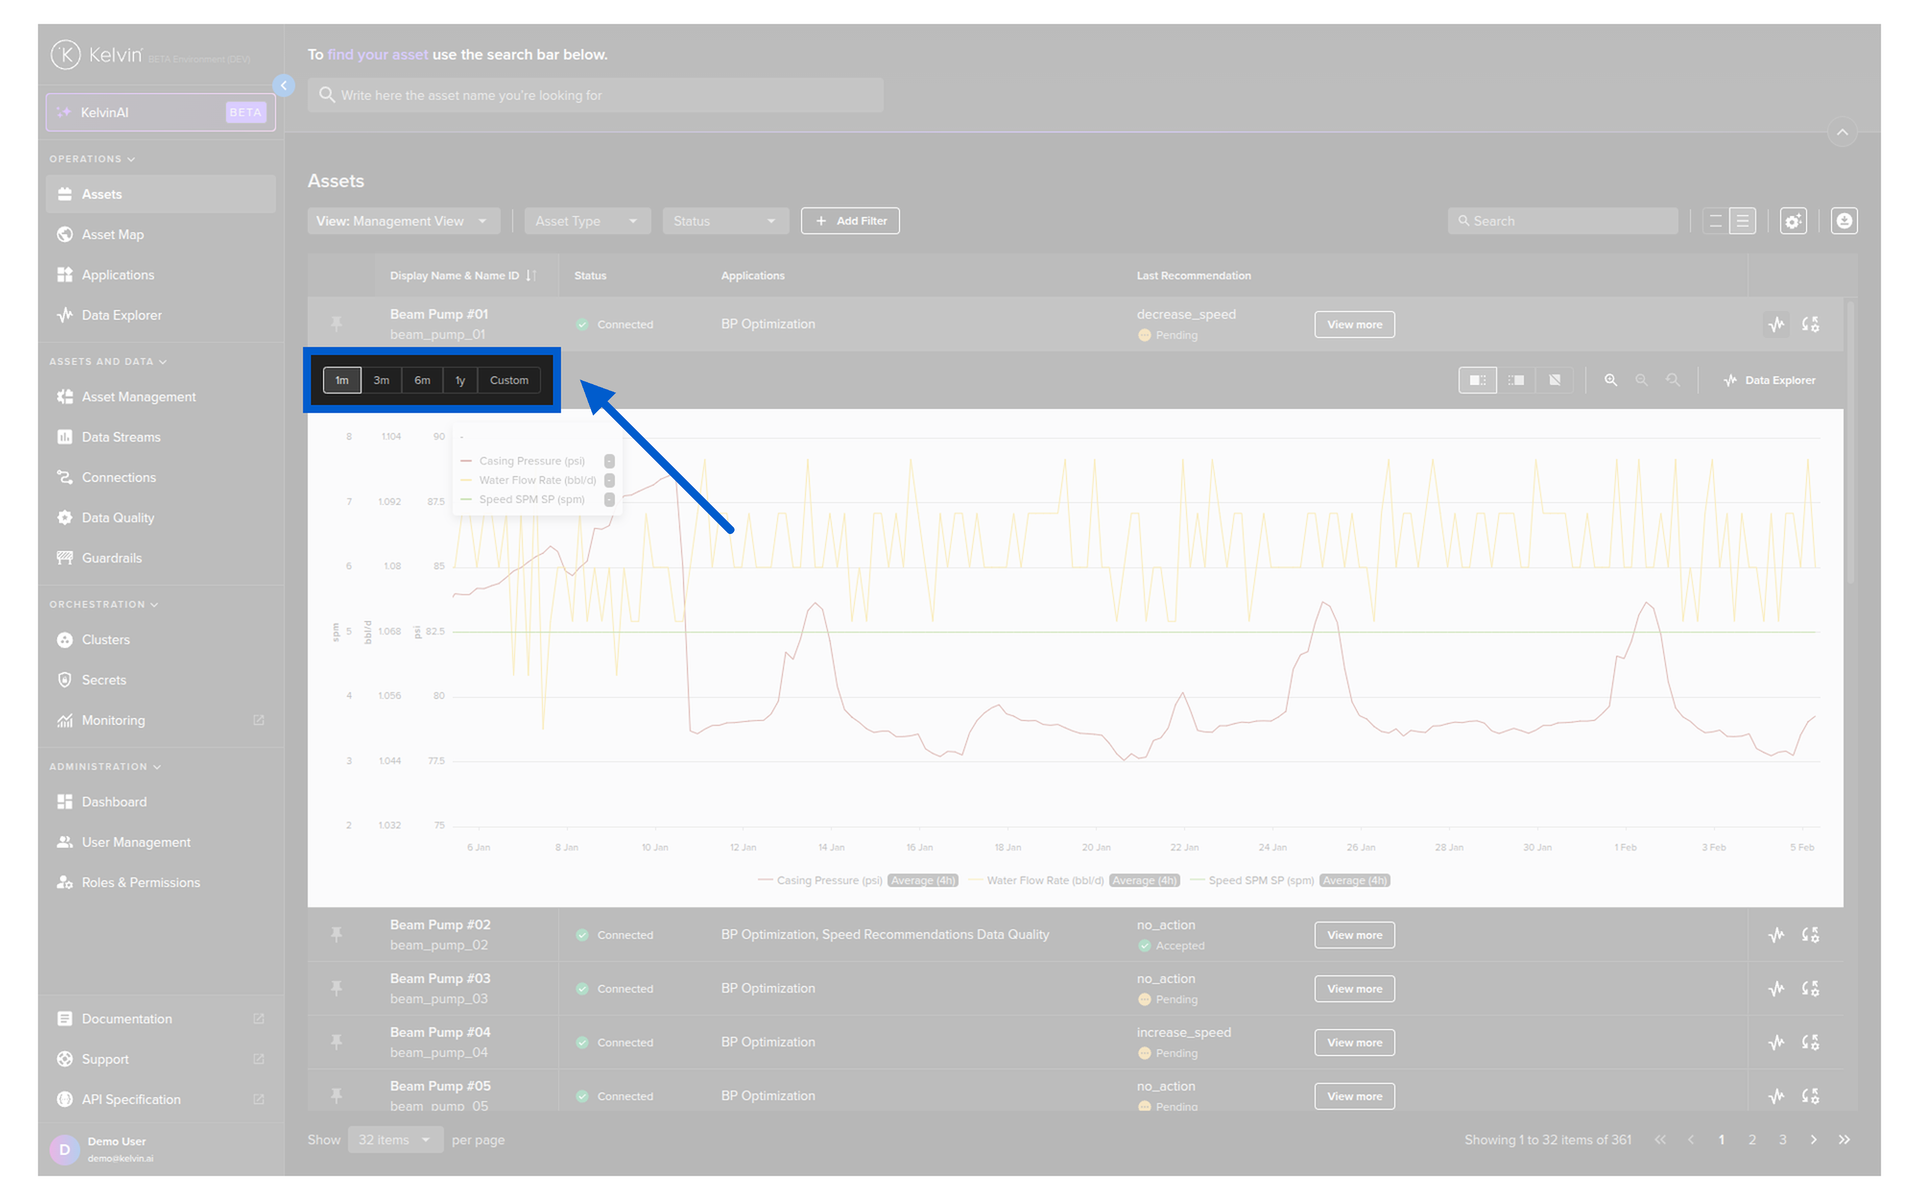
To have full control over the timeframe, use the full Data Explorer.
You can select to hide the legend or place it on the left or right hand side of the Data Explorer chart.
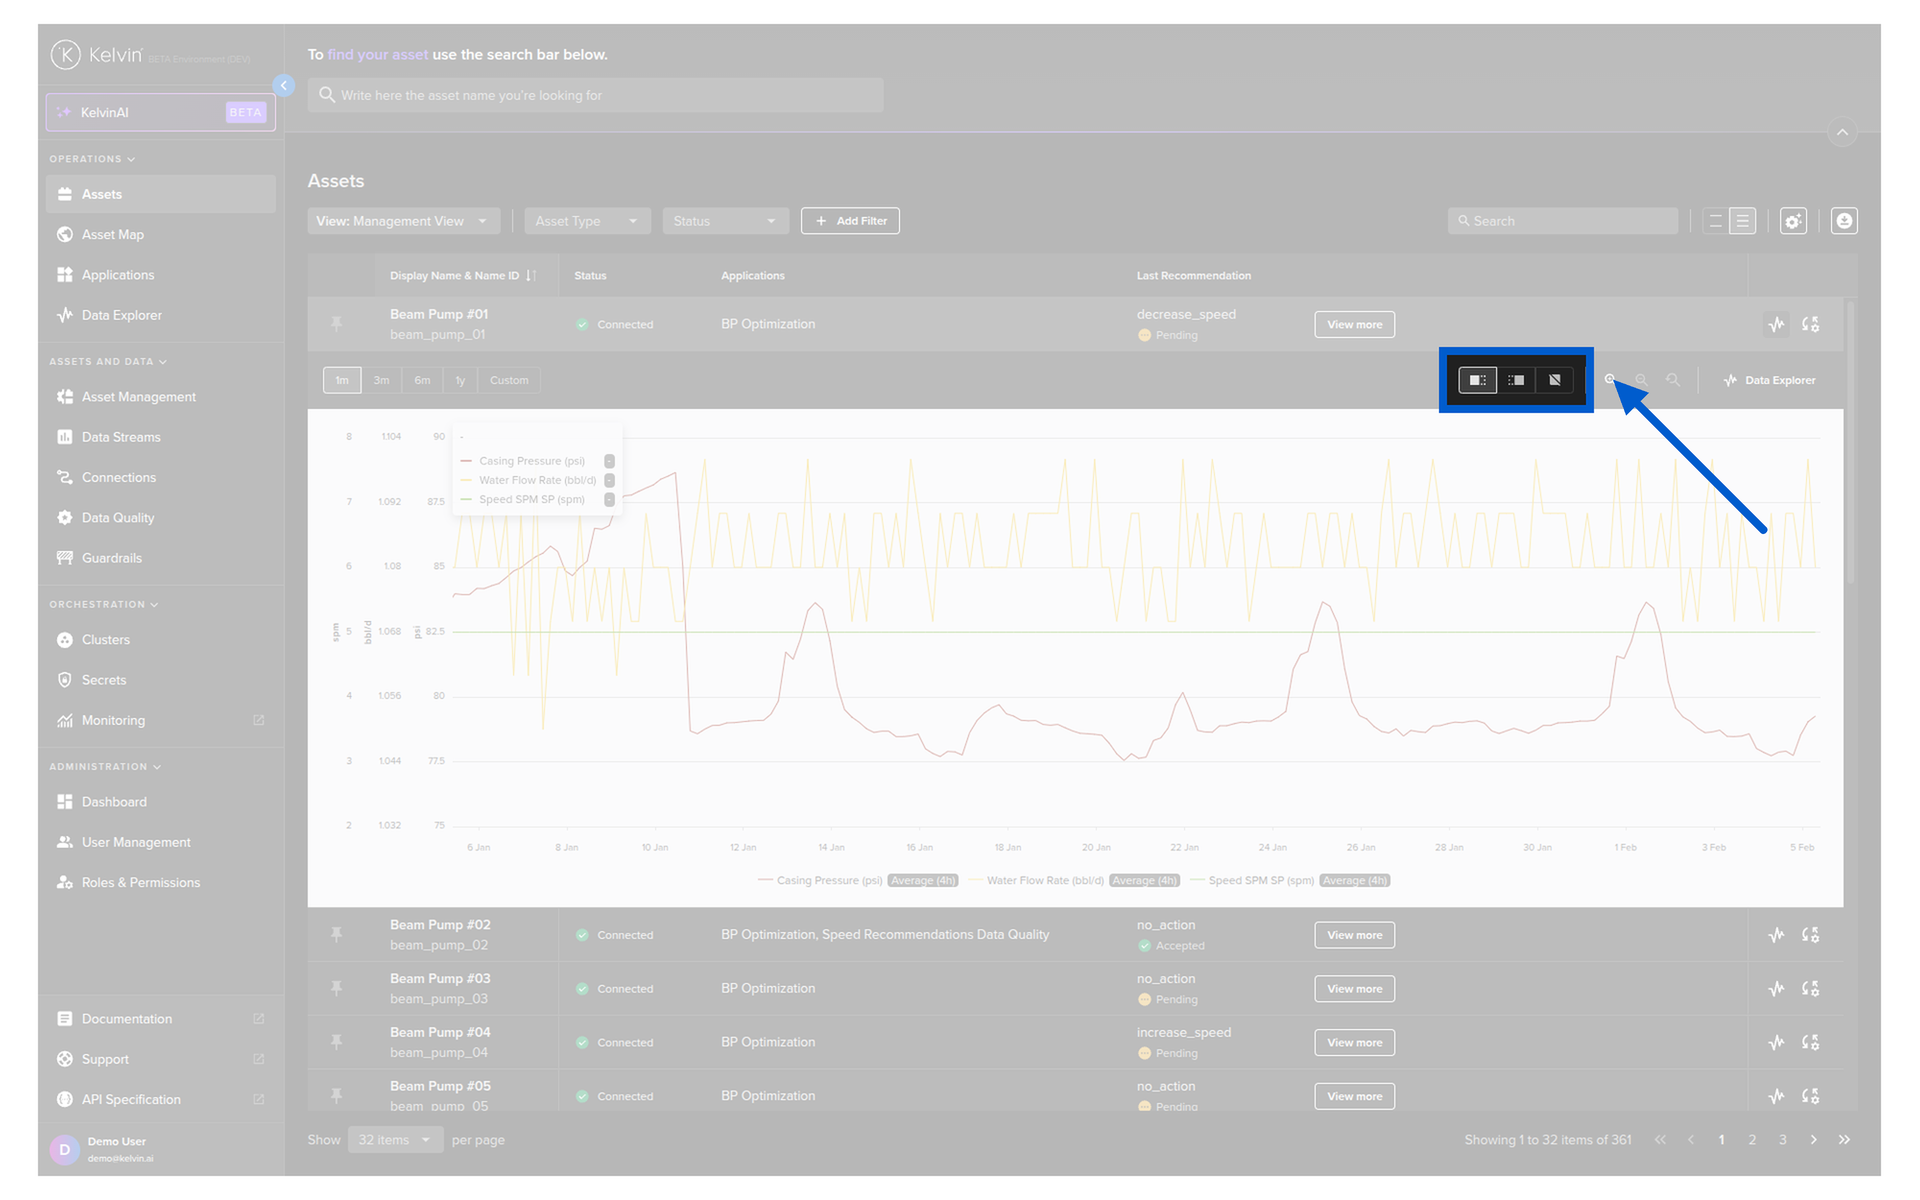
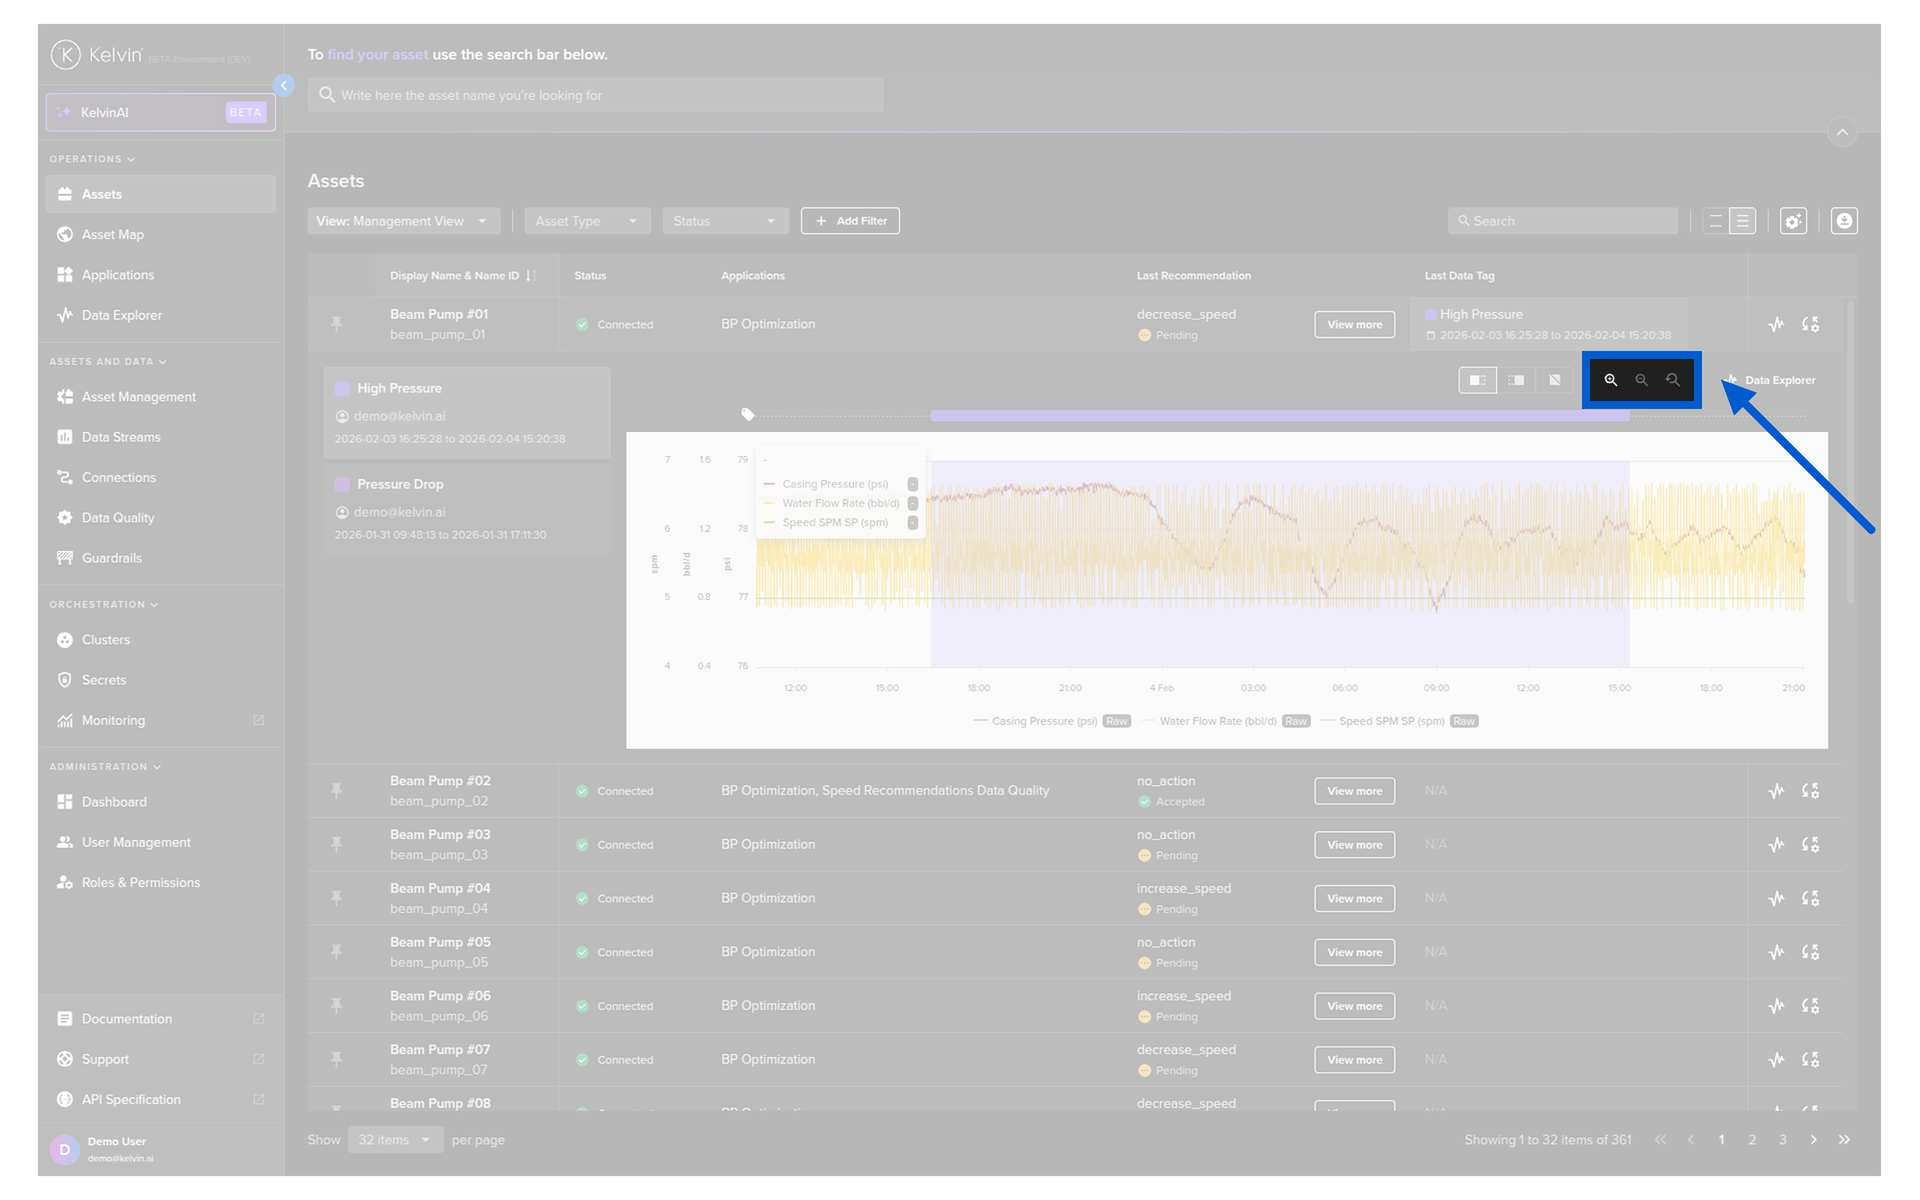
You can manually zoom in/out and reset it with these icons.

Inline Manual Controls
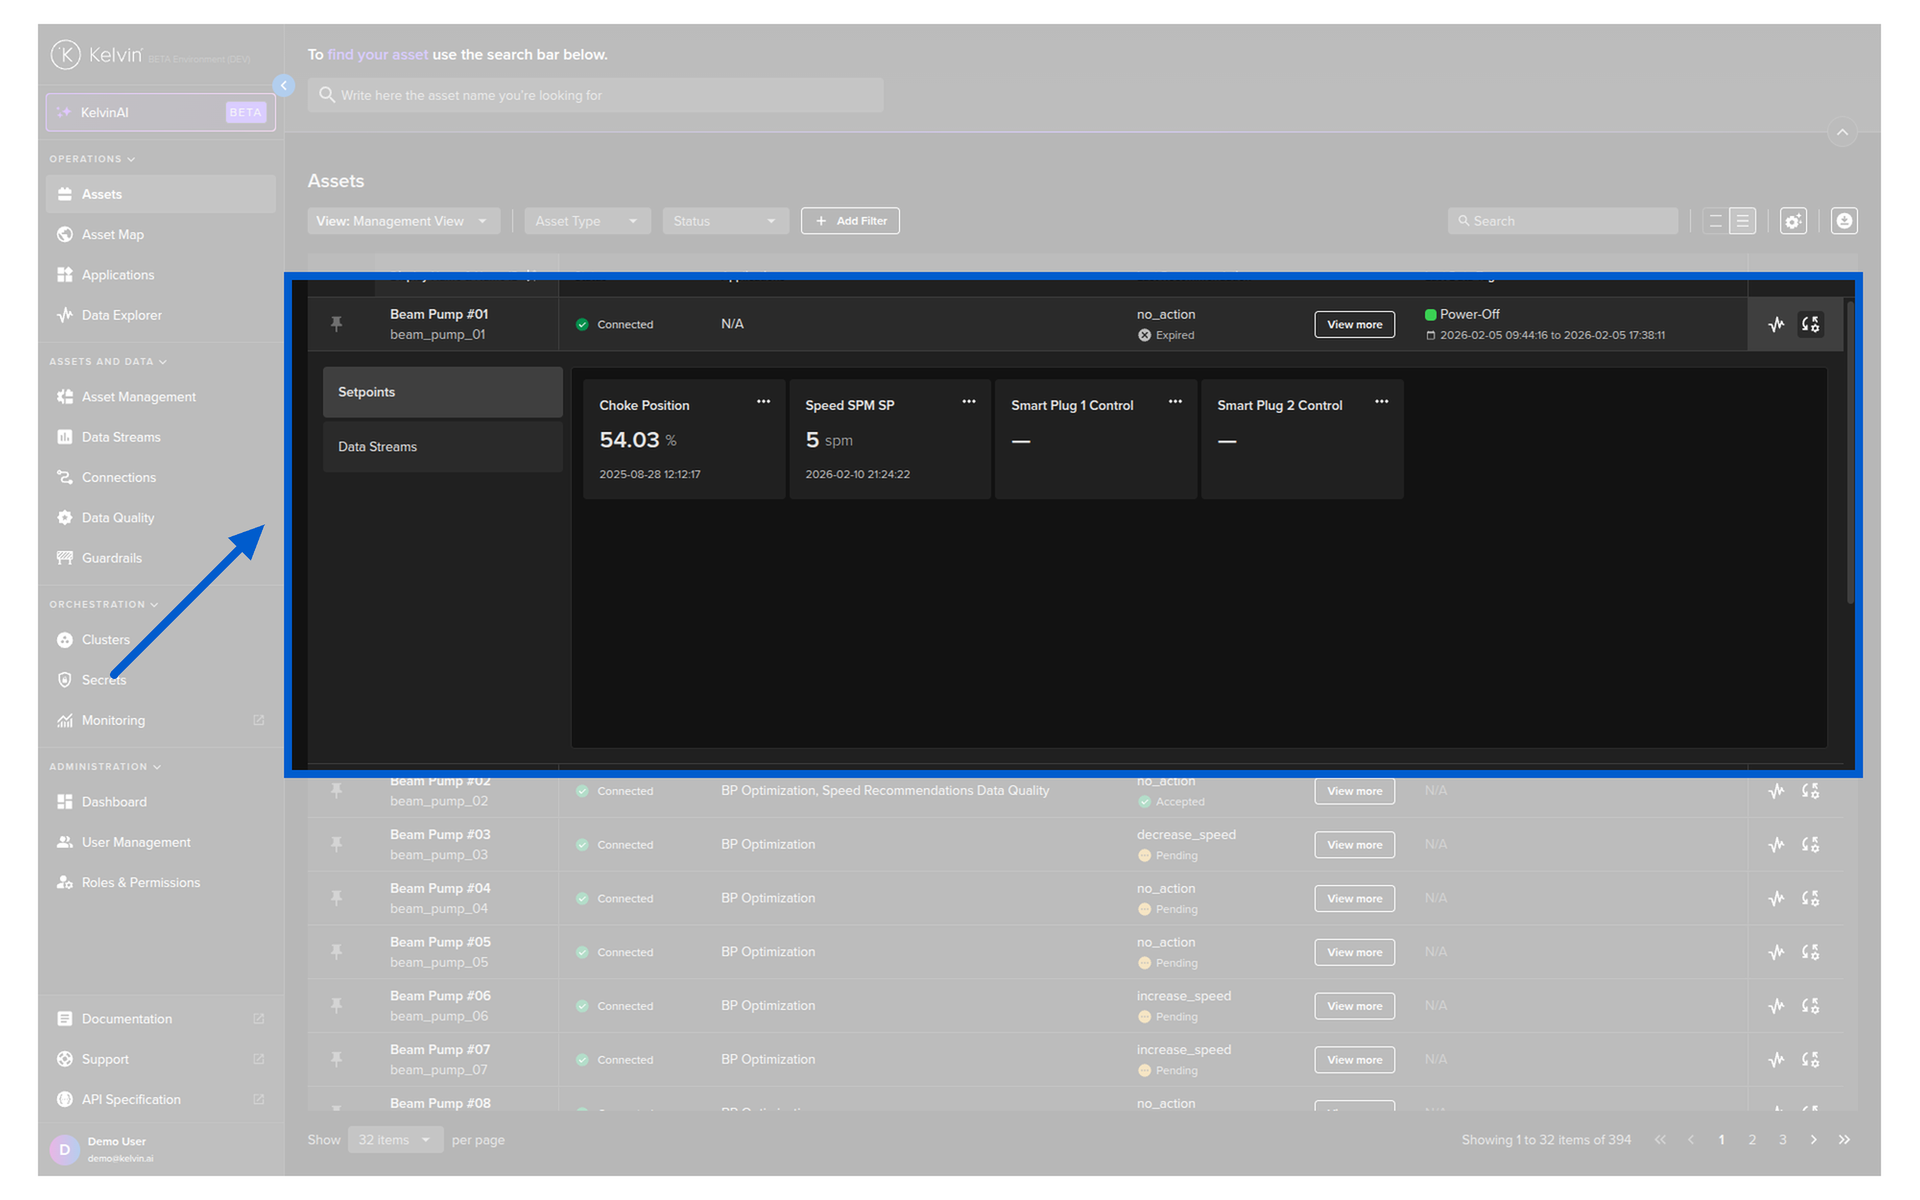
You can quickly see the Manual Controls and Data Streams in the table for an Asset without having to switch back and forth to the Asset details page.
Click on the Manual Controls icon;
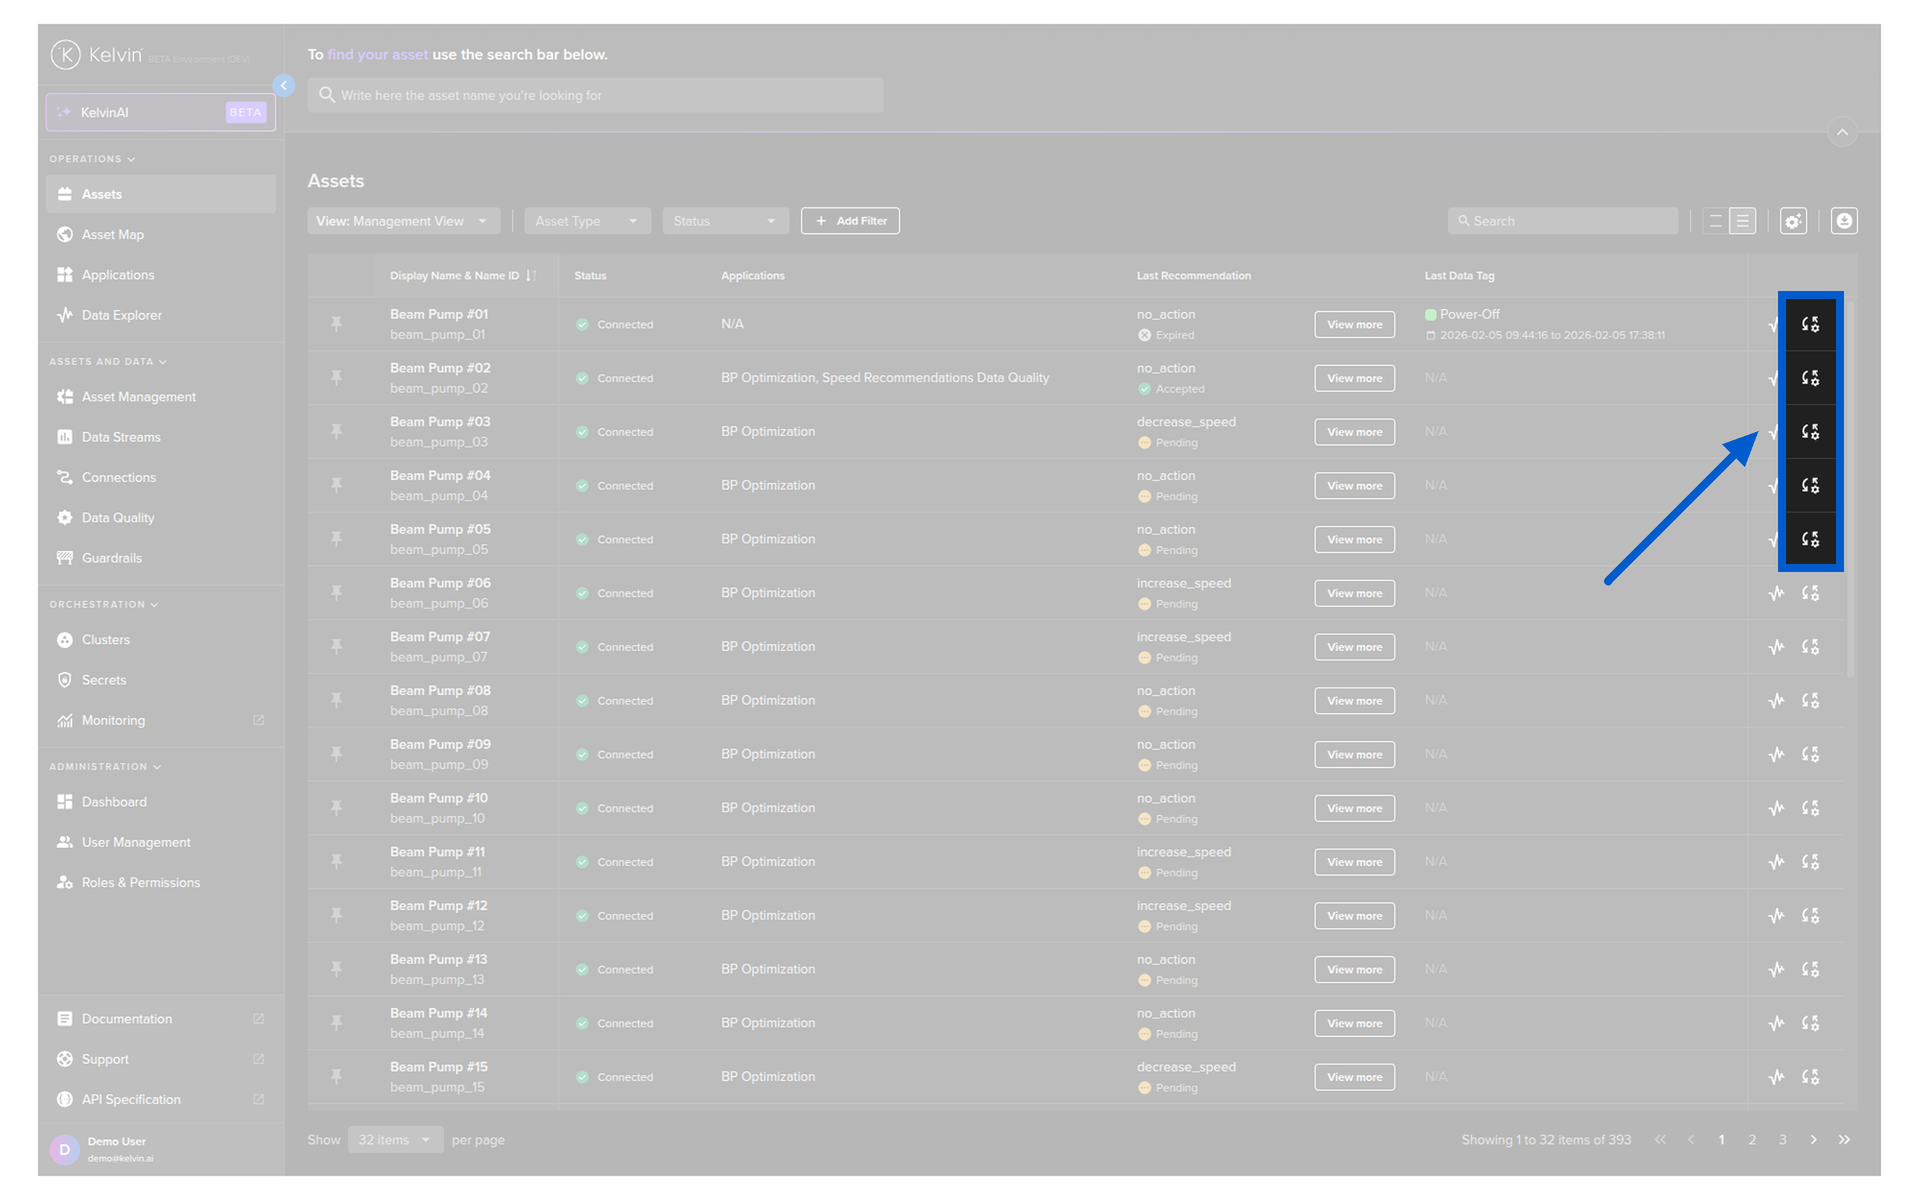
And the Manual Controls will appear inline below the Asset row.
Note
When you select another row's Manual Controls, then any previous inline Manual Controls will close.

The list on left has the two defaults; Setpoints and Data Streams.
Note
You can also add more custom groups which will be shown here and in the Asset's details Manual Control tab.
Click here to read how to setup additional groups.
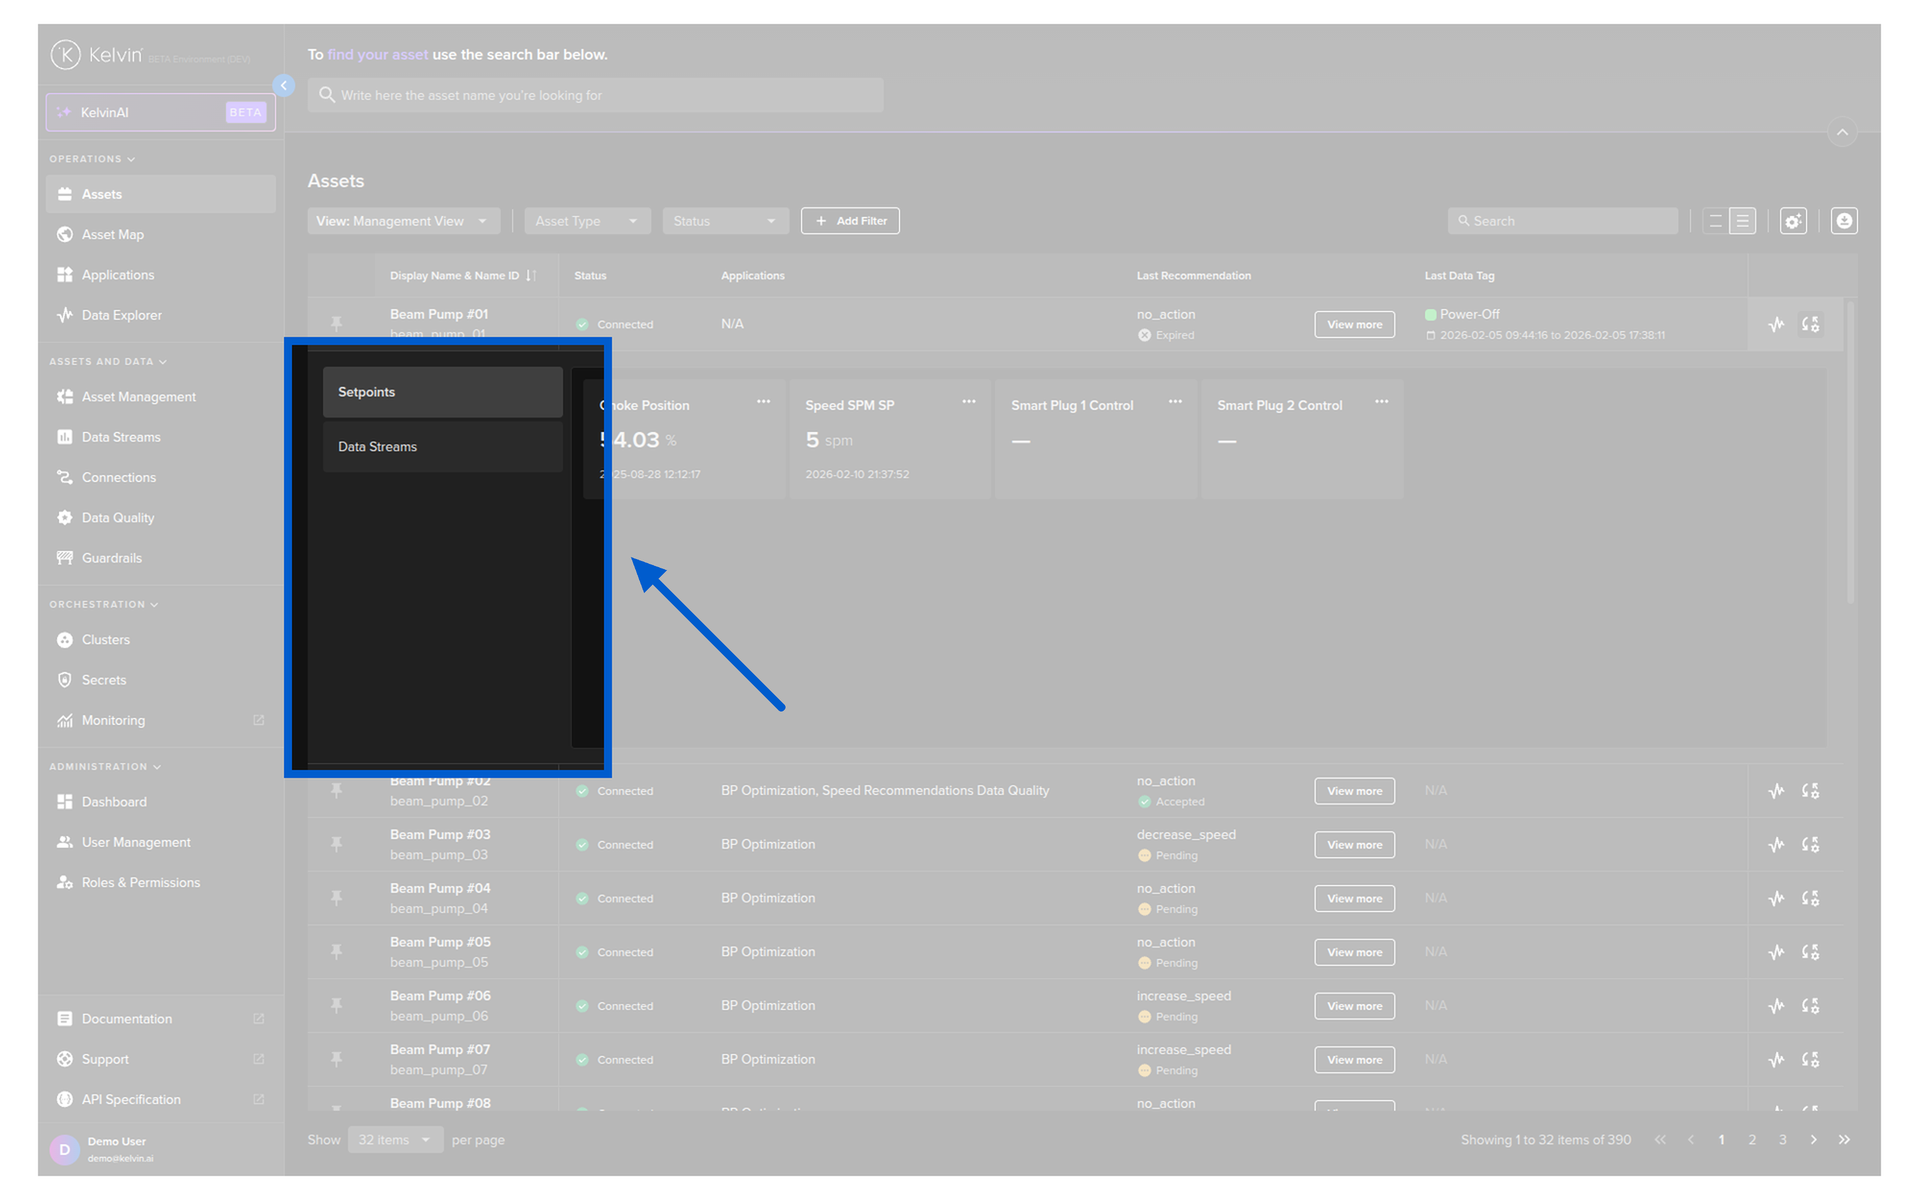
For the defaults;
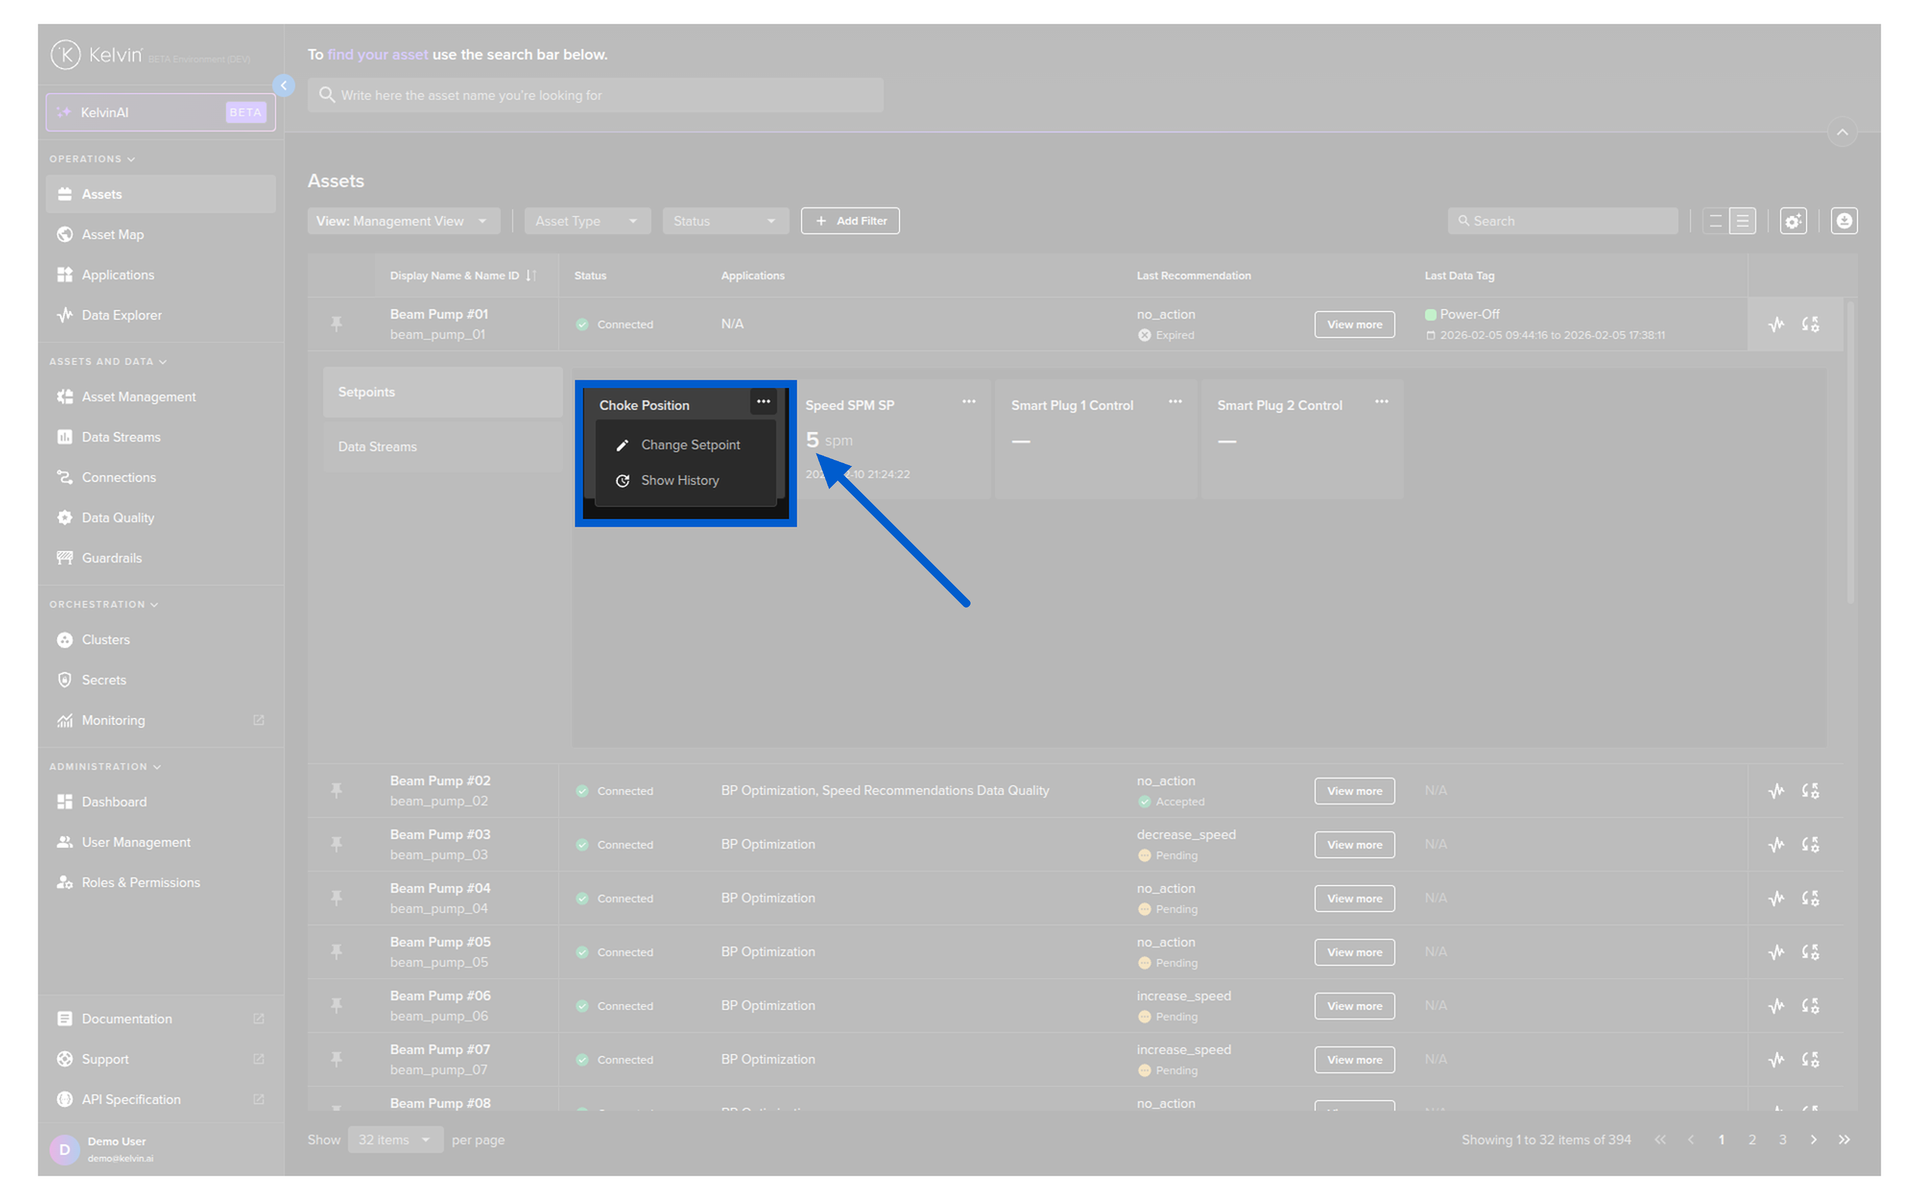
Setpoints
These are Data Streams that you can read and write to. When you are in Setpoints;
Click on the More icon;
Note
Click here to learn how about each option in this drop down menu.
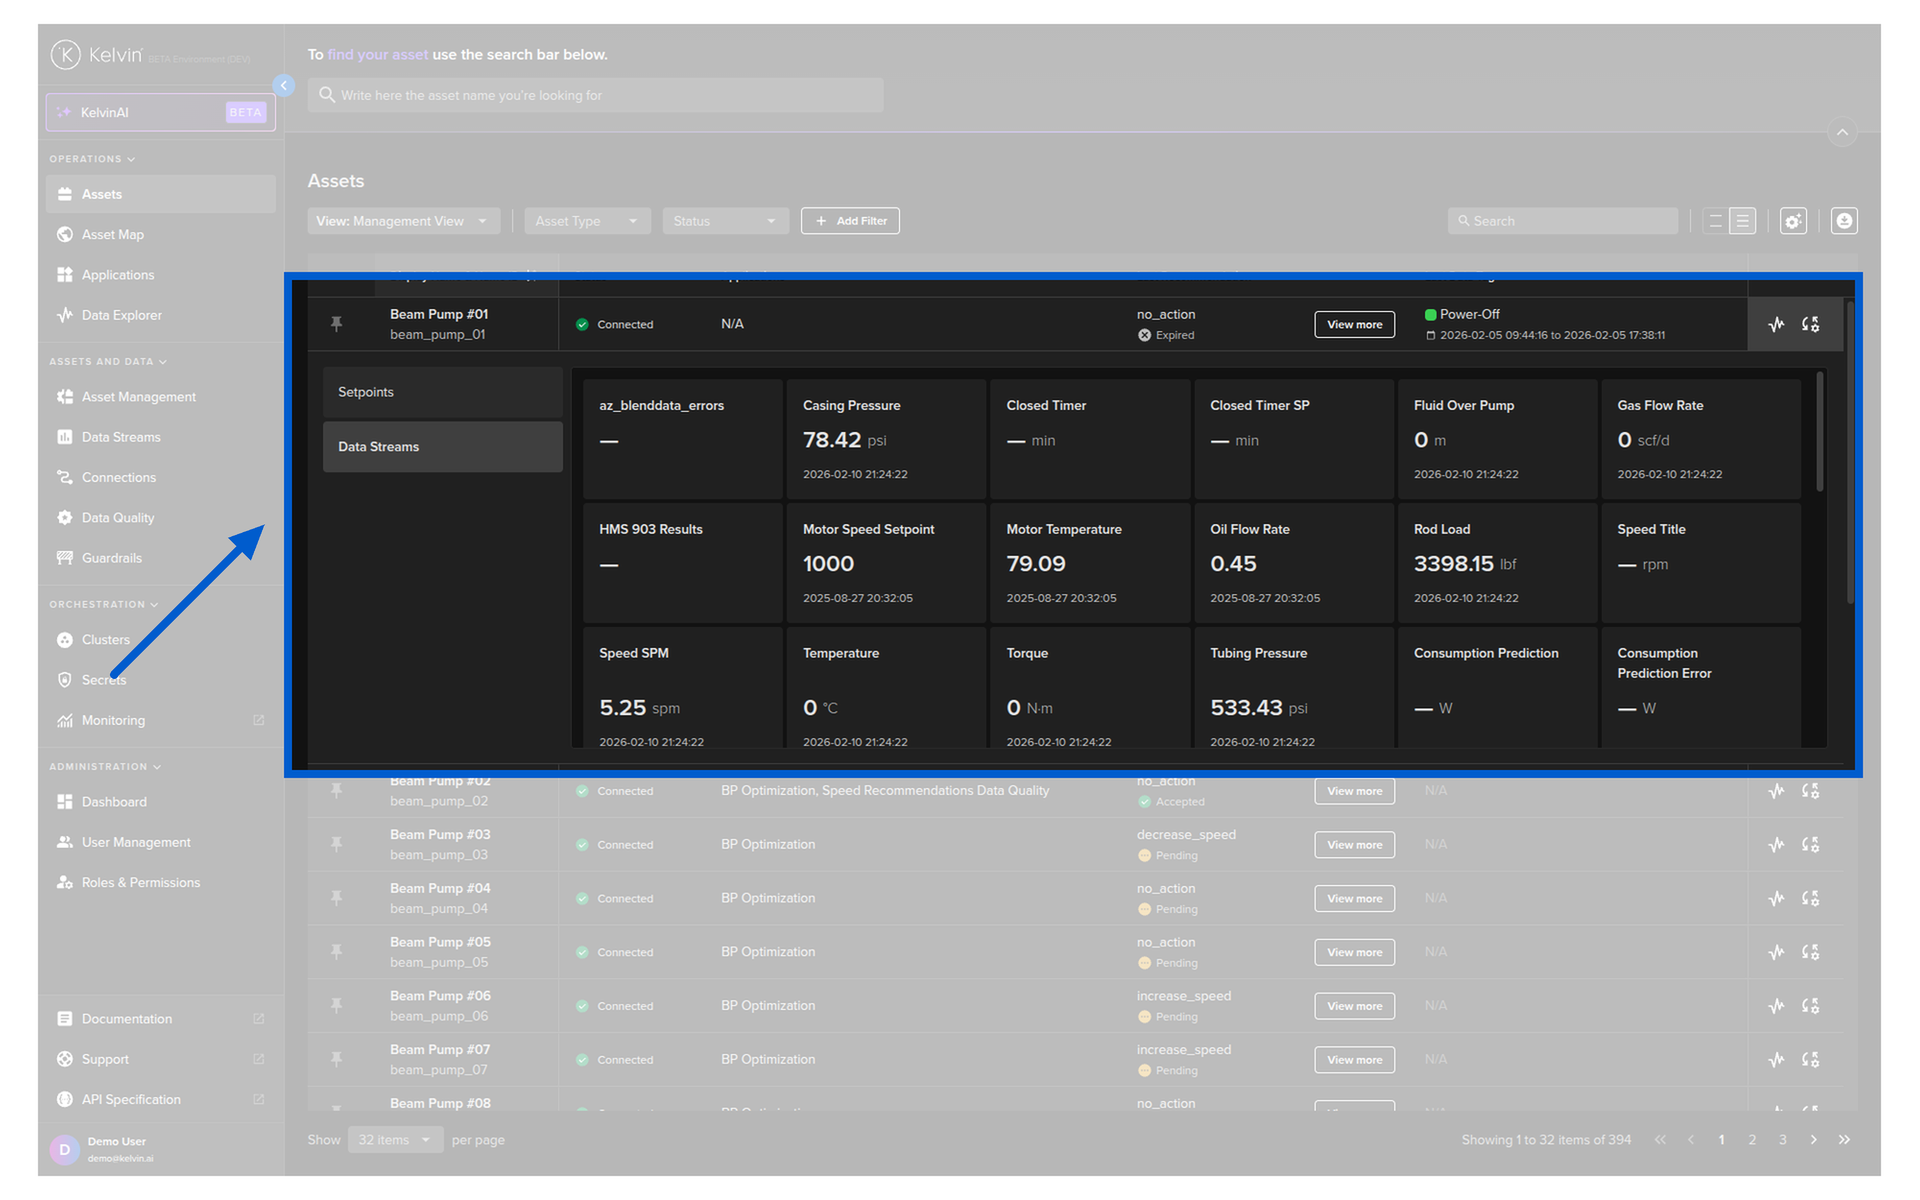
Data Streams
These are read only Data Streams.
Click on the Data Stream option and you will see all the Data Streams and their current values.
Inline Recommendations
You can quickly see a list of Recommendations in the table for an Asset without having to switch back and forth to the Recommendation popup.
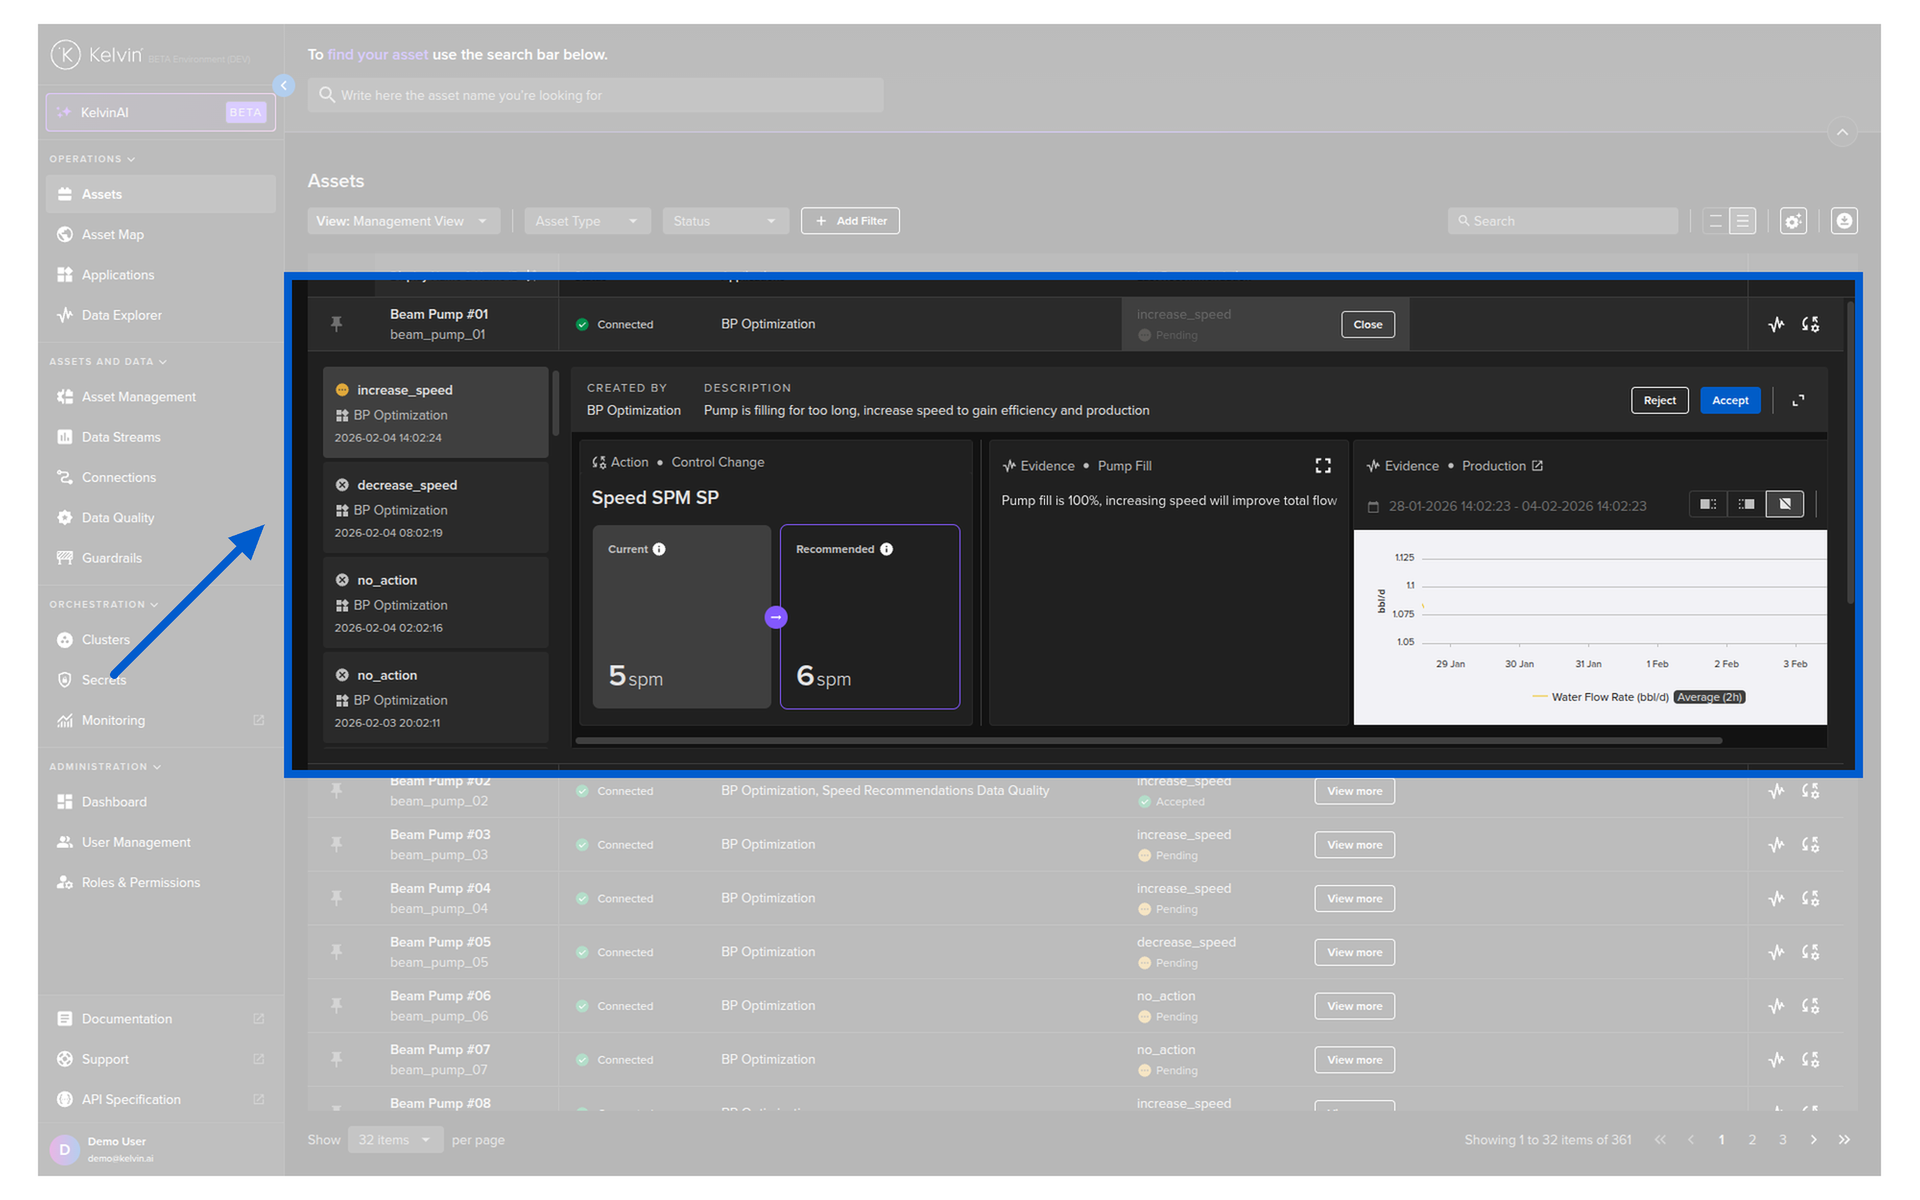
Click on the View More button and the inline Recommendation will appear.
On the left you will see a list of the most recent Recommendations active for this Asset.
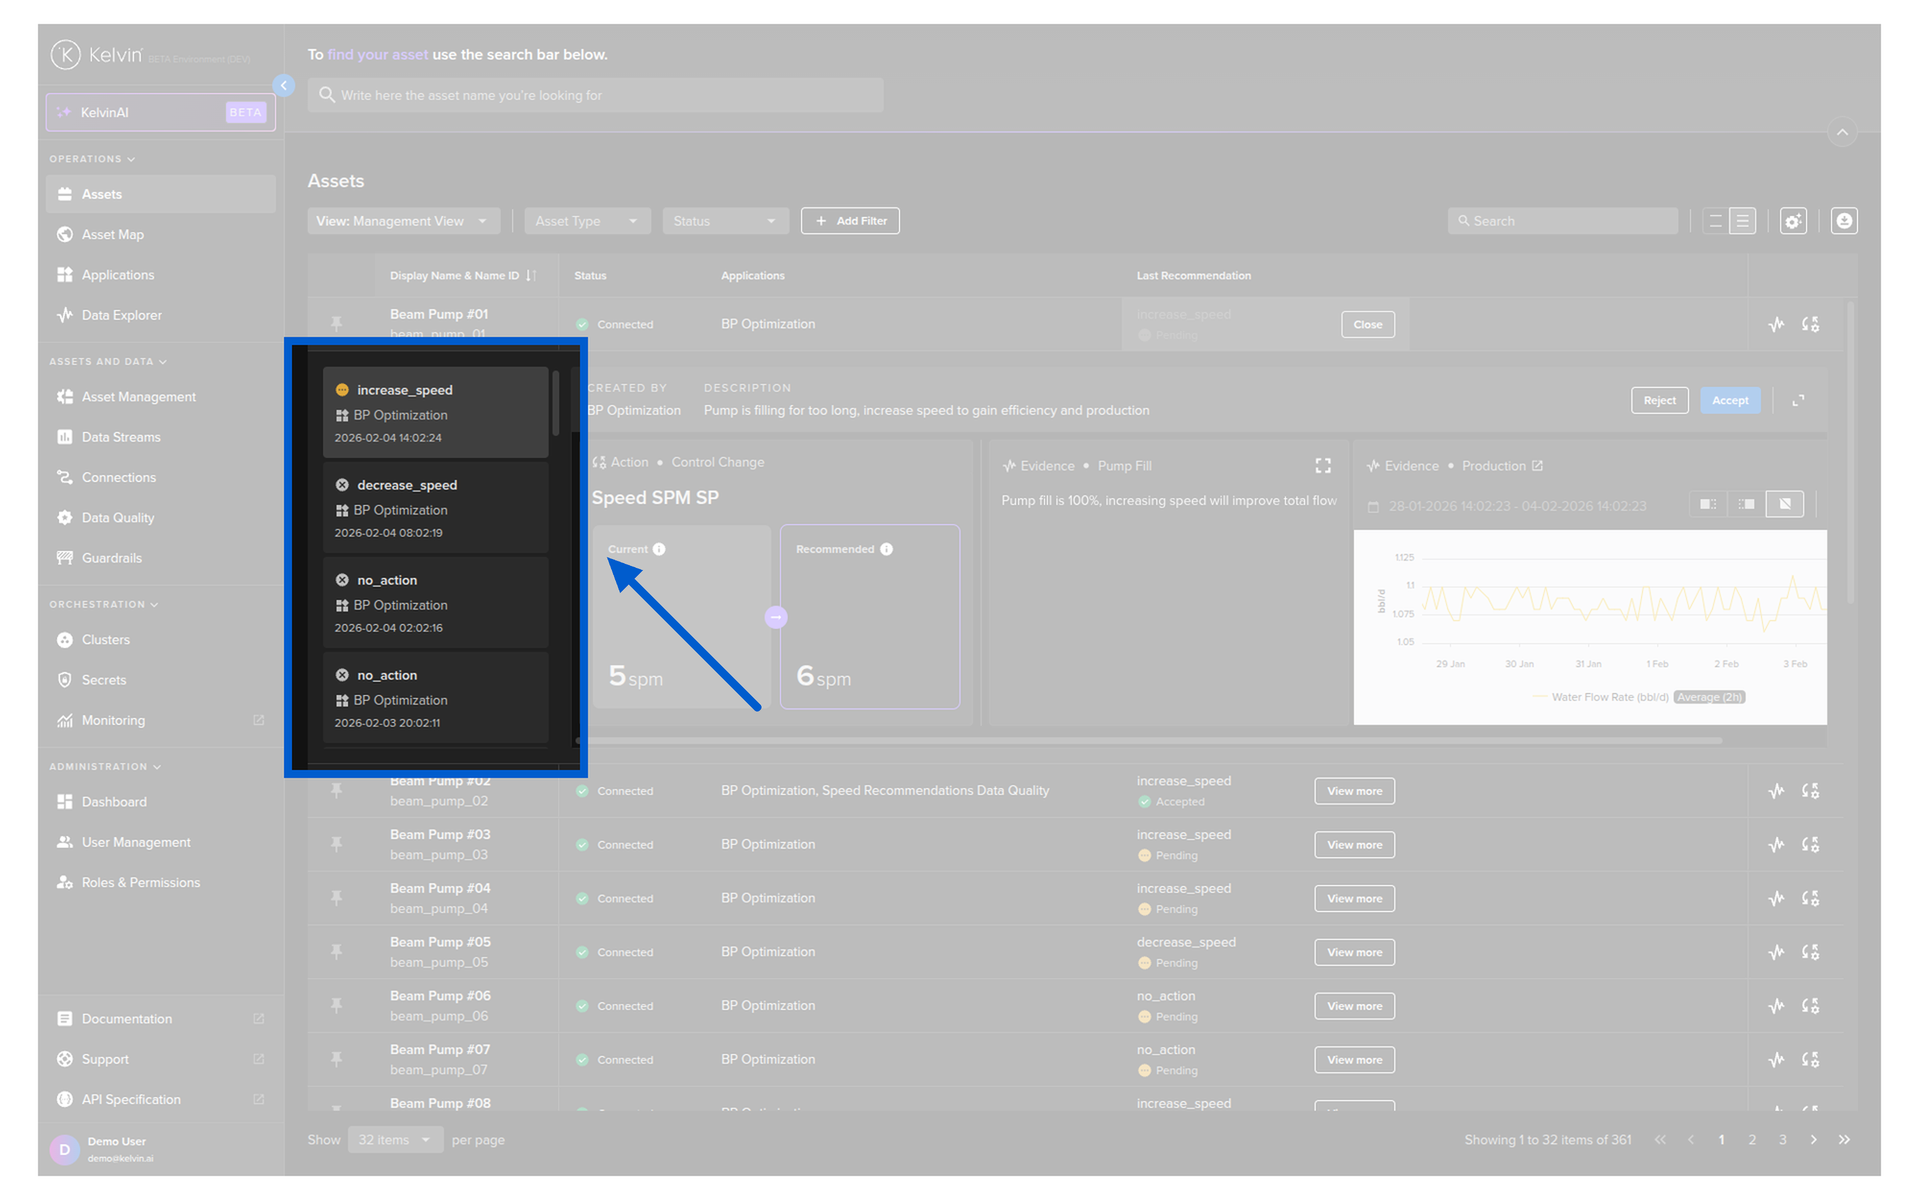
On the right is about the current Recommendation that is selected.
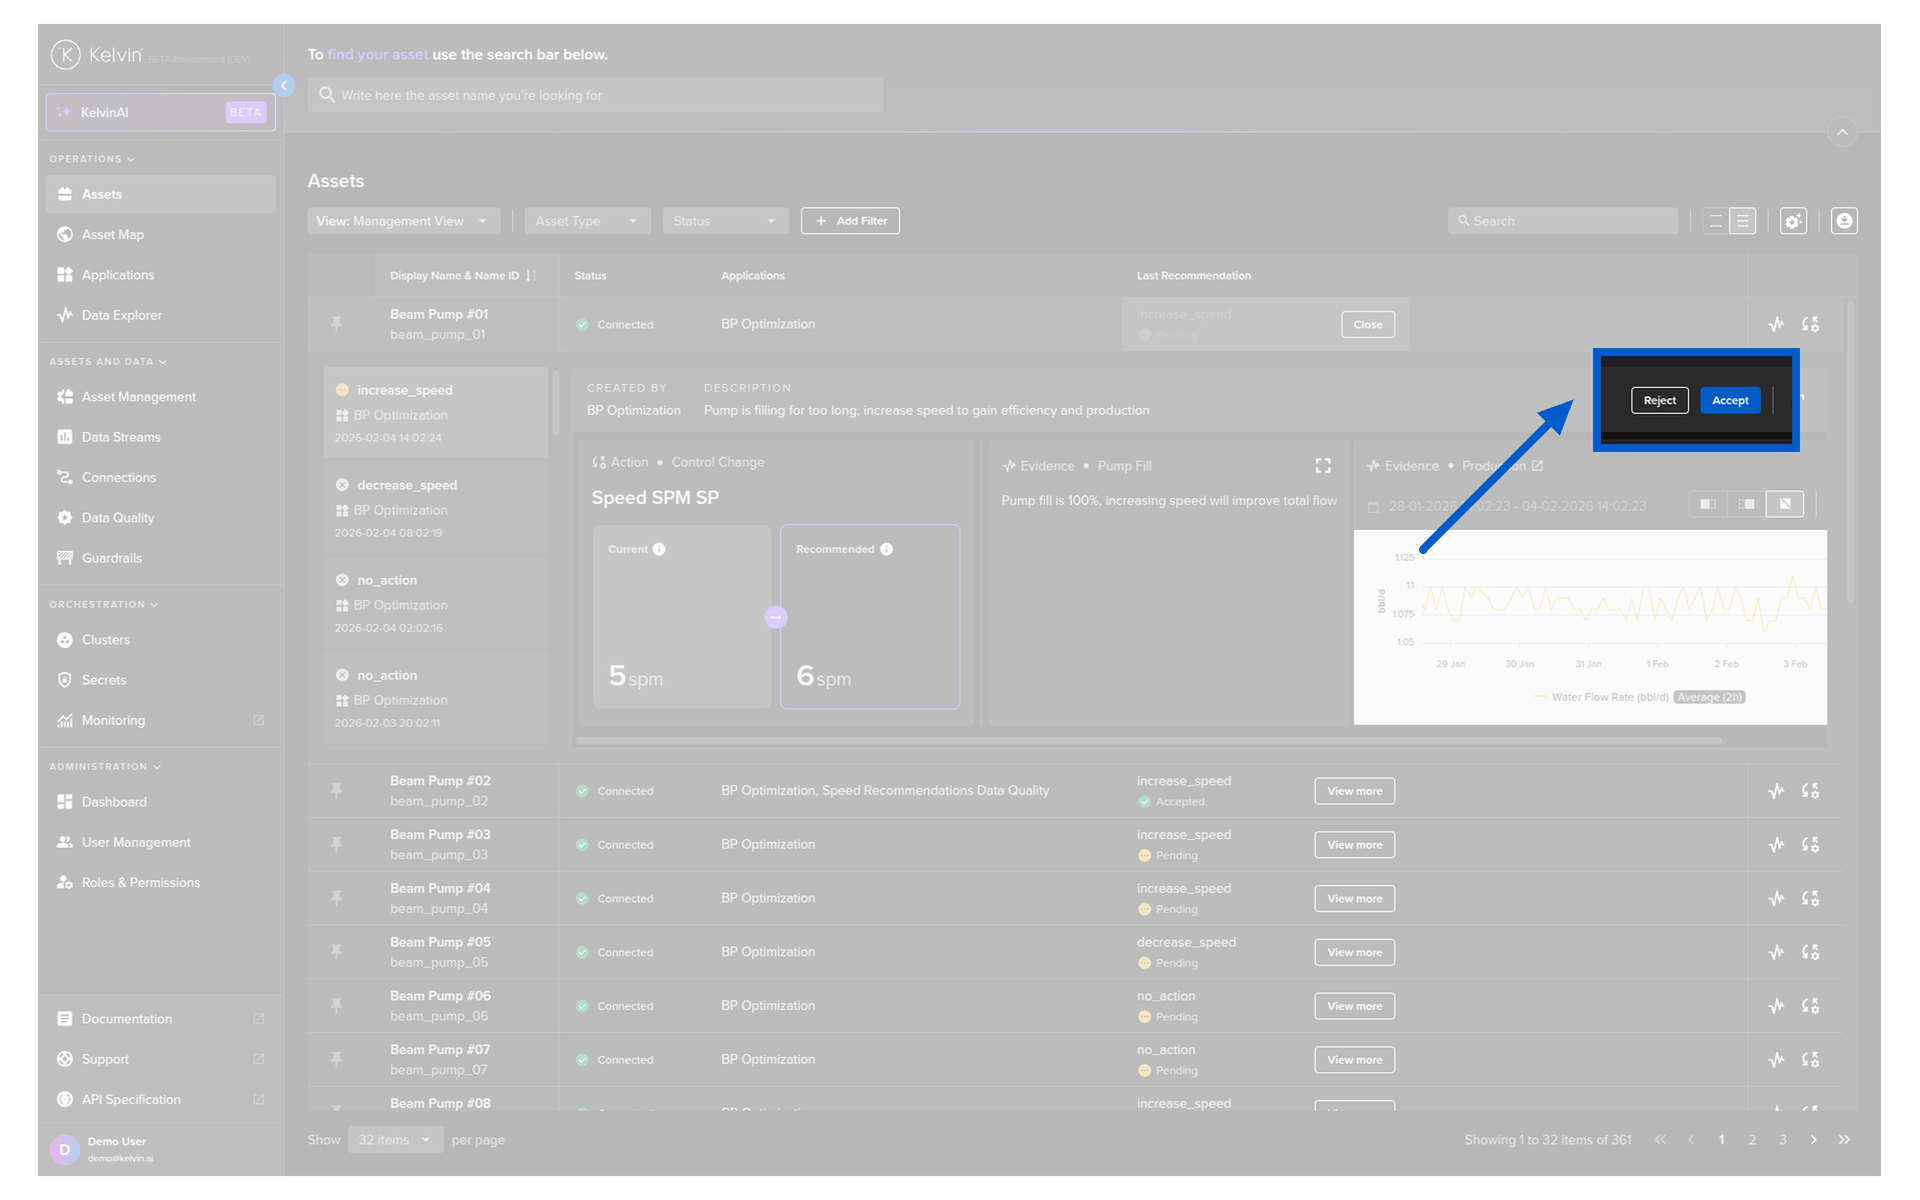
Most important at the top you will see the action buttons to either Accept or Reject this Recommendation.
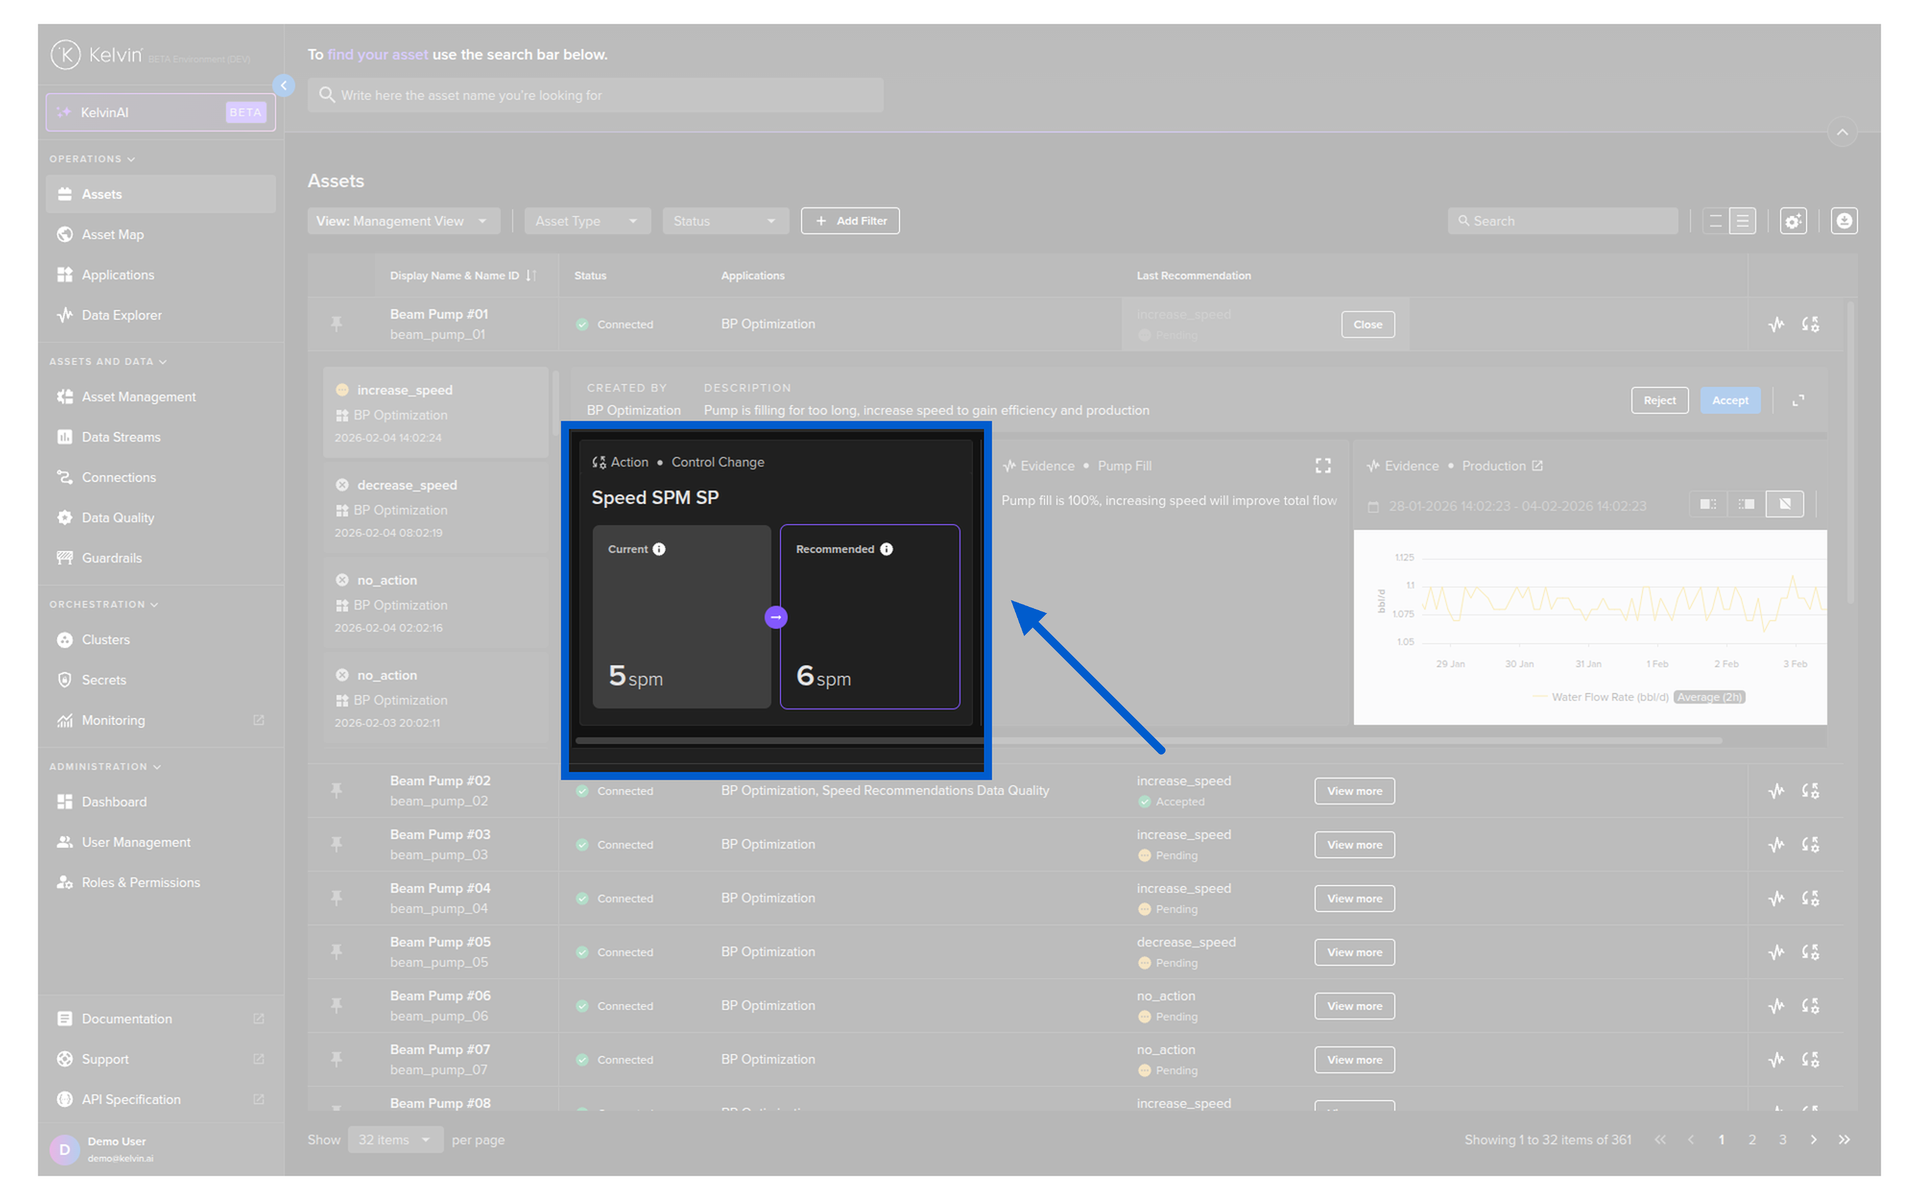
Below this you can see the list of Actions in cards that will be taken if the Recommendation is Accepted.
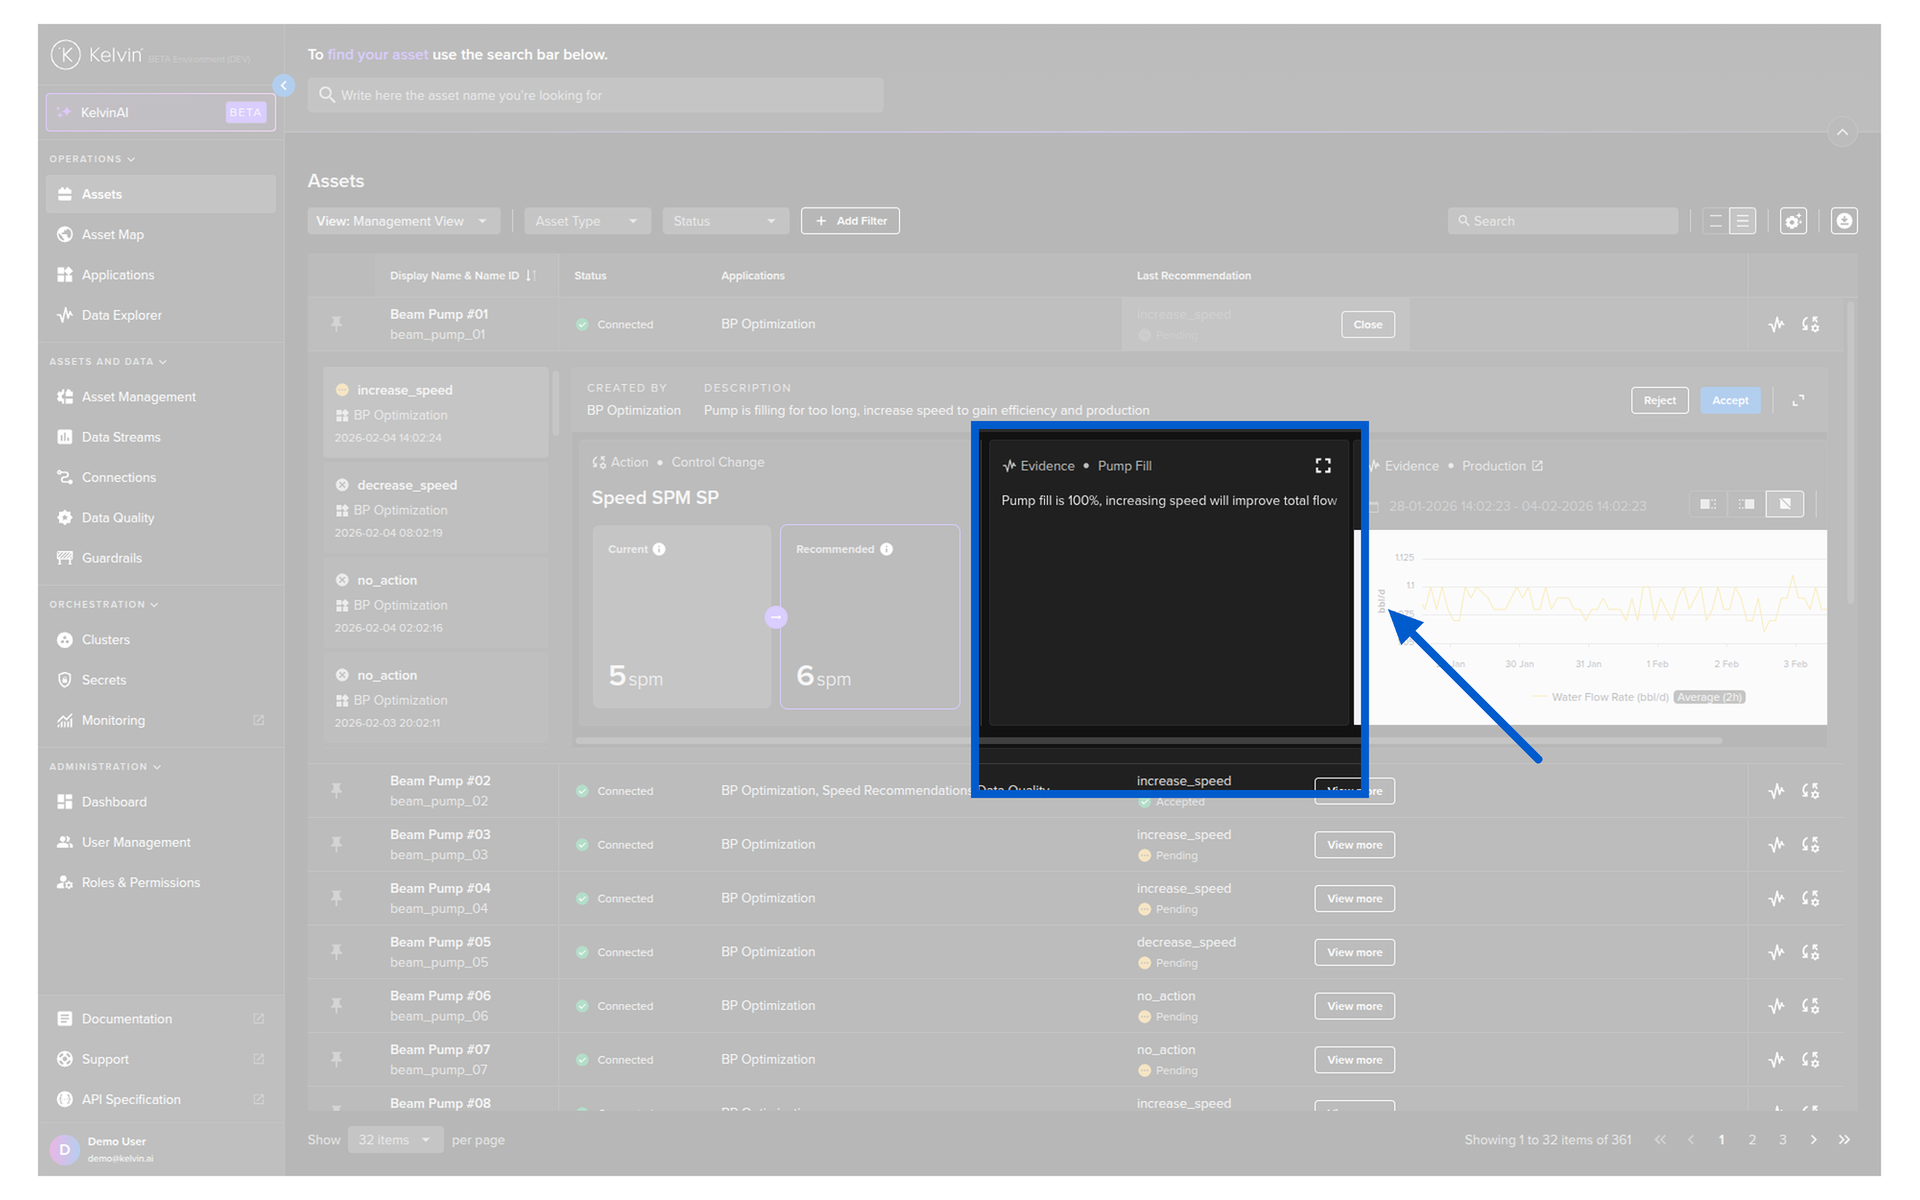
And to the right of Actions, a list of Evidences in cards for deep analysis of the data for the Recommendation creation.
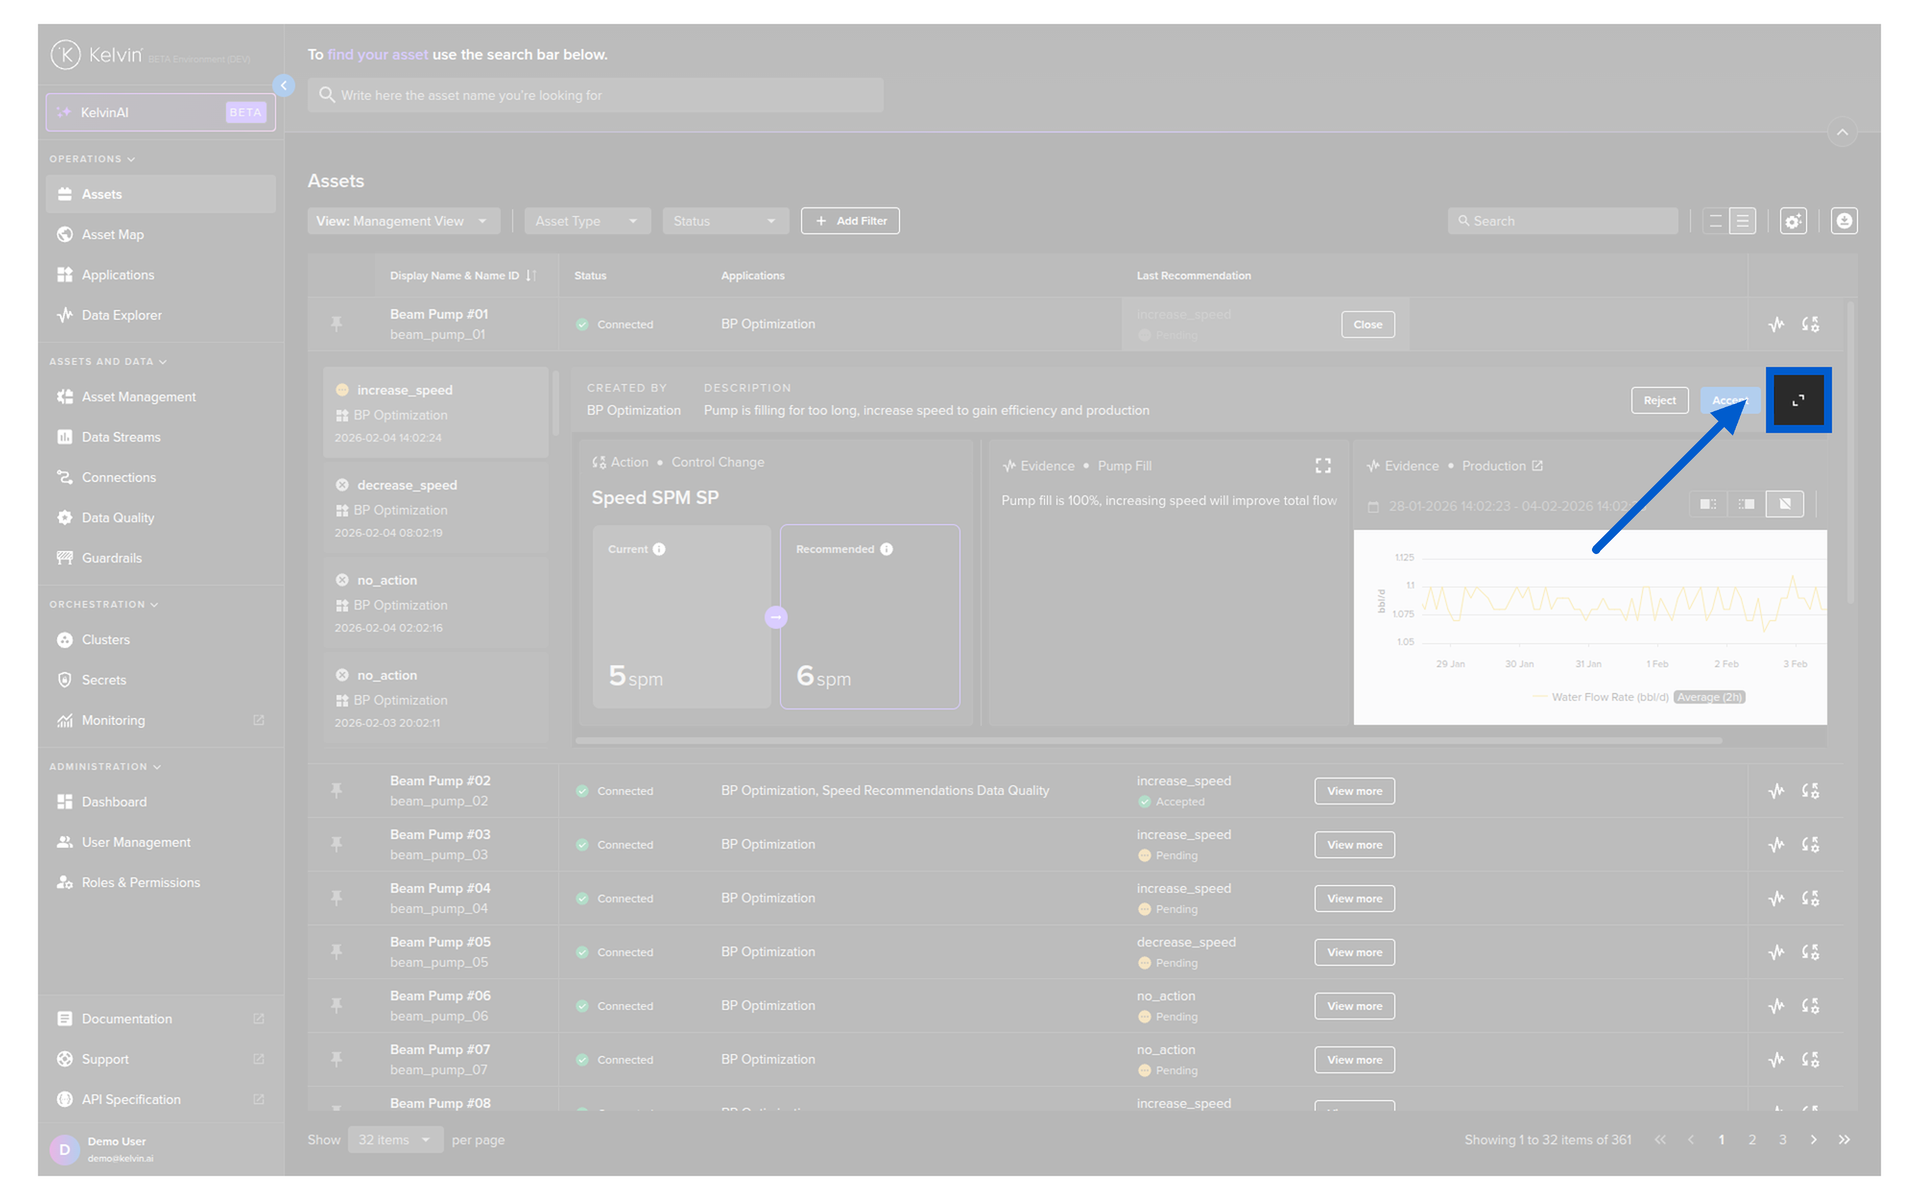
You can also see the full Recommendation in a popup by clicking on the expand icon.
Info
Click here for a full explanation on the popup features.
Inline Insights
You can quickly see the latest Insights inline for an Asset without having to switch back and forth to the Data Explorer page.
Note
To use this feature you will need to add at least one Insights column with the required filters.
Click on an insight name;
Note
If there are no insights matching the column's filter settings, then you will see N/A and will not be able to open the inline insight feature.
And the Insight list and Data Explorer will appear inline below the Asset row.
Note
When you select another row's Insights, then the previous inline Insight will close.

On the left you will see all of the Insights that meet the column's filter settings.
If you need the full Data Explorer experience and features, click on the Data Explorer button to open the Data Explorer page.
Note
The current Asset will be automatically selected and populated in the Data Explorer
There are also a number of useful features available.
You can select to hide the legend or place it on the left or right hand side of the Data Explorer chart.
You can manually zoom in/out and reset it with these icons.
Download Table
You can download the table to a CSV file that you can open in your favorite spreadsheet editor such as Google Sheets or Microsoft Excel.
Success
You can customize your columns as the file will contain the exact same information and columns as displayed on your browser.
Once you have the columns and information setup in the Kelvin UI, simply click on the Download icon ![]() and select where to save it.
and select where to save it.
The file will contain the exact same information as what you see in your table in the Kelvin UI.
![]()
Note
It will download the data from all rows available in the filter, not just the rows showing in the Kelvin UI.
Customize Asset View
In operations you normally have a large number of Assets to manage and look after. Normally most of the Assets are set to Closed Loop in Recommendations and require very little attention. Other Assets may need careful monitoring and manual adjustments.
In the Asset page you have the ability to customize your view and ensure on the most important Assets are being shown.
Any settings in this page are remembered between sessions, so once set you can come back at any time and see the Assets you have selected.
There are five main ways to customize your Asset Overview.
- Customize your Views (Columns)
- Pin important Assets to always appear at the top of the page
- Select only Assets associated with certain Asset Types
- Select the Statuses of Assets to show
- Apply advanced filters on Asset Properties or Kelvin SmartApps™
All five of these methods will be applied together.
Note
For example, if you filter only Connected Assets, running in Open Loop mode in Kelvin SmartApps™, then you will not see any Disconnected Assets even if they are running in Open Loop mode.
Custom Views
Custom Views List
You have the option to save customized views. Customized views will retain both custom columns and filters.
Success
Even if you do not save your Custom View you will not lose your view setup when you navigate away and return.
But we do advise you save it if you want to work with multiple types of views.
This allows you to easily switch between different custom Asset views you have created.
You can see all your saved views in this drop down menu.
Note
If you click on the meatball menu item ![]() , there is an option for the View to be Visible to all users.
, there is an option for the View to be Visible to all users.
This option is only available if you are an administrator.

There are some default views that will be displayed. These are set by the Administrator and can not be modified.
Edit Custom View
To edit the name of a view, on the list you can click on the meatball menu item ![]() and select Edit option.
and select Edit option.
Note
You can not edit default views that are set by the Administrator.
You can make changes to a default view and save it as a new View name.
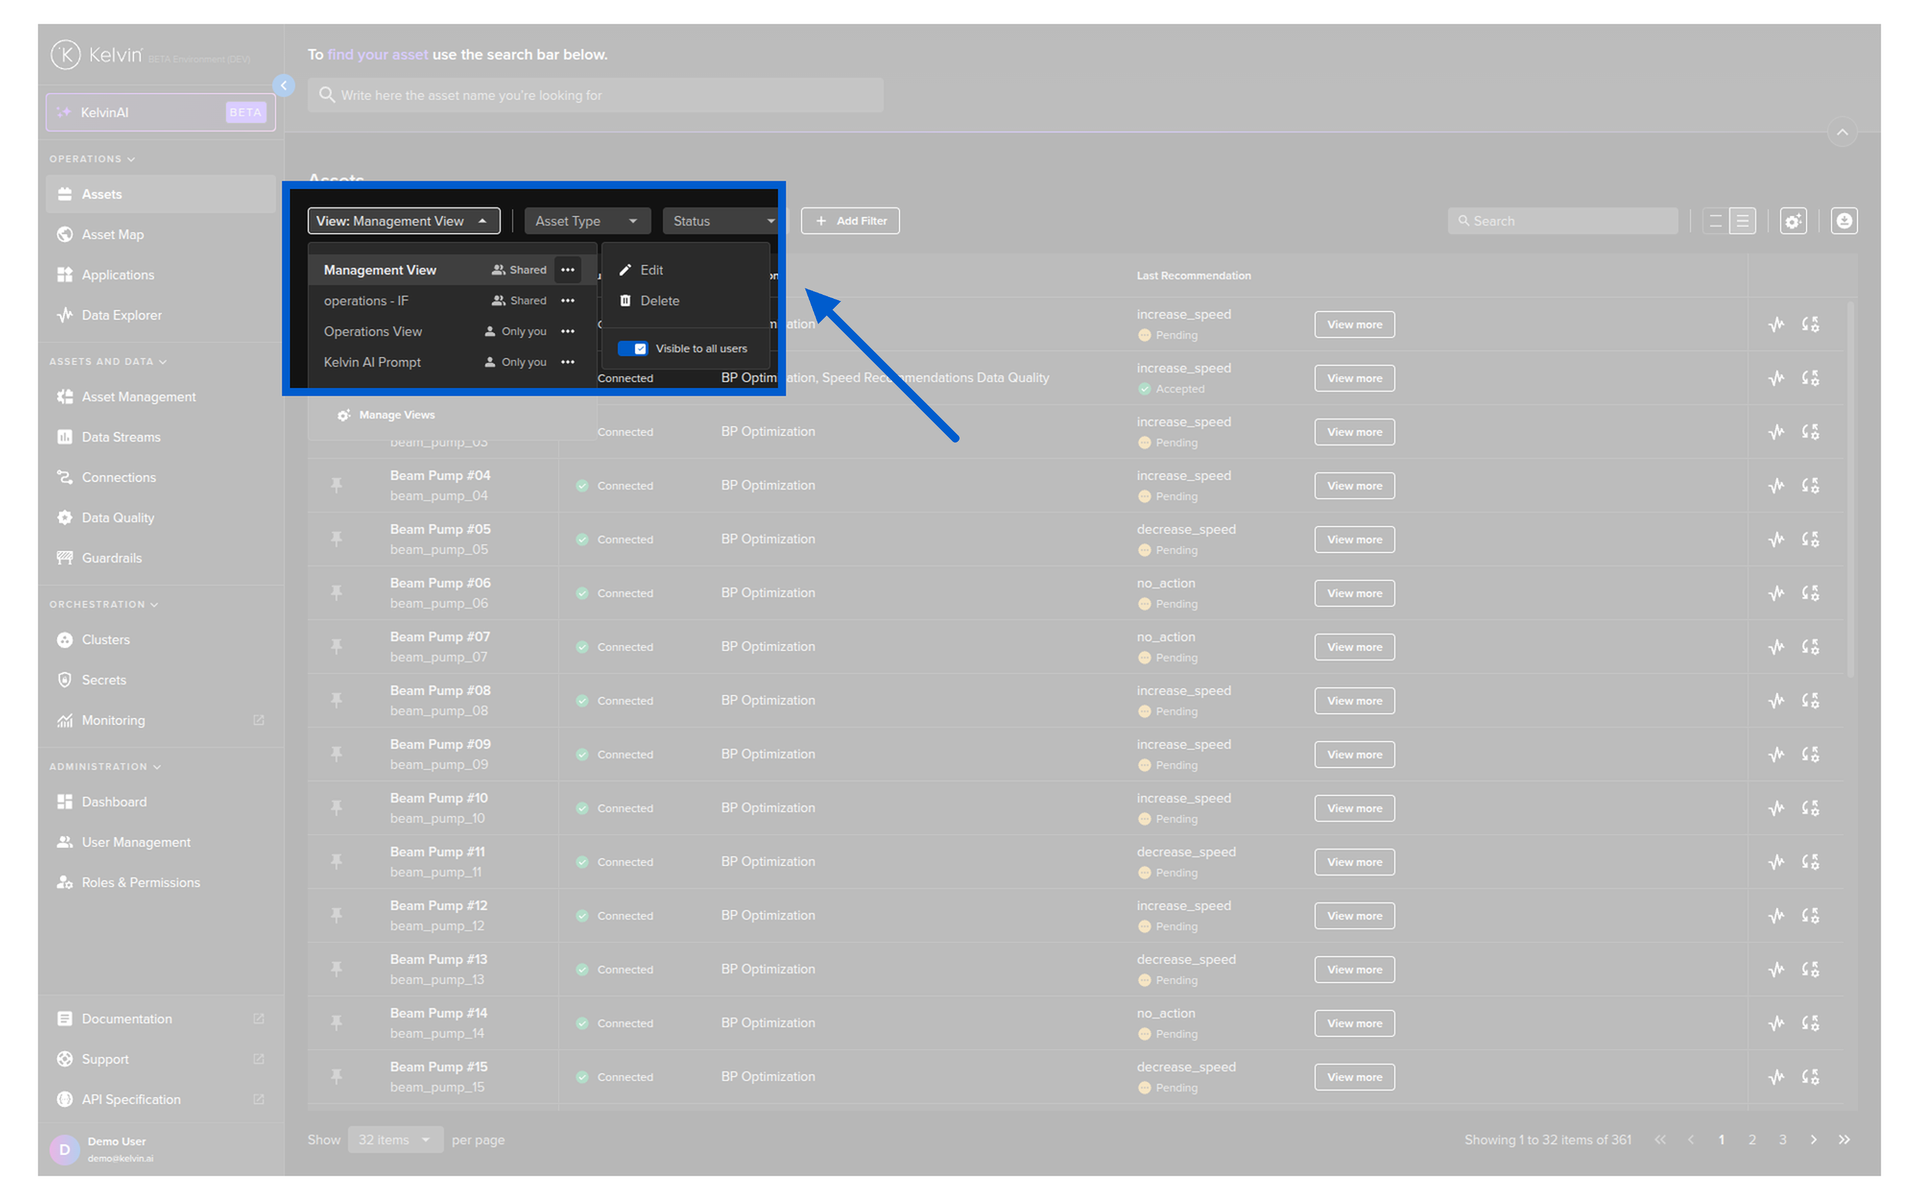
Delete Custom View
To delete a view, on the list you can click on the meatball menu item ![]() and select Delete option.
and select Delete option.
Note
You can delete any default global views that are set by the Administrator.
This will only affect you. All other users will still see the view option.
Manage Custom Views
Note
This option is only available to Administrators
You can manage all your views easily in a popup. Click on the Manage Views Option.
And a popup will appear.
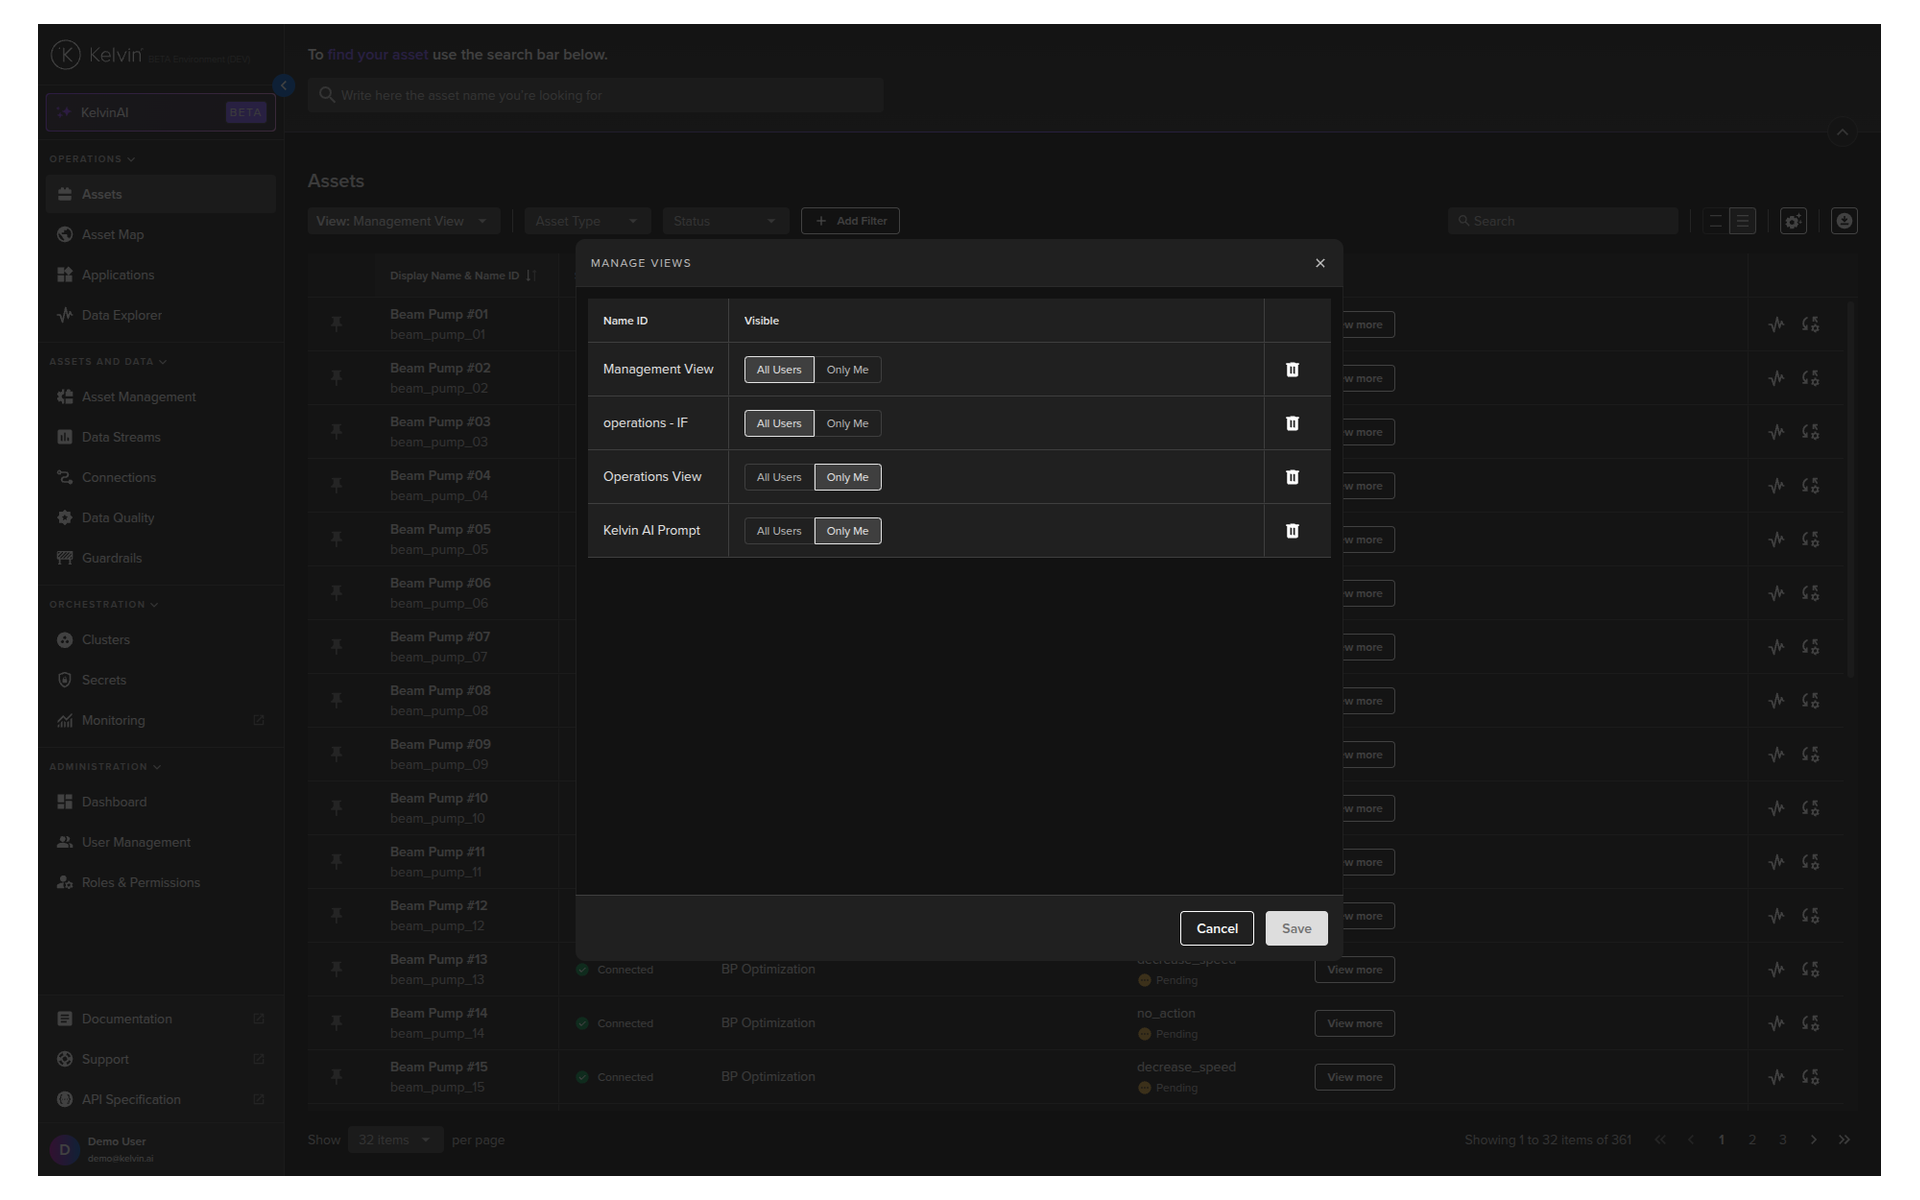
In the scope you can select the views that will be available to all users on the Kelvin Platform.
Note
Any global views are not editable by the user and can not be deleted.
Users can use the global views, change it to their requirements and save it as a new view.
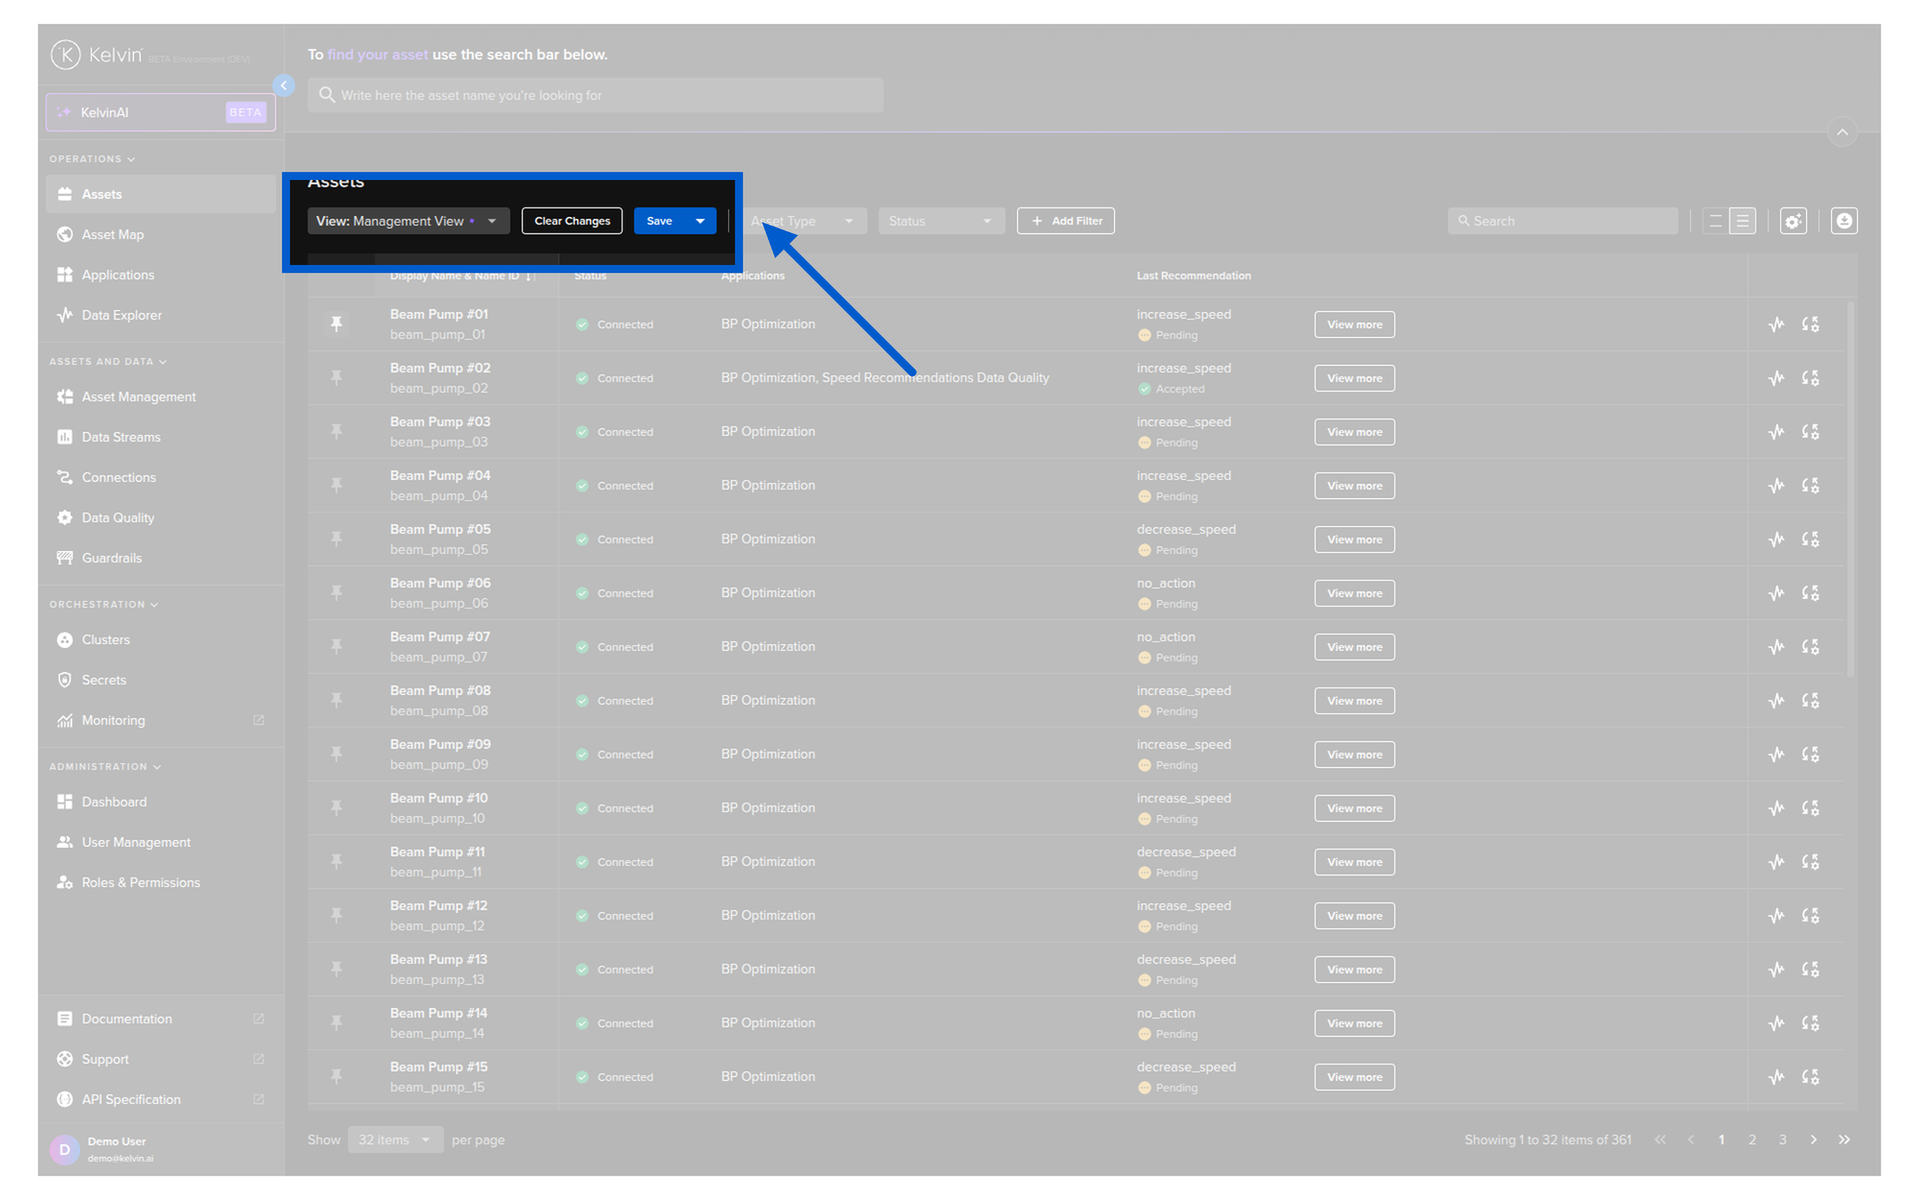
Save Custom View
And when you change the view layout and columns you will have the choice to overwrite the current view or save it to a new view.
Note
Administrators will also have the option to make the saved view visible to all users.
Pin Assets
You can keep important Assets pinned to the top of the page simply by clicking on the pin icon.
The pinned Assets will show on the top of every page.
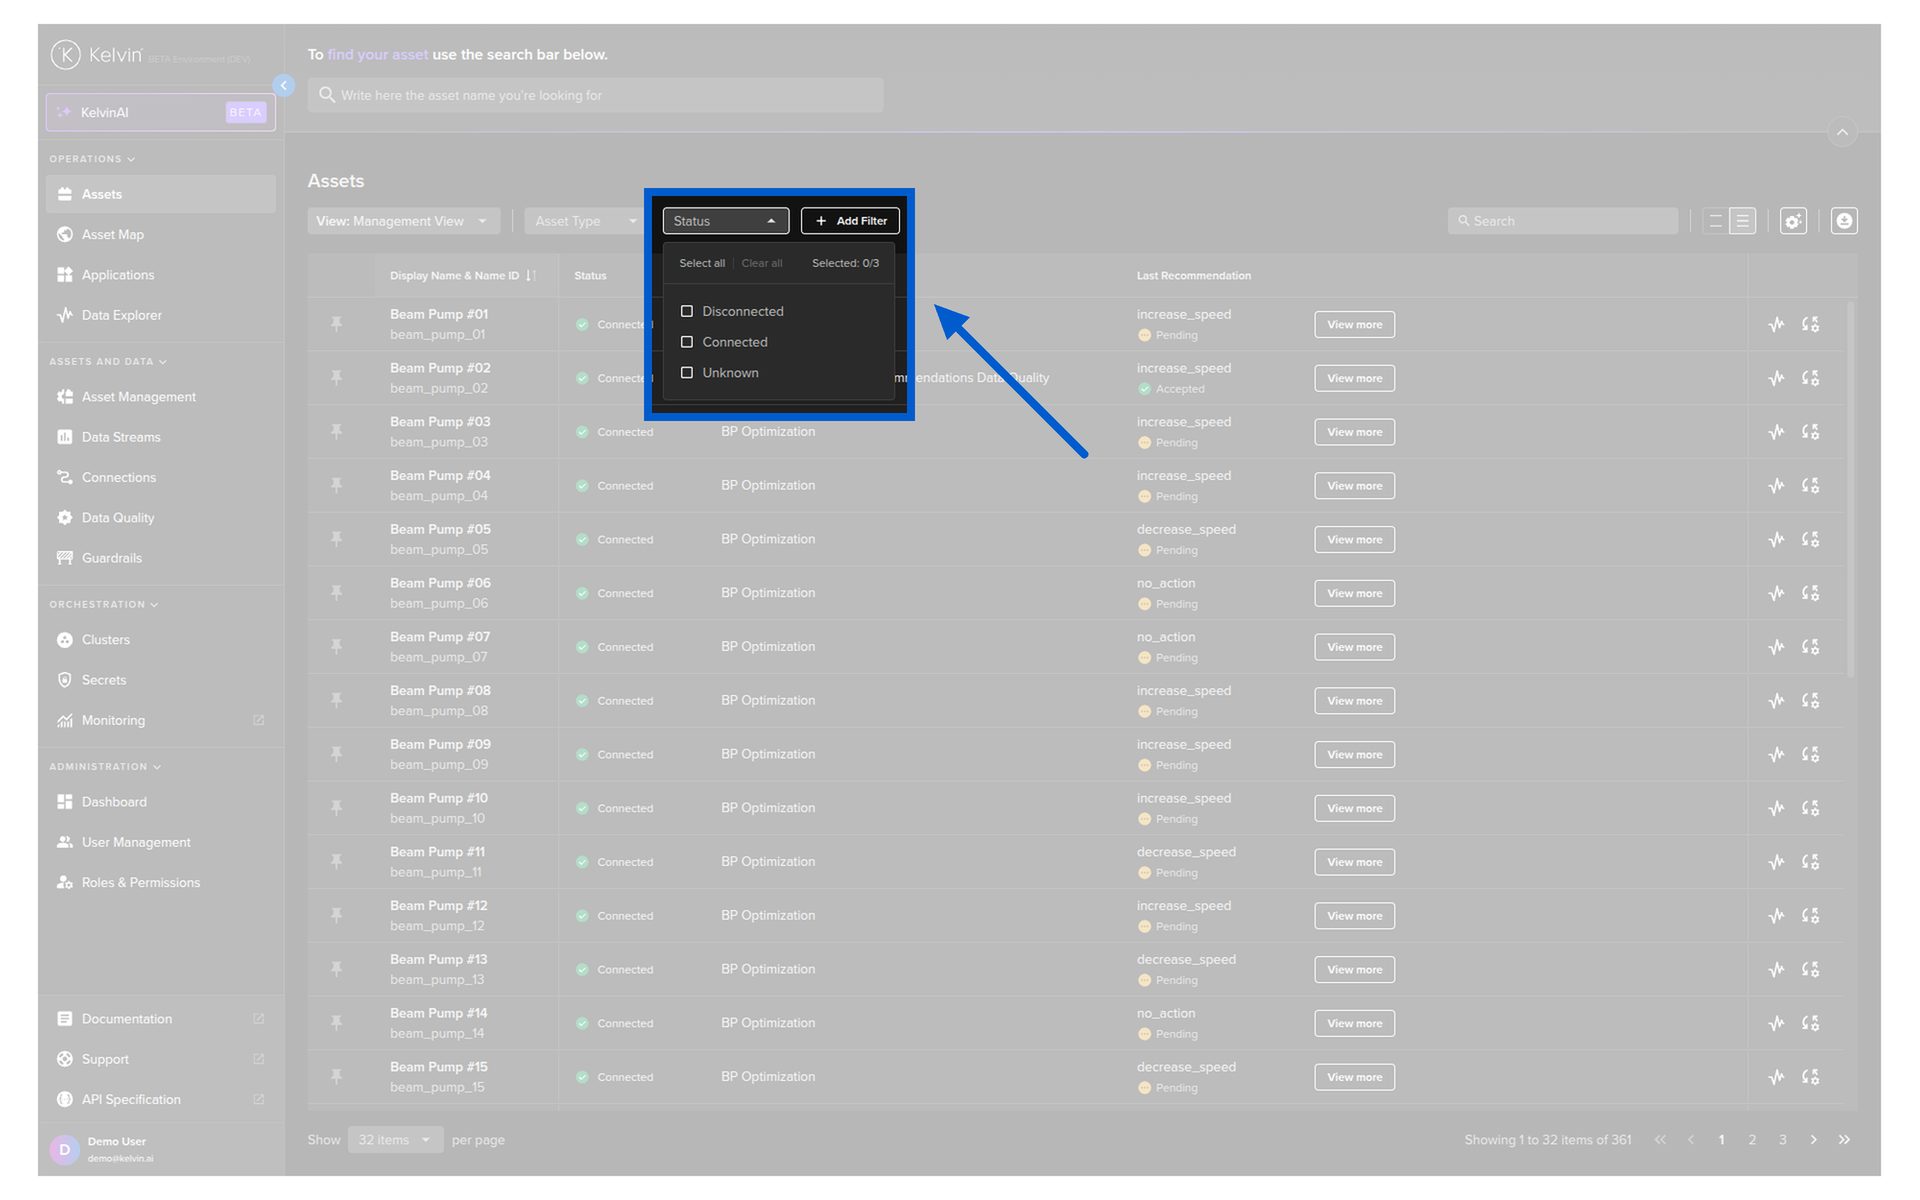
Select Statuses
You can limit the Assets shown according to their current status. There are three statuses available; Connected, Disconnected and Unknown.
| Status | Description |
|---|---|
| Disconnected | All Data Streams associated with the Asset are currently not connected to the Cloud |
| Connected | All Data Streams associated with the Asset are currently connected to the Cloud and recording data |
| Unknown | All Data Streams associated with the Asset have not sent any data since being created |
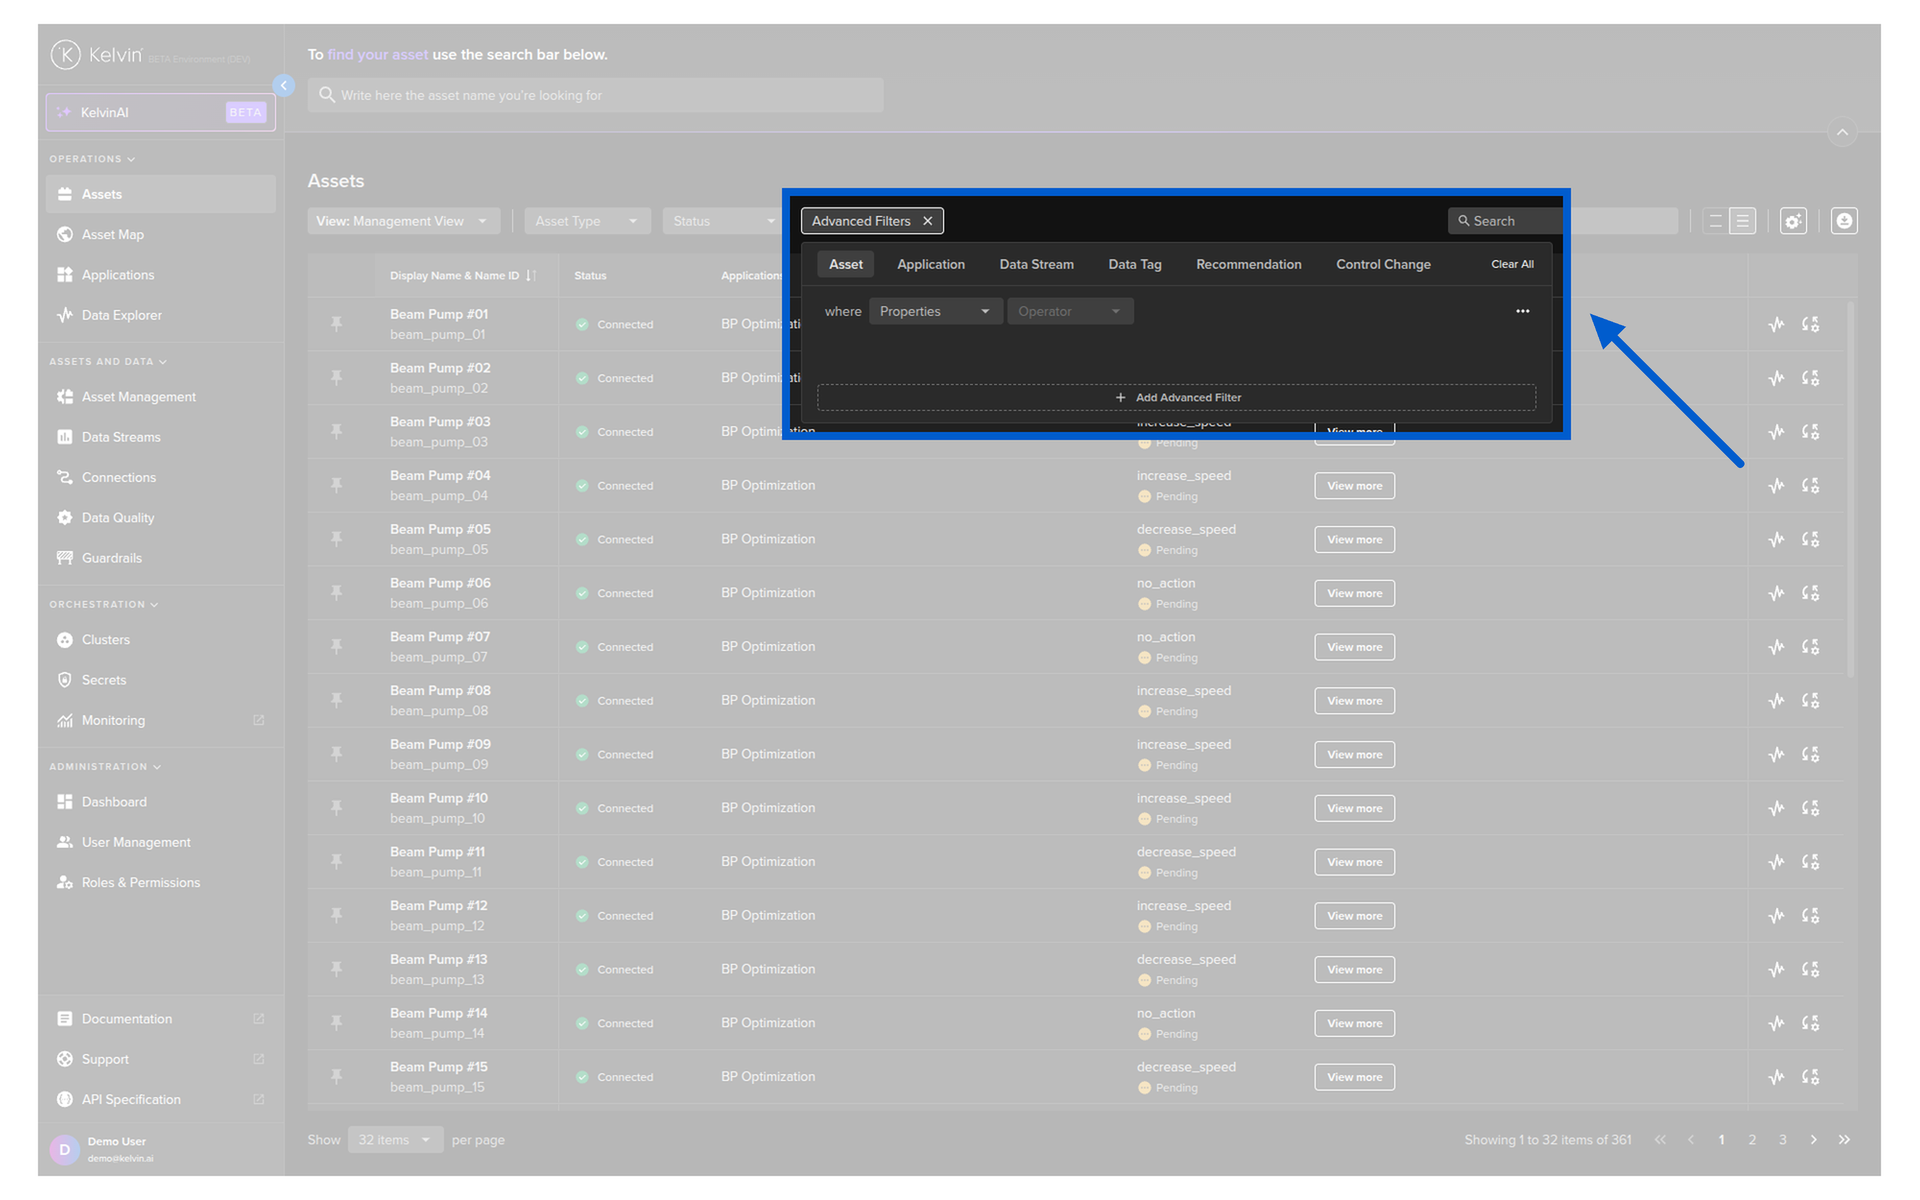
Advanced Filters
All filters are processed together as AND.
This is a powerful filter that allows you to create as many conditions as required to fine tune the Assets that are shown in the table.
Any settings are persistent between sessions, so you do not have to continually reconfigure your requirements.
You can build advanced filters across the following categories:
| Category | What You Can Filter On |
|---|---|
| Asset | Asset properties (for example, type, location, or any custom property defined on the Asset). |
| Application | Running Kelvin SmartApps™ on the Asset. Only applications in the running state are matched. Applications that are stopped, failed, or in any other non-running state are excluded. |
| Data Stream | Data Streams associated with the Asset. |
| Insight | Tag type, created by, or time range. |
| Recommendation | Type, status, created date, or updated date. |
| Control Change | Setpoint, status, or created date. |
For example, you are managing a large number of wells and want to only monitor wells that are running the Motor Speed Control Kelvin SmartApp™ in Open Loop mode and are in drilling operations. You can setup this view by;
Click on Add Filter button and add a Application (Kelvin SmartApp™) filter like this
It is also the same process to add a filter on the Asset Properties.
That's it ! All the filters are automatically applied as you create them. Now you only see these filtered Assets.