Add Custom Connection - How To
Developers can create custom Connection Applications for the Kelvin Platform.
Note
You can read more about Custom Connections in the Overview section and developer sections for Import Connections and Export Connections.
There are two types of custom Connections available;
- Import Connection
- Export Connection
You can install them both in the same manner through the Kelvin UI, Kelvin SDK and Kelvin API.
Connections can be deployed to both x86_64 and ARM64 devices.
To start click on the Connections menu option from the left side bar menu.
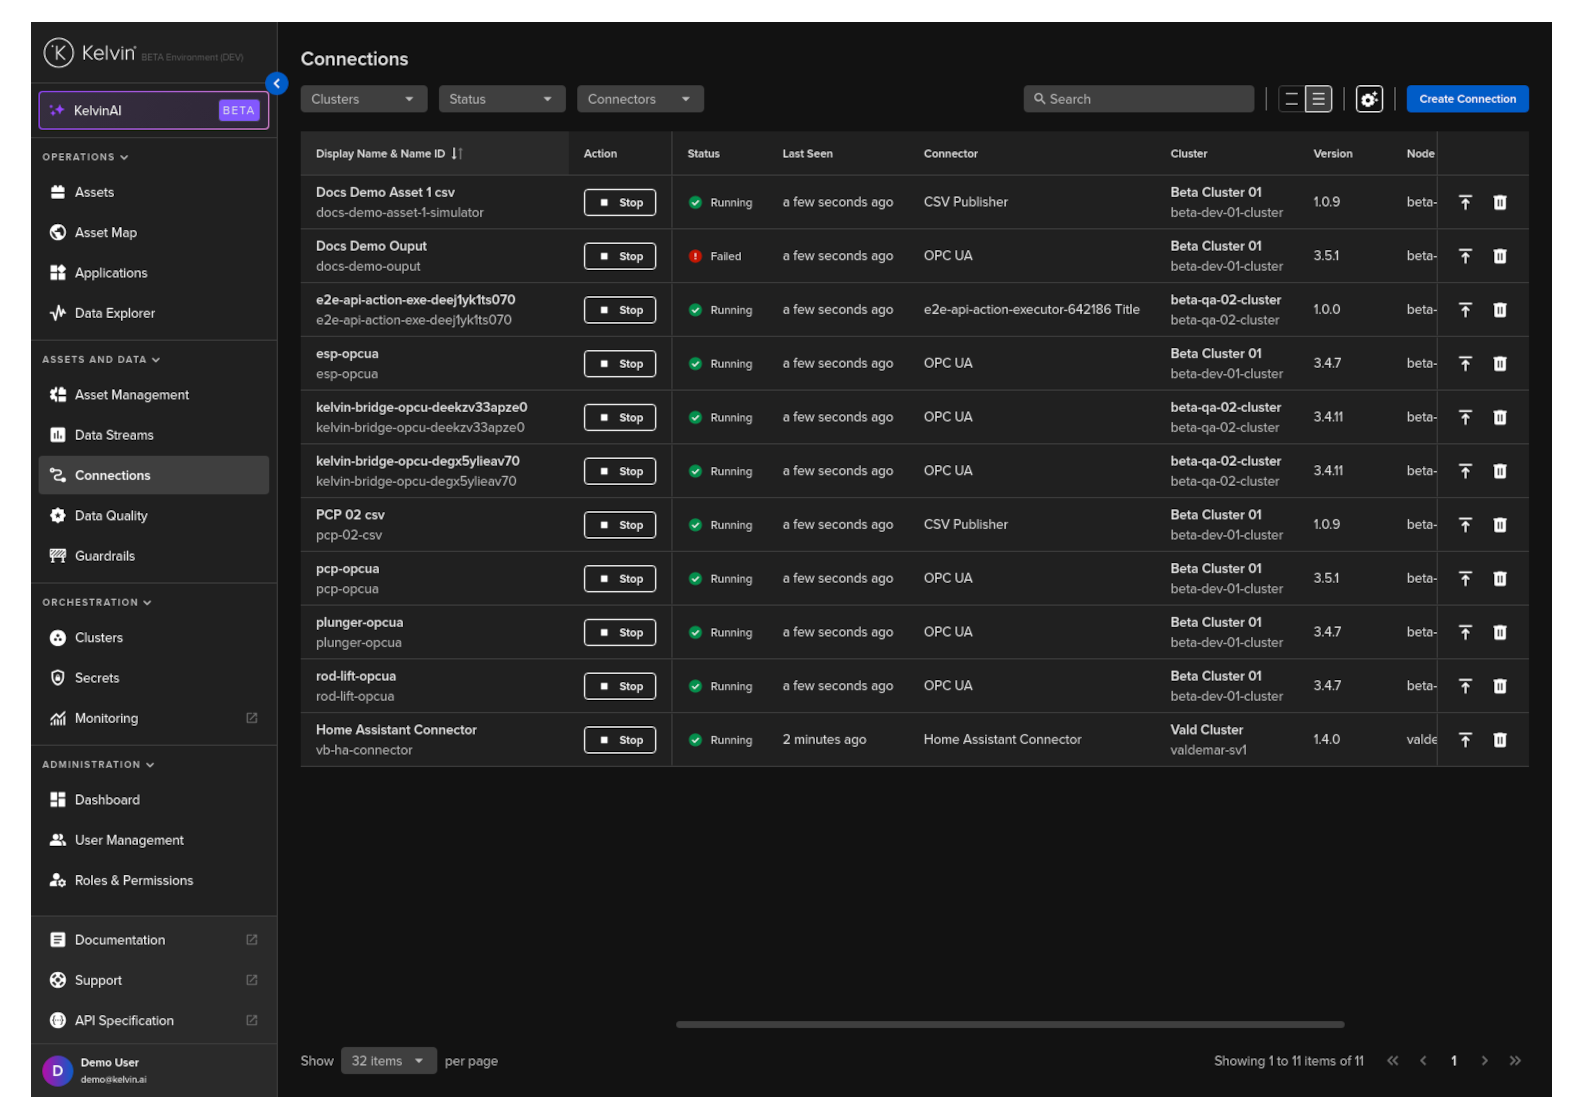
click on the Create Connection button.
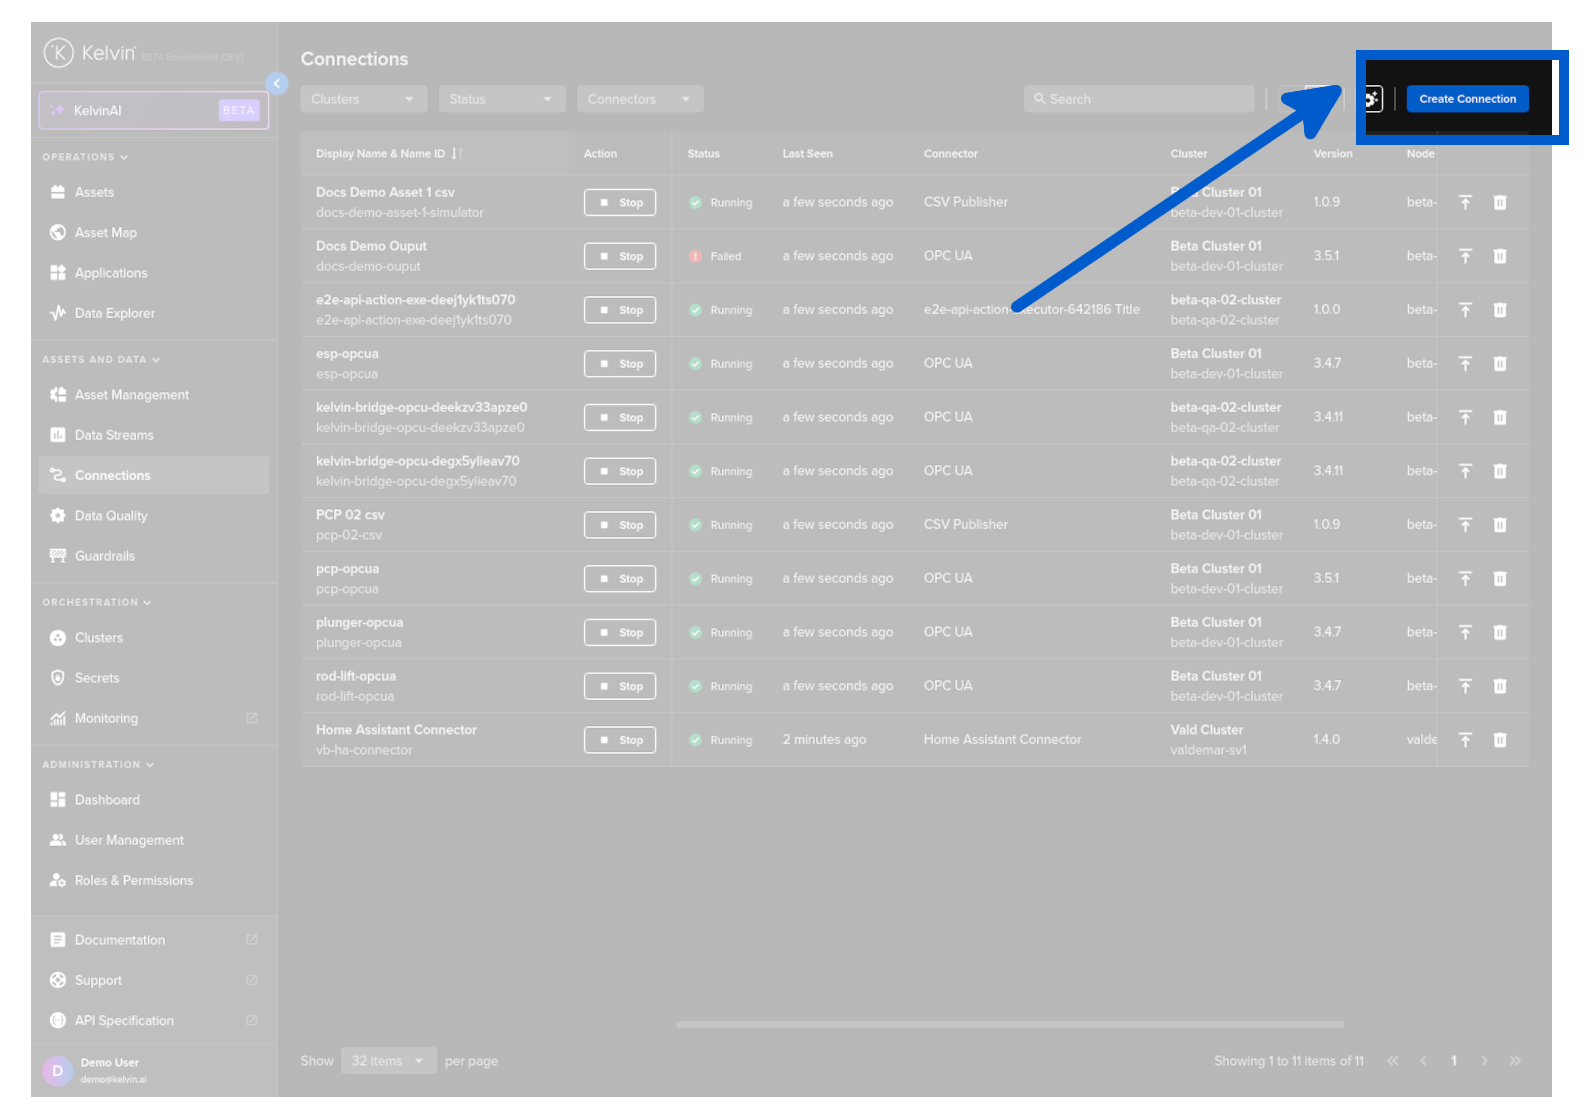
Step 1
Select either Import Data and Control Setpoints or Export Data and click Next.
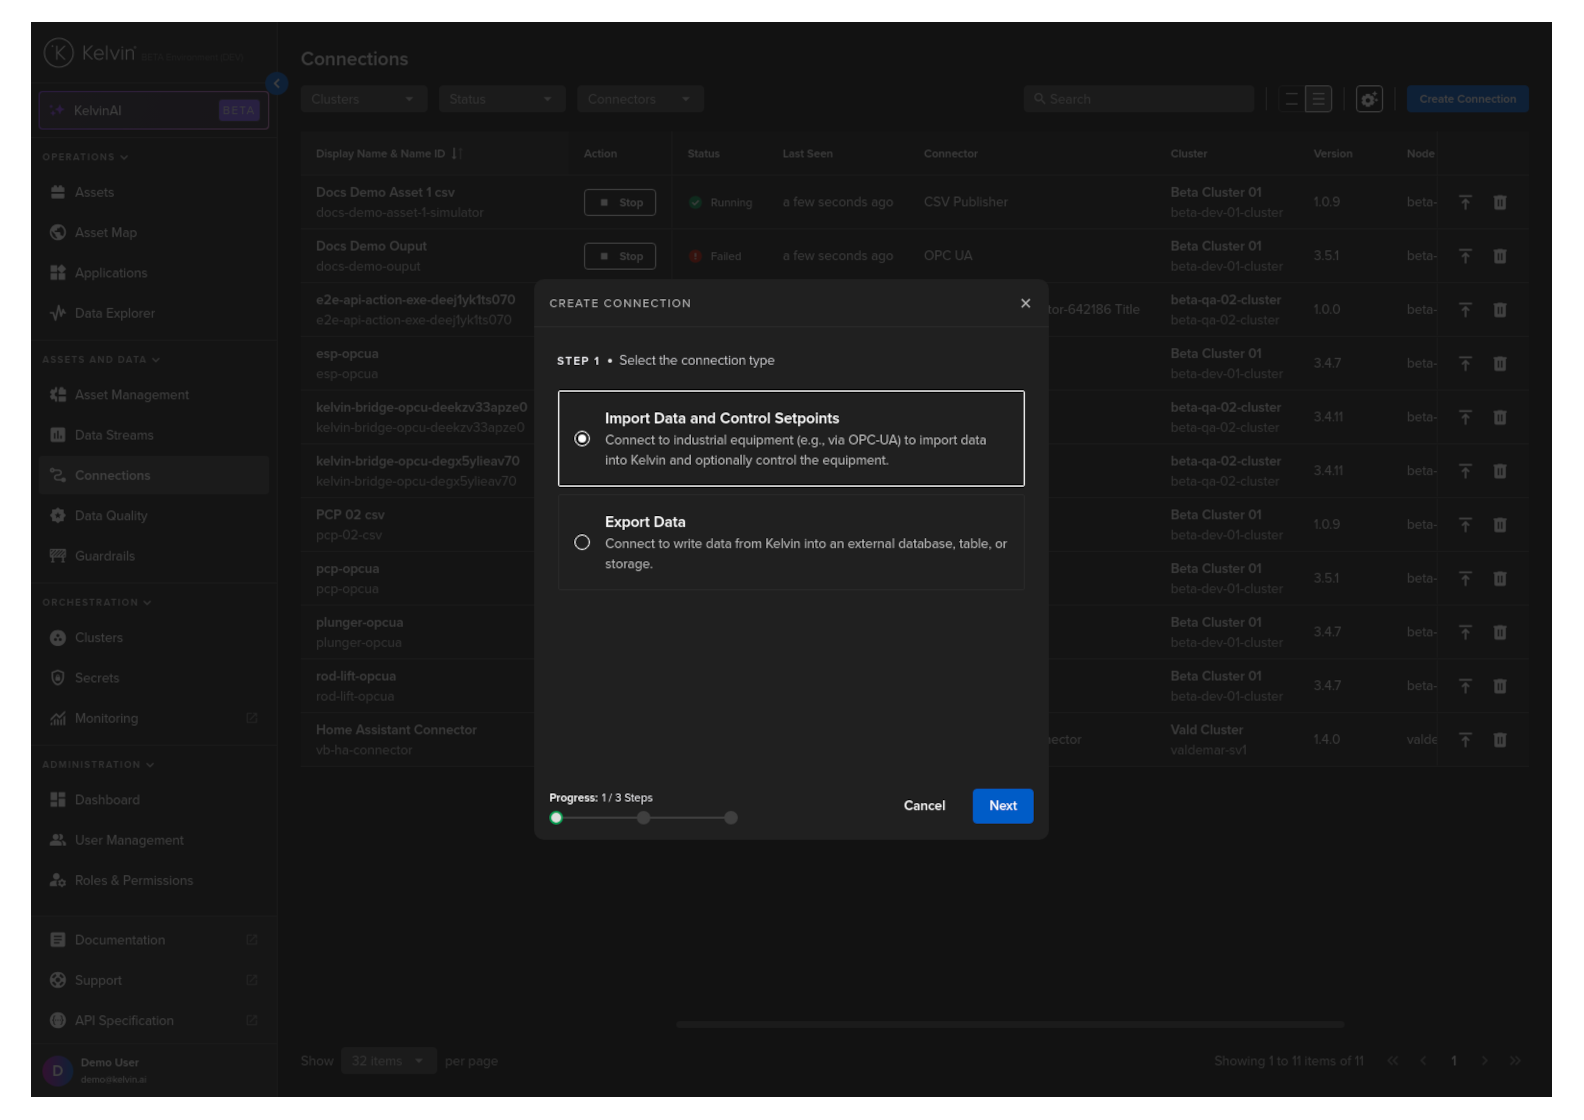
Step 2
Here you will see a list of Import Connection Applications available in the App Registry.
Select the custom Connector's name option, select a Version and click Next.
Step 3
In Step 3 you have a range of options available.
Note
You will only be able to deploy your workload once all options have a green check ![]() .
.
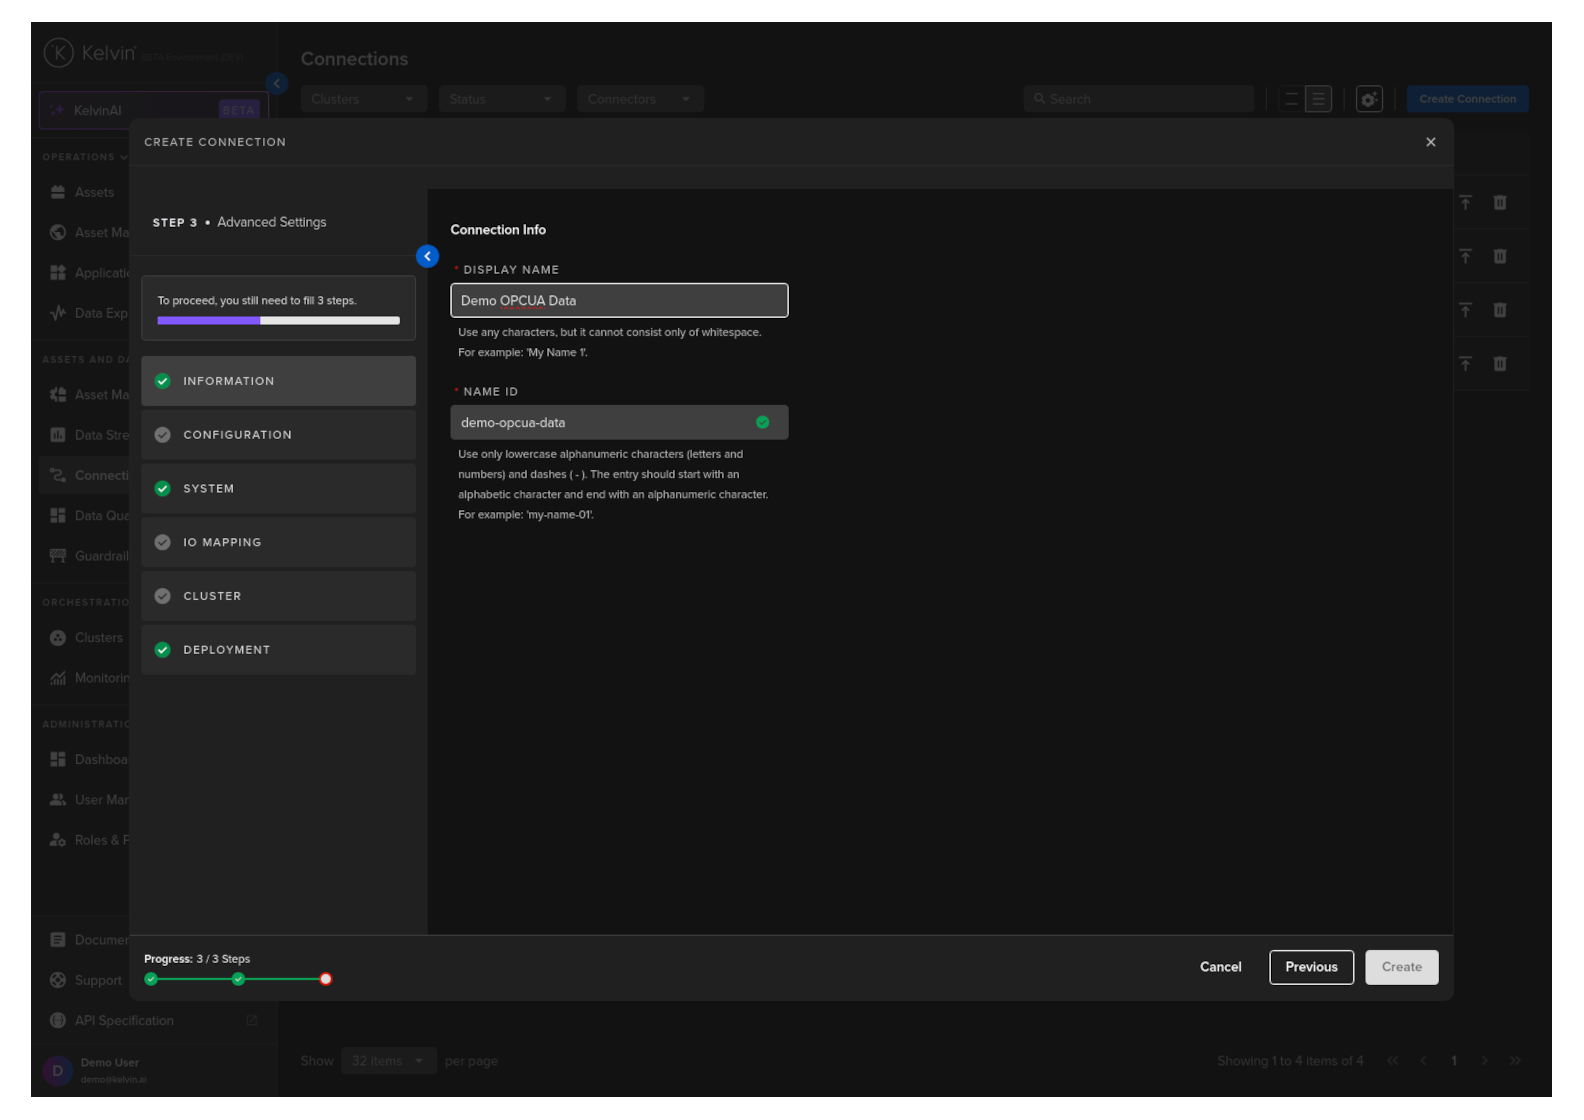
Information
Type in a memorable name in the Display Name text input. You can use any letters, numbers and special characters.
The Connection Name text input will be automatically converted and filled in as you type in the Display Name section. The conversion ensures the Connection Name only contains lowercase alphanumeric characters and ., _ or - characters.
Configuration
Configuration options are Connection specific and depends on the type of custom Connection that has been created.
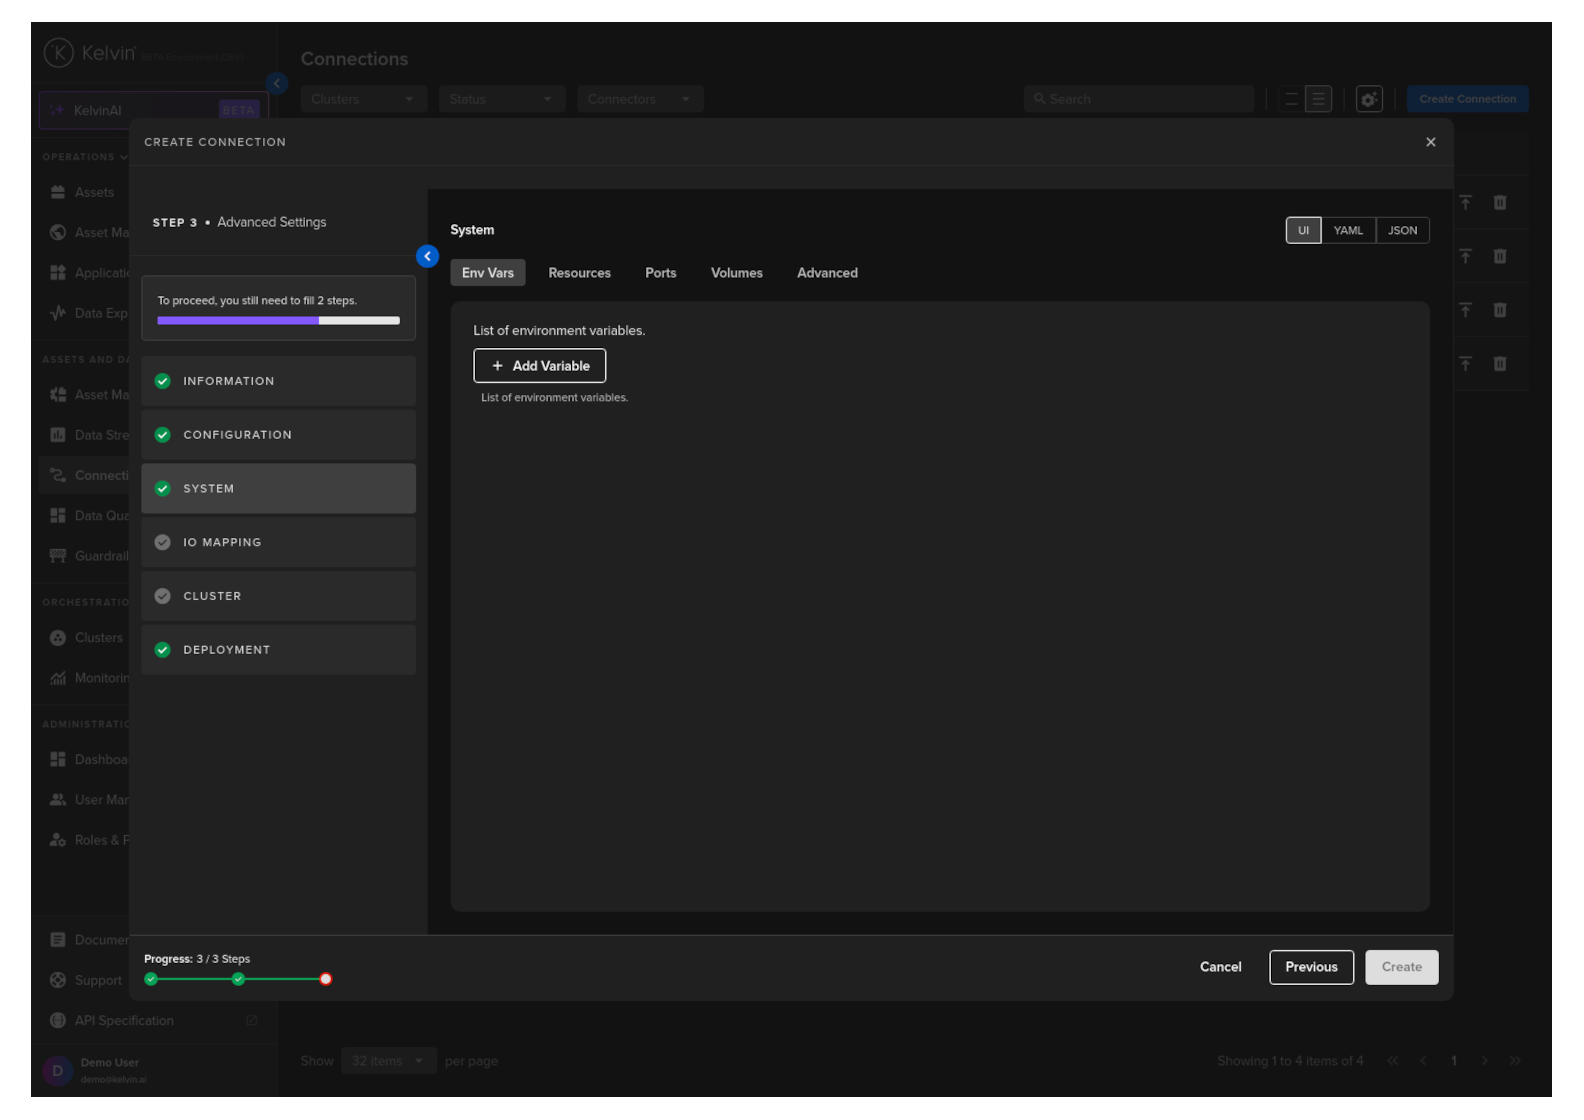
System
Here you will be able to tune all the system variables that are present in the app.yaml file of the Application.
You can choose to edit it using a UI or directly on the YAML or JSON.
Note
Using YAML or JSON is very useful for fast application of settings if you have preset configurations and want to copy/paste them into here.
Env Vars
Here will be shown the list of default Environment Variables and the default values that were set in the app.yaml file of the Application during development.
You can edit these and change both the environment name or value. You can also add addition Environment variables.
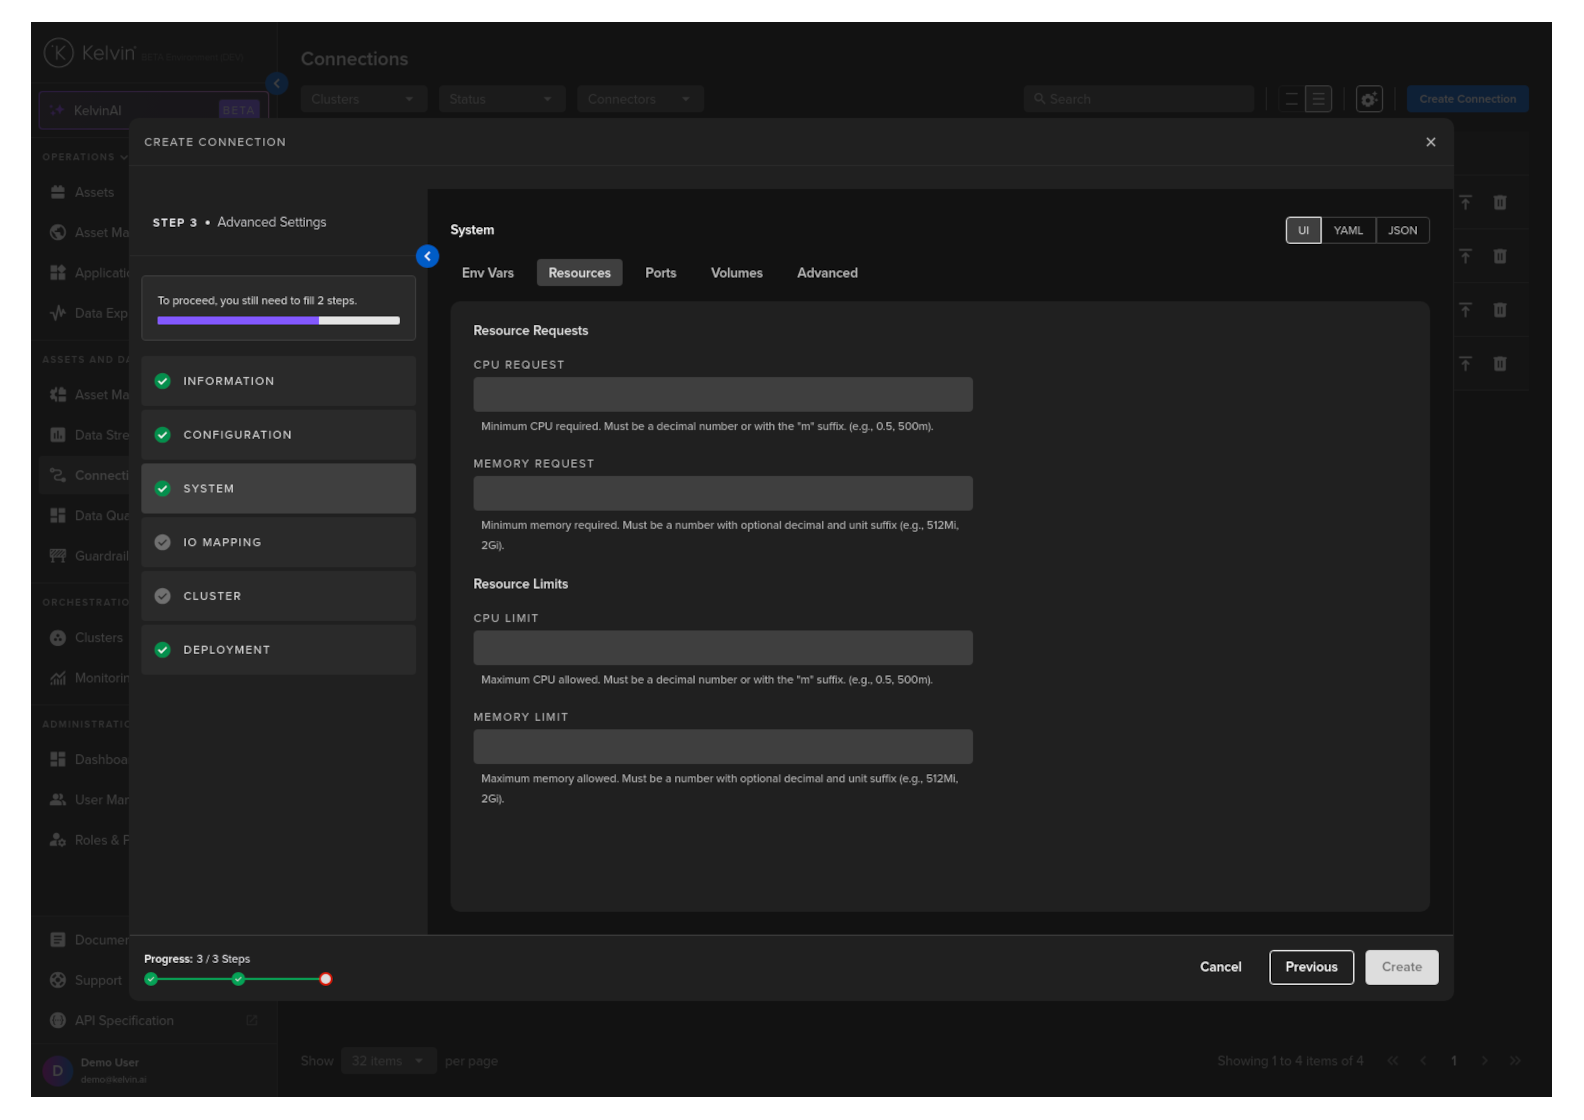
Resources
Apply resources available for the Workload.
See Set CPU/Memory Limits for detailed documentation on this section.
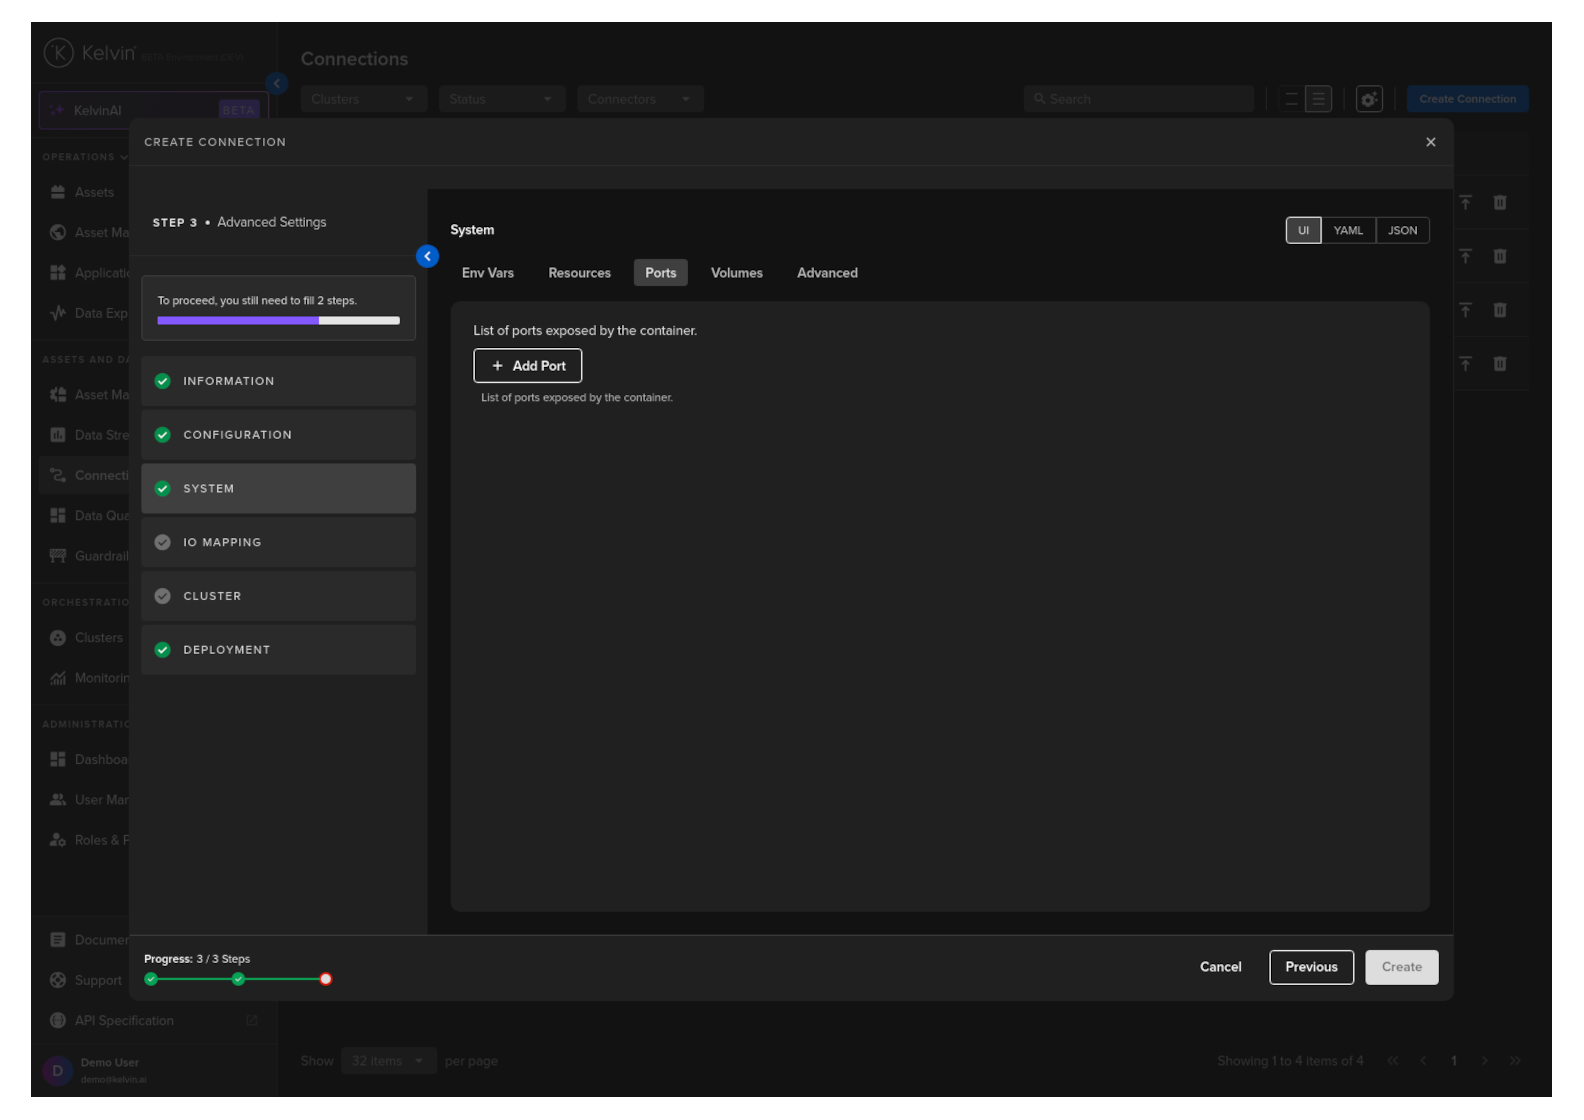
Ports
Open ports to your Workload.
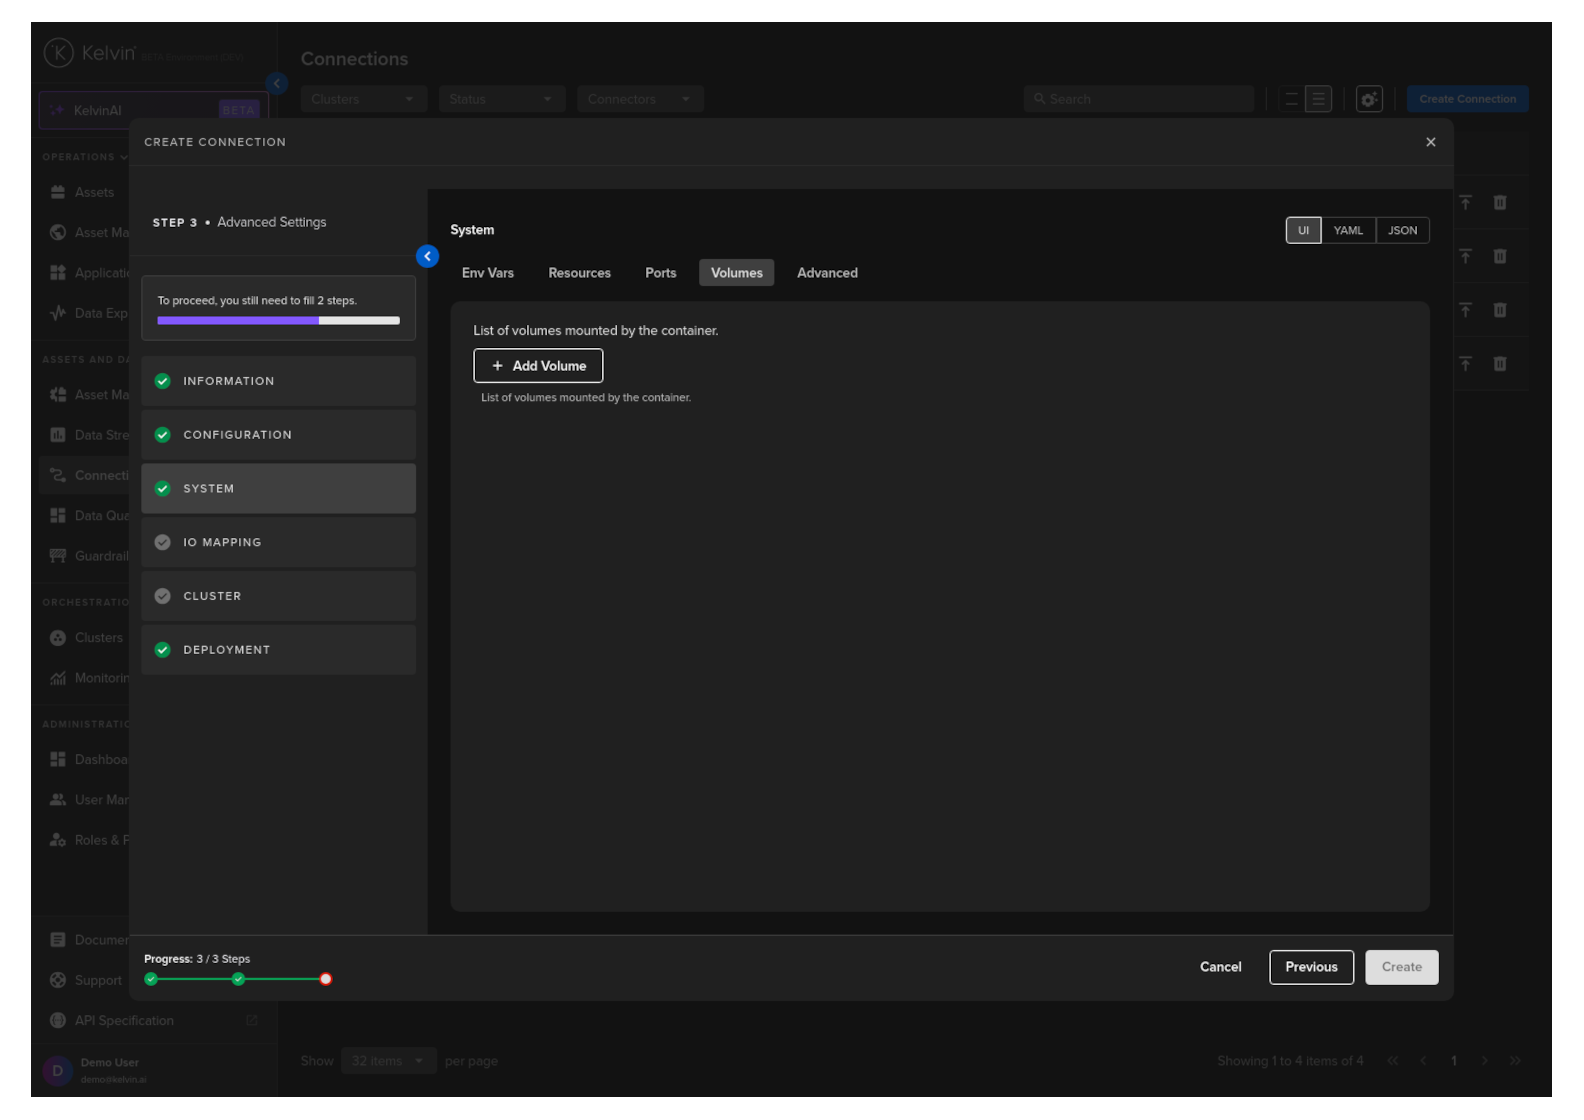
Volumes
Mount volumes to your Workload.
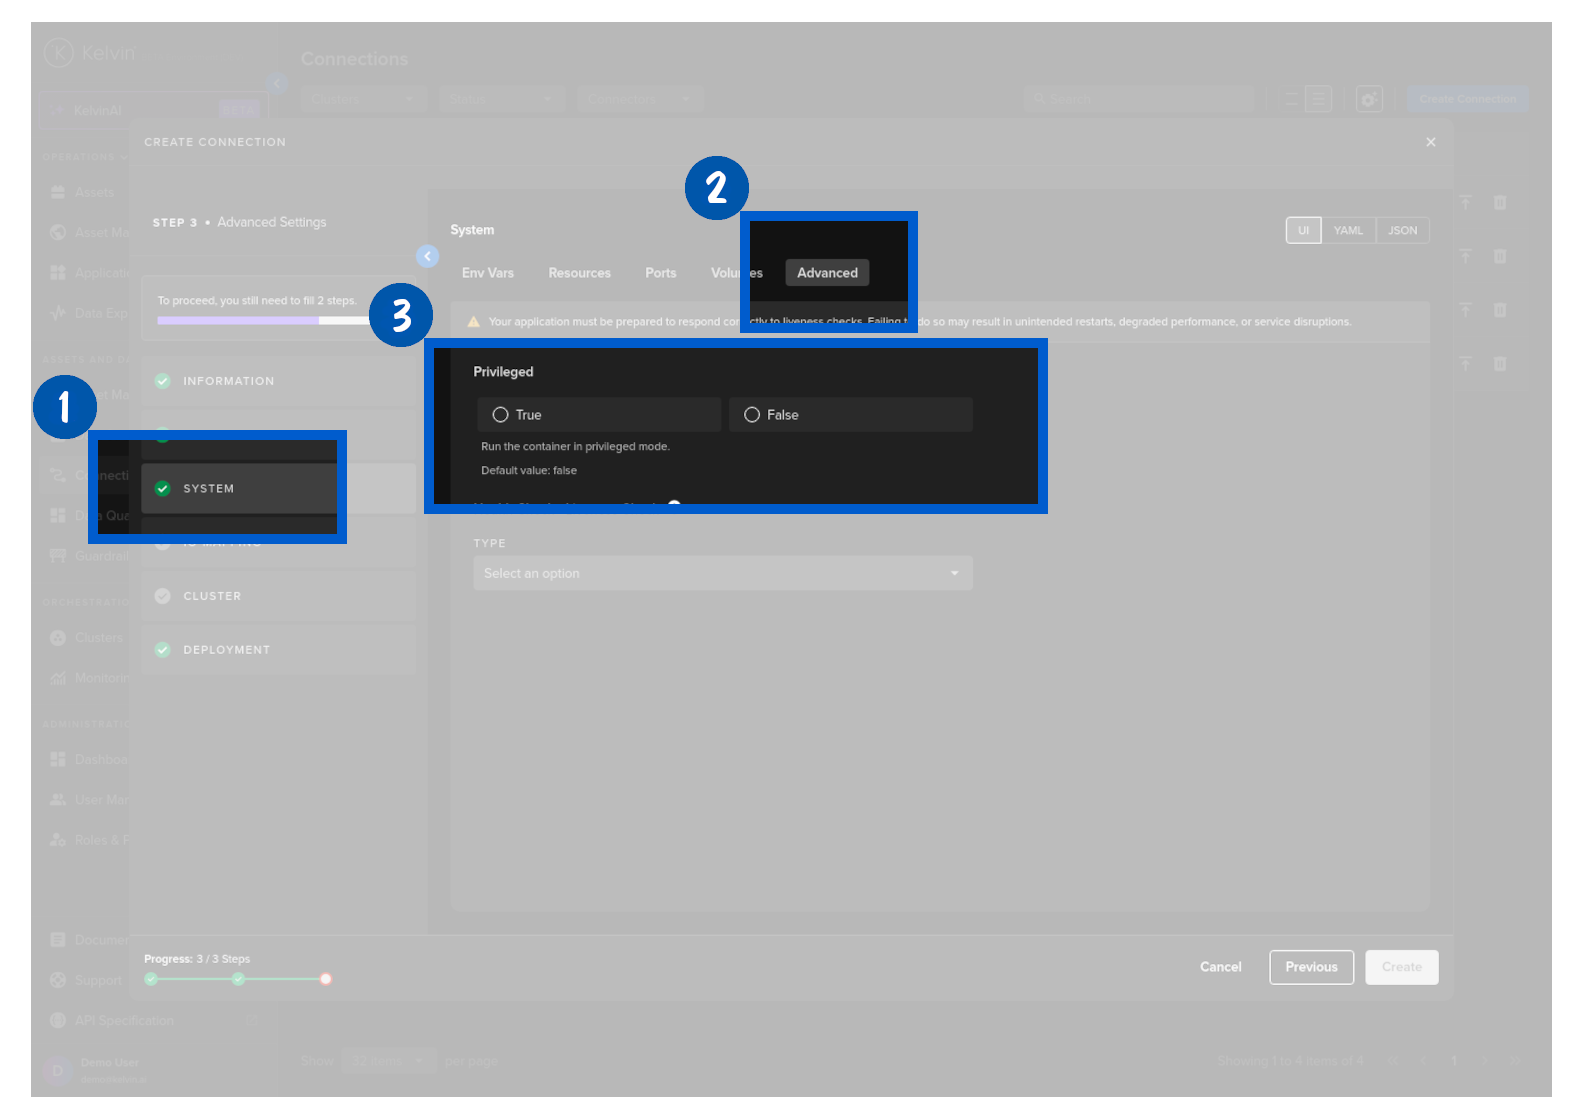
Advanced
Choose if you would like to add Privileged mode to the Workload
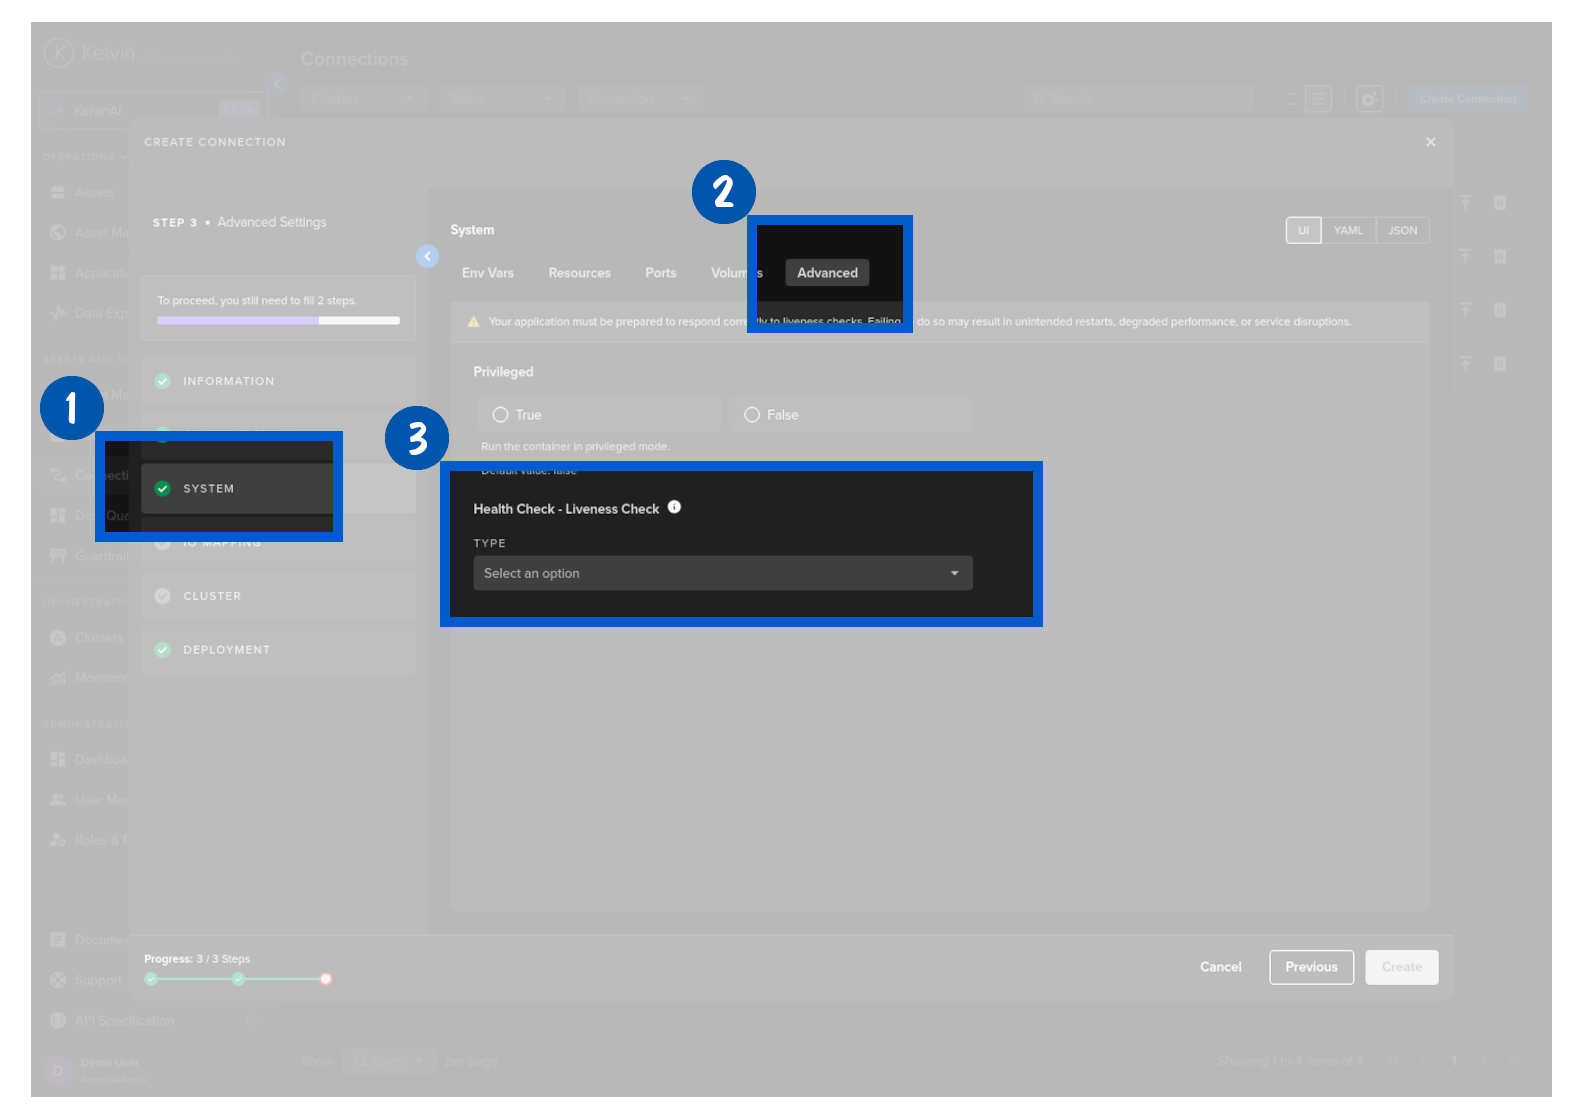
Optionally choose a health check service for your Workload. These are Kubernetes liveness probes and detailed information can be found on the Kubernetes Website.
Warning
If you use a Health check option, make sure you add code to respond to the liveness probe requests.
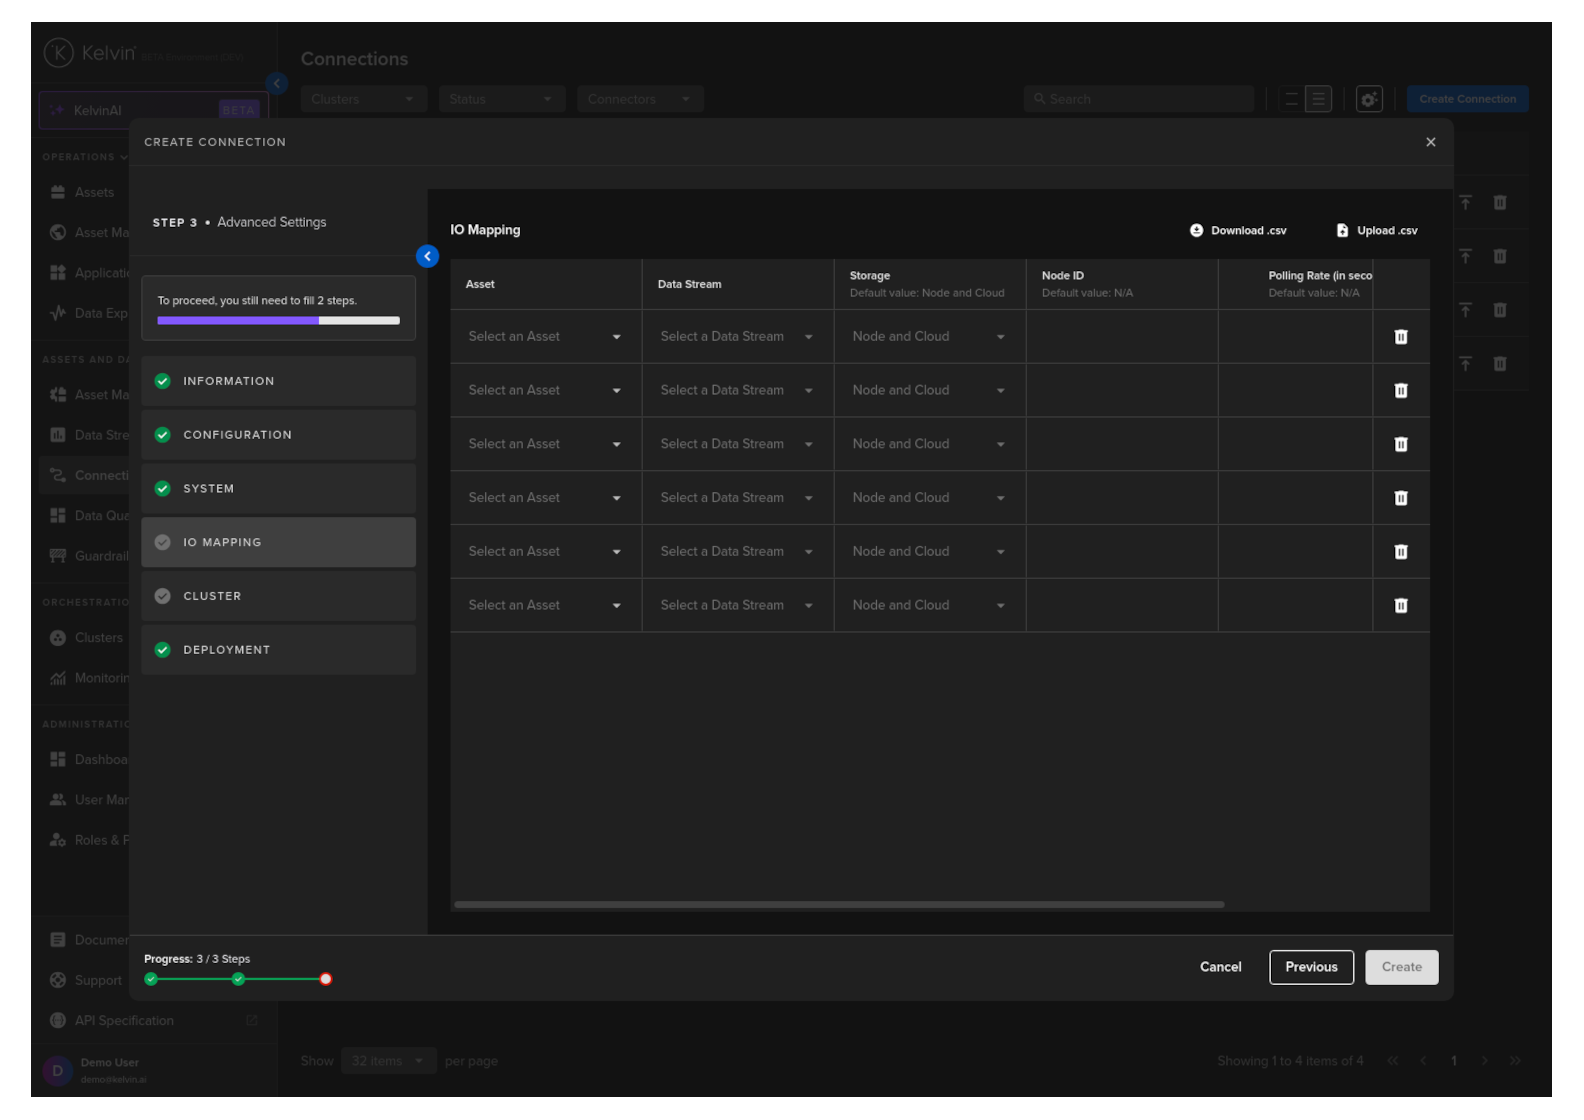
IO Mapping
Select an Asset, Data Stream and fill in the connection and other optional values.
Full descriptions of each column is giving below.
Success
If you have many connection IO to fill in, you can save time with the download/upload csv file option in the top right hand corner of the popup.
Use Microsoft Excel or Google Sheets to fill in all the Connection IO details.
You can only upload one file. Multiple file uploads is not allowed and only the latest selected file will be used.
| Header | Description | Connection Type | Example | Mandatory |
|---|---|---|---|---|
| Asset | The Kelvin Asset name (must be lowercase alphanumeric with no spaces) | Import Or Export | well-01 | Yes |
| DataStream | The Kelvin Data Stream name (must be lowercase alphanumeric with no spaces) | Import Or Export | water-flow | Yes |
| Storage | Location of the storage; "none", "node", "node-and-cloud" | Import | node-and-cloud | No |
| Specific Custom Connector Settings | Any specific custom connector settings will be filled in here for each Asset / Data Stream | Import | ... | ... |
| Polling Rate (in seconds) | How often to pull the data from the asset | Import | 30 | Yes |
| Protocol Type | Specifies the protocol data type used for interpreting the data. | Import | uint32 | Yes |
| Control Writable | Read/Write (RW) or Read Only (RO) | Import | RO | Yes |
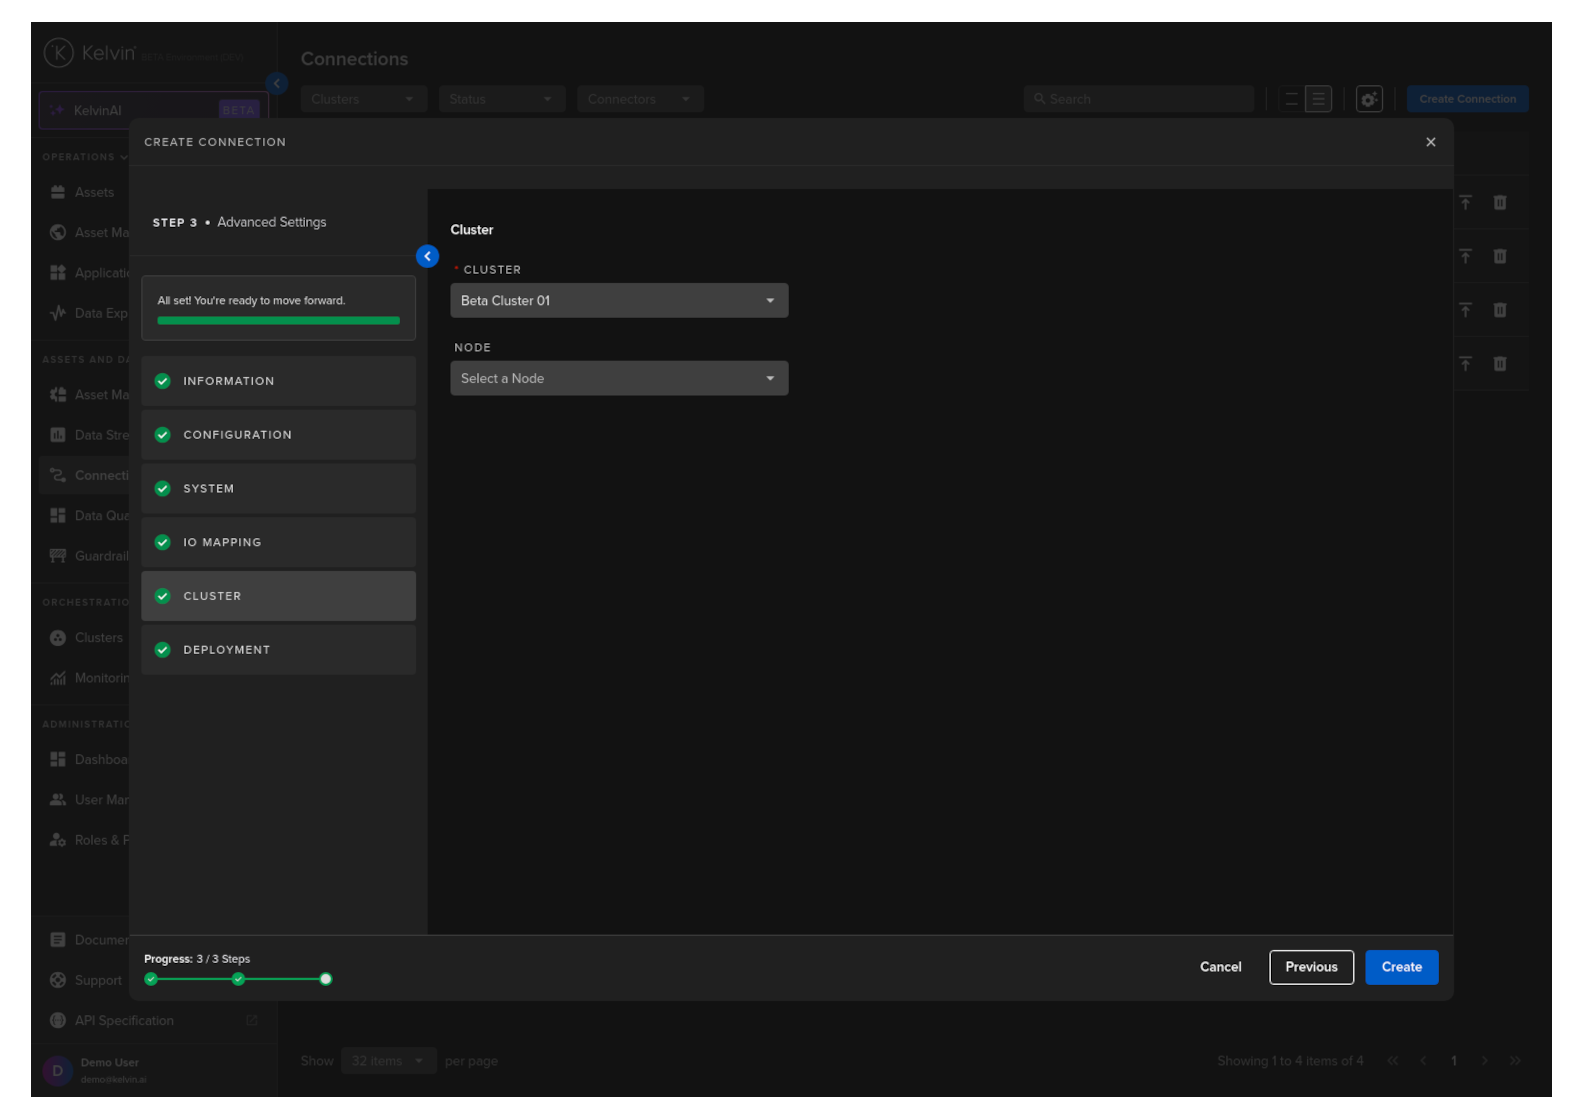
Cluster
Then select which Cluster to deploy the new Connector to.
Optionally you can also select the Node in the Cluster. If you do not then the system will automatically assign the Node.
It is important that the asset is reachable from the selected Cluster and Node.
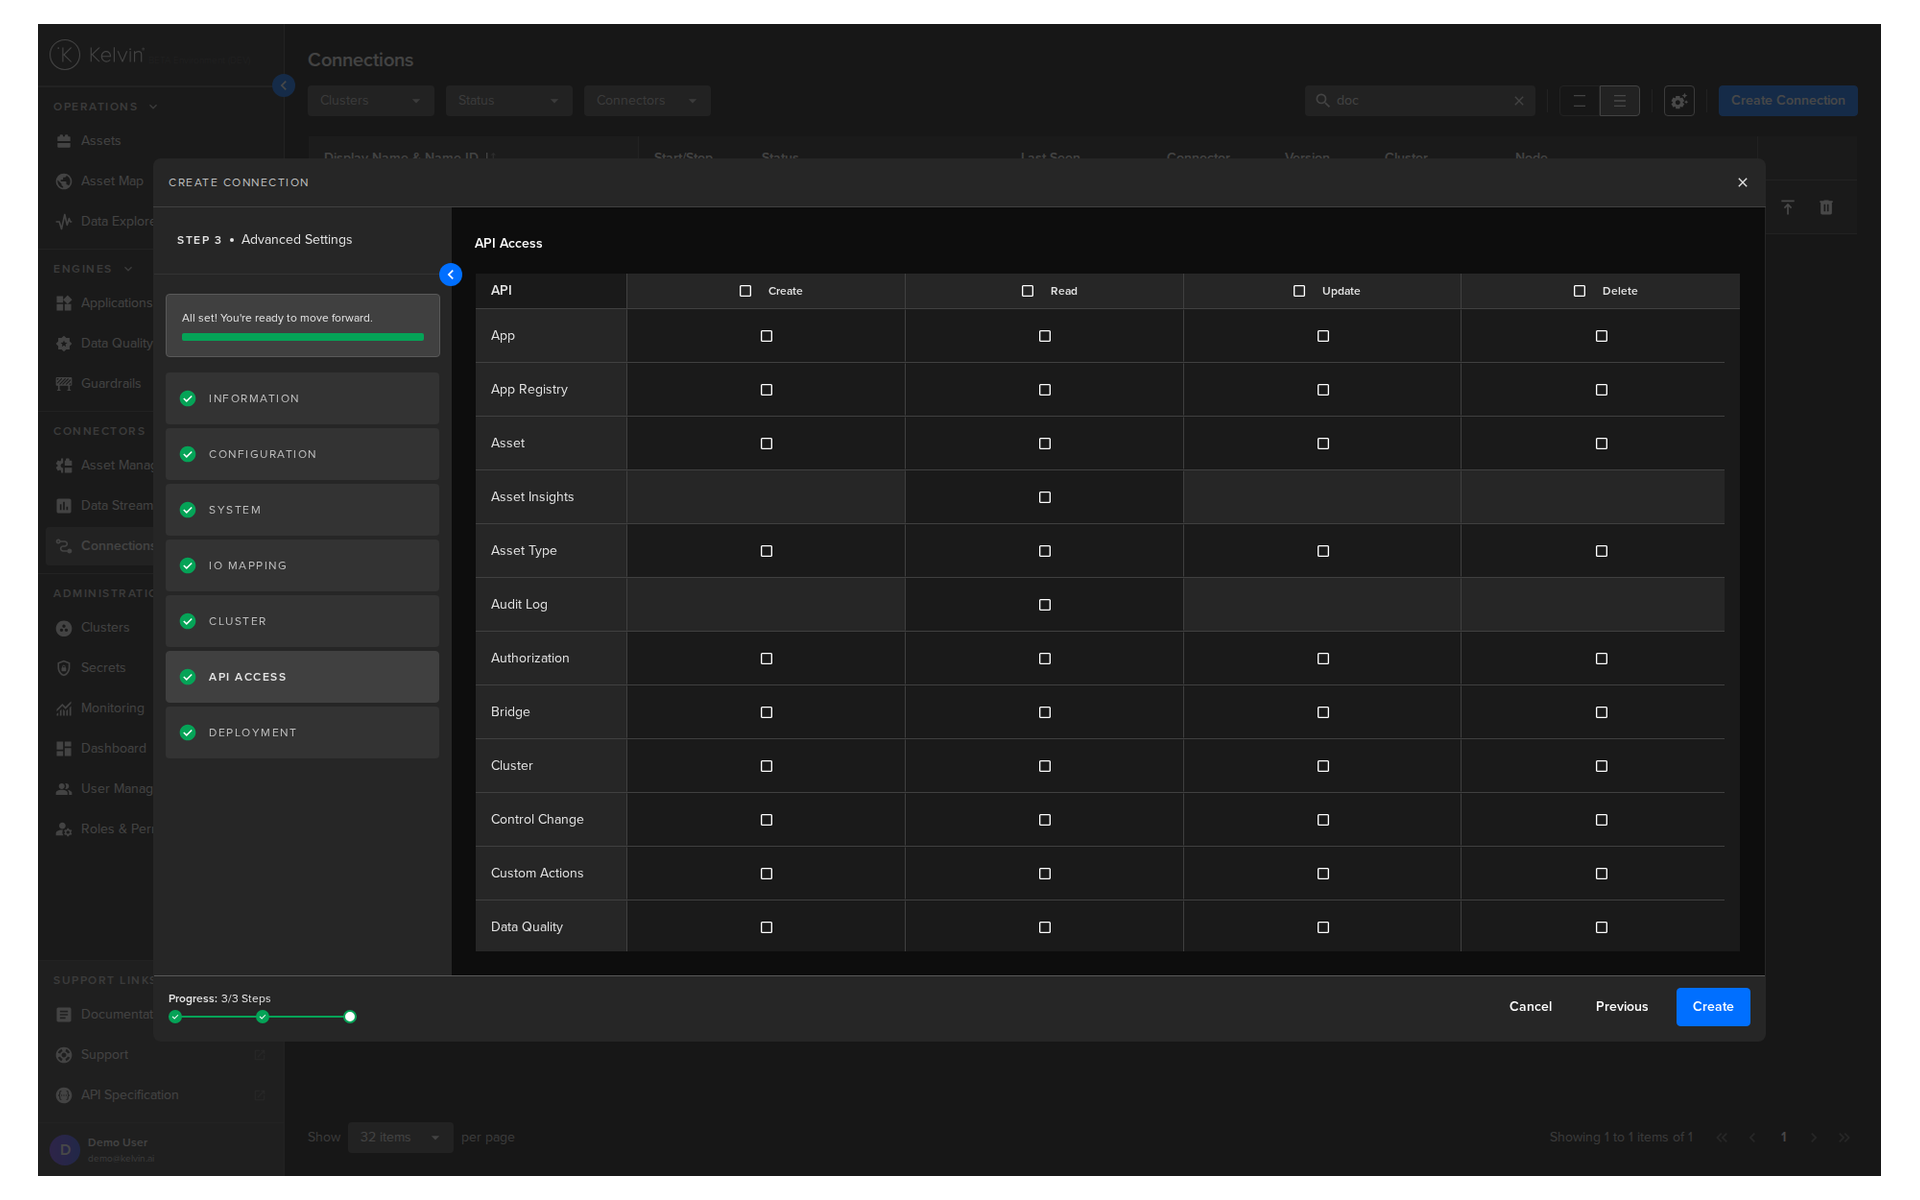
API Access
Define the API access permissions for the connection. This allows you to specify exactly which API endpoints the connection is authorized to use, improving security by granting only the permissions required to run the application.
Warning
The API Access selection can NOT be changed once the connection has been deployed.
To alter the API Access settings, you must delete and redeploy the connection.
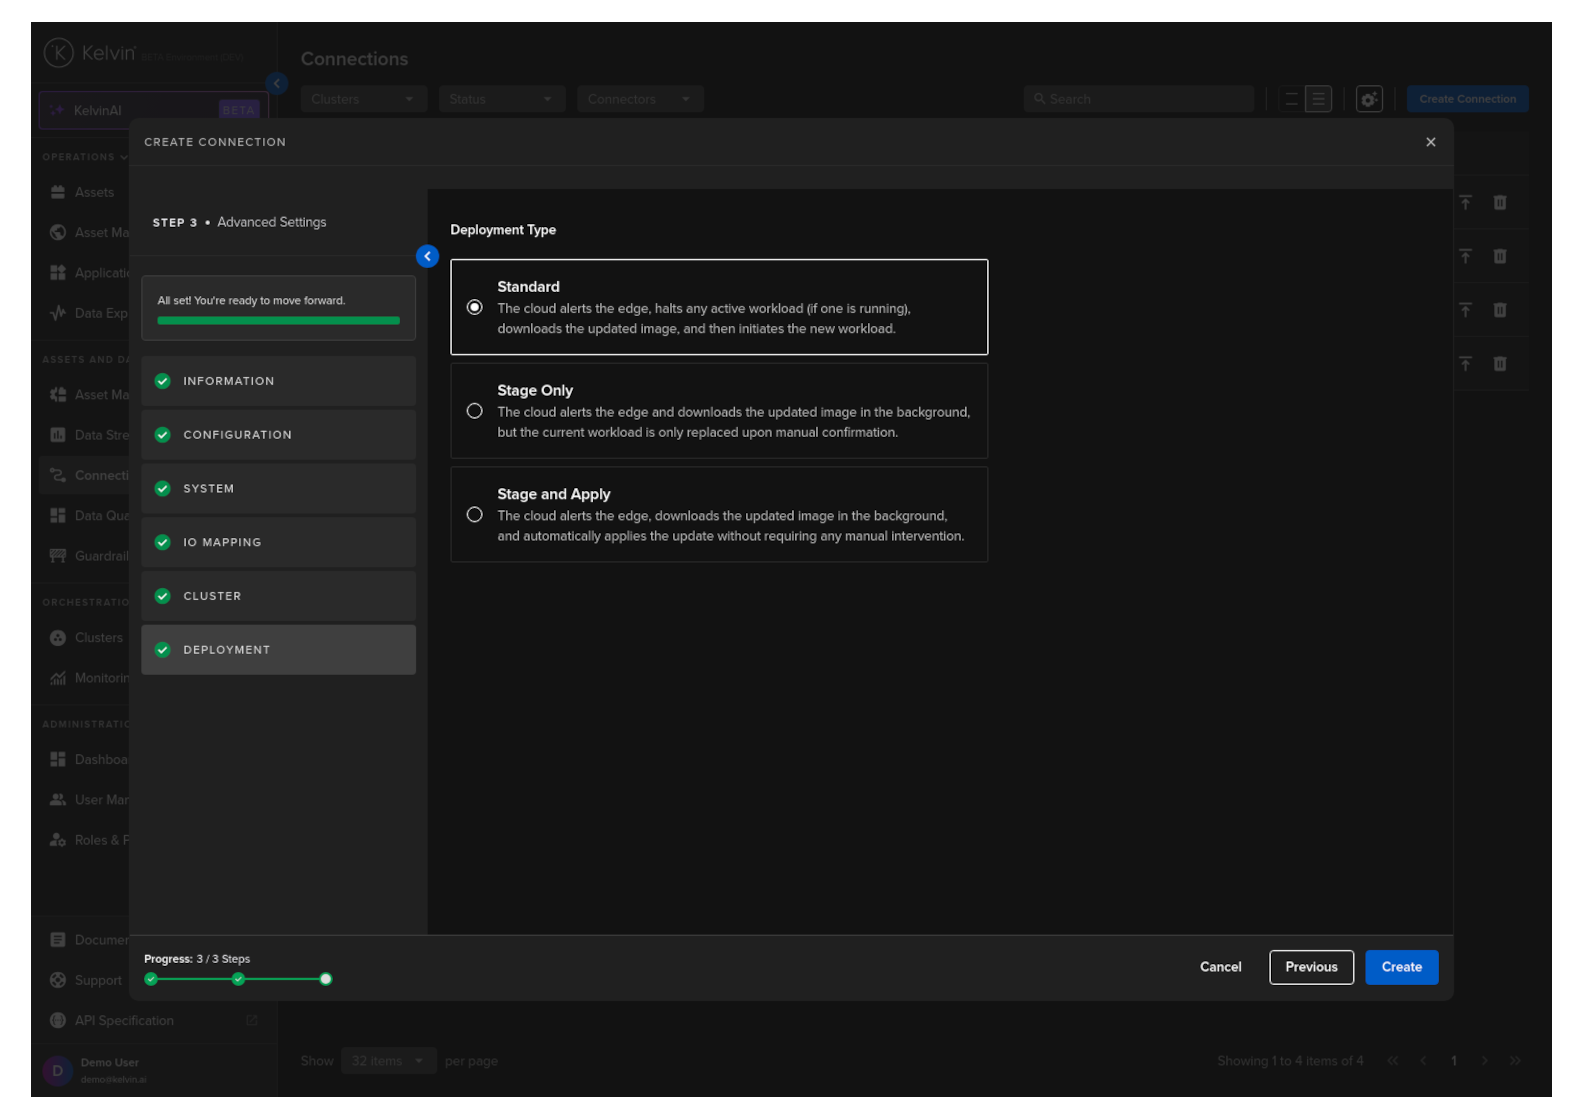
Deployment
For a standard Workload deployment, choose the Standard option.
Note
Stage Only and Instant Apply are covered in a different documentation section.
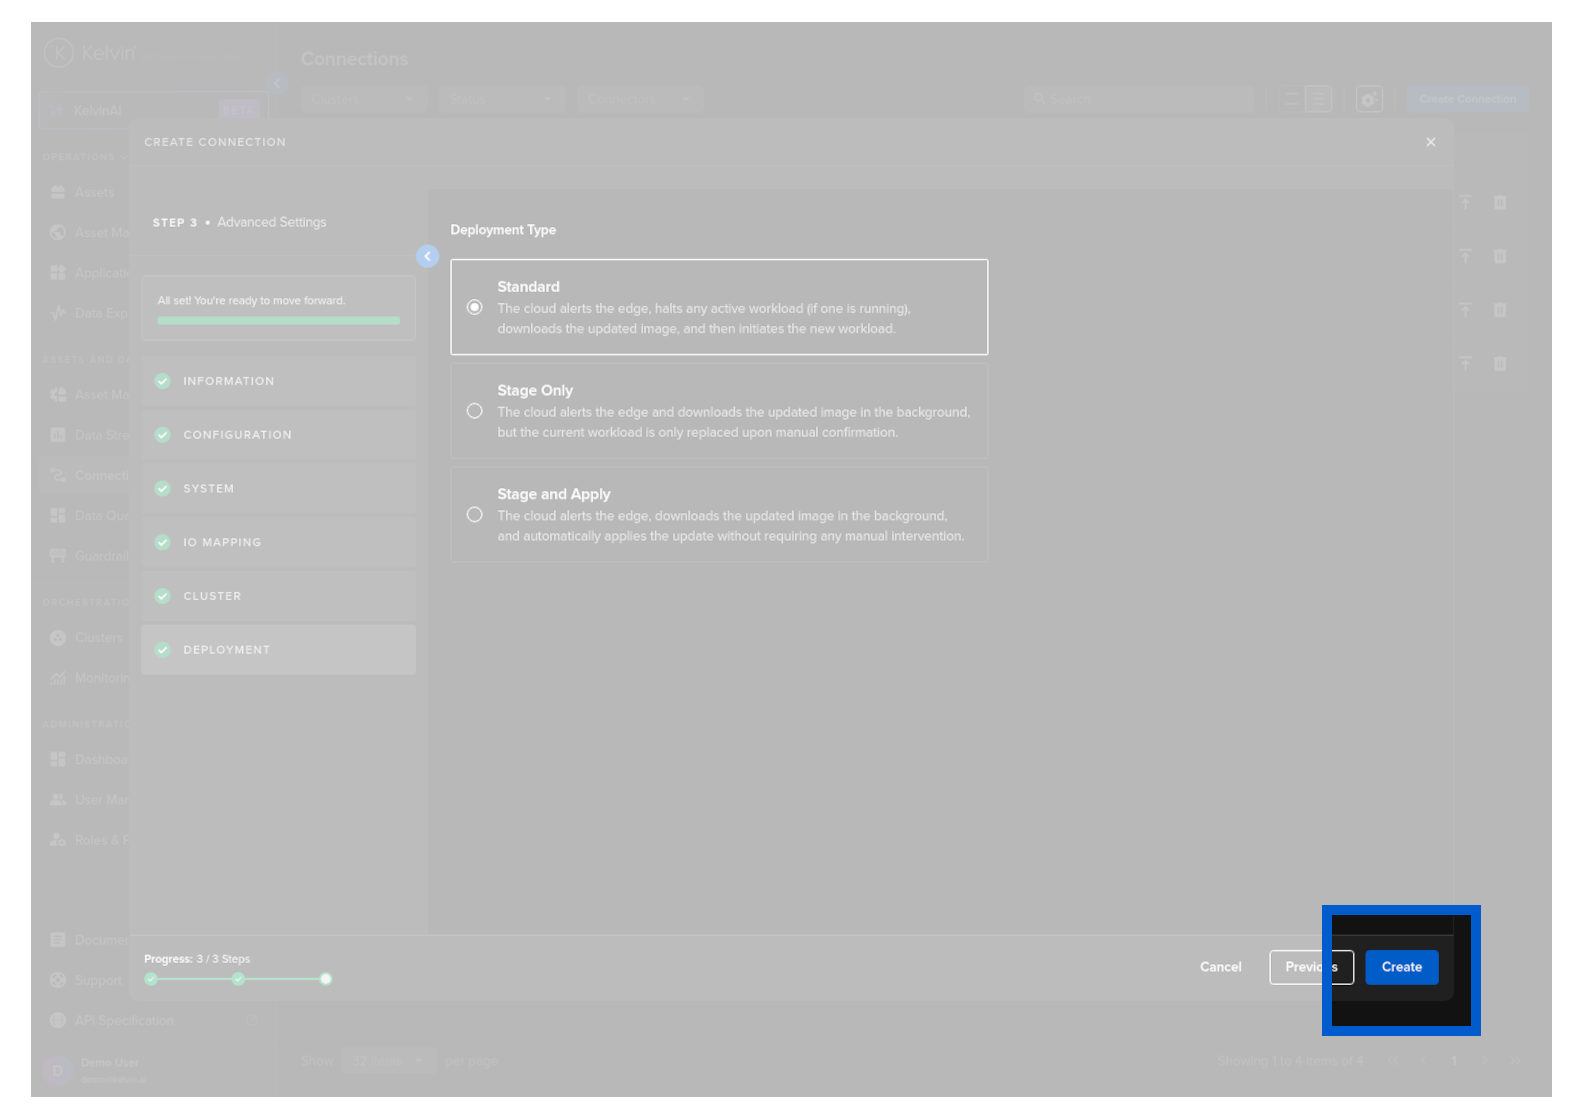
When you are ready and you have a green check ![]() on all options, you will see the Create button turn blue.
on all options, you will see the Create button turn blue.
You can then see the status of the Connection in the Connections list going from Pending, Deploying to Running. It will start automatically, connect to the asset and start collecting data.
You can even create and deploy the Connection if the Cluster is offline. It will be placed in a queue with a status of Pending and will be automatically deployed when the Cluster comes back online.
This is a bare bones example of creating a Connection. The specifics of the runtime will depend on the specifications set by the Developer of the Connection Application.
This is a bare bones example of creating a Connection. The specifics of the payload will depend on the specifications set by the Developer of the Connection Application.