Deploy Workload
Deploying a workload means that you select a Kelvin SmartApp or Docker App from the App Registry and deploy it to the edge to monitor and control nominated assets.
Note
The App Registry is a list of all Applications that have been developed and uploaded to the Kelvin Platform. You can see the full App Registry by going to Applications on the Kelvin UI.
The App Registry is already split up into groups with by type (Kelvin SmartApps™ or Docker App) or in a custom defined group.
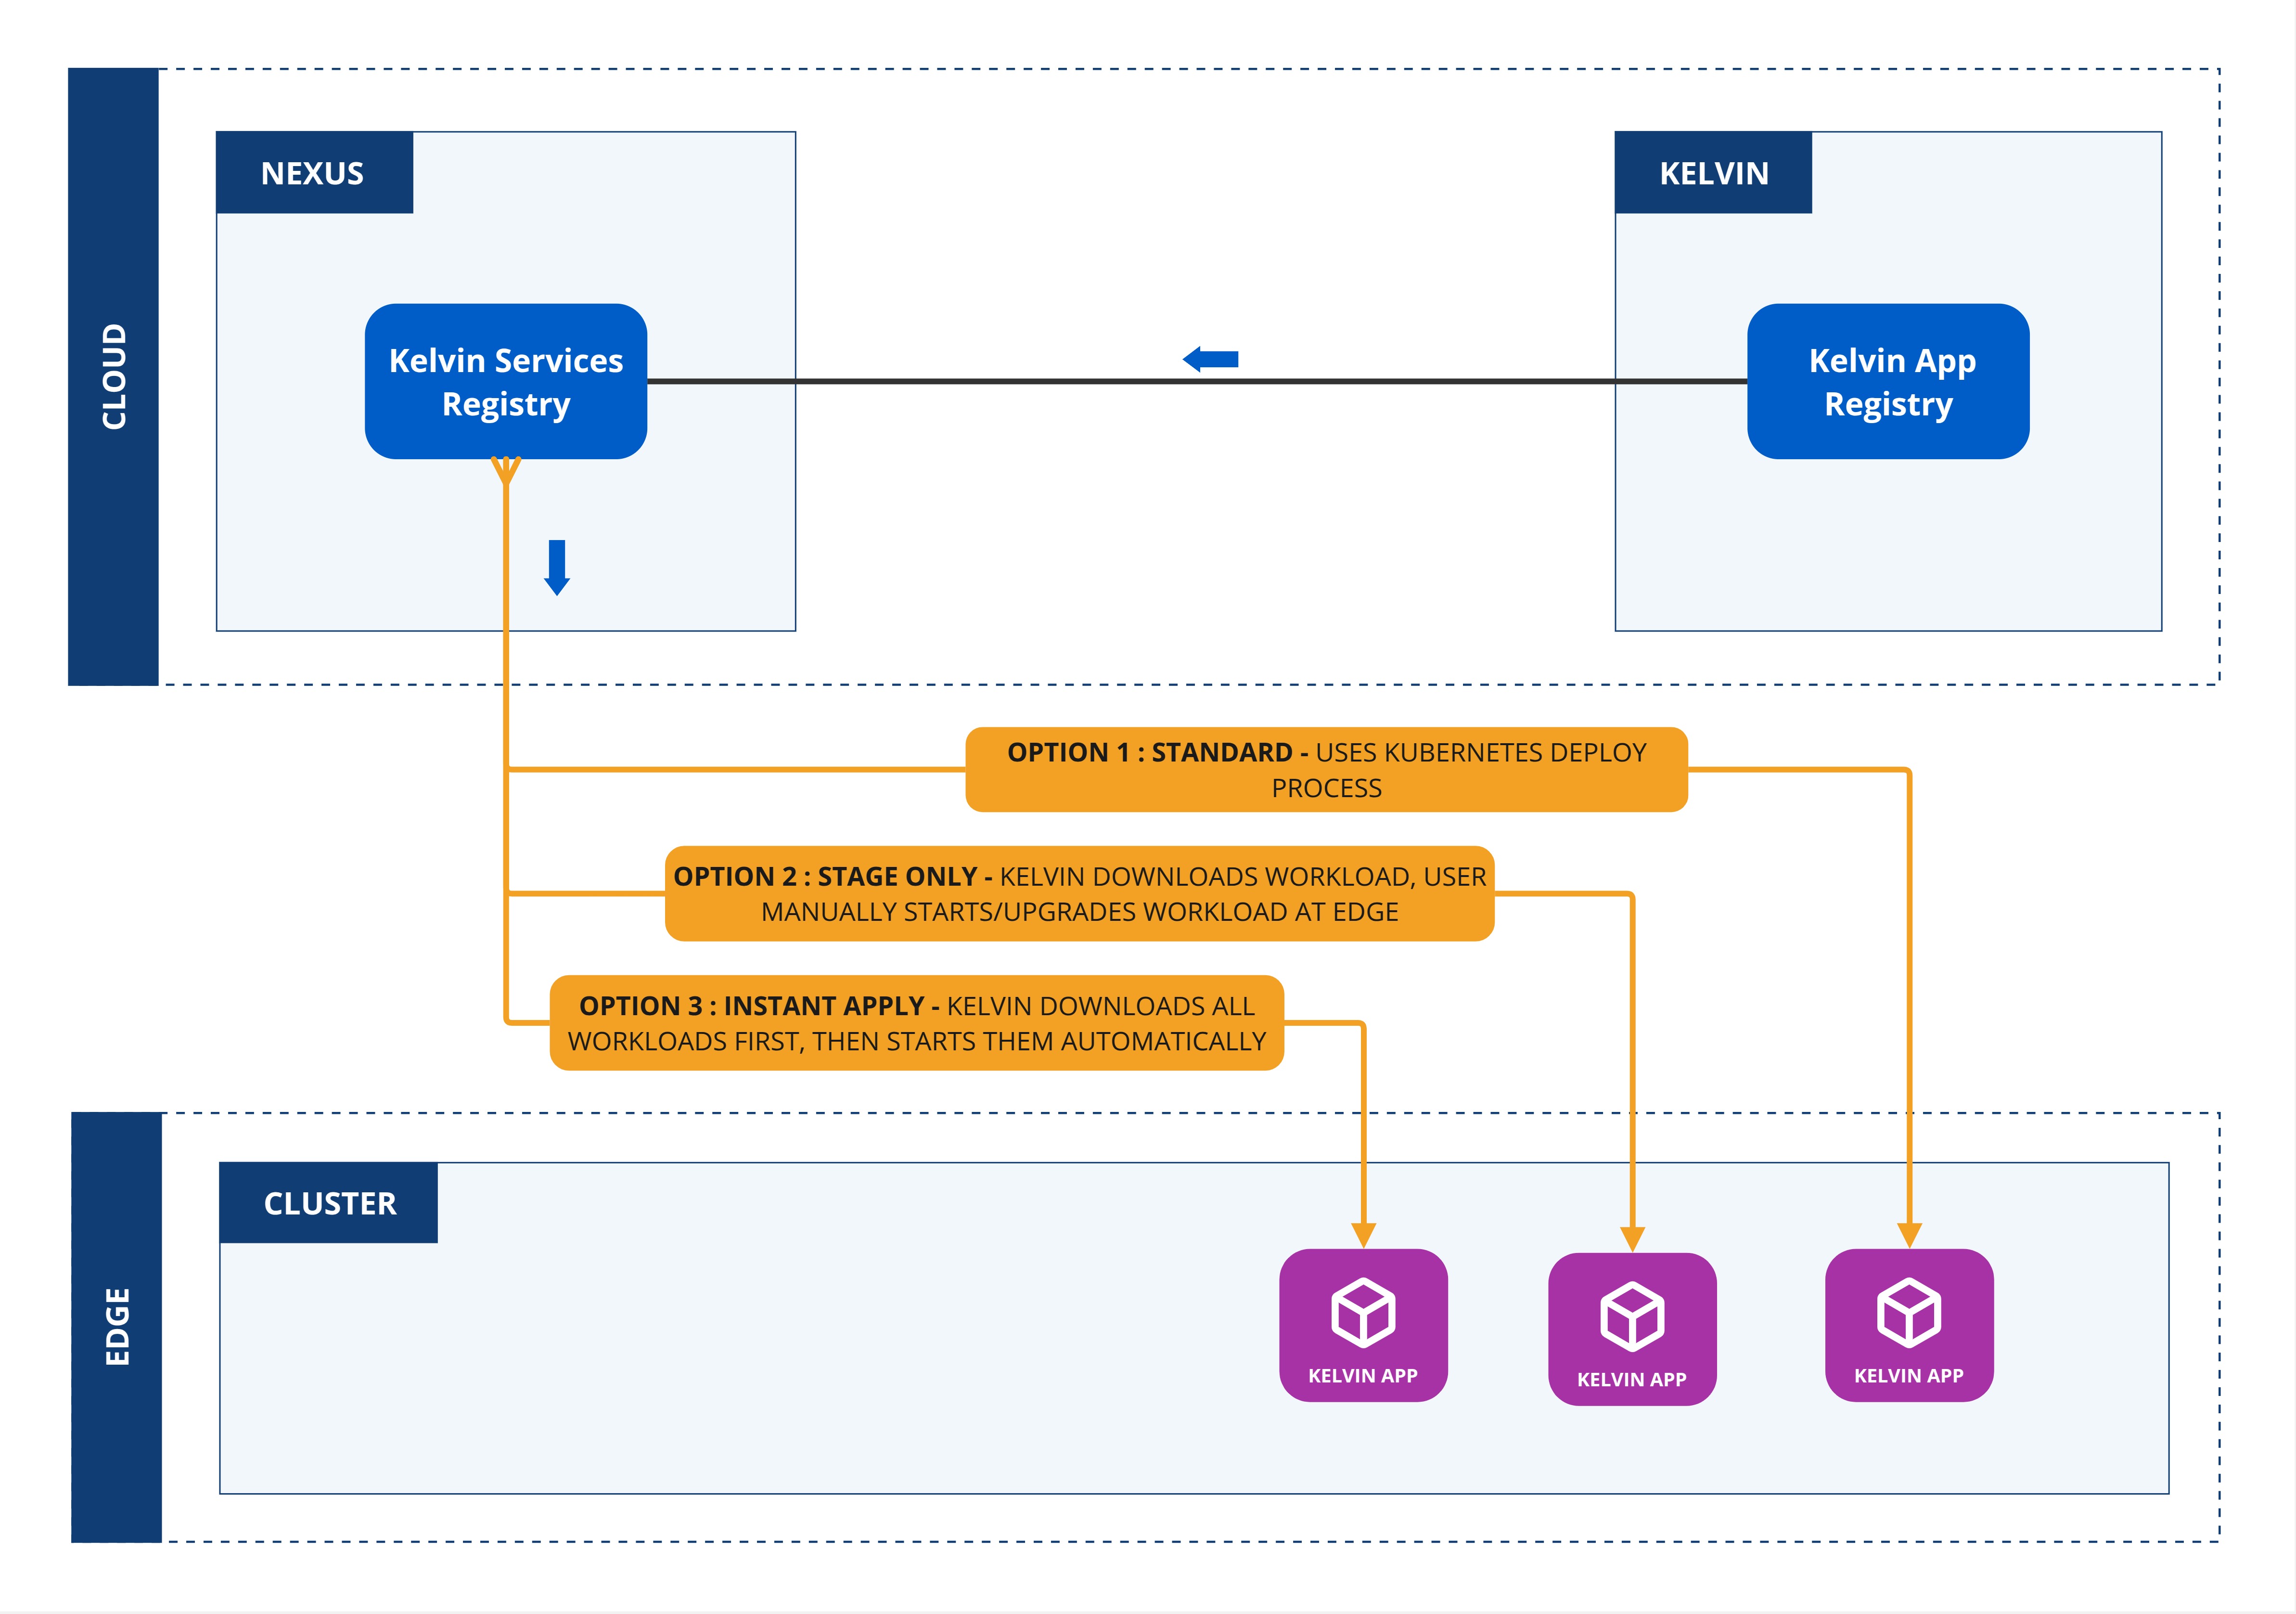
When you deploy a workload, you can choose whether to deploy immediately or to stage the workload at the edge and apply it at a later time.
| Field | Option | Description |
|---|---|---|
| Standard | None | This will use the standard Kubernetes deployment process for workload containers and the workload will be automatically started after downloaded to the edge. |
| Staged | Stage Only | This will download the workload to the edge but will not start the workload. You will need to send an additional command to start the workload either through the Kelvin API or locally in the terminal of the edge computer |
| Staged | Instant Apply | This will use Kelvin's deployment process for workload containers and the workload will be automatically started after downloaded to the edge. The difference to the Kubernetes deployment process is that Kelvin will download all workloads and stage them first. Only when all workloads have been successfully downloaded will the start command be given to all the workloads. |
Default Settings
To simplify the deployment process, you can set default settings that will be automatically chosen when deploying.
Note
The default settings can overwritten during each deploy if special conditions are required.
When completing the deployment of a Workload there is an option to update the default settings with the current deploy selections.
Deploy Standard Workload
On this page we will show you how to deploy a standard workload.
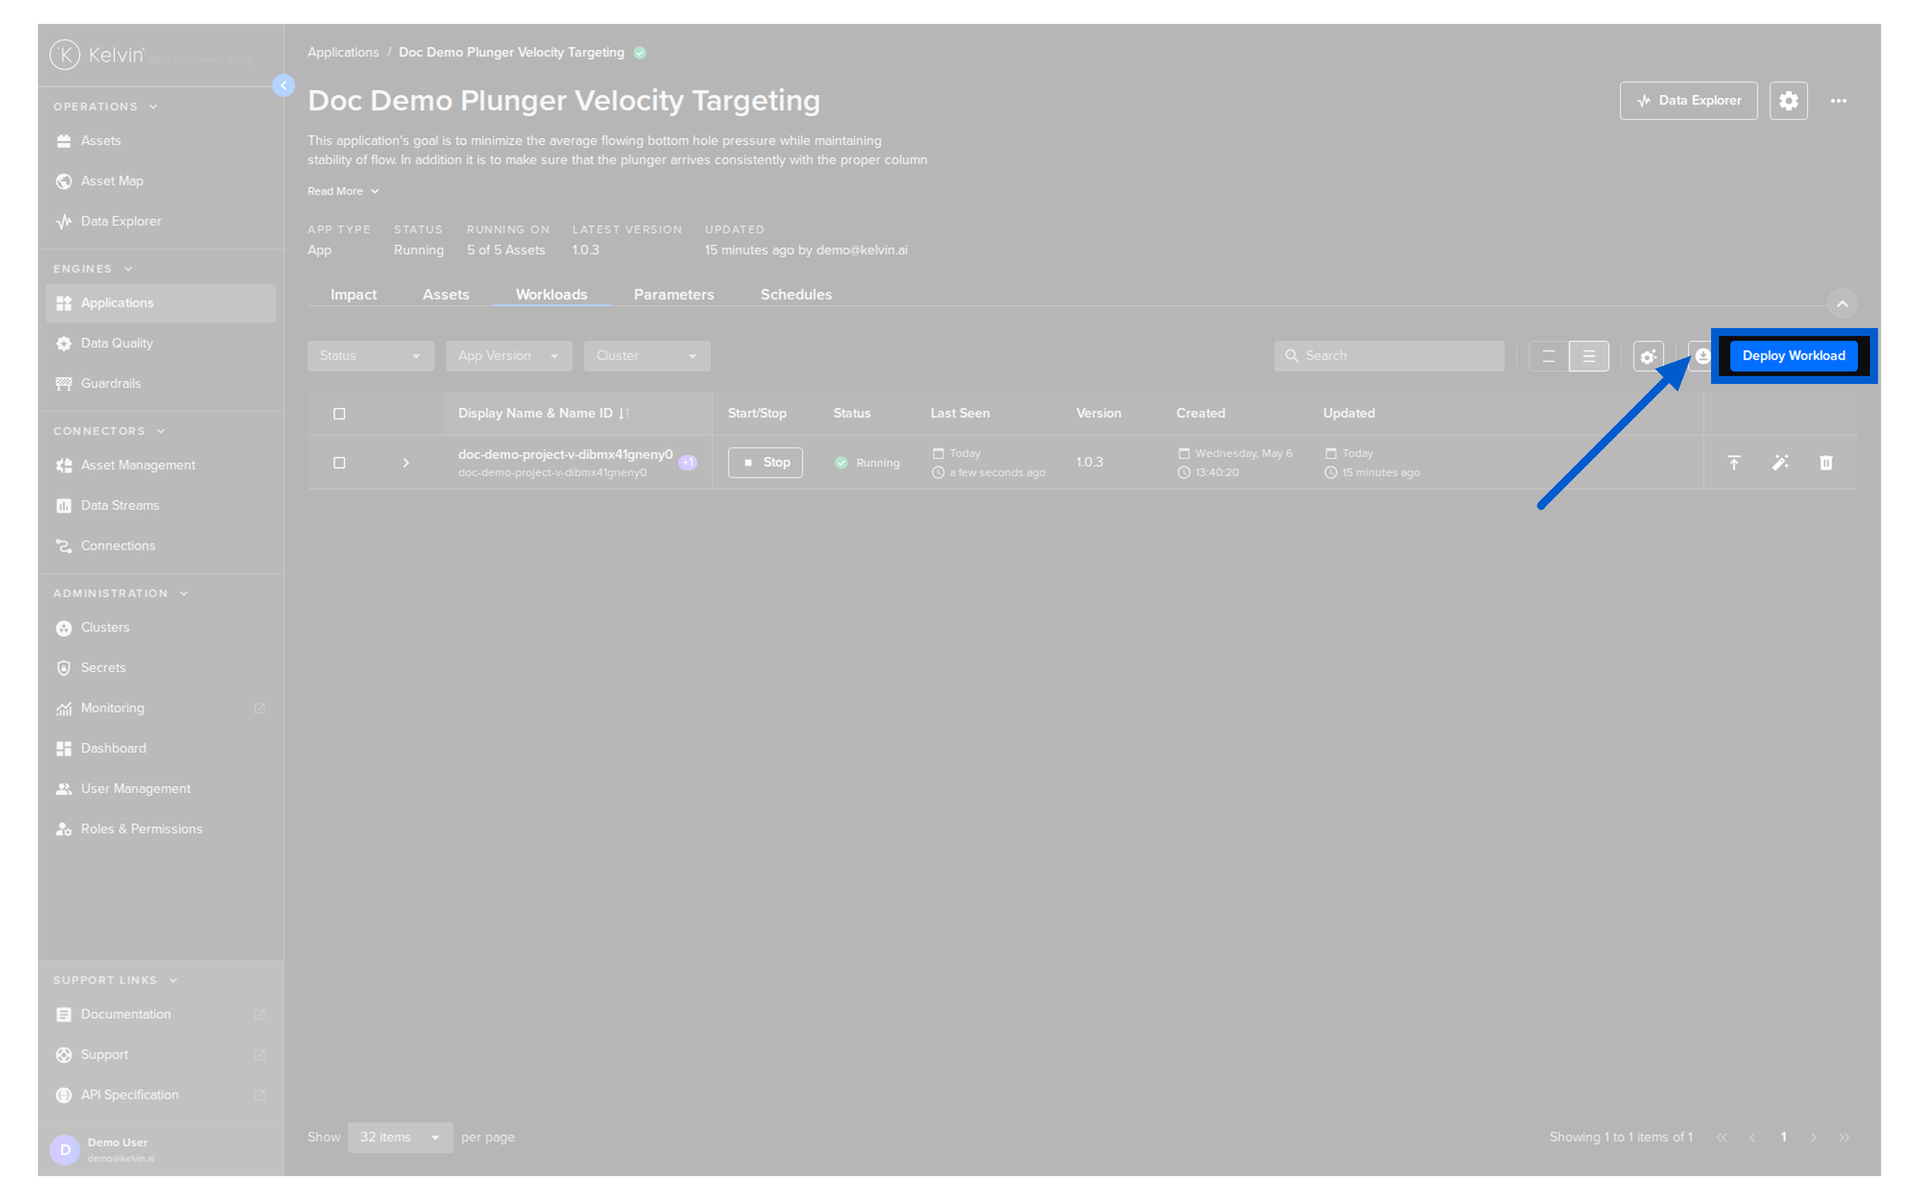
To start, go to Applications, select a Kelvin SmartApp™ with an App icon ![]() , click on the Workloads tab then click on the Deploy Workload button;
, click on the Workloads tab then click on the Deploy Workload button;
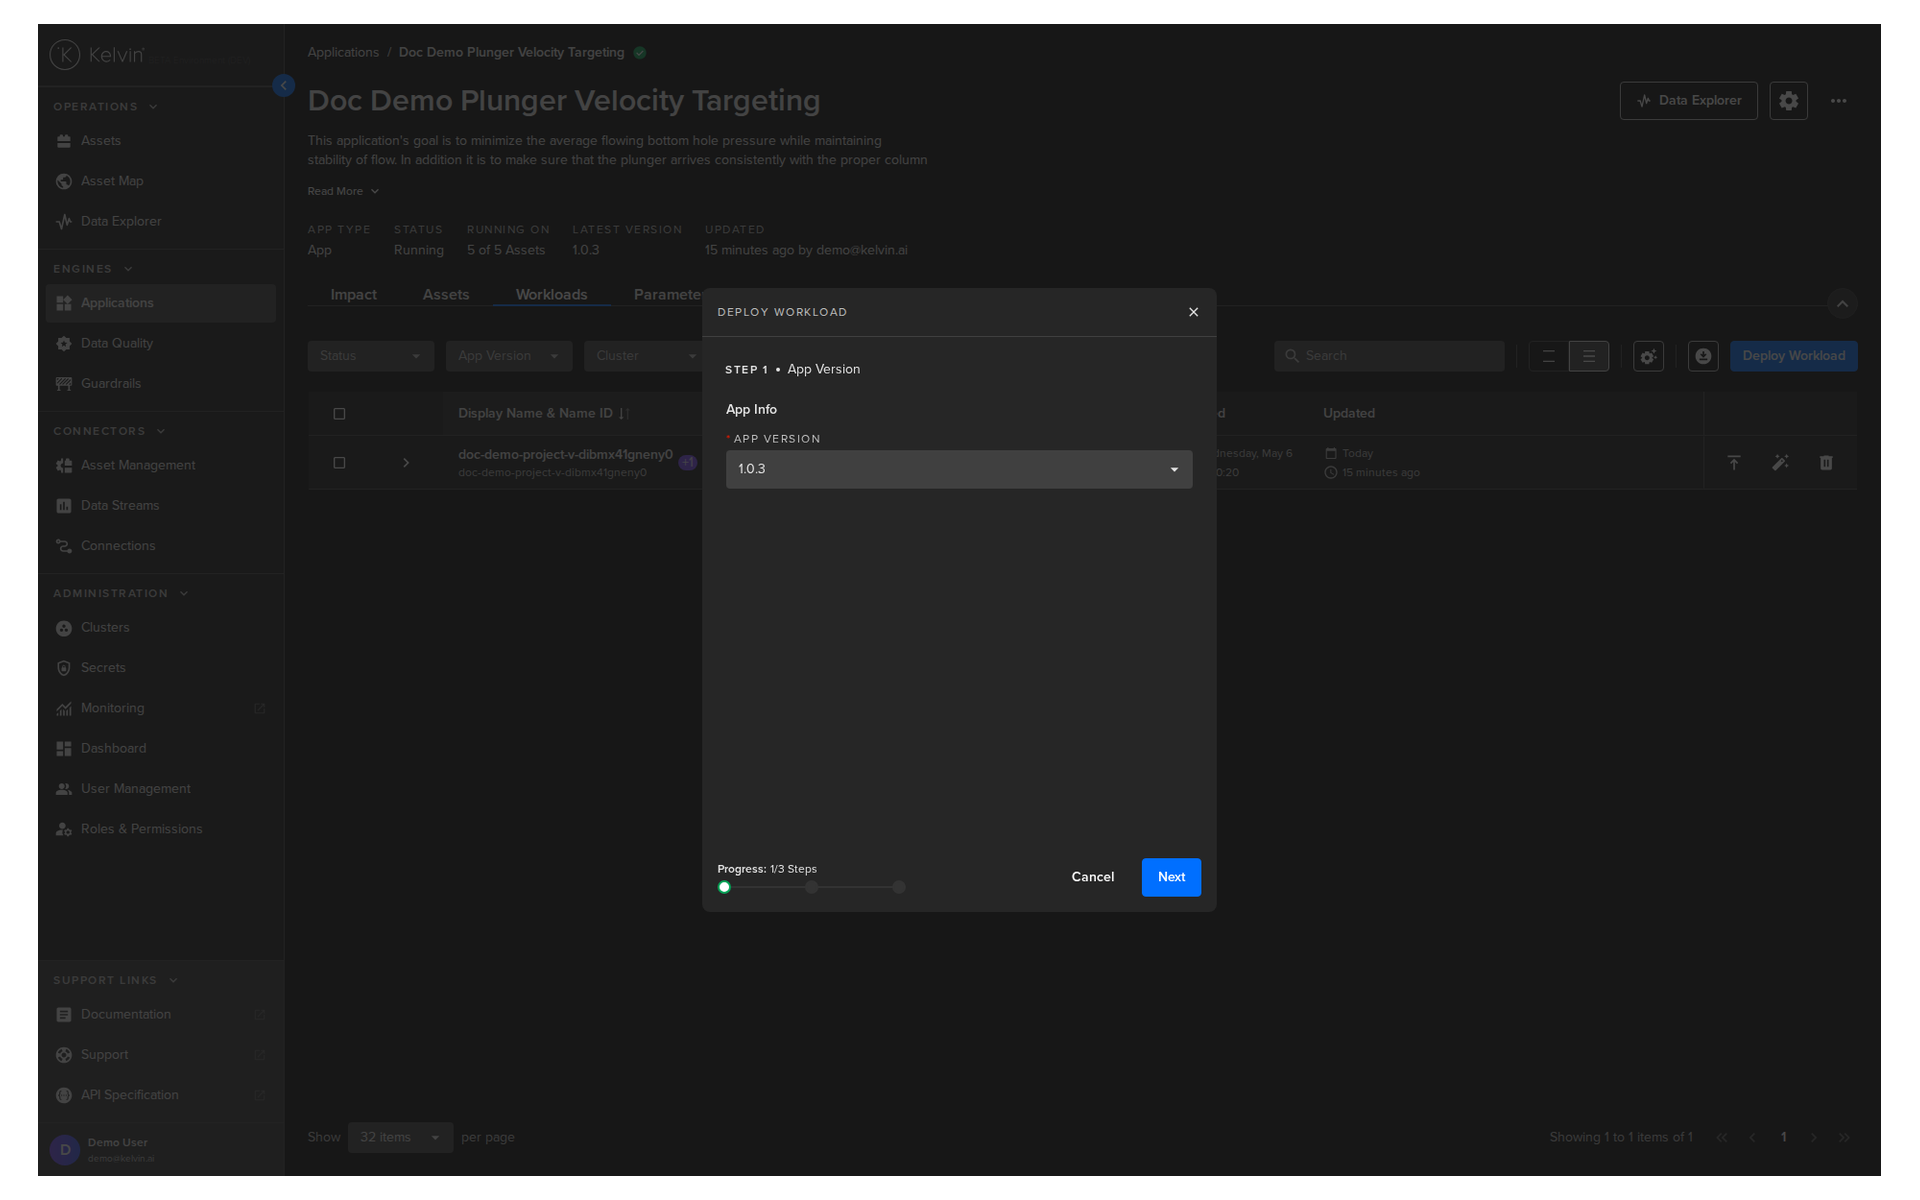
Select the Kelvin SmartApp™ App version, then click Next to go to Step 2.
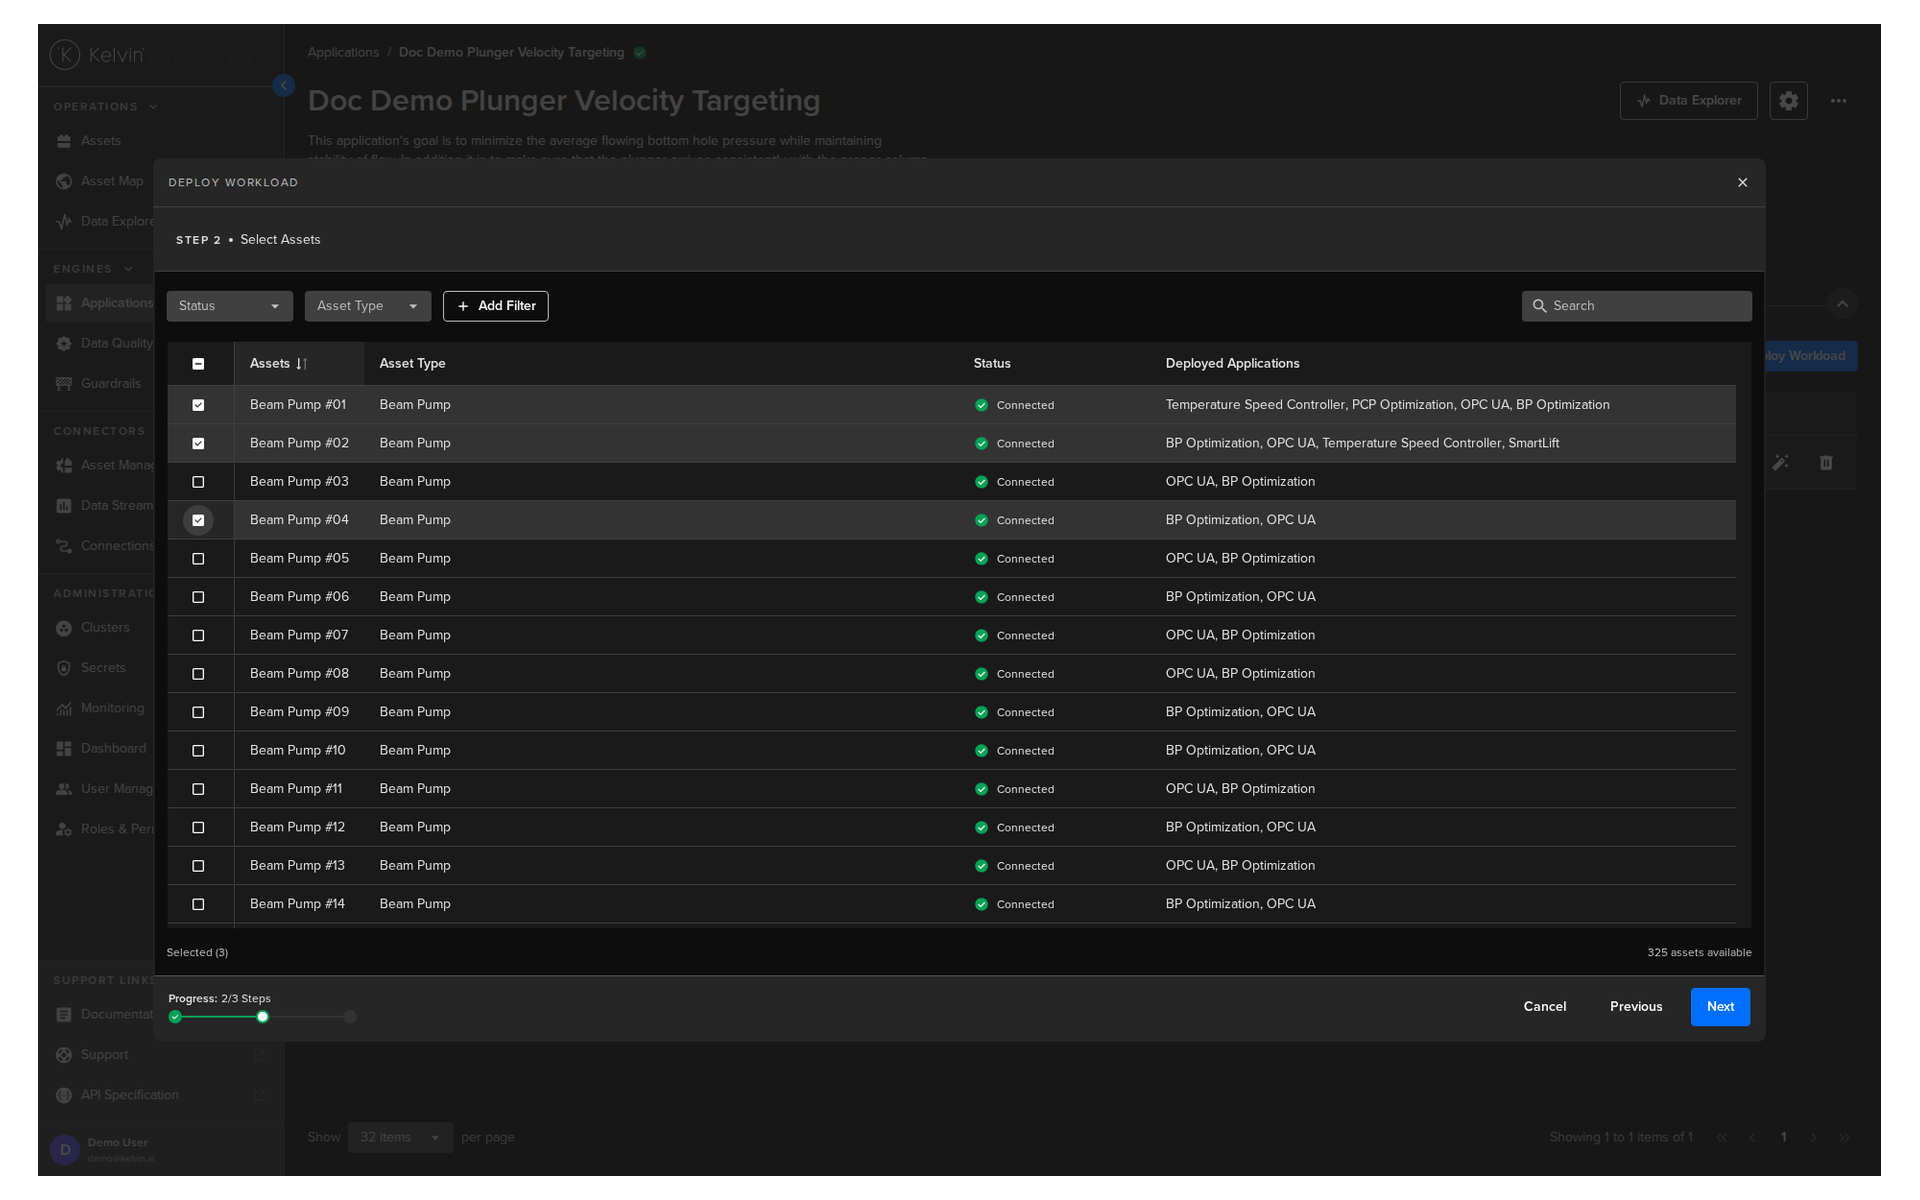
In Step 2 select the Assets you want to add to the Kelvin SmartApp™ then click the Next button.
Warning
Assets that are already running this Application will not be shown.
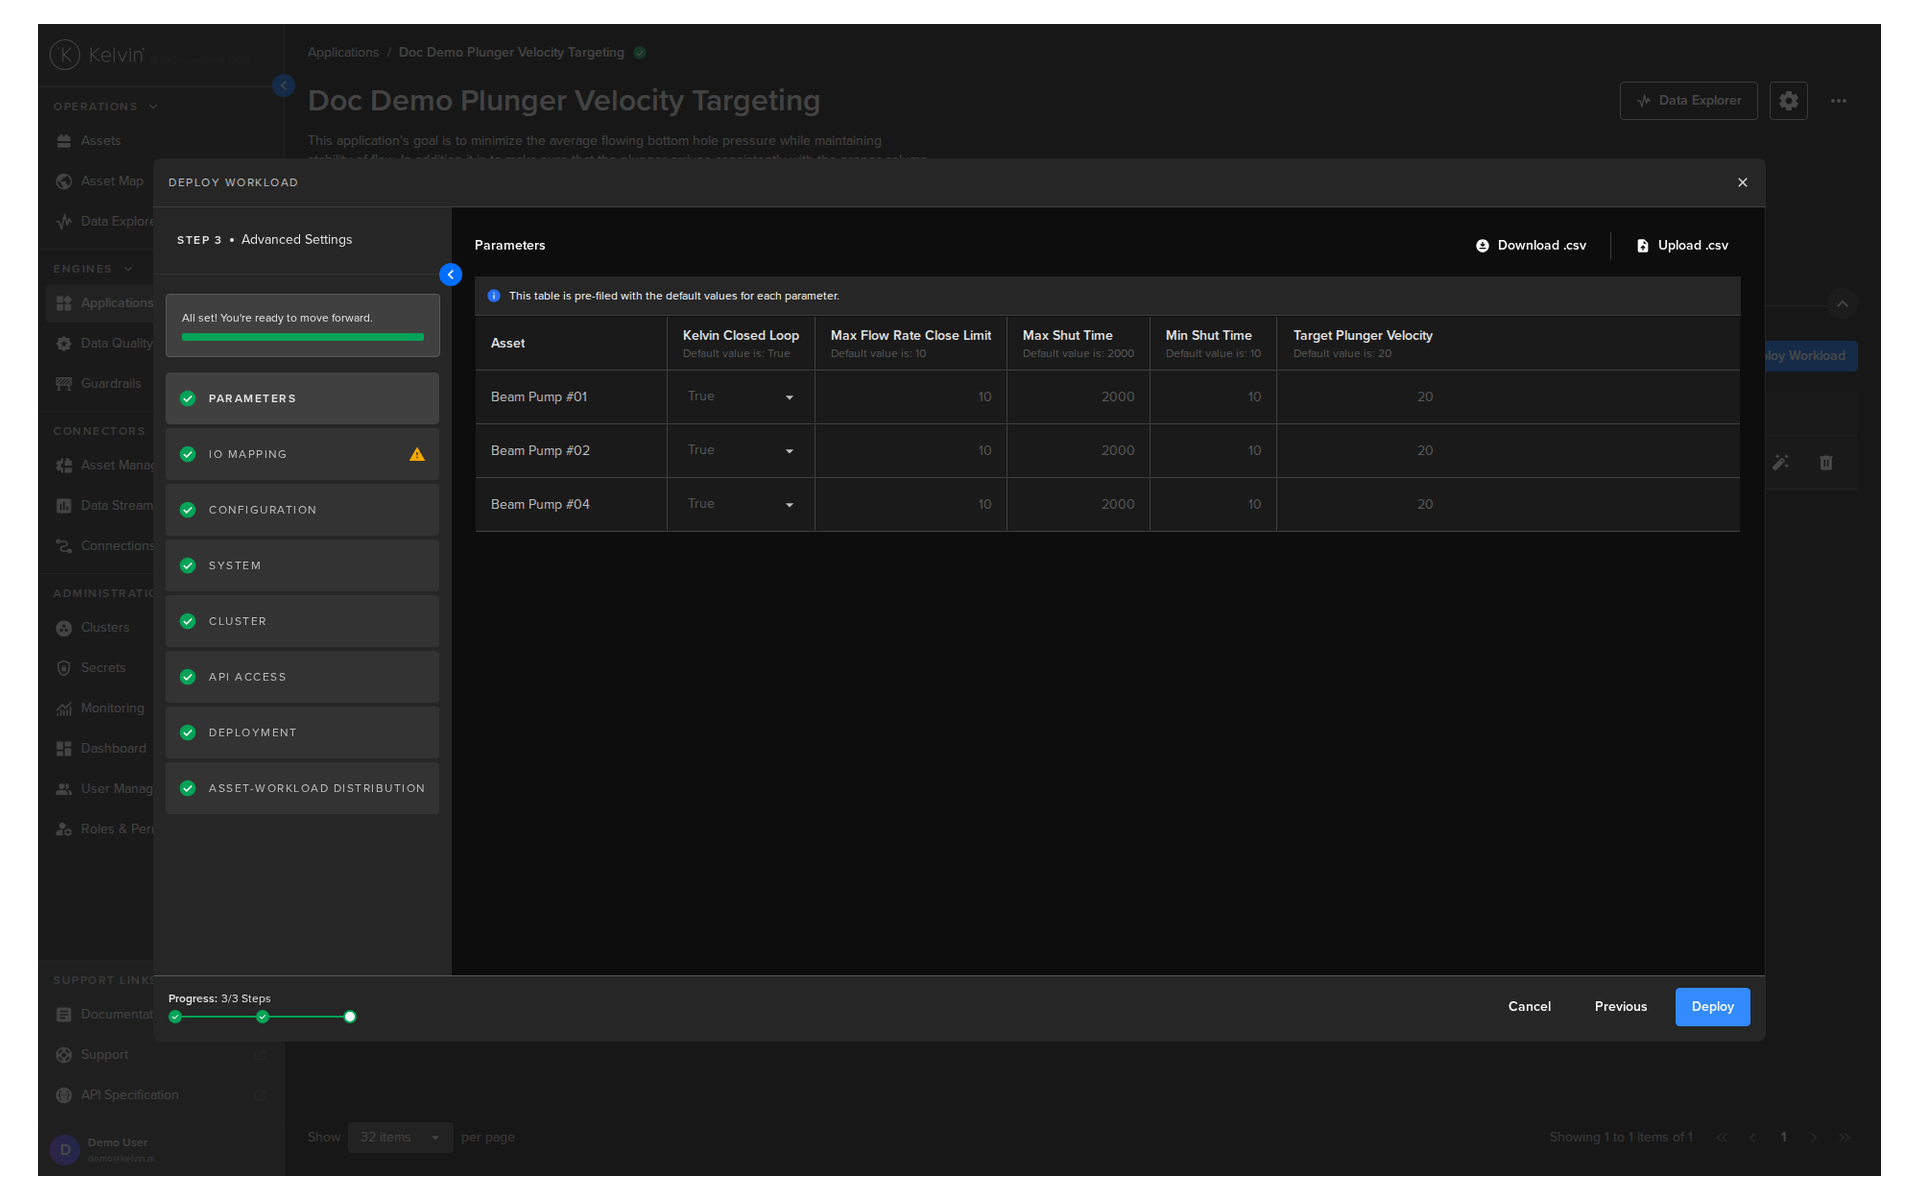
In Step 3 you have a range of options available.
Note
You will only be able to deploy your workload once all options have a green check ![]() .
.
Parameters
Select the Parameter values that each Asset should start using for this Kelvin SmartApp™ when deployed.
Note
When there are many Assets or Asset Parameters to set, you can download a blank csv file with the headers preset with the parameter names.
You only need to add the Assets names and the parameter values you want to overwrite the default values for.
Any blank spaces will be automatically filled with the default Asset Parameter values.
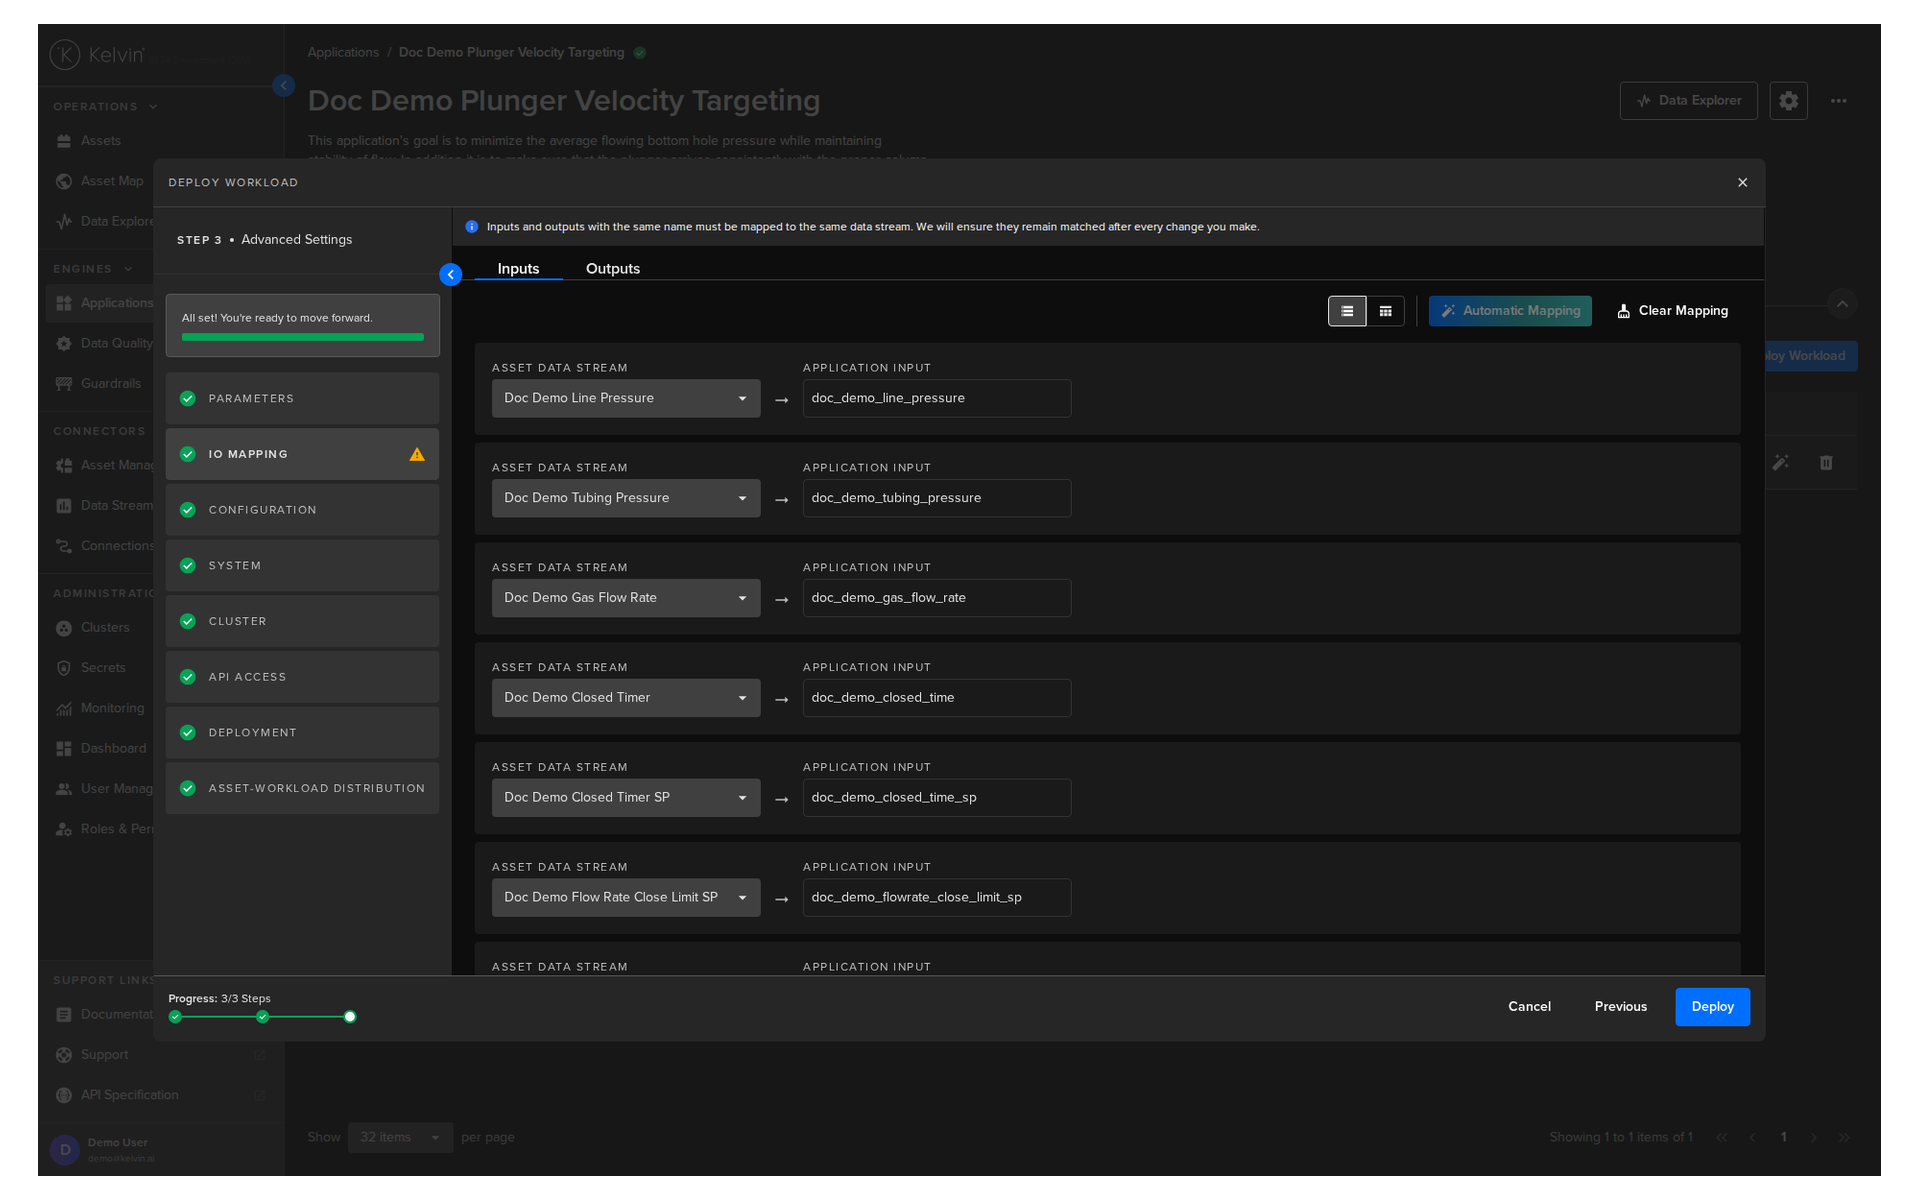
I/O Mapping
Link the Asset's Data Streams to the Kelvin SmartApp™ input/output variables.
Note
Asset's Data Streams are declared as pairs in any Connection that is deployed.
Kelvin SmartApp™ input/output variables are defined by the Developers in the app.yaml file.
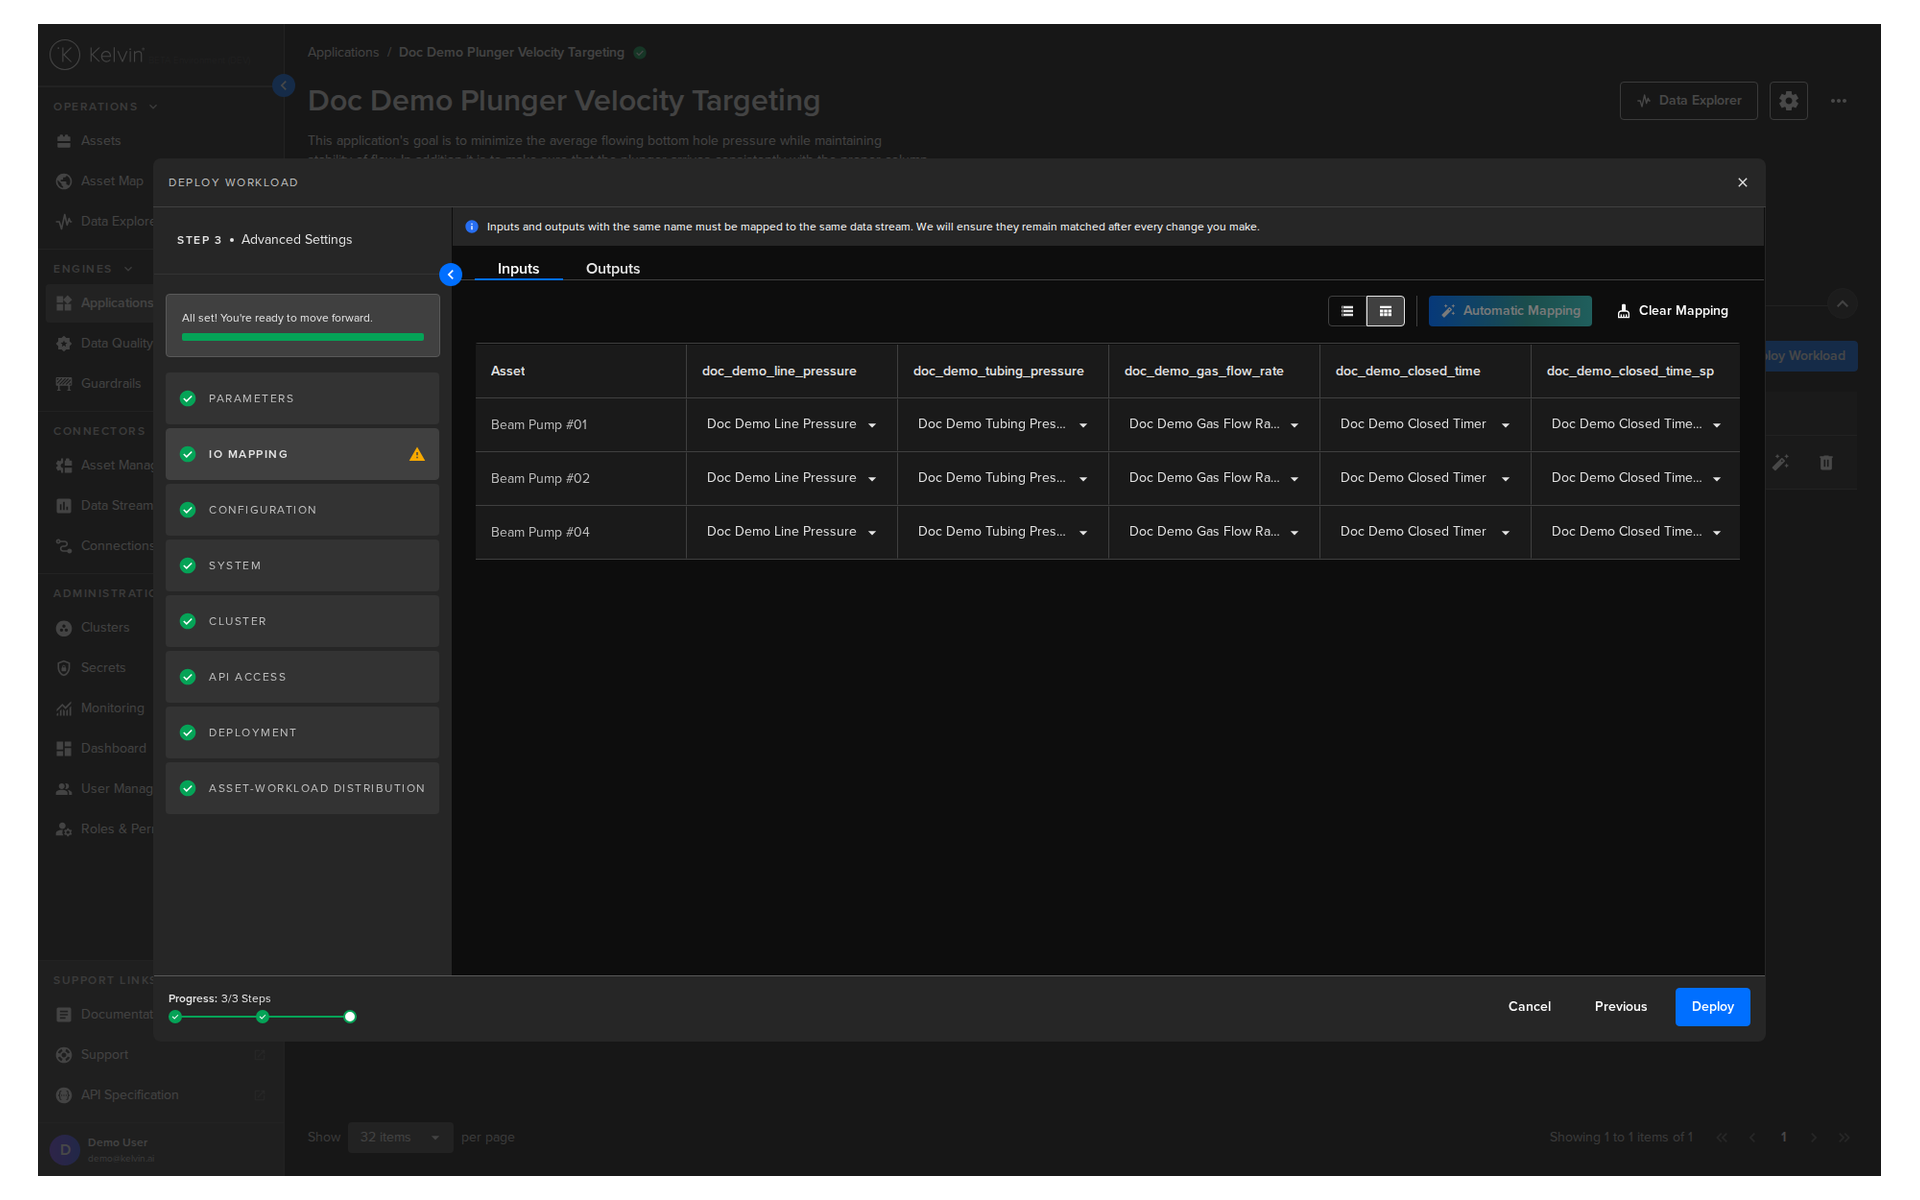
Aggregated Mapping
Aggregated Mapping lets select multiple Data Streams for each Application Input or Output.
When you click the Deploy button, the system will intelligently check each selected Asset and its Data Streams to find matching Asset/Data Stream pairs that have been declared and deployed on a Connection, and will then use those pairs for the Application Input or Output.
This allows you to add many Assets at once, even if each Asset uses a different Data Stream name for the same Application Input.
Click on the Aggregated icon.
Note
When you open this option page, this is the default view.
![]()
This is the aggregated view.
You can only select Data Streams that already have Connections that are collecting timeseries data.
Other data streams will be unselectable and have a warning icon showing.
Note
If some Assets are missing Data Streams, a warning message will appear.
You can go to the Advanced Mapping to select alternative Data Streams for the problematic Assets.
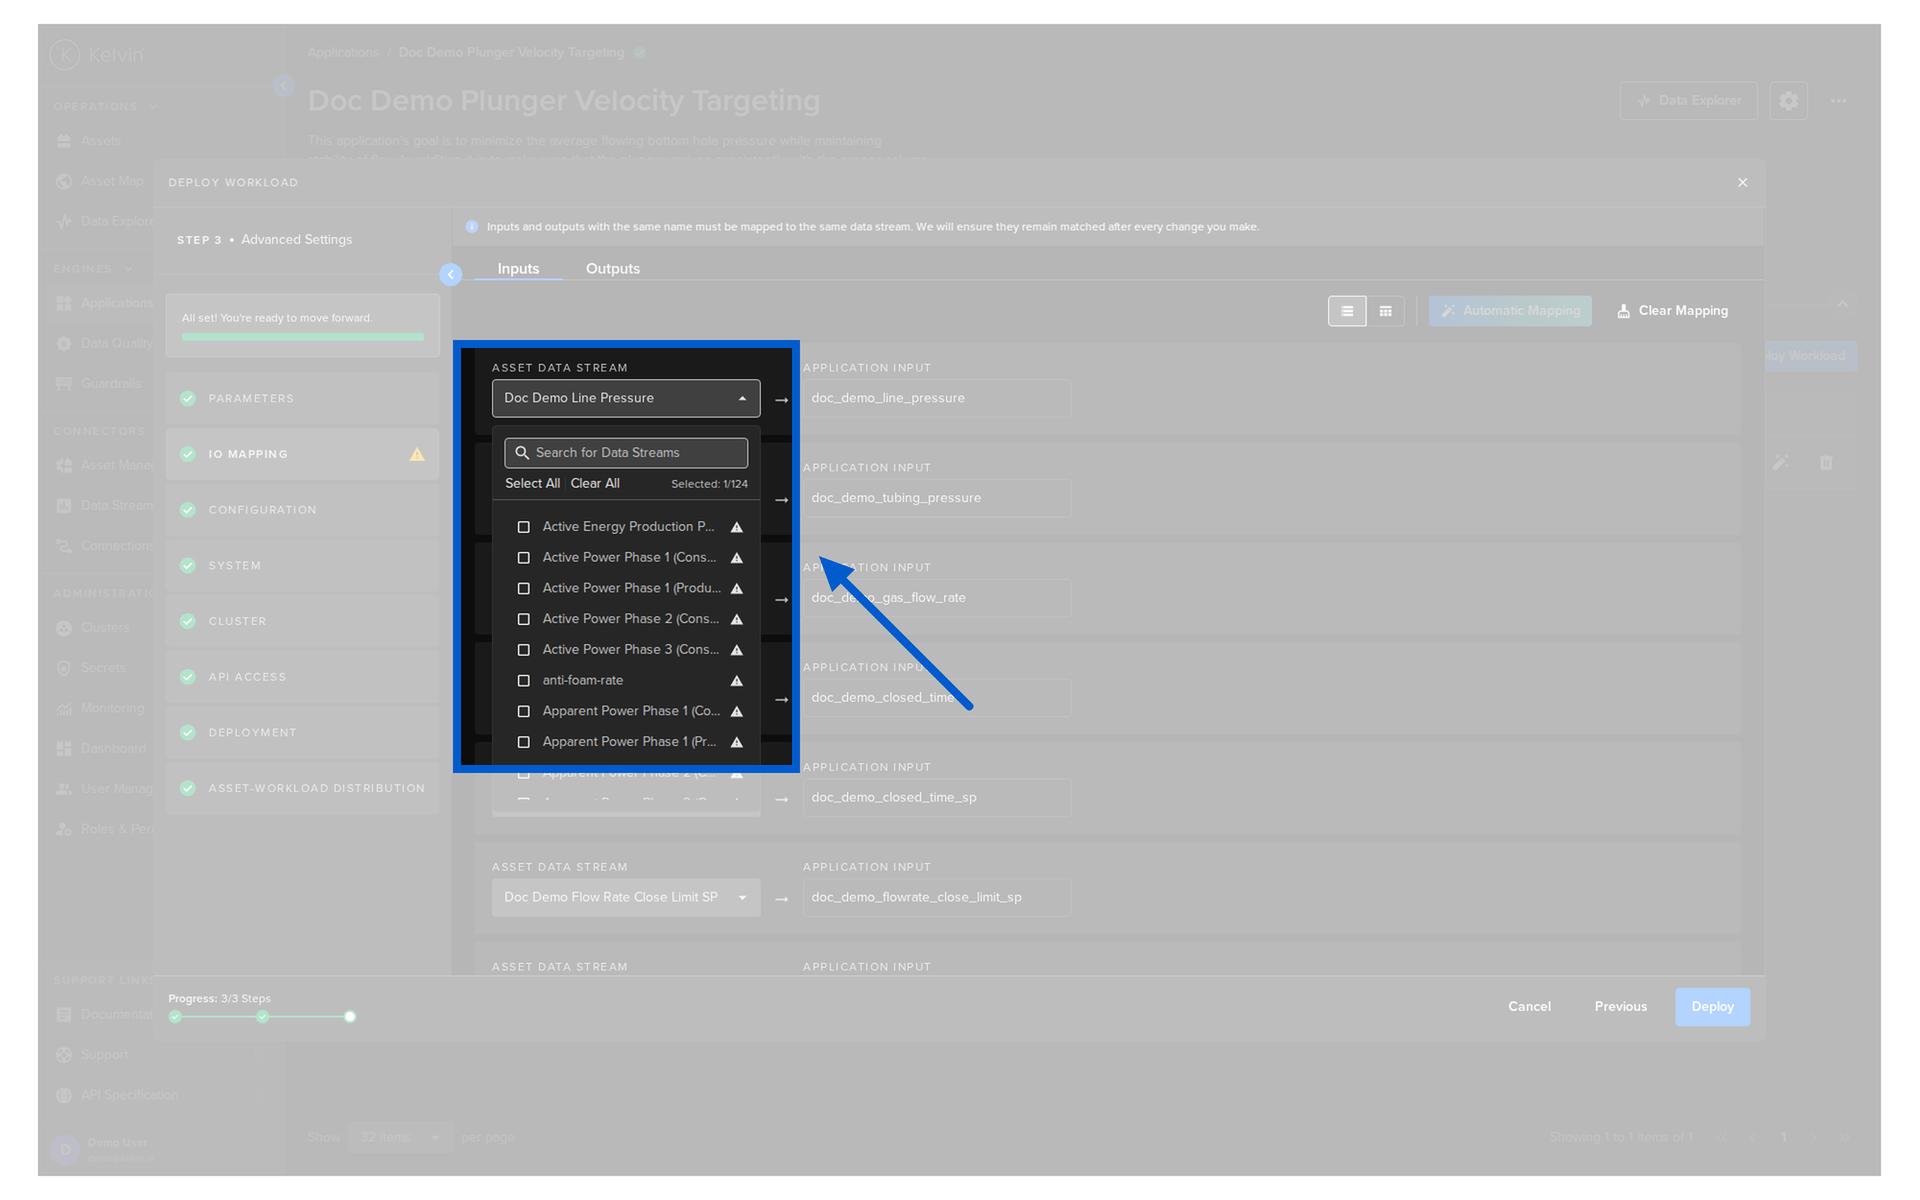
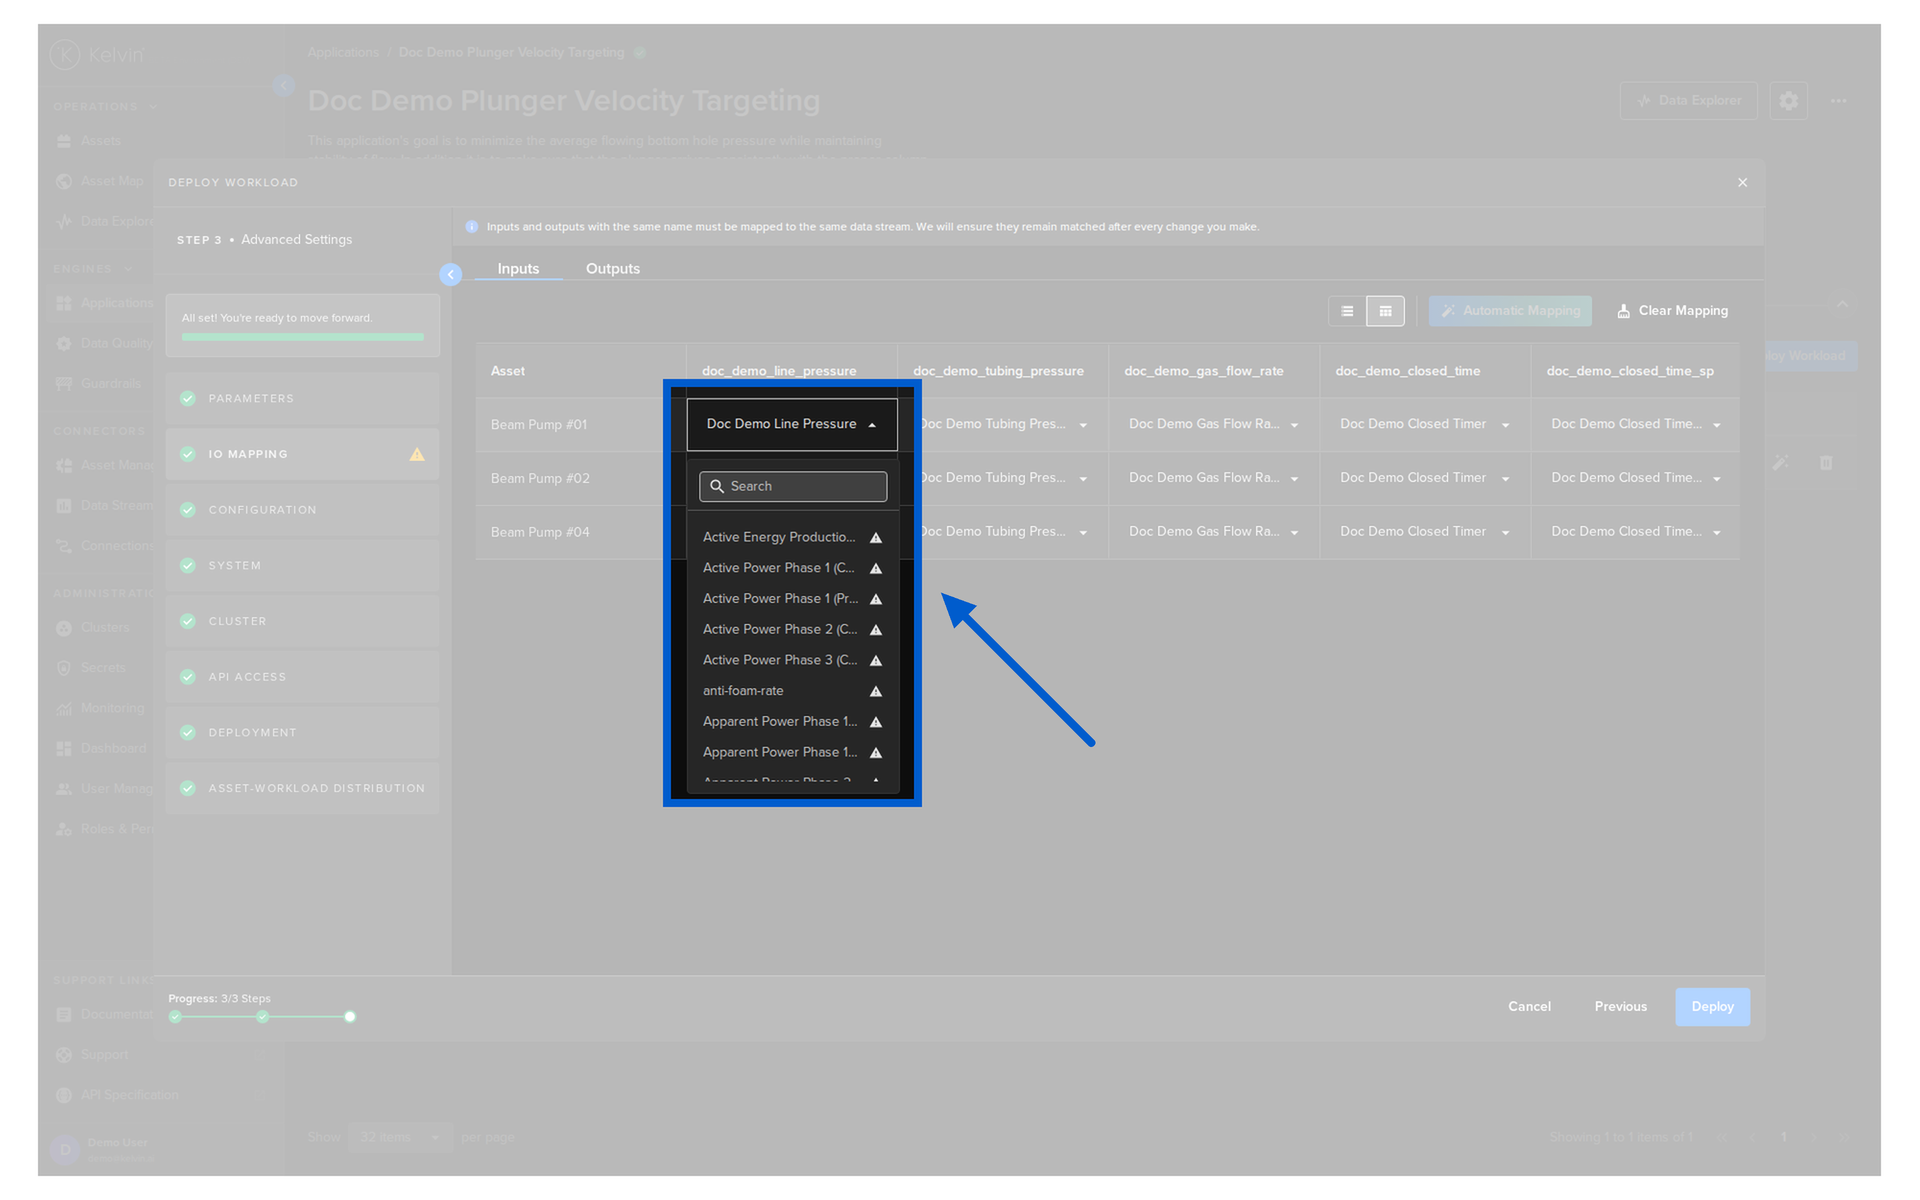
Advanced Mapping
Advanced Mapping allows you to manually select the Asset / Data Stream pairs individually for each Asset.
Note
If you select different Data Streams for each Asset for an Input, this will also be updated in the Aggregated view.
![]()
This is the advanced mapping view.
You can only select Data Streams that already have Connections that are collecting timeseries data.
Other data streams will be unselectable and have a lock showing.
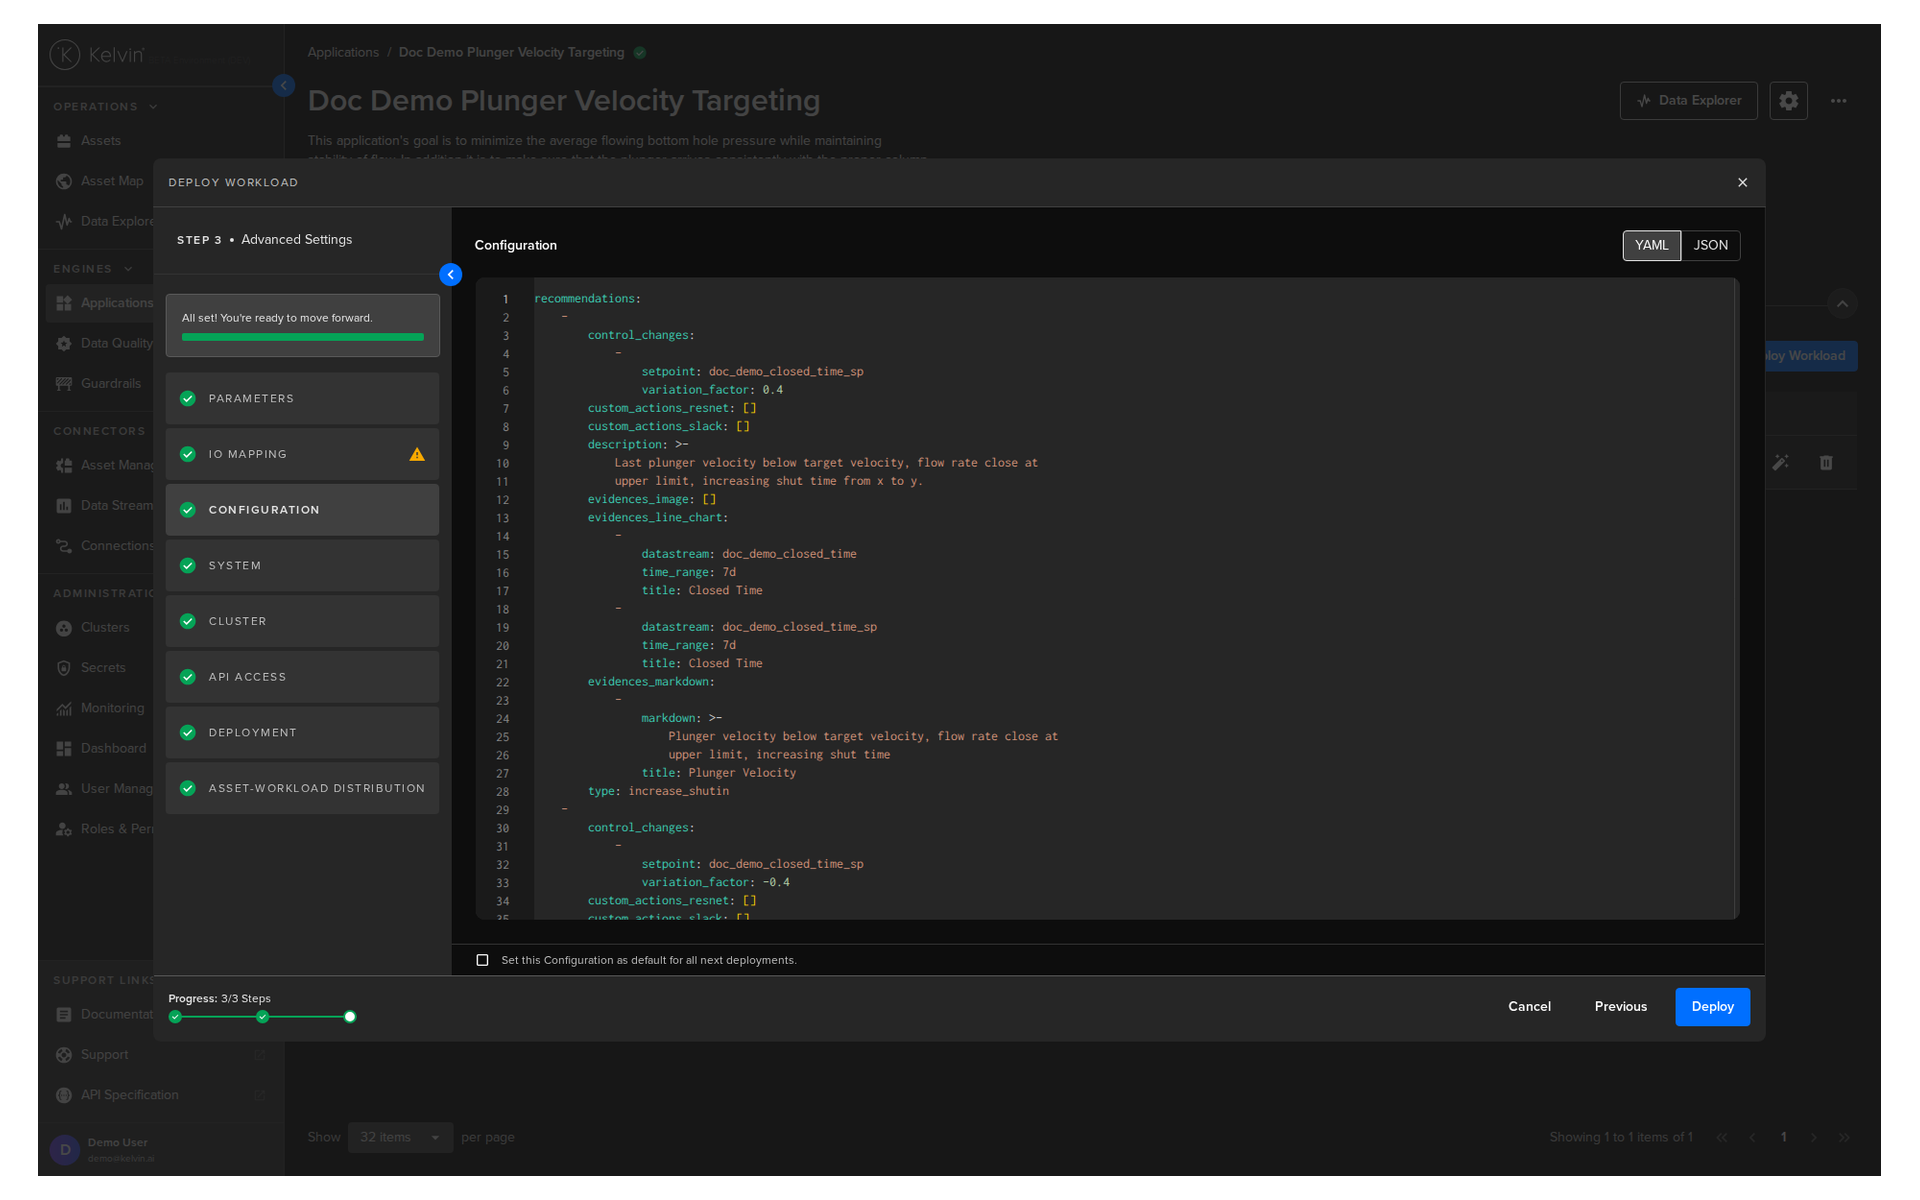
Configuration
Add any configuration information that is required by the Kelvin SmartApp™.
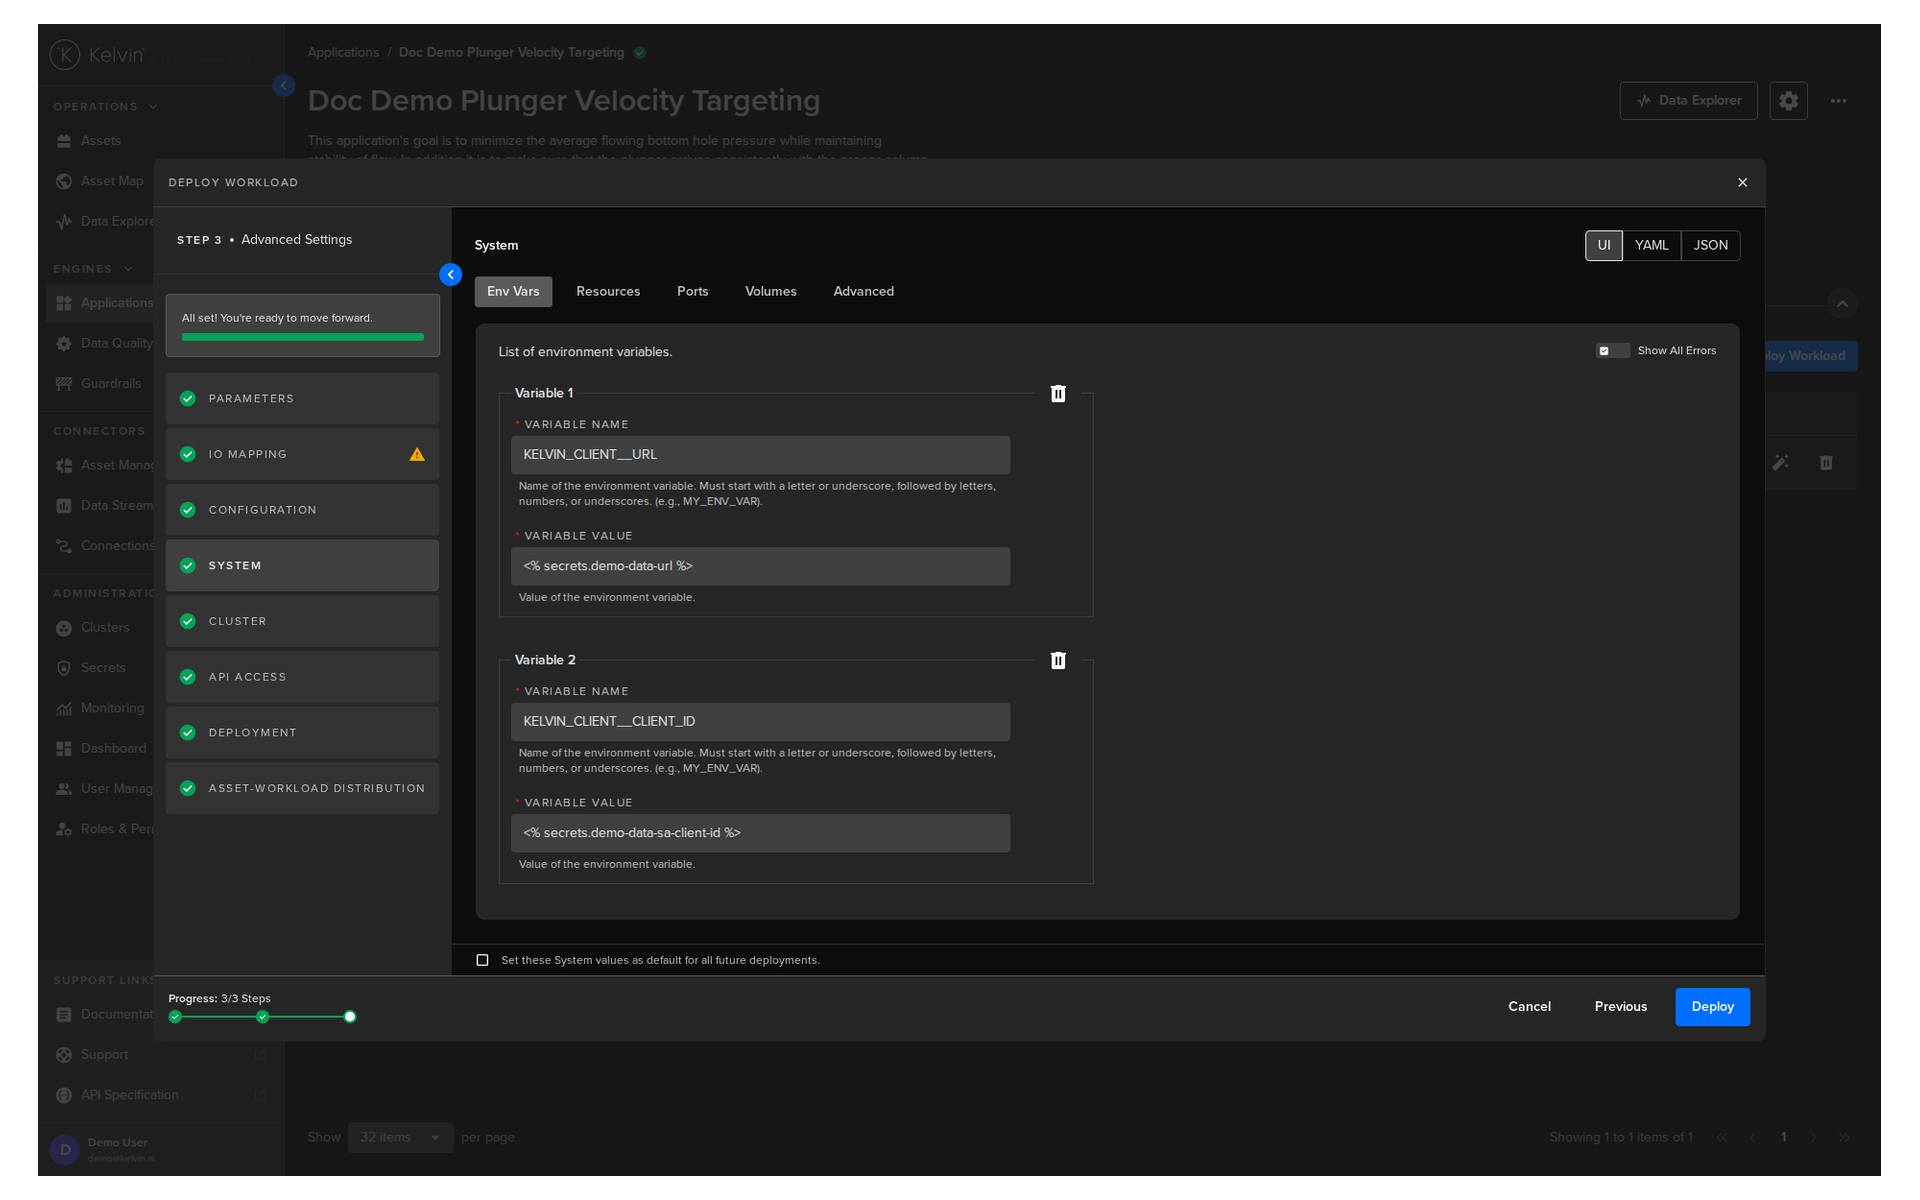
System
Here you will be able to tune all the system variables that are present in the app.yaml file of the Application.
You can choose to edit it using a UI or directly on the YAML or JSON.
Note
Using YAML or JSON is very useful for fast application of settings if you have preset configurations and want to copy/paste them into here.
Env Vars
Here will be shown the list of default Environment Variables and the default values that were set in the app.yaml file of the Application during development.
You can edit these and change both the environment name or value. You can also add addition Environment variables.
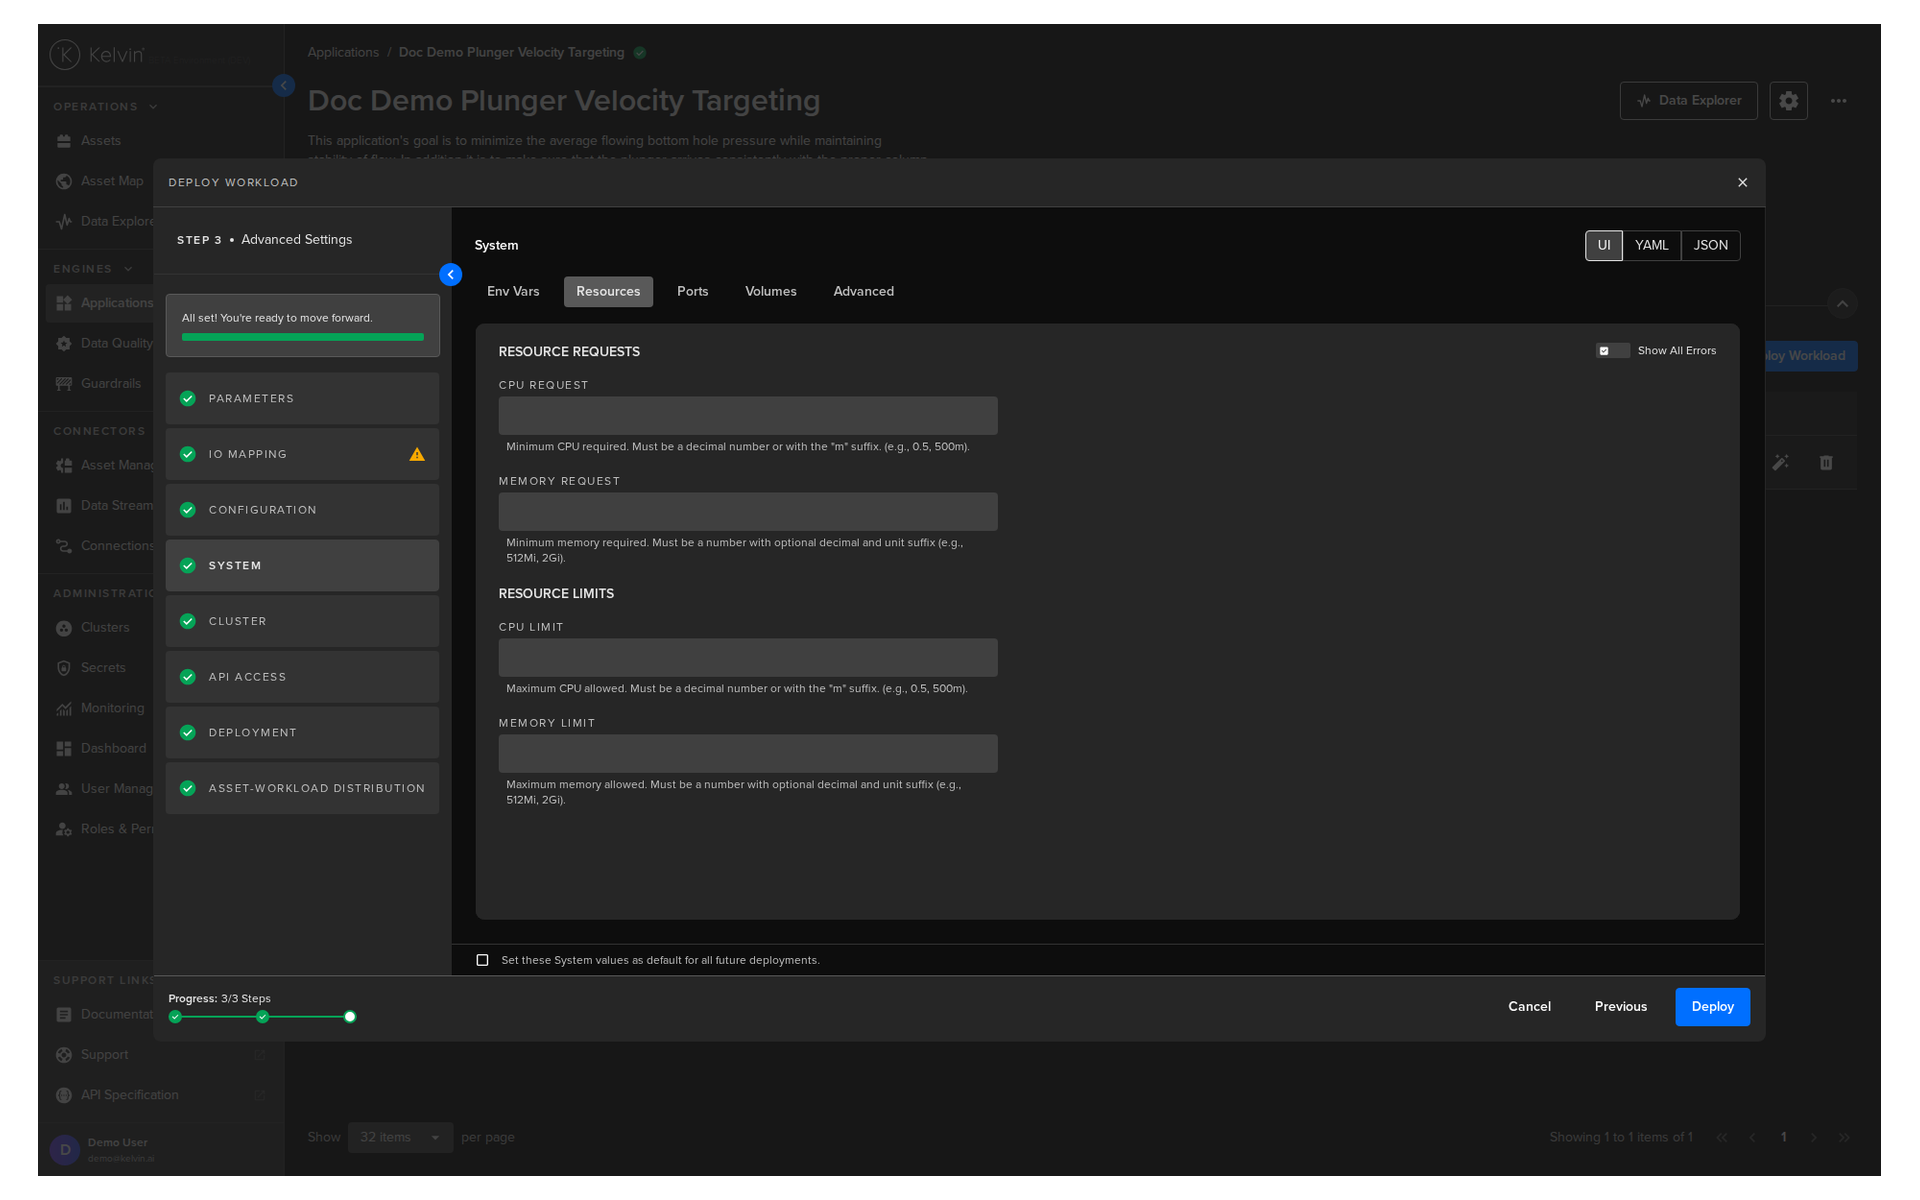
Resources
Apply resources available for the Workload.
See Set CPU/Memory Limits for detailed documentation on this section.
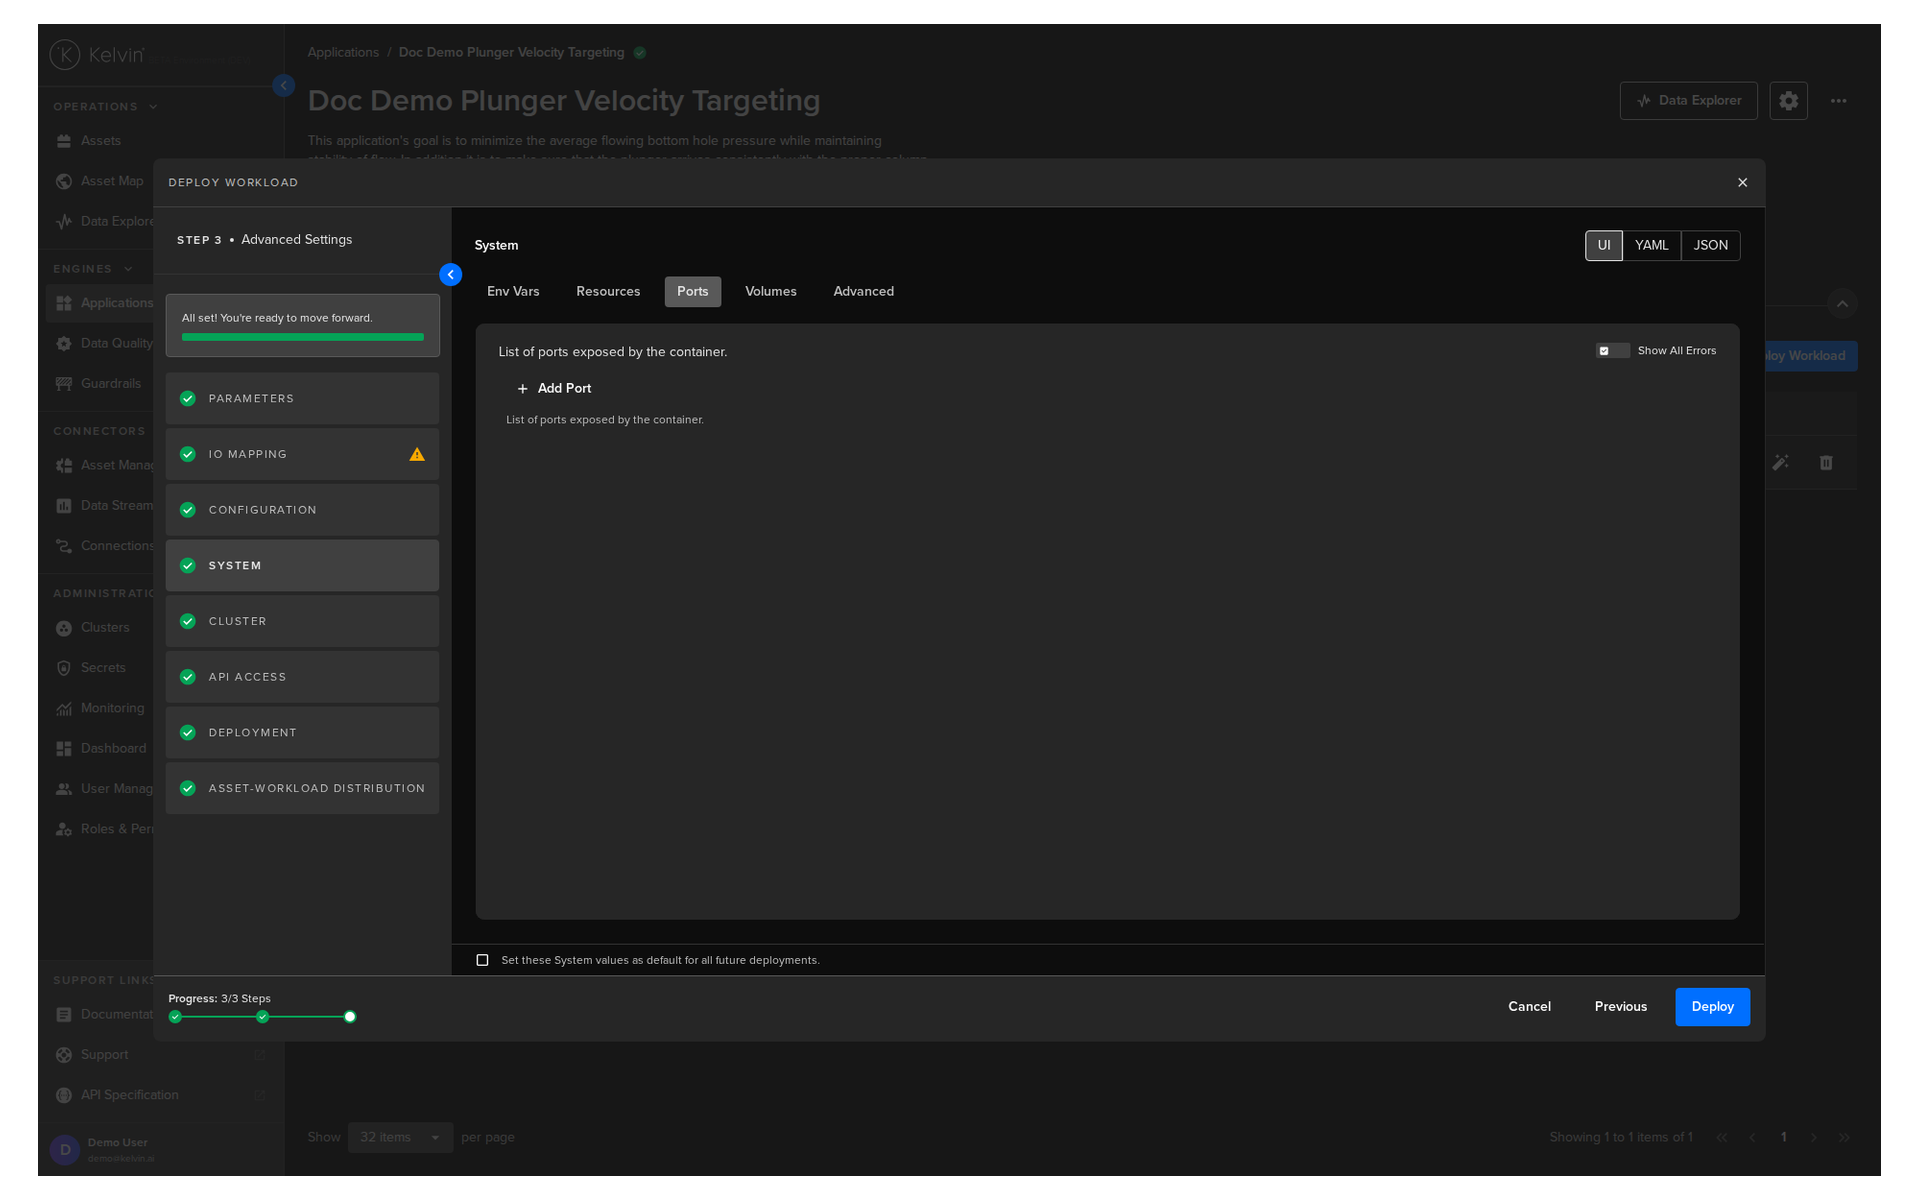
Ports
Open ports to your Workload.
Volumes
Mount volumes to your Workload.

Advanced
Choose if you would like to add Privileged mode to the Workload
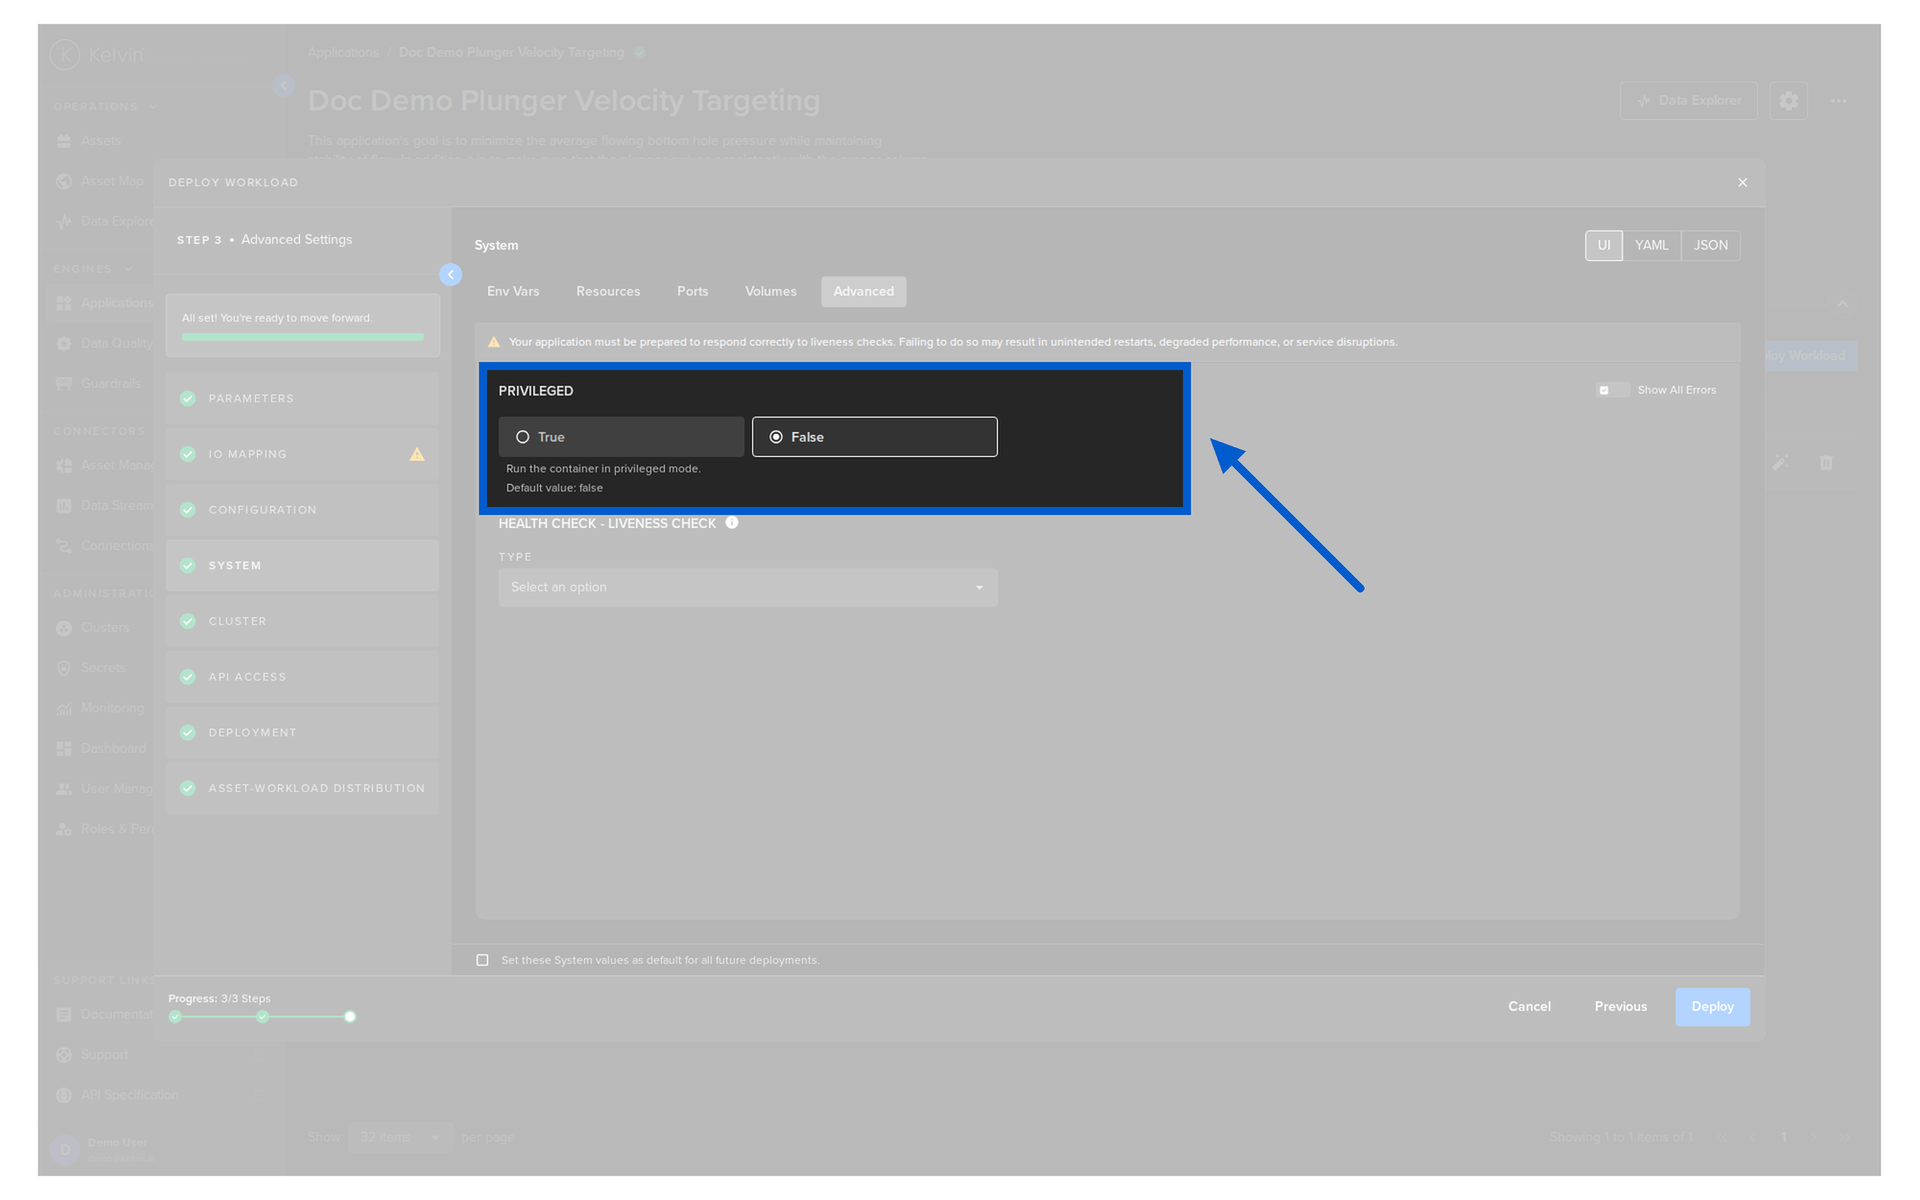
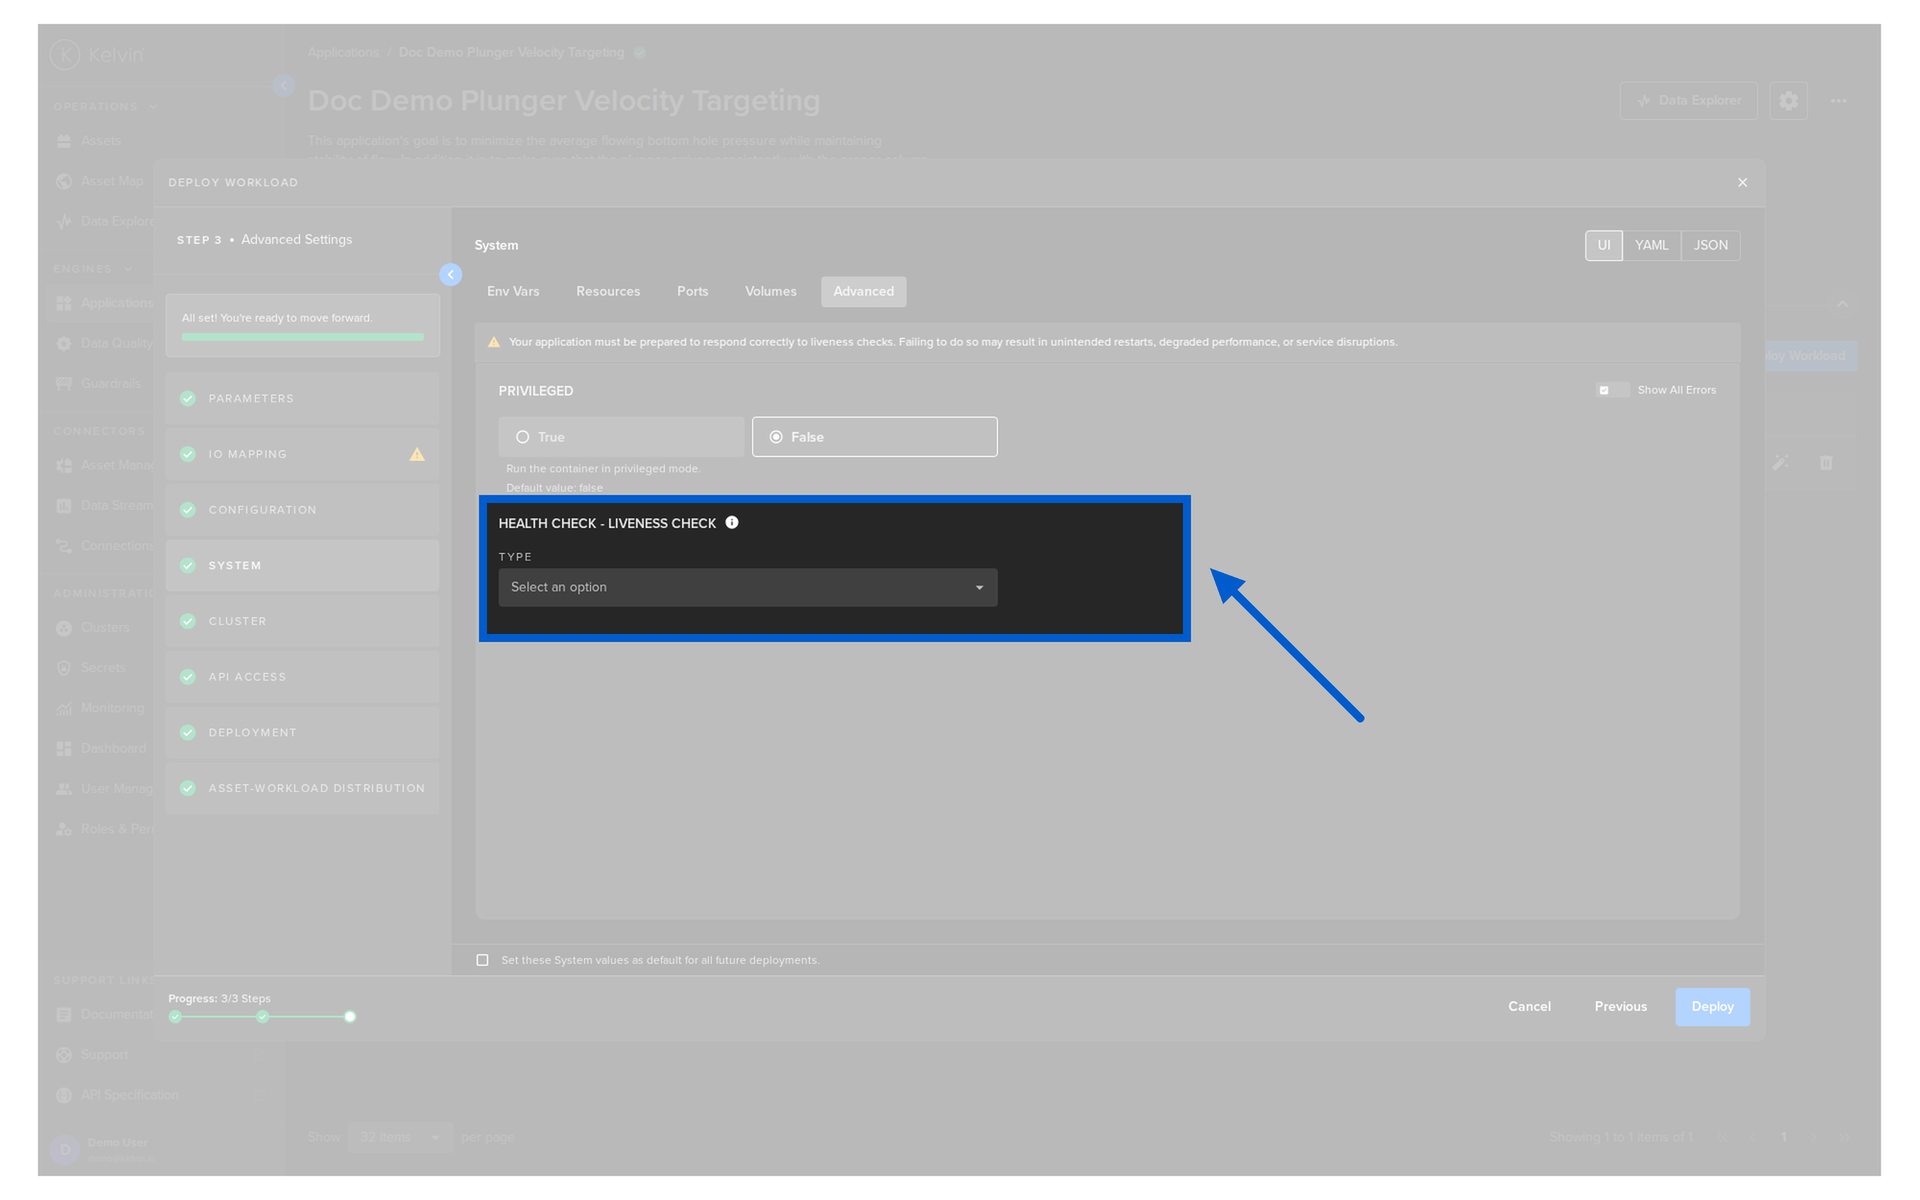
Optionally choose a health check service for your Workload. These are Kubernetes liveness probes and detailed information can be found on the Kubernetes Website.
Warning
If you use a Health check option, make sure you add code to respond to the liveness probe requests.
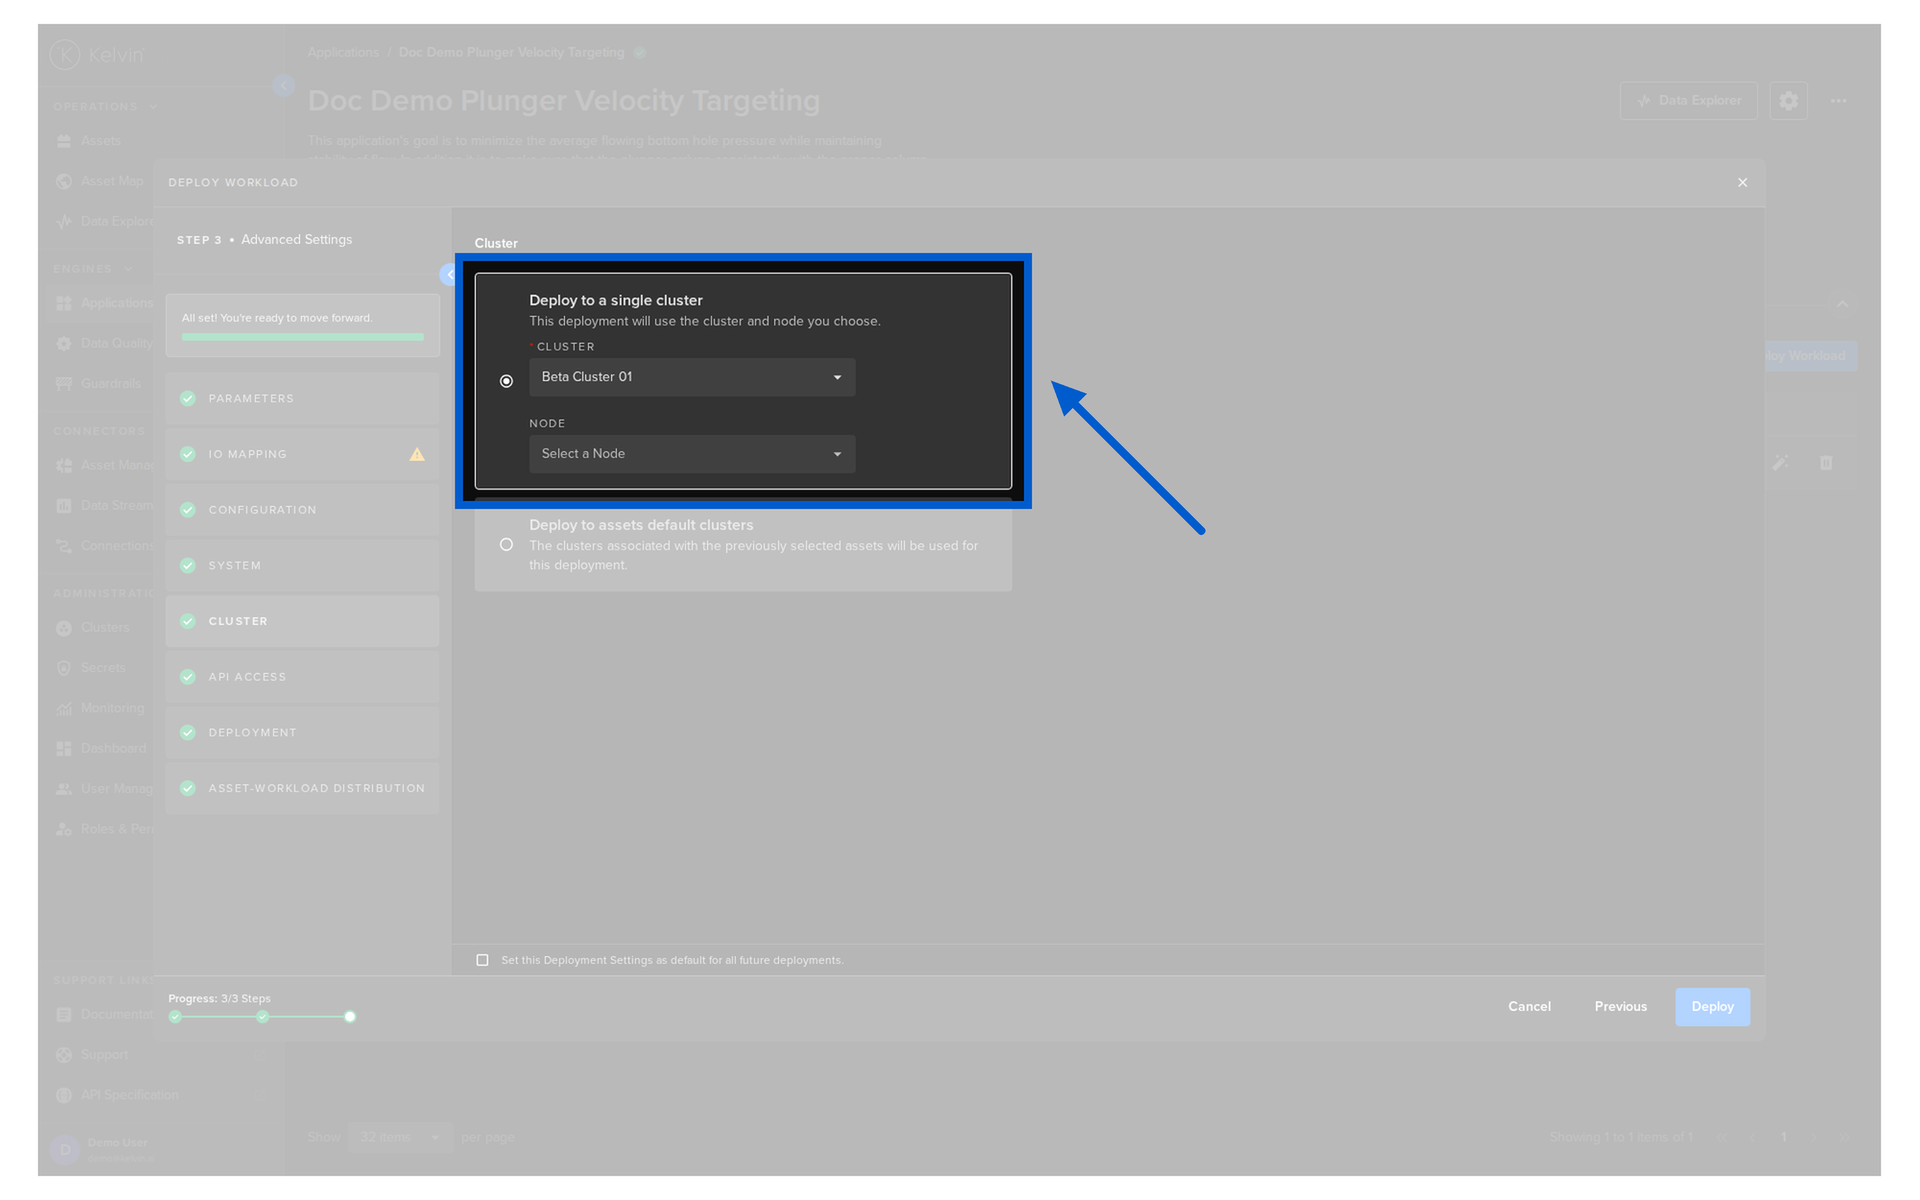
Cluster
Choose which Cluster the Assets will be deployed to. There are two choices
Either deploy all Assets to a Cluster / Node
Note
In a multi-node Cluster you can also optionally choose which Node to deploy to.
If you do not then the system will automatically assign the Node.
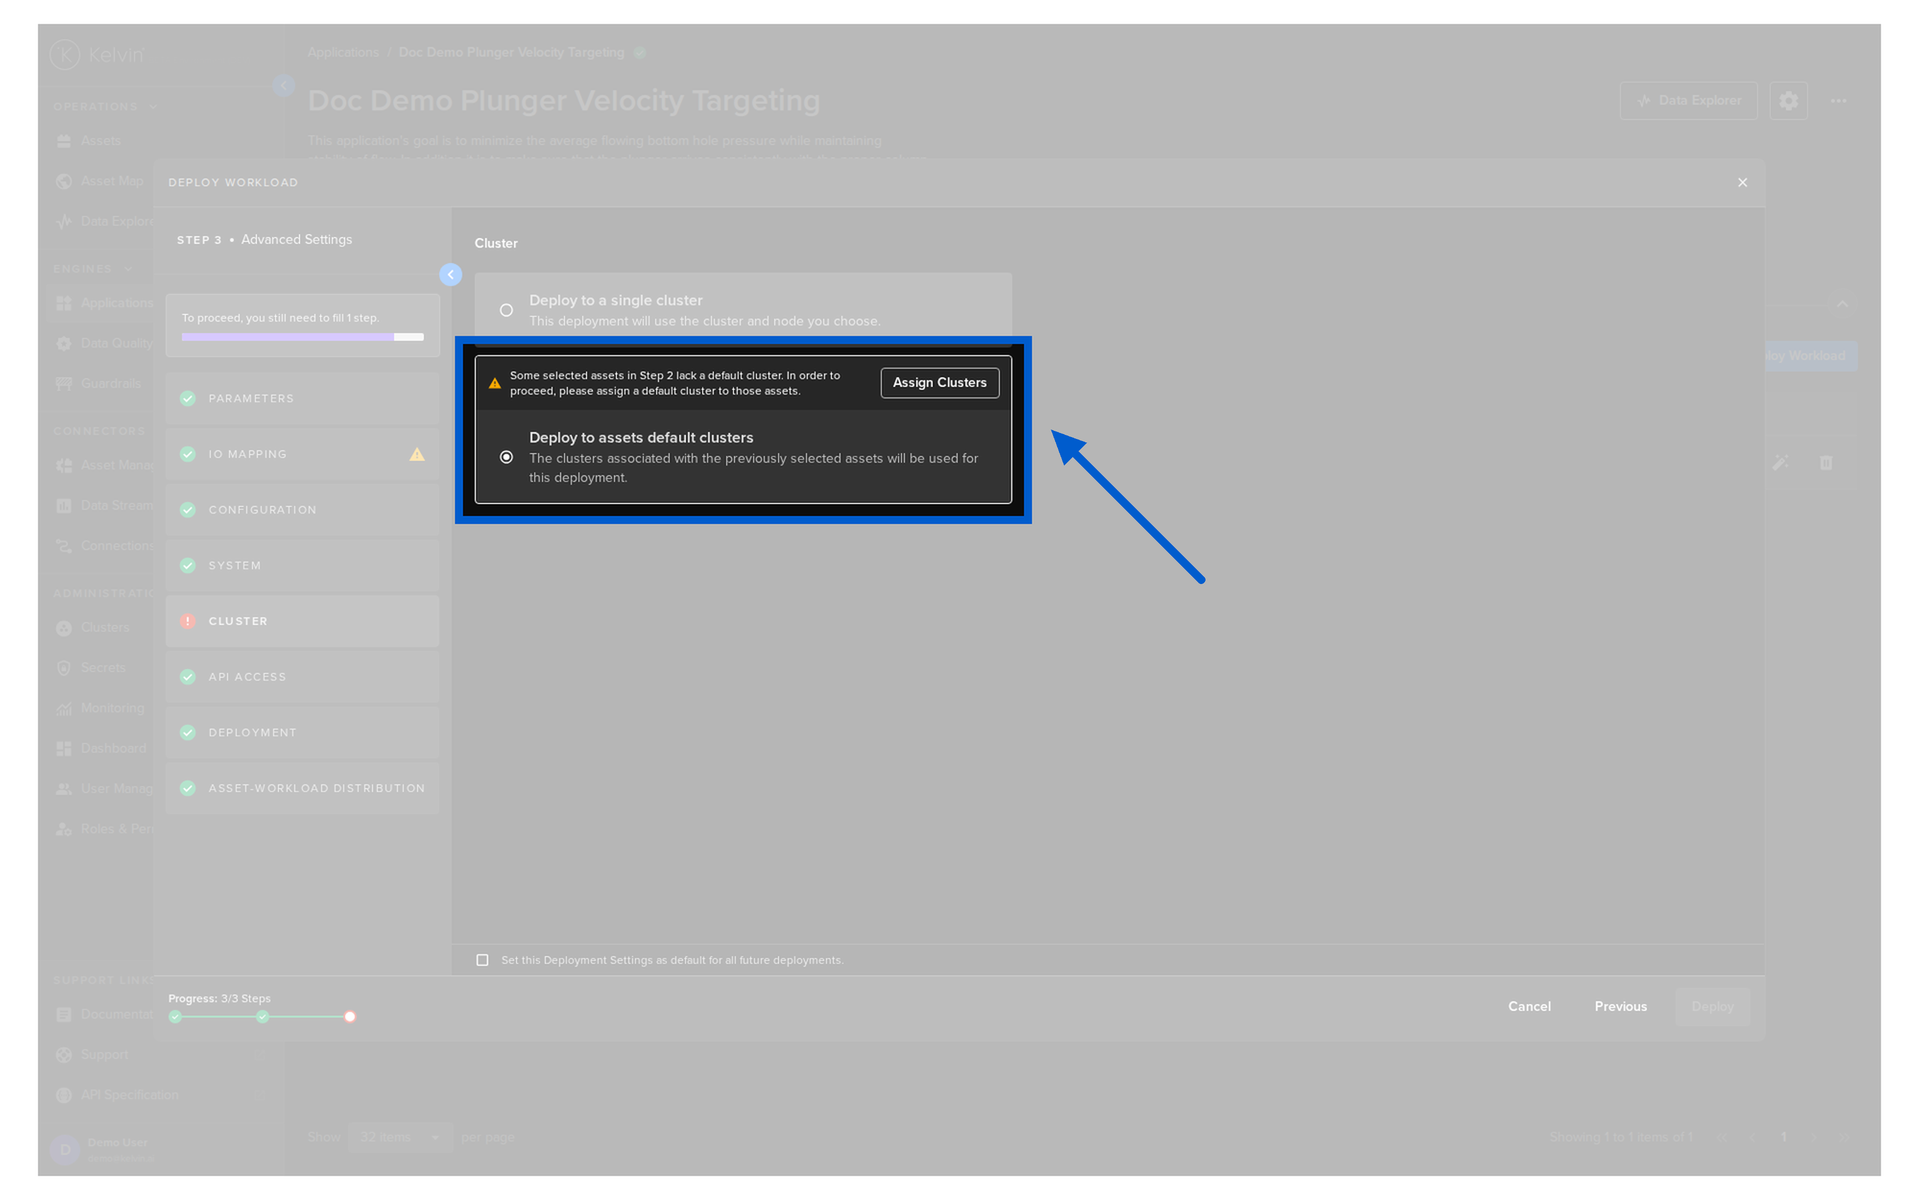
Or deploy to each Asset's defined default Cluster.
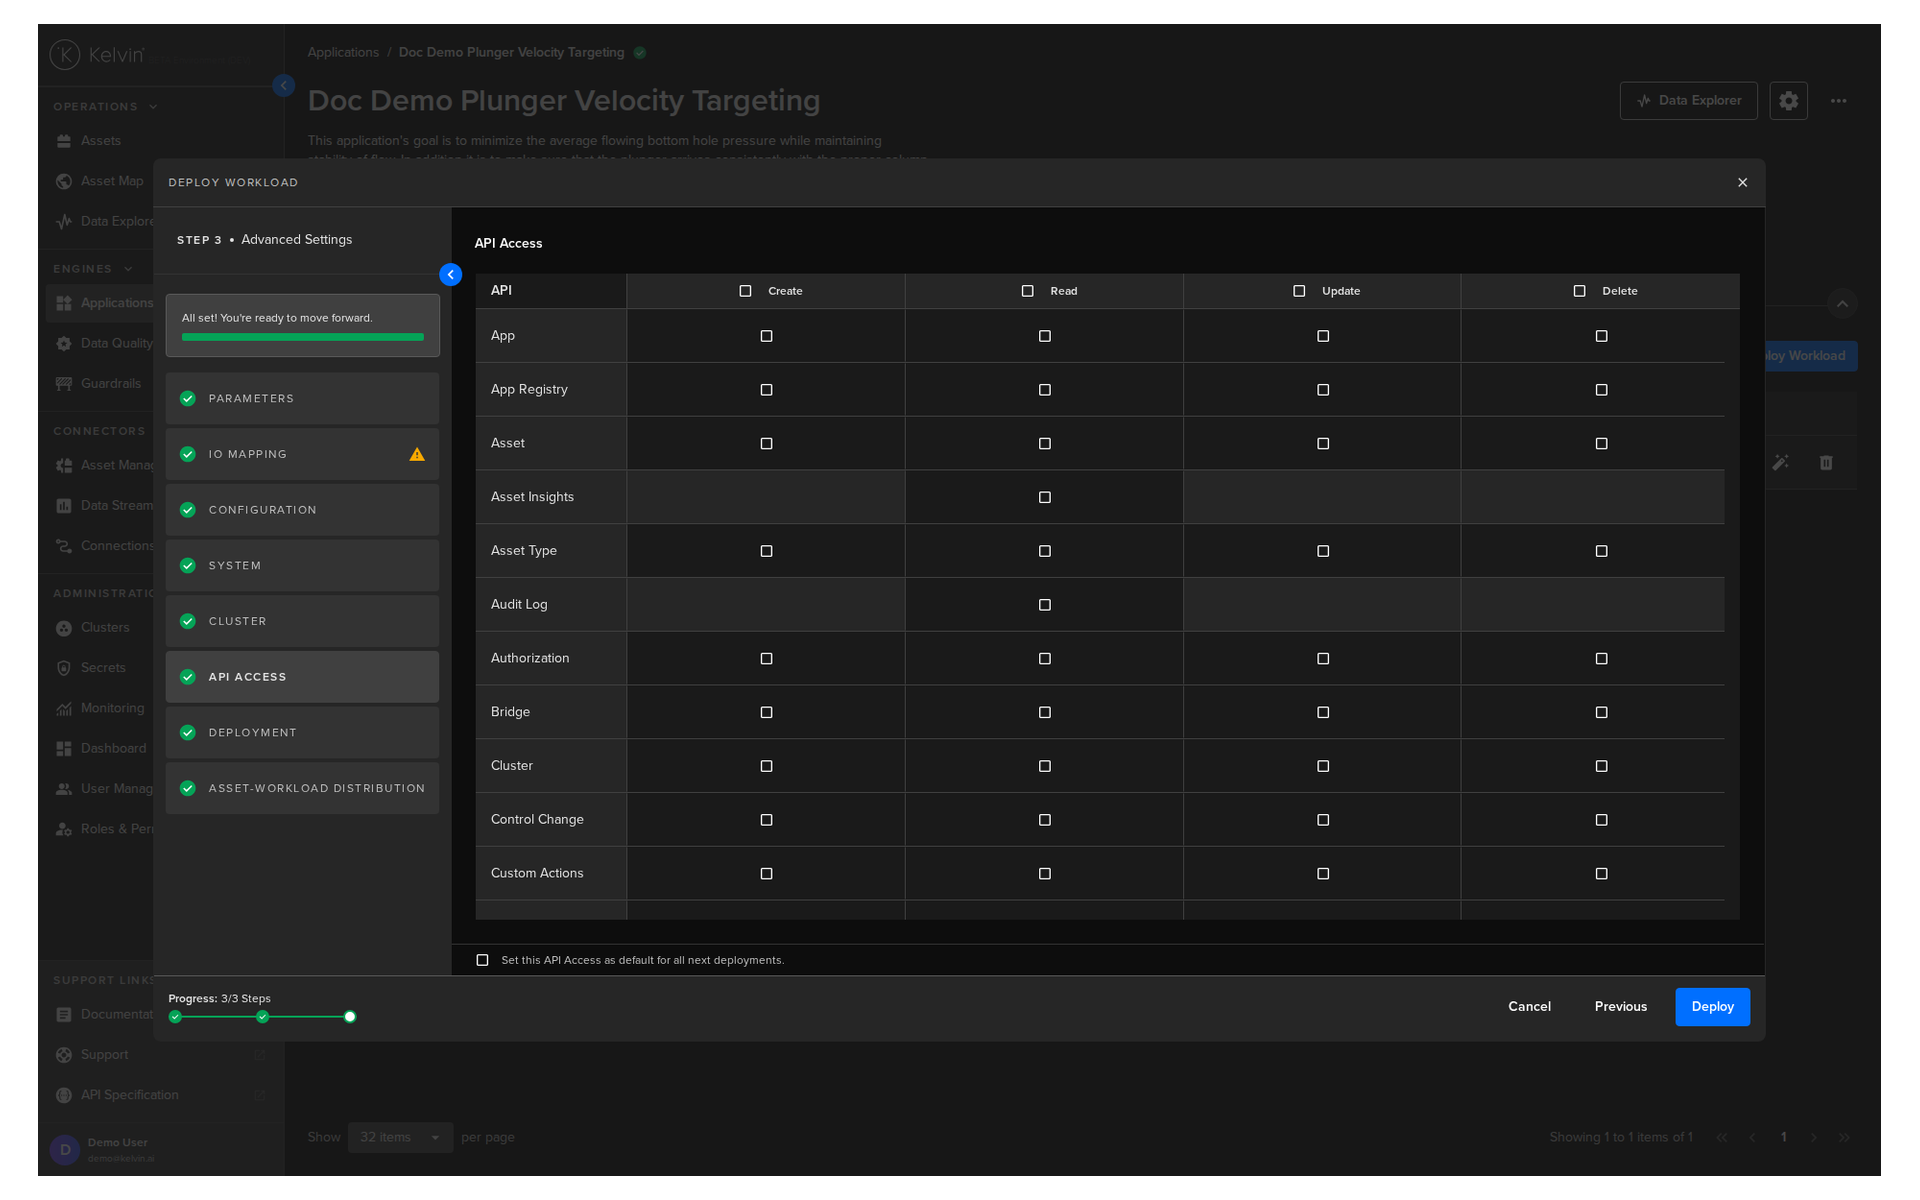
API Access
Define the API access permissions for the application workloads. This allows you to specify exactly which API endpoints the workload is authorized to use, improving security by granting only the permissions required to run the application.
Warning
The API Access selection can NOT be changed once the workload has been deployed.
To alter the API Access settings, you must delete and redeploy the workload.
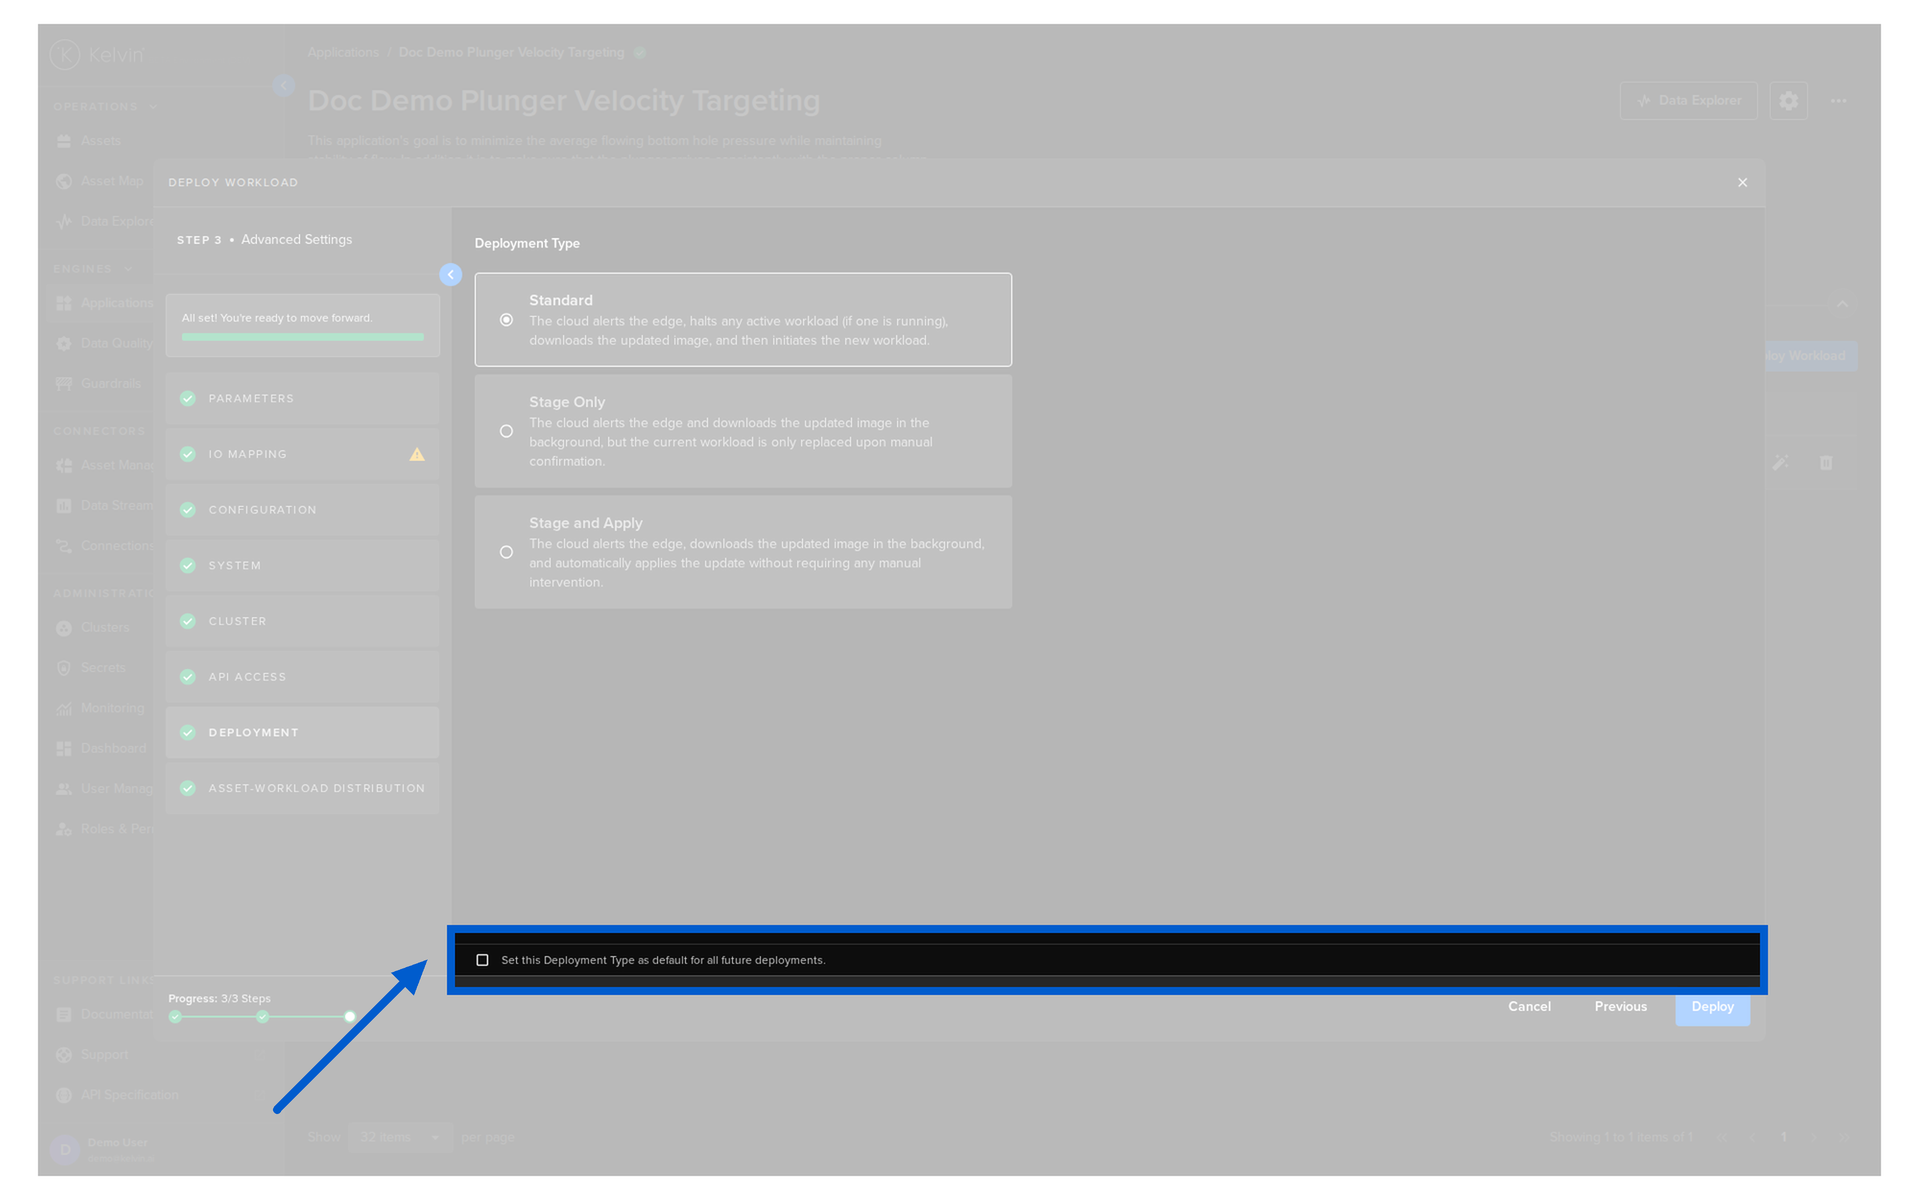
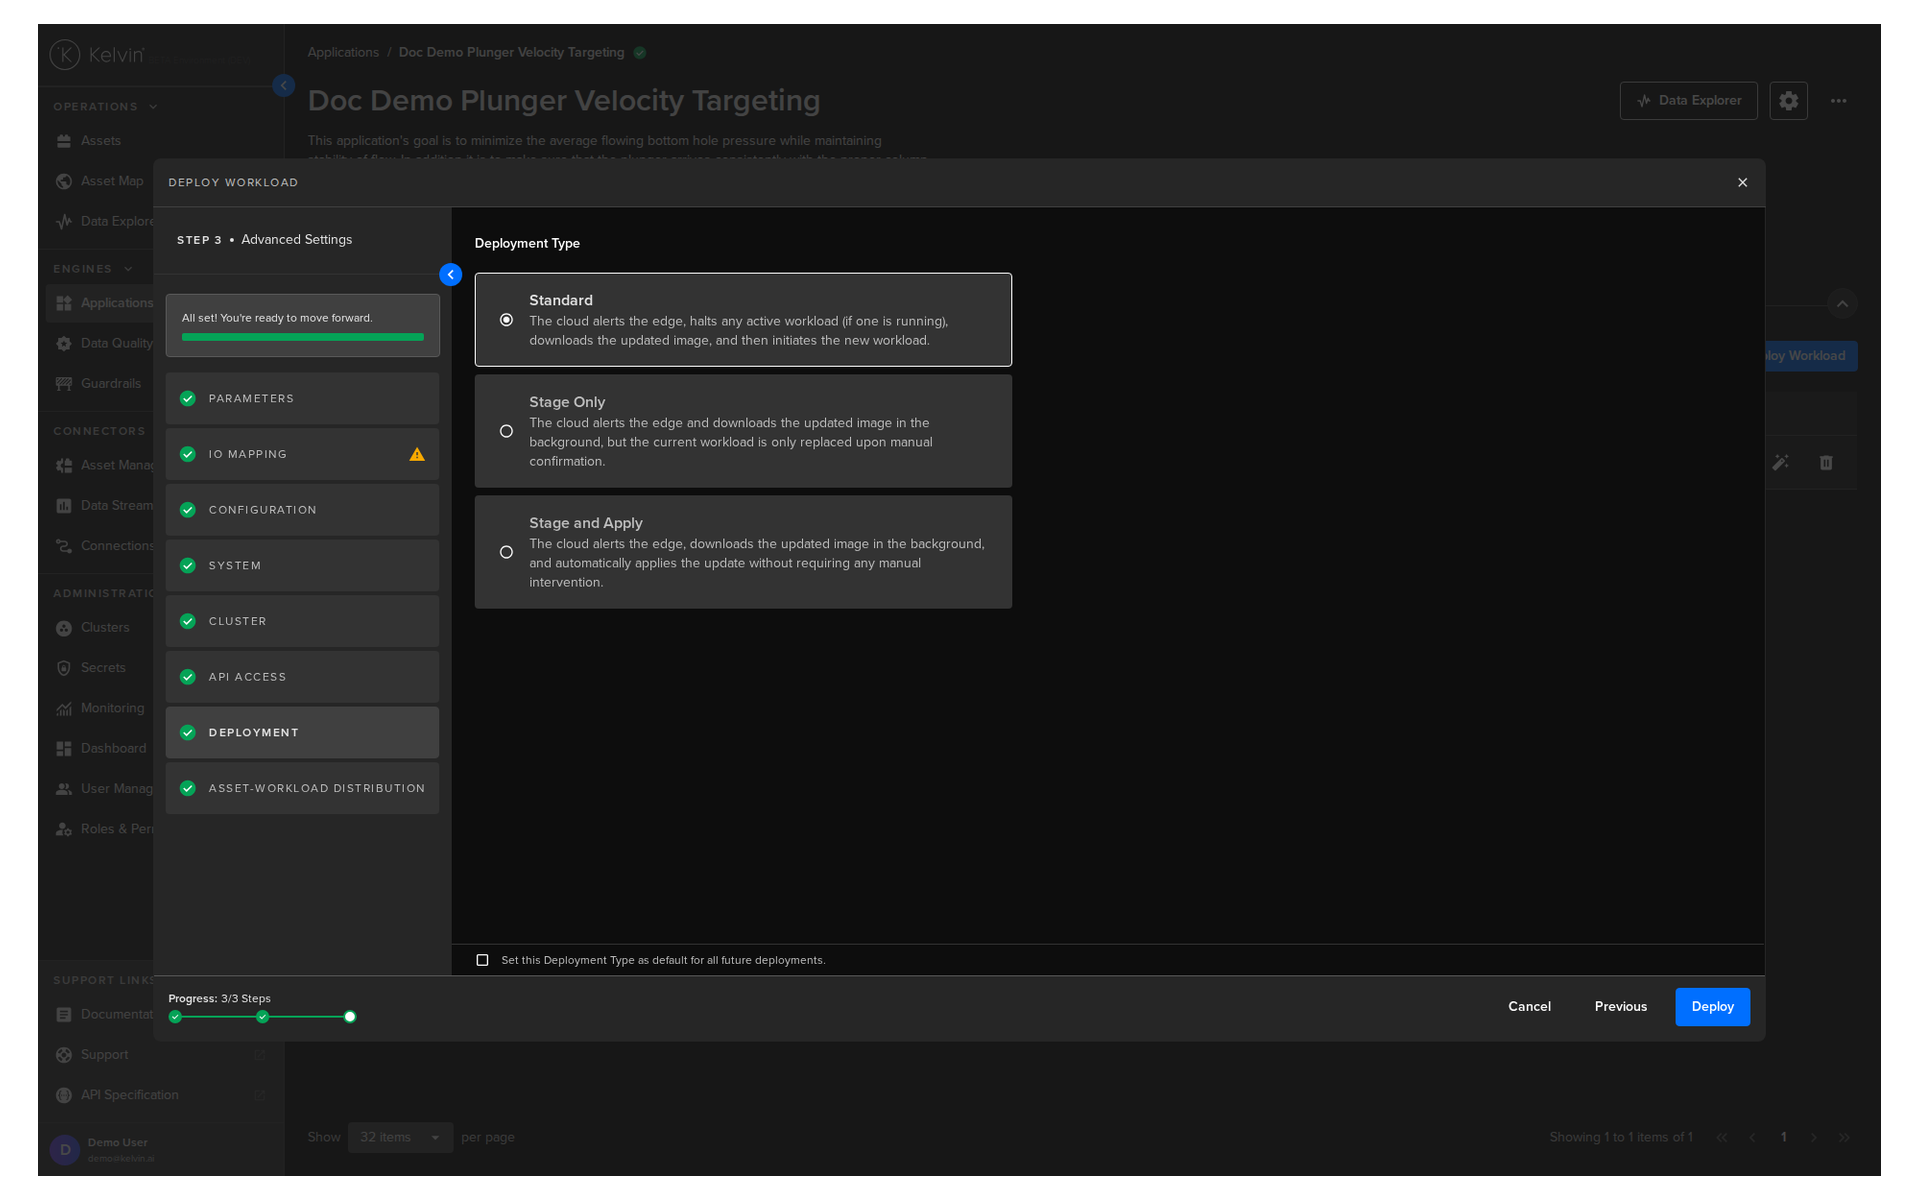
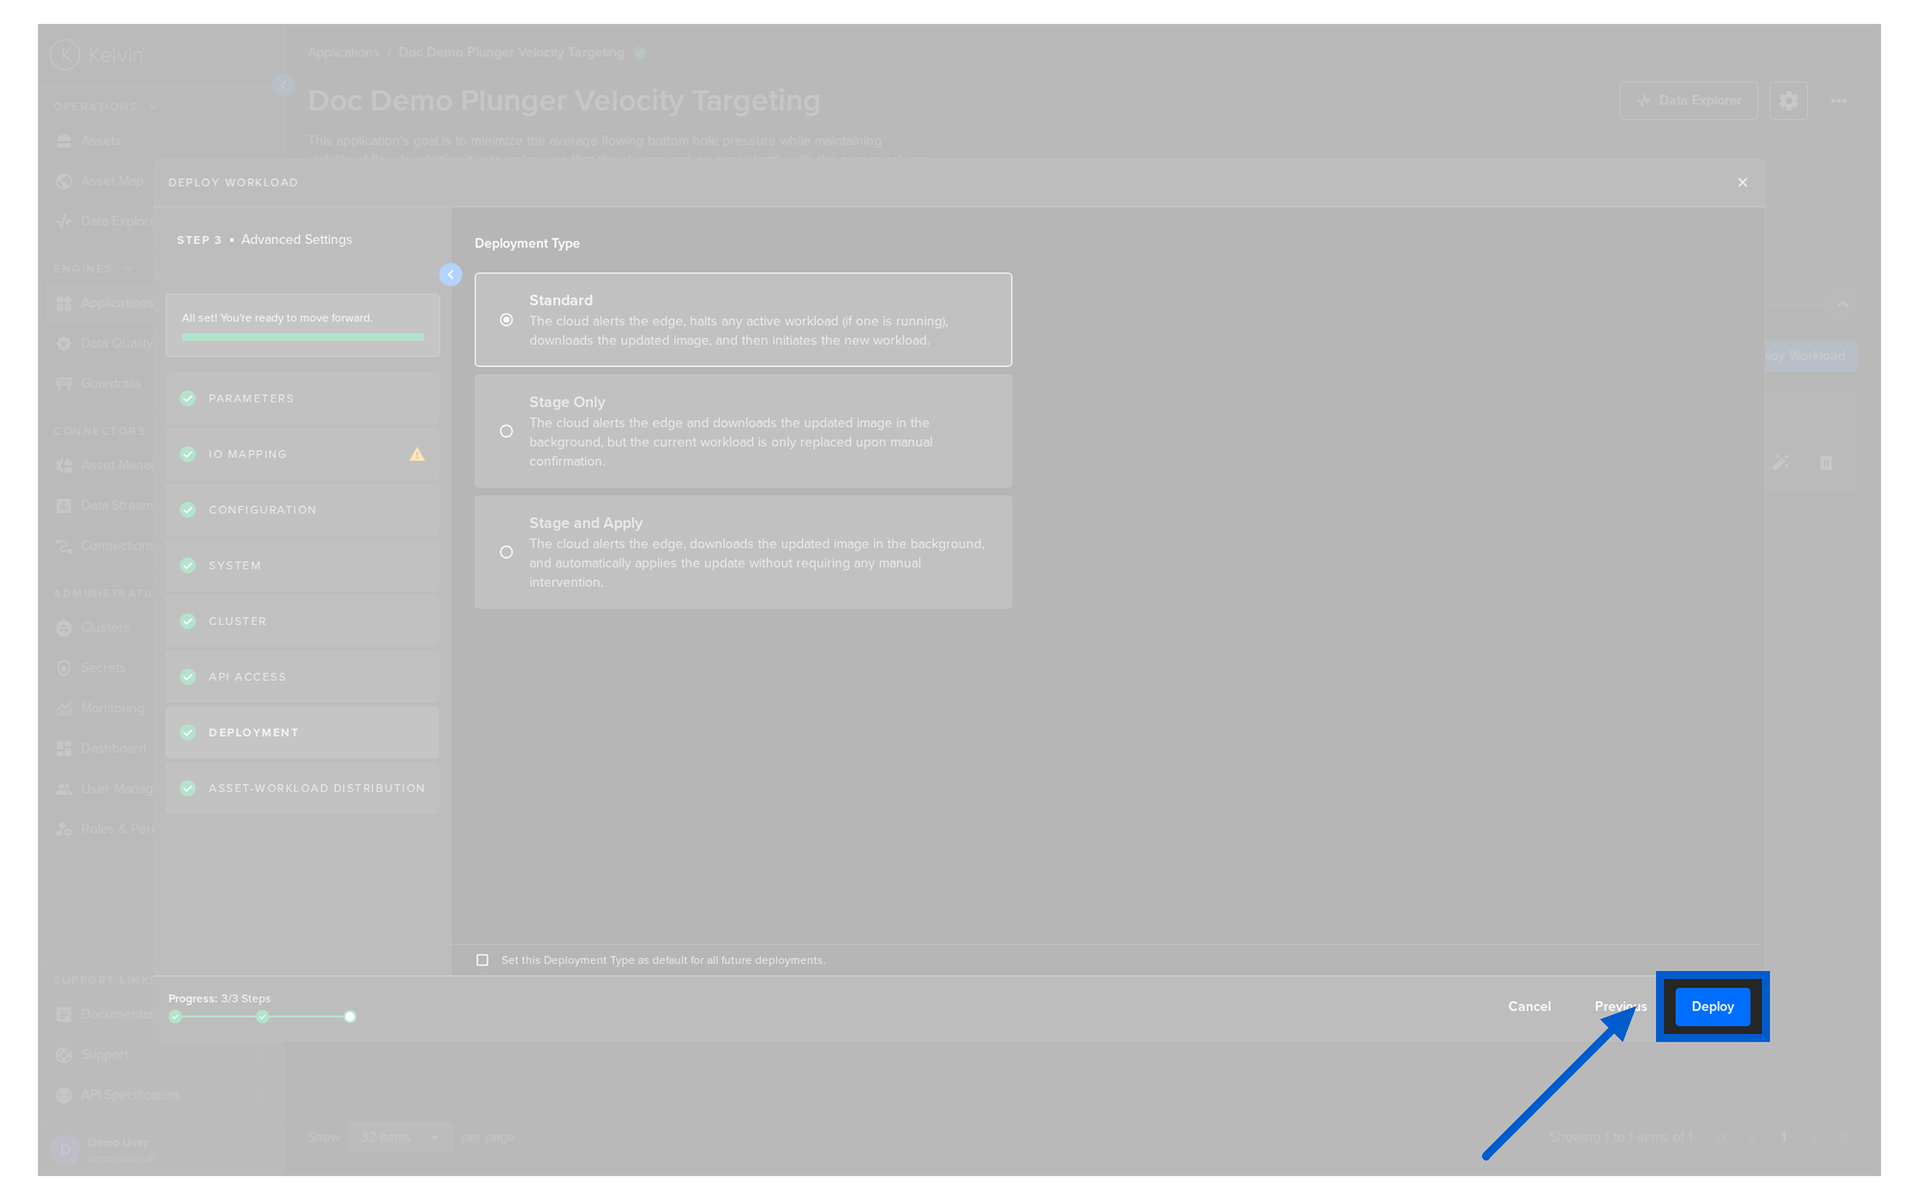
Deployment
For a standard Workload deployment, choose the Standard option.
Note
Stage Only and Instant Apply are covered in a different documentation section.
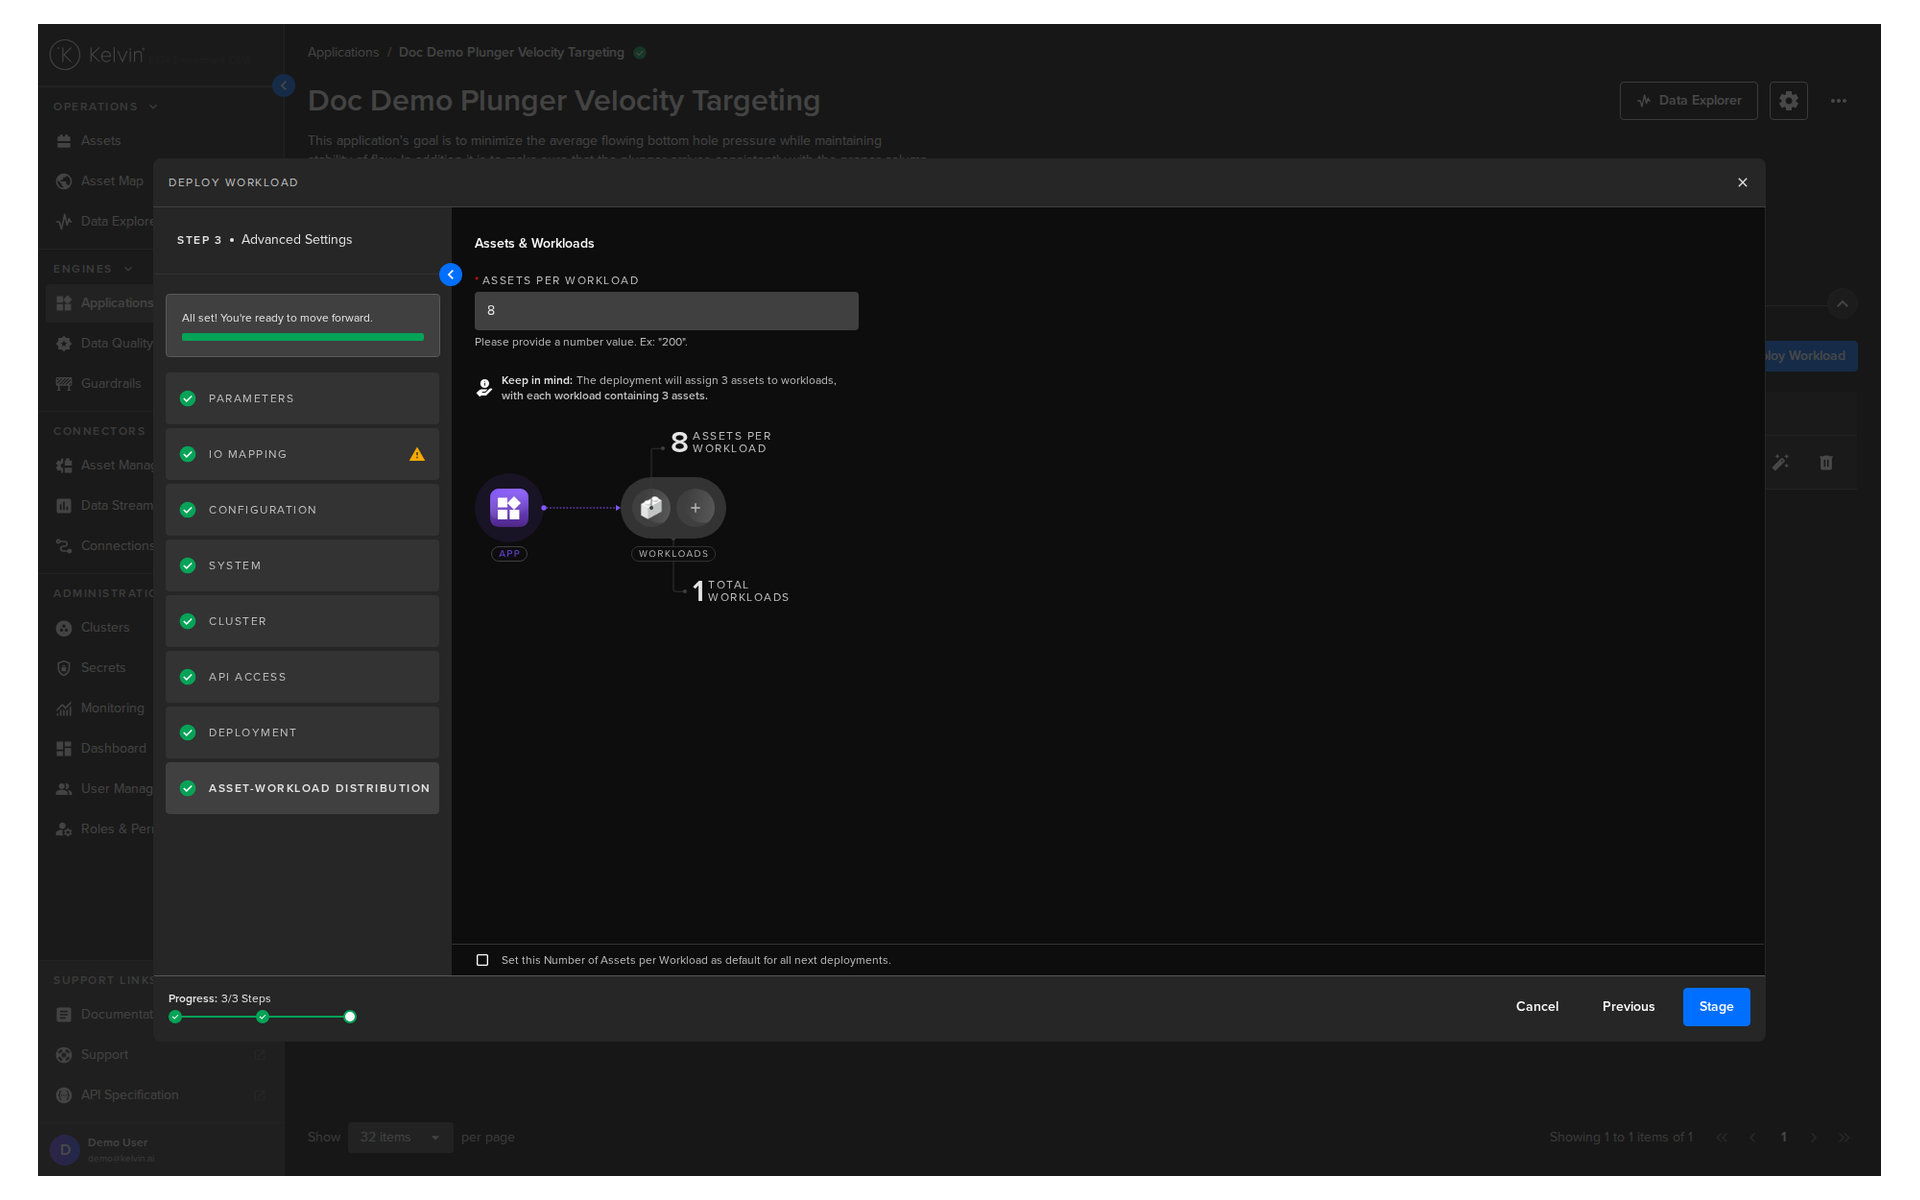
Asset-Workload Distribution
Define how many Assets are controlled by each Workload that is deployed.
Success
Allowing each Workload to handle more Assets is more efficient in your edge hardware memory and runtime resource usage.
Be aware that when deploying a workload, checks are made on sufficient memory available and the deploy will fail if there is not enough memory.
However no runtime resource usage is calculated at deployment, so excessive asset allocation can impact SmartApp performance due to CPU and memory constraints.
When you are ready and you have a green check ![]() on all options, you will see the Deploy button turn blue.
on all options, you will see the Deploy button turn blue.
You can then see the status of the Workload in the Workloads list going from Pending, Deploying to Running.
You can even deploy the app if the Cluster is offline. It will be placed in a queue with a status of Pending and will be automatically deployed when the Cluster comes back online.