Attribute Based Access Control
Attribute Based Access Control (ABAC) is the fine tuning layer of user access rights. This controls the access users have to specific data in the database.
Note
ABAC can be broadly defined as the user access rights to perform actions on groups of data.
For example, users can be given read only access to all Asset names starting with the name wells_* and update access to Asset names staring with wells_field01_*.
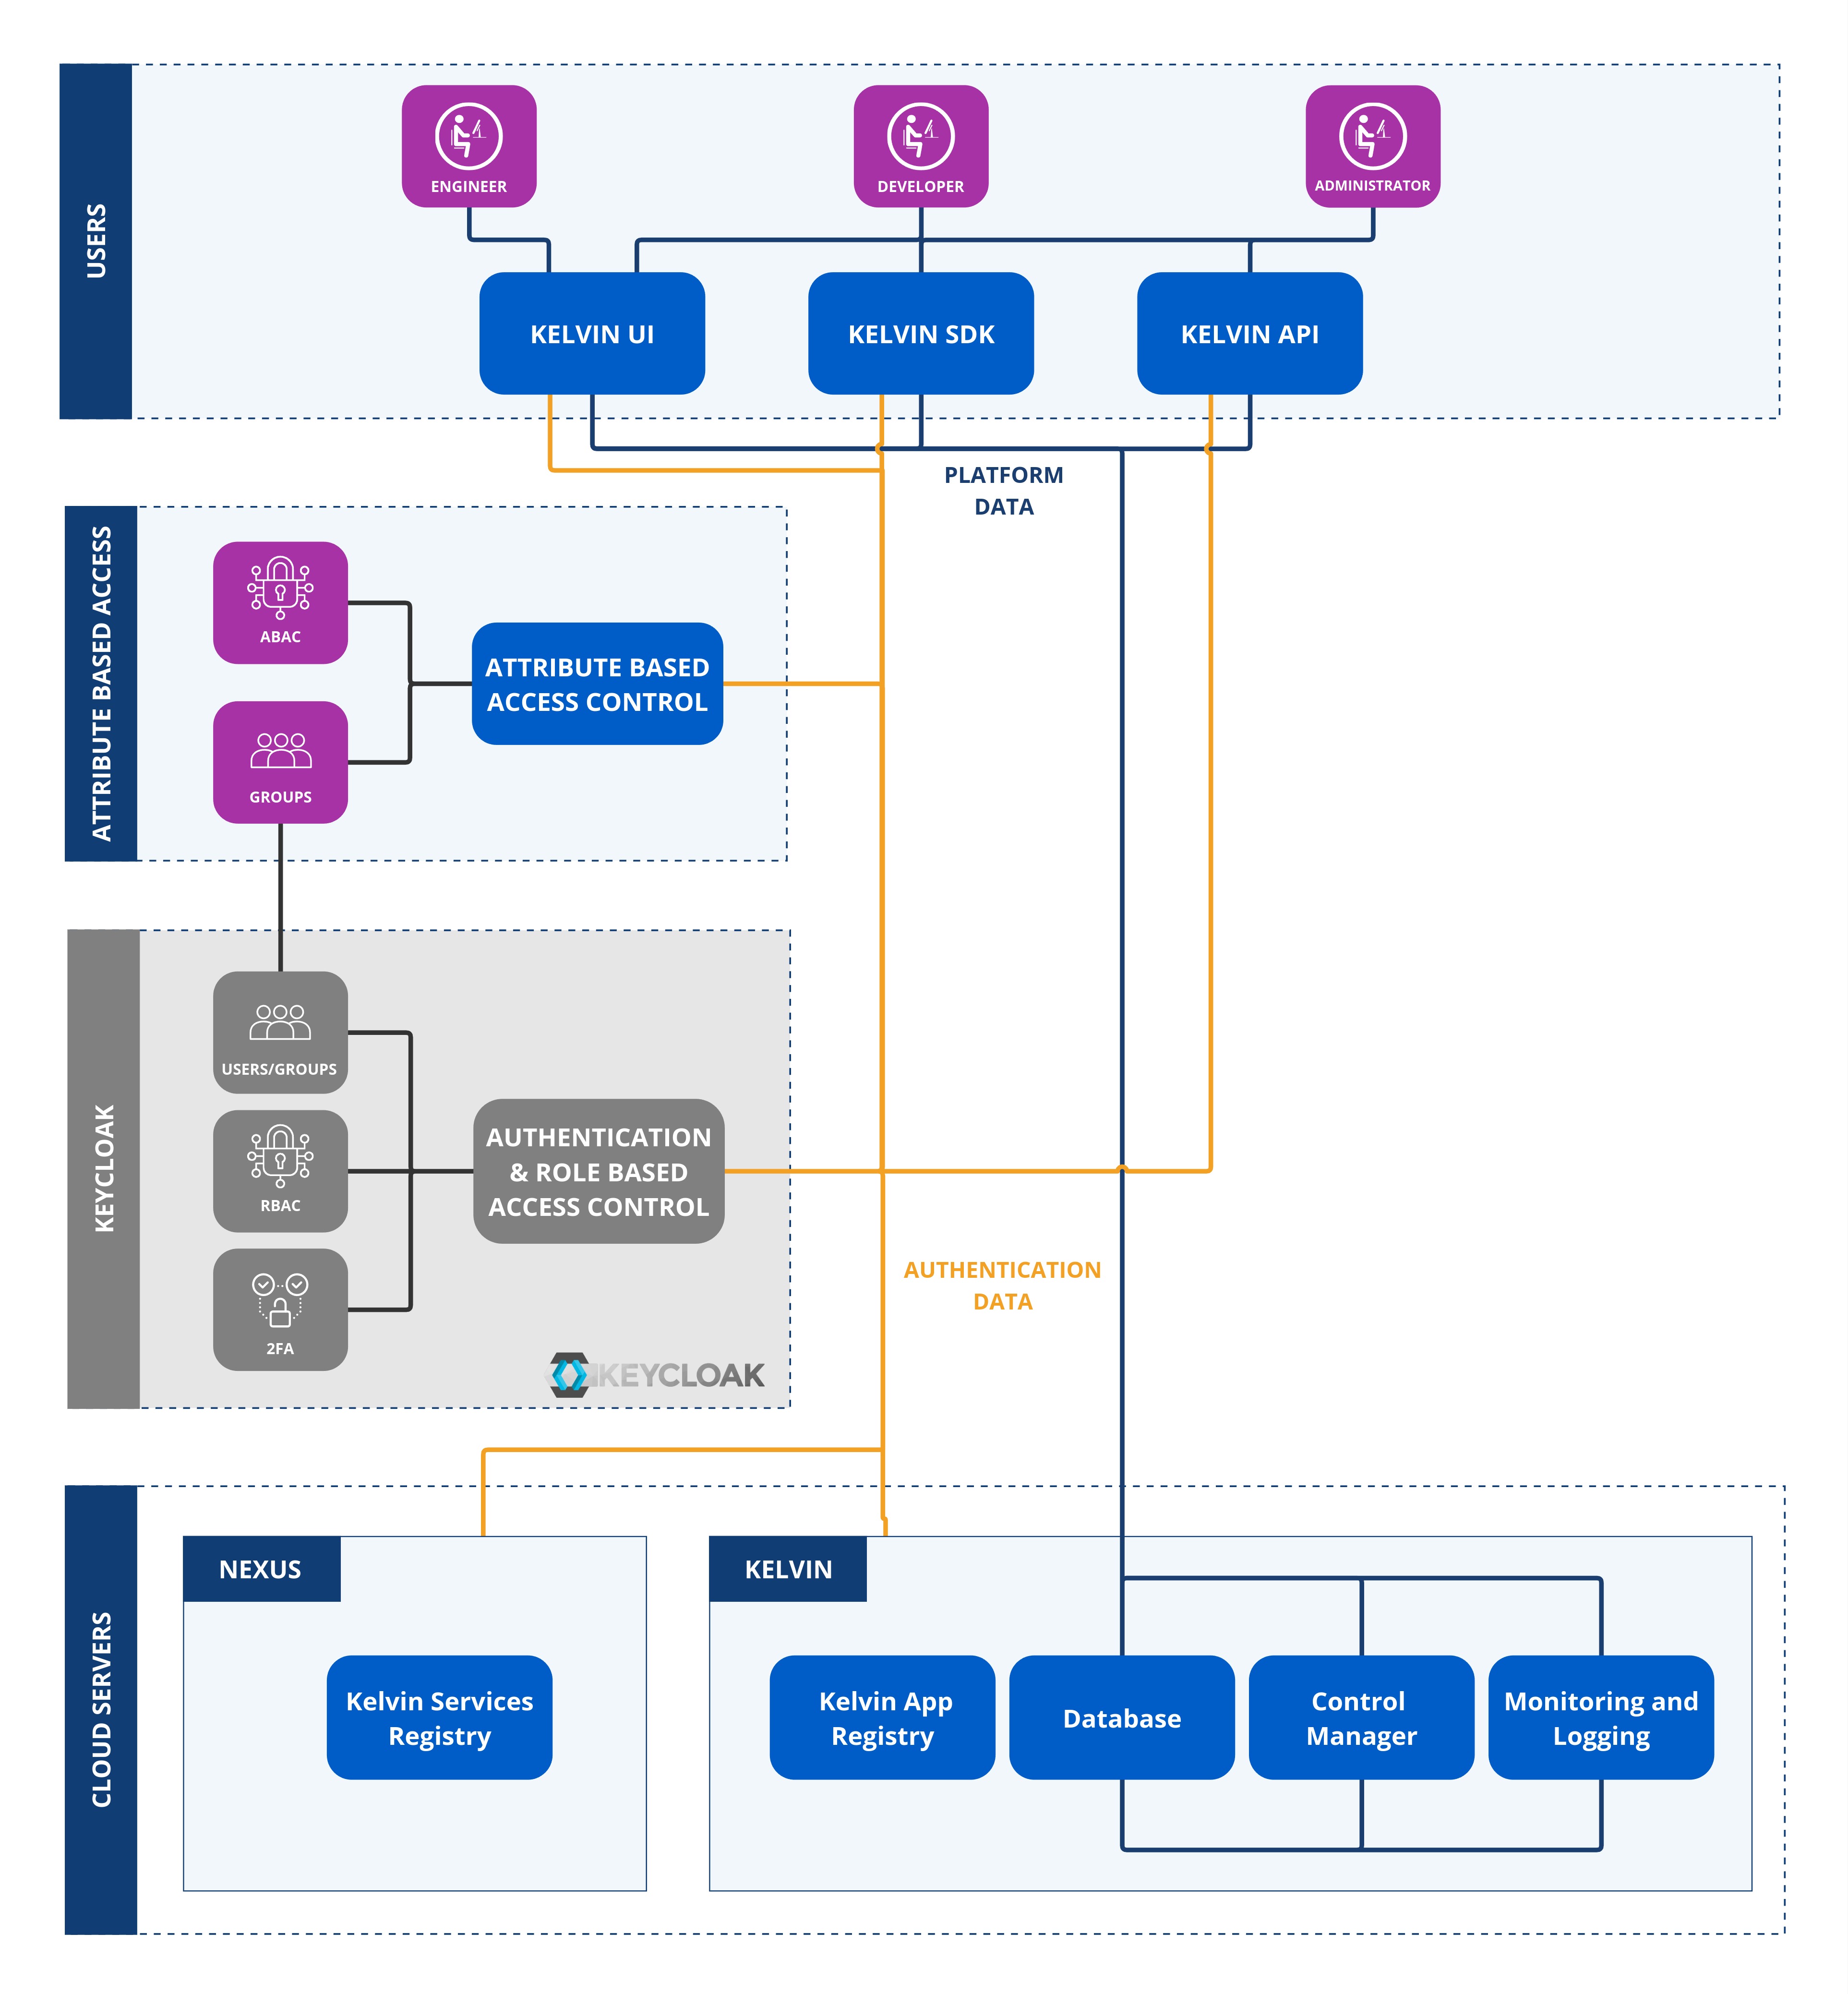
Roles are used within Groups to define the Policies (Permissions) assigned to each group.
Warning
Do not confuse this role with the roles in the Role Based Access Control (RBAC) which is managed by the authentication system, Keycloak or SSO.
Each Role consists of one or more Policies (Permissions), where a Permission may represent a single action or encompass multiple actions through an expression.
Note
Access is checked also with RBAC in the following order.
- User's Group
- Group's Role Based Access Control settings in permissions
- Group's Attribute Based Access Control settings in policies
Only if a user has access to all three will access or action be granted.
To start, click on Roles & Permissions in the Administration section of the left side bar;
And then click on the Add Role button.
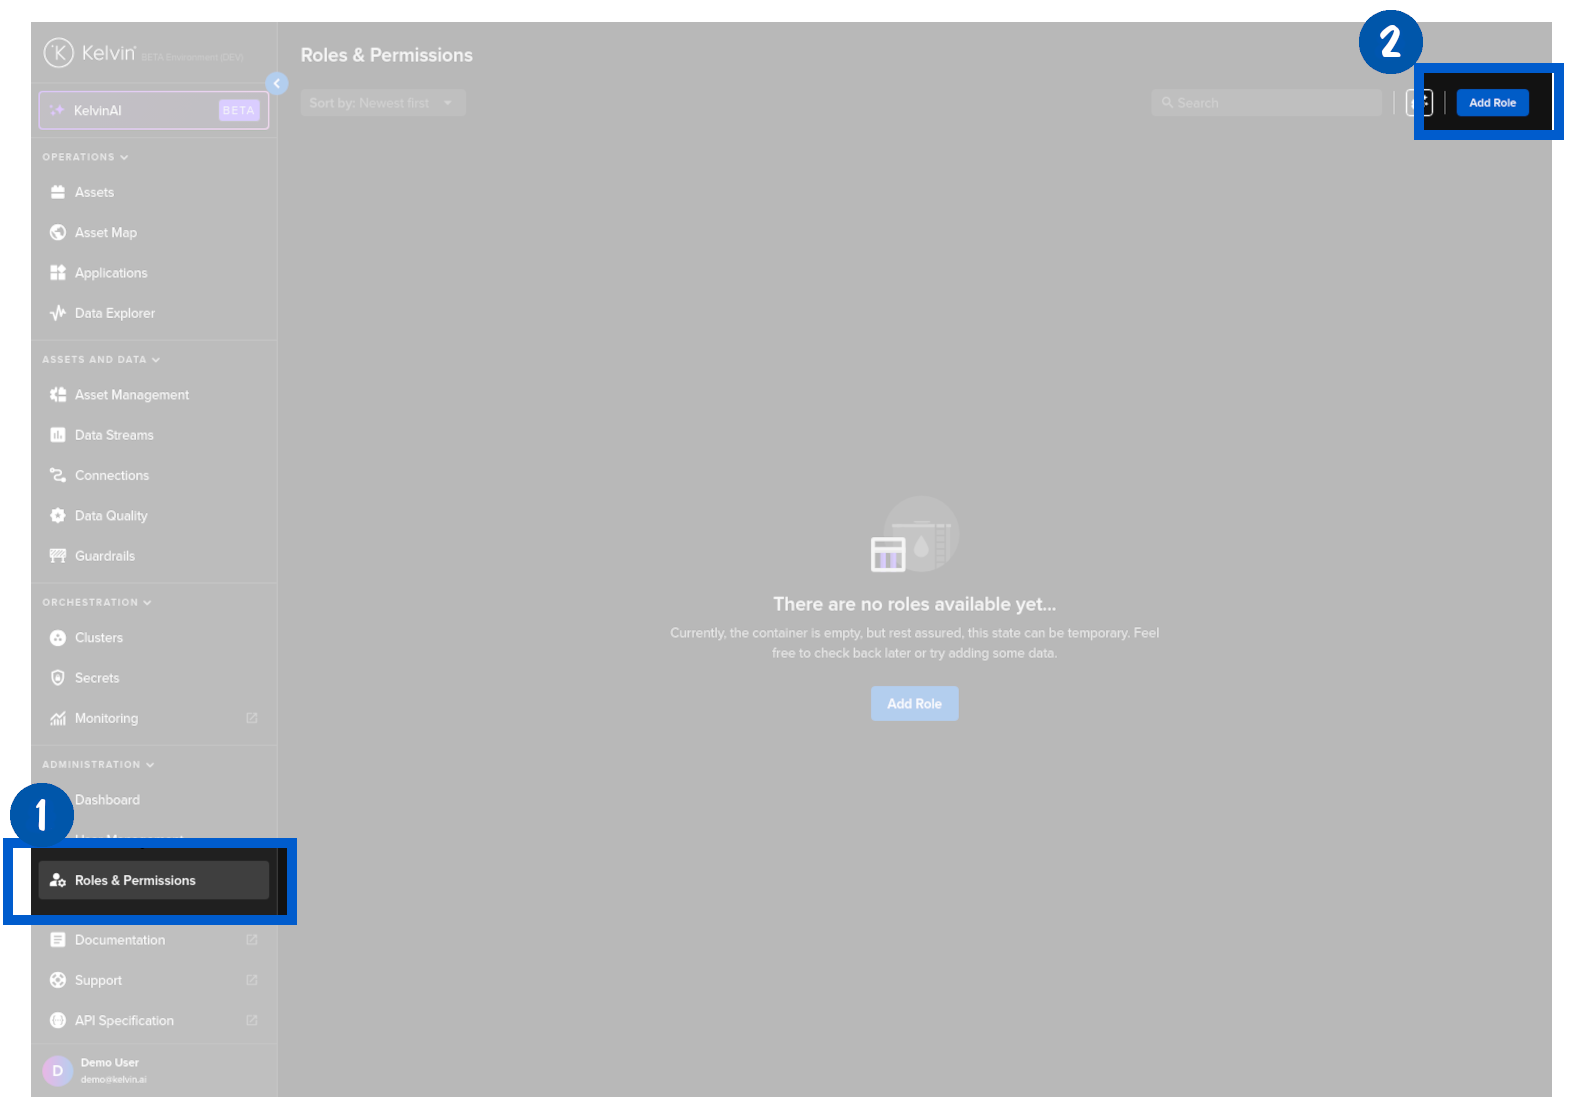
You will see a popup appear.
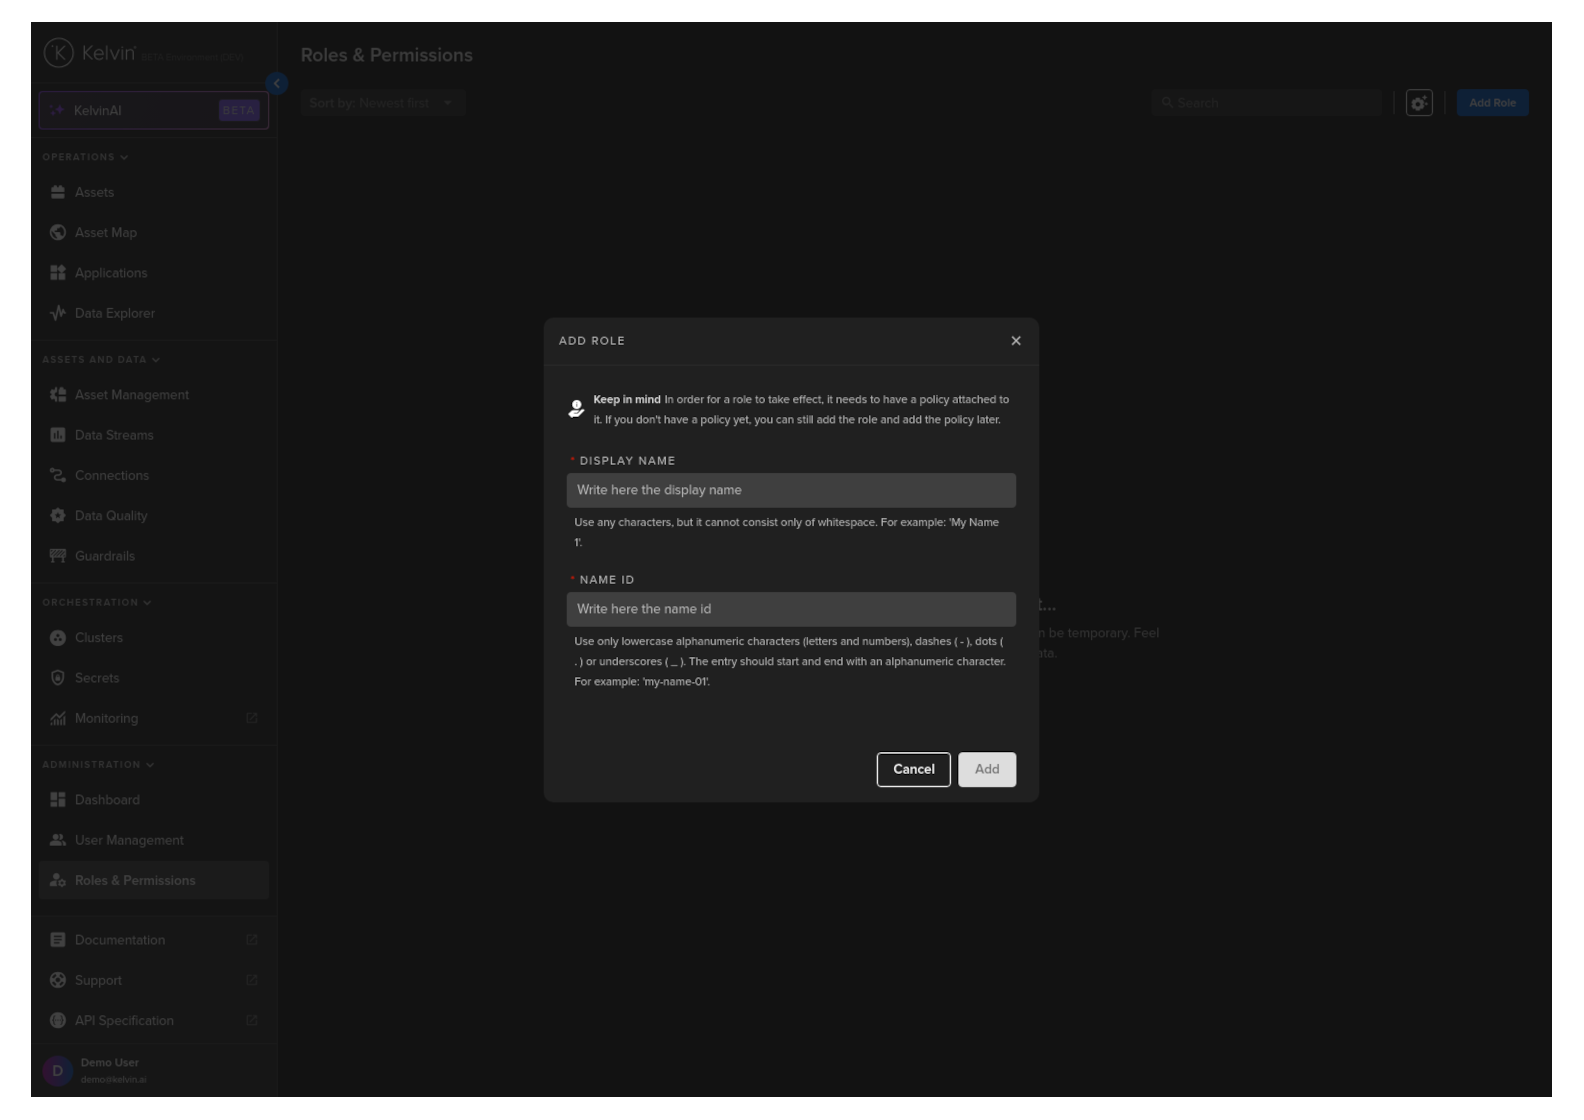
Now type a friendly Display Name.
The name ID will be automatically created from the Display Name. You can change this if required.
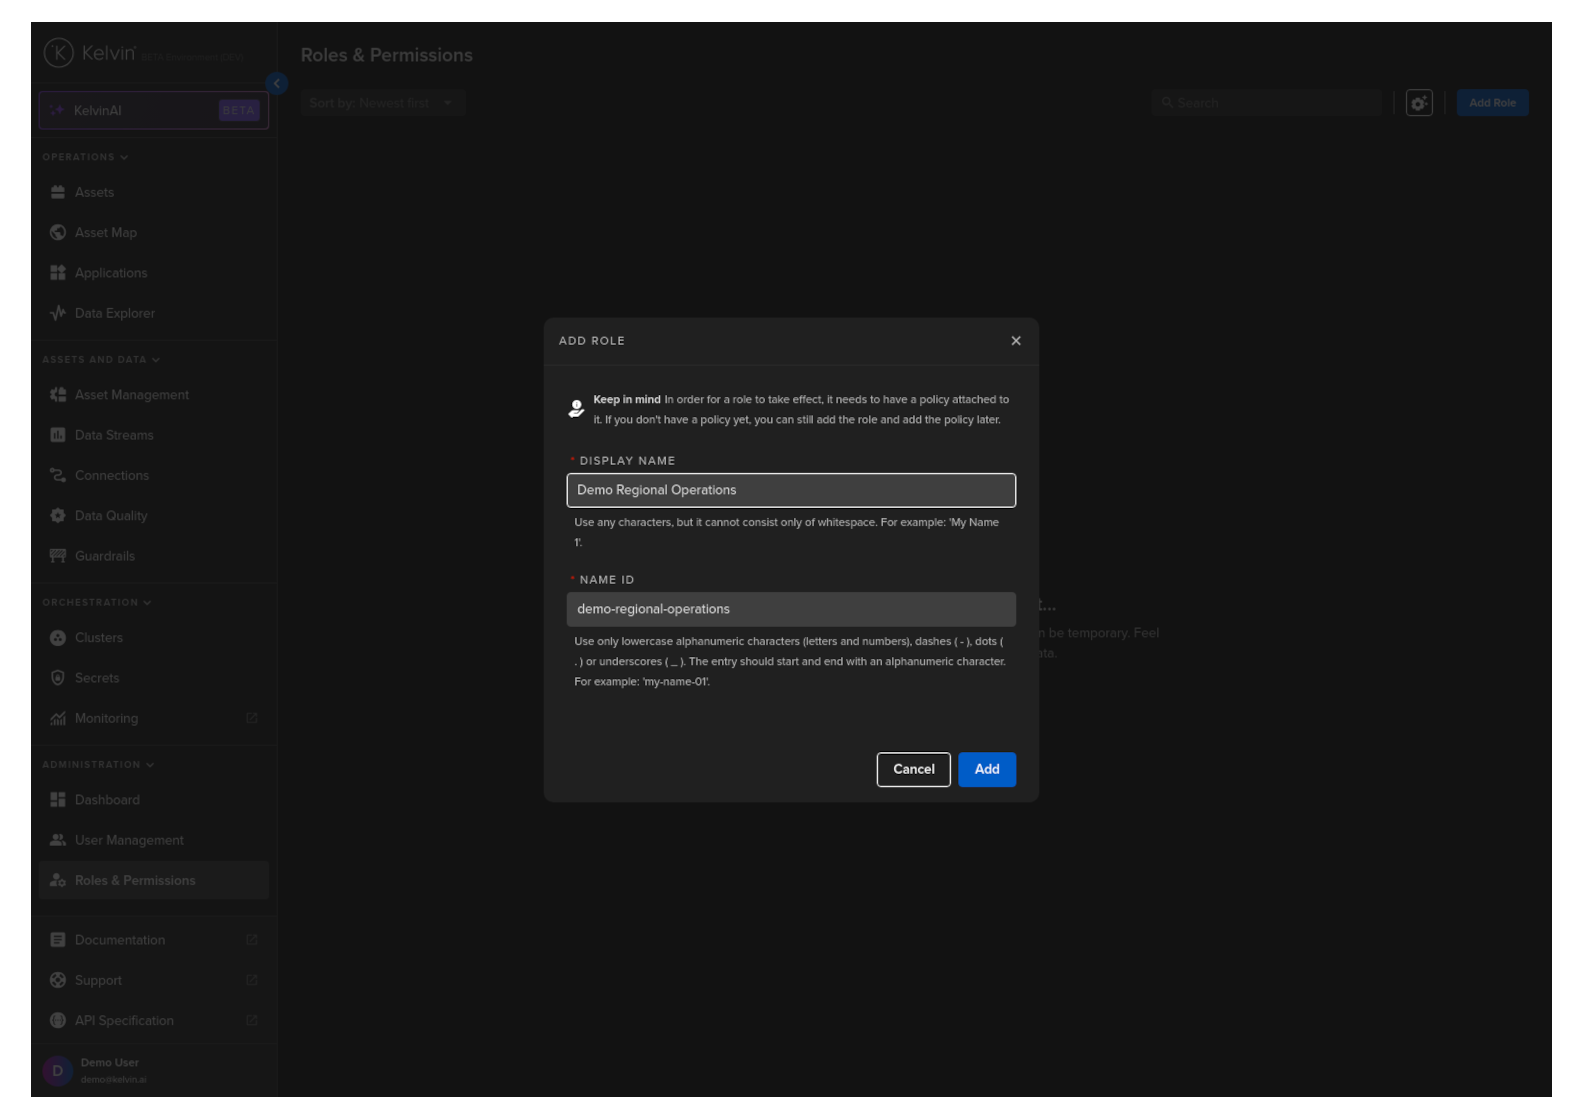
Then click the Add button.
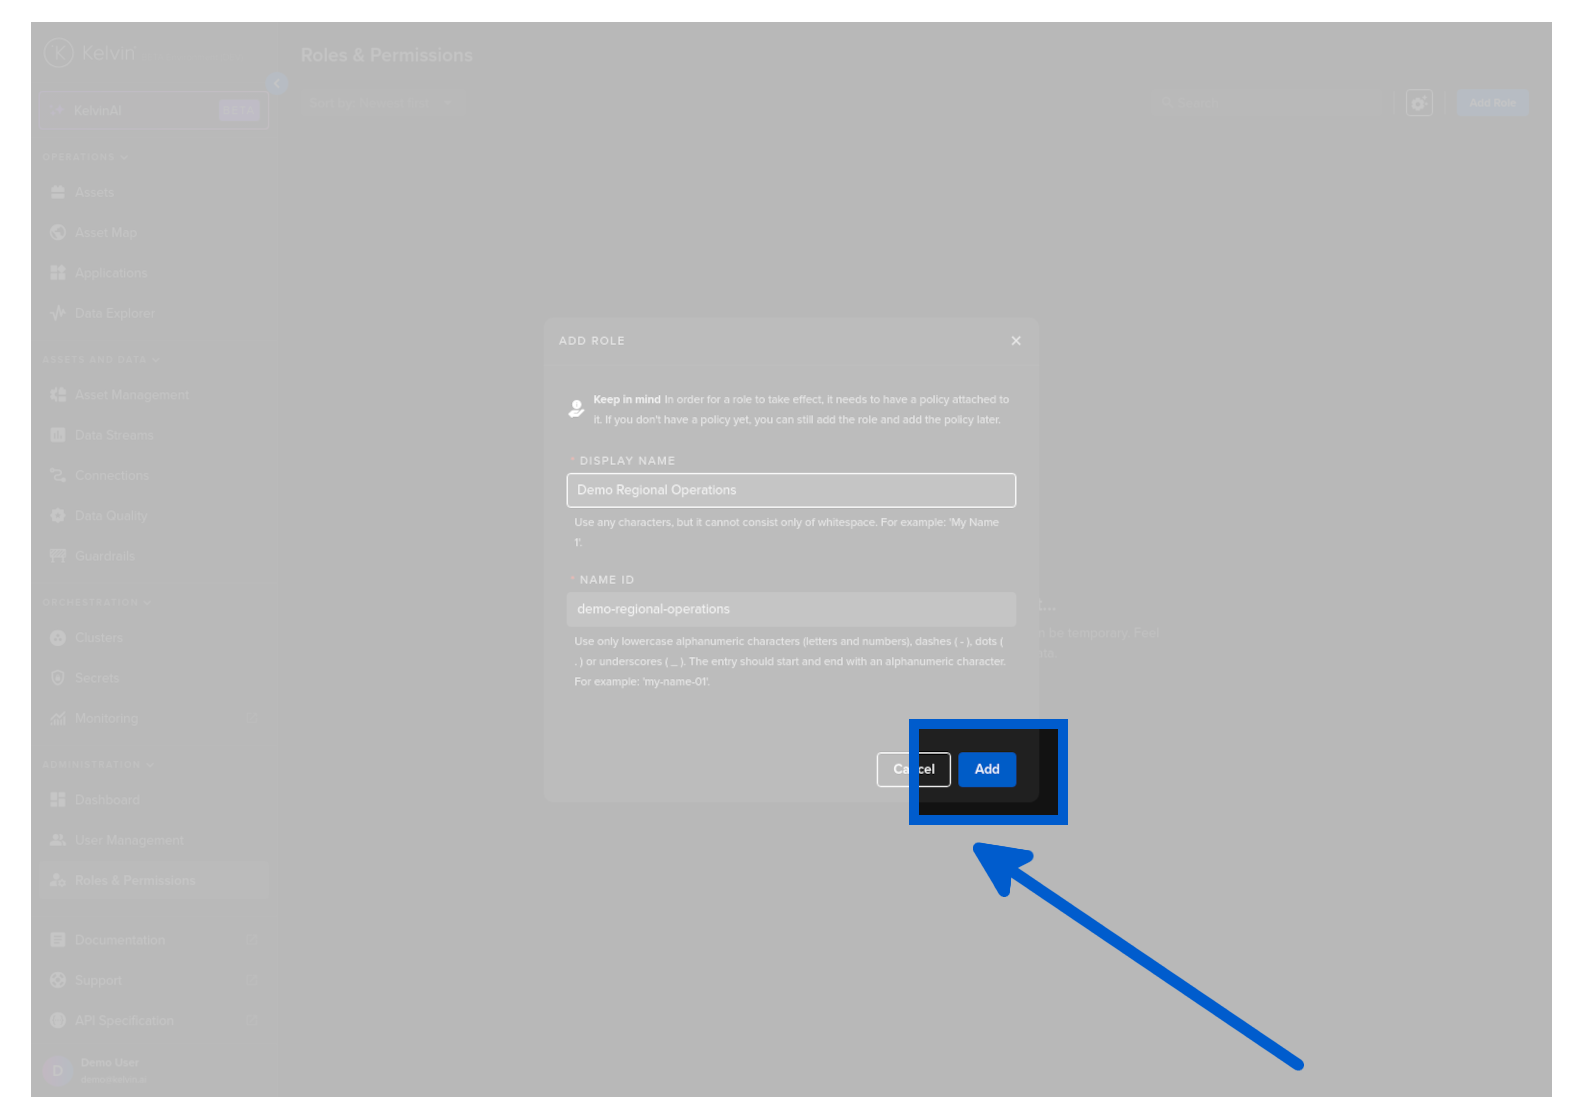
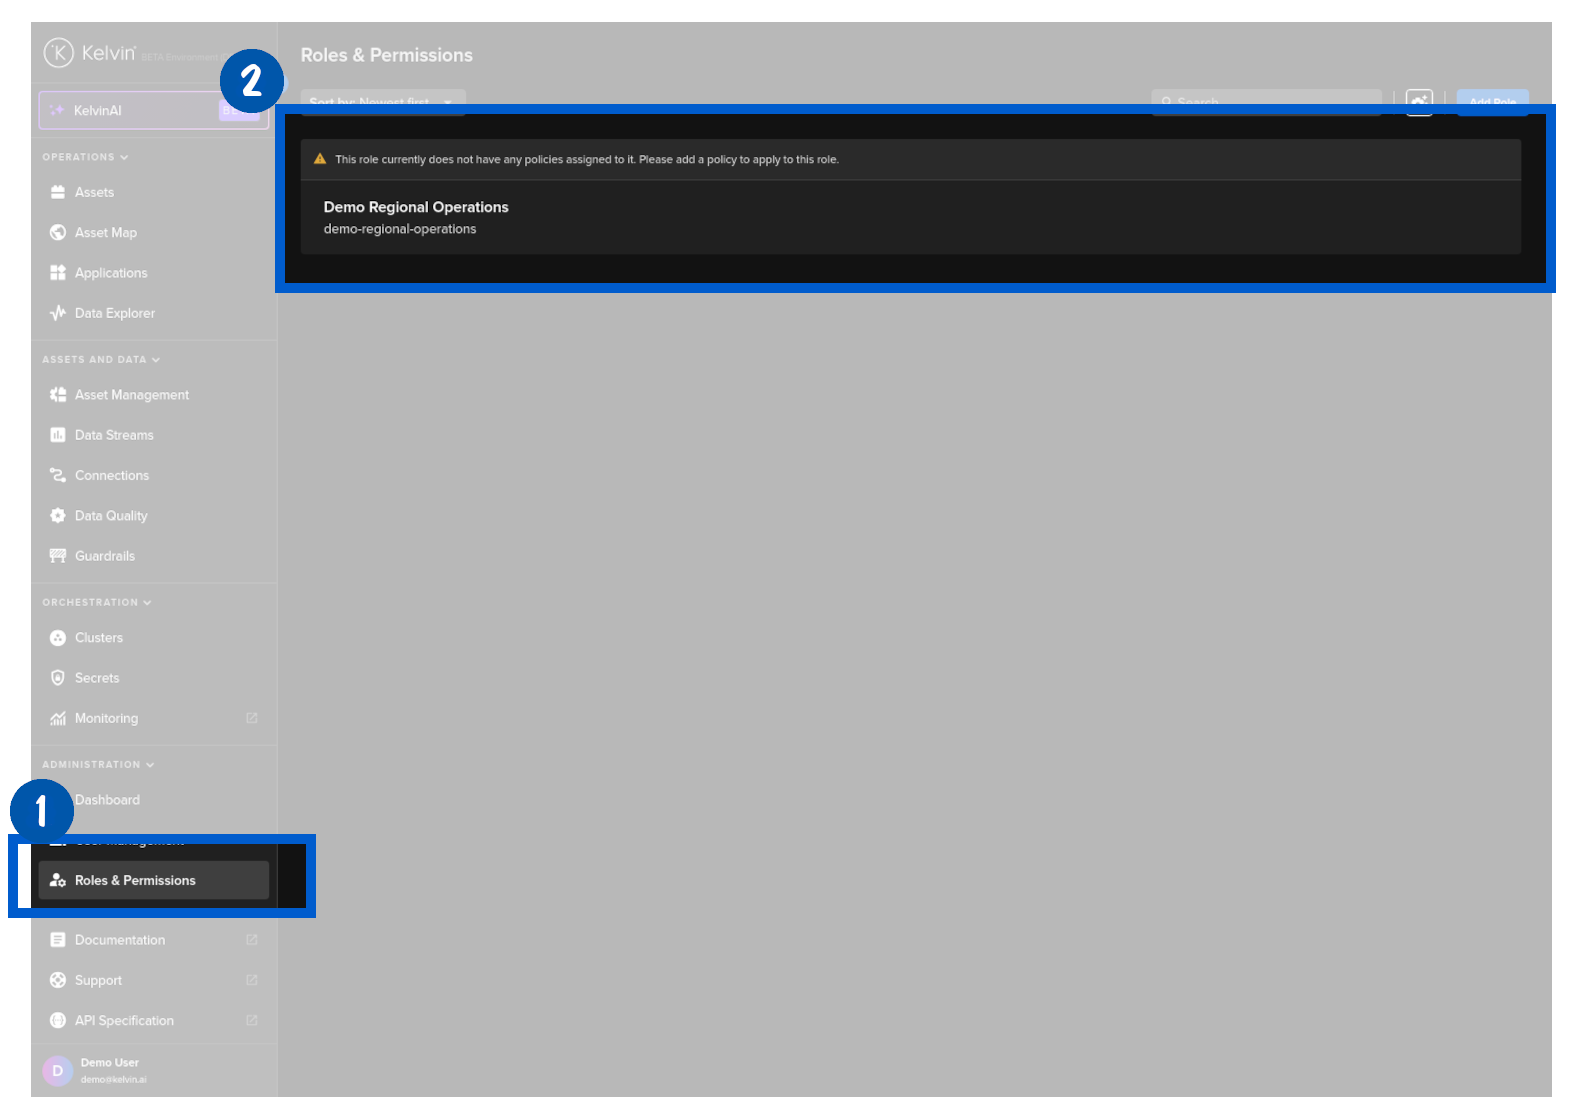
Congratulations, you have created a new Role.
You will now be automatically taken to the Role to add Policies (Permissions).
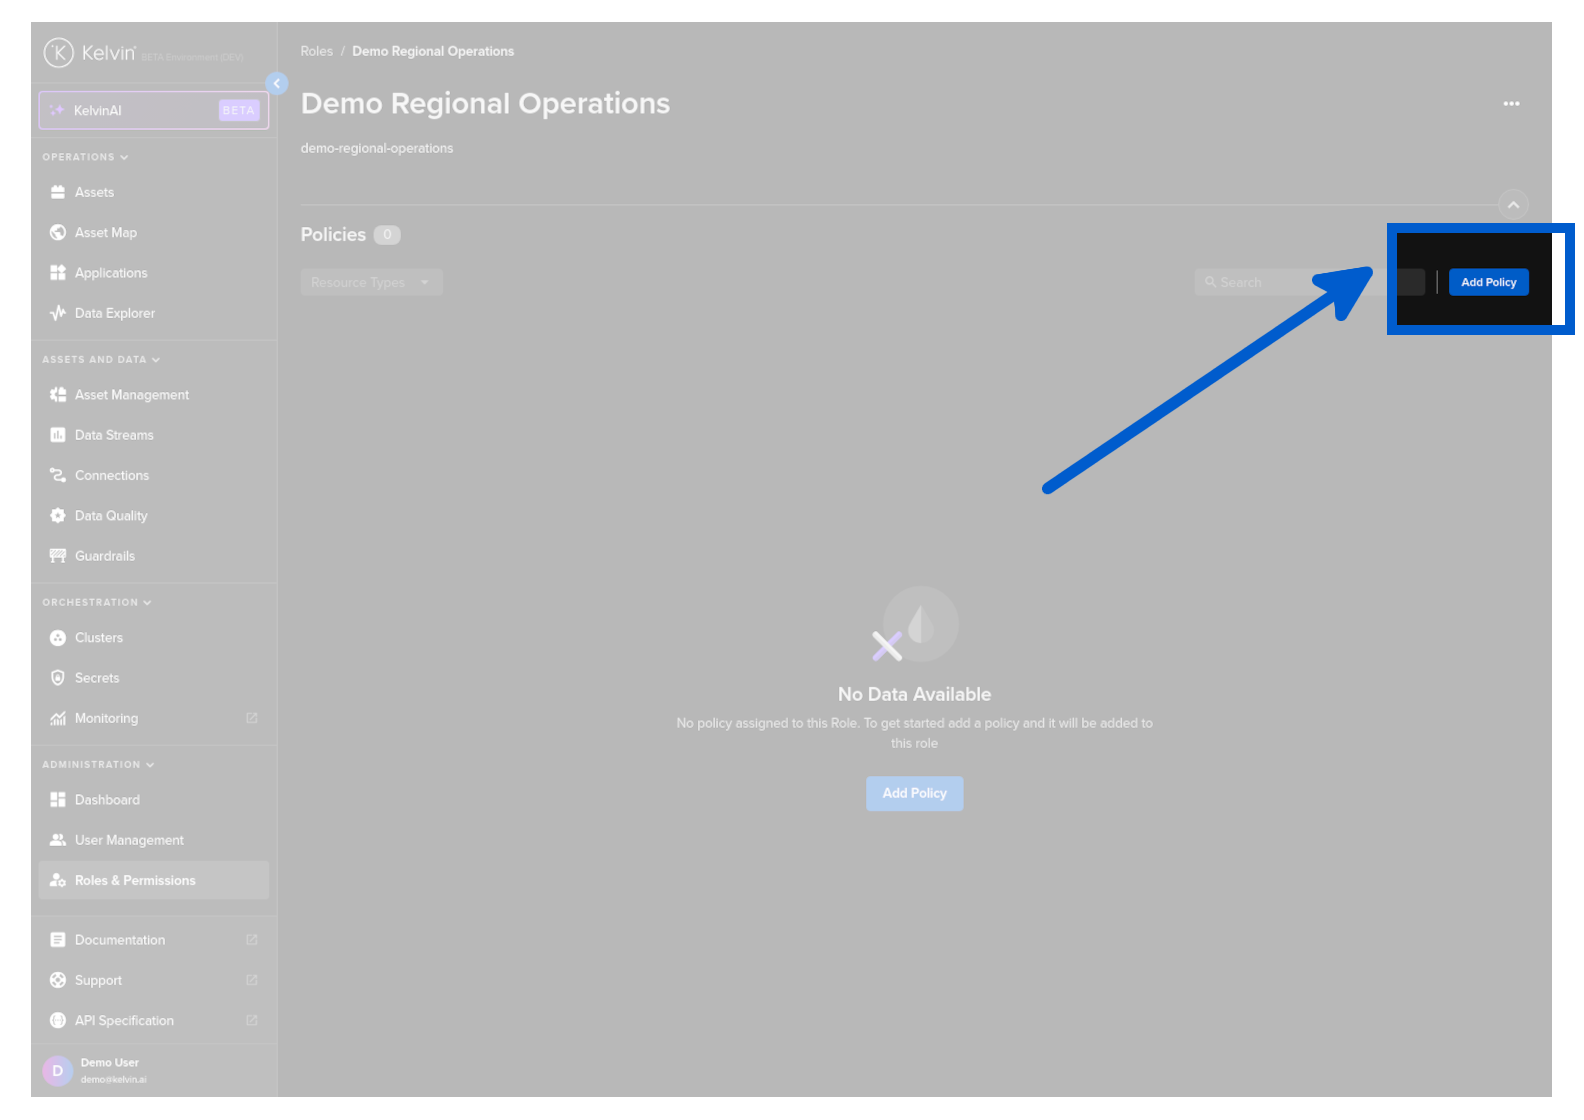
To add a Policy (Permission) to a Role, click on Roles & Permissions in the Administration section of the left side bar and then click on a Role that you wish to add or edit Policies.
You will then see the Policy section of the selected Role.
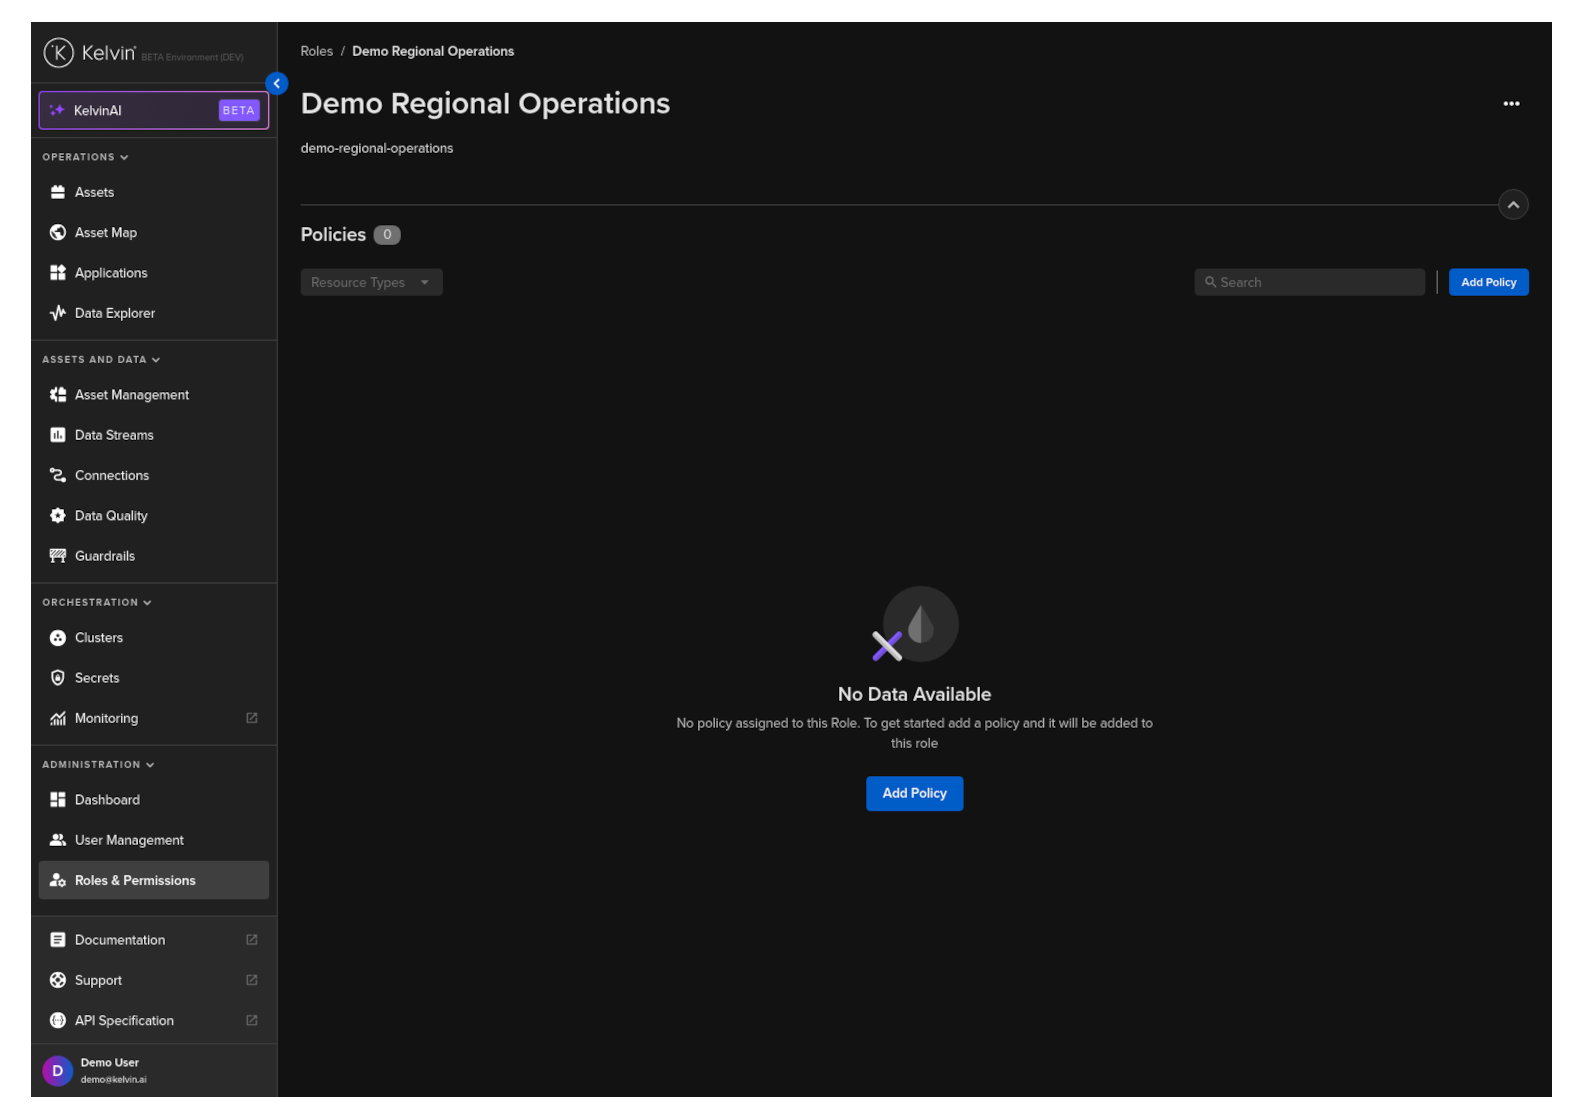
Click on the Add Policy button.
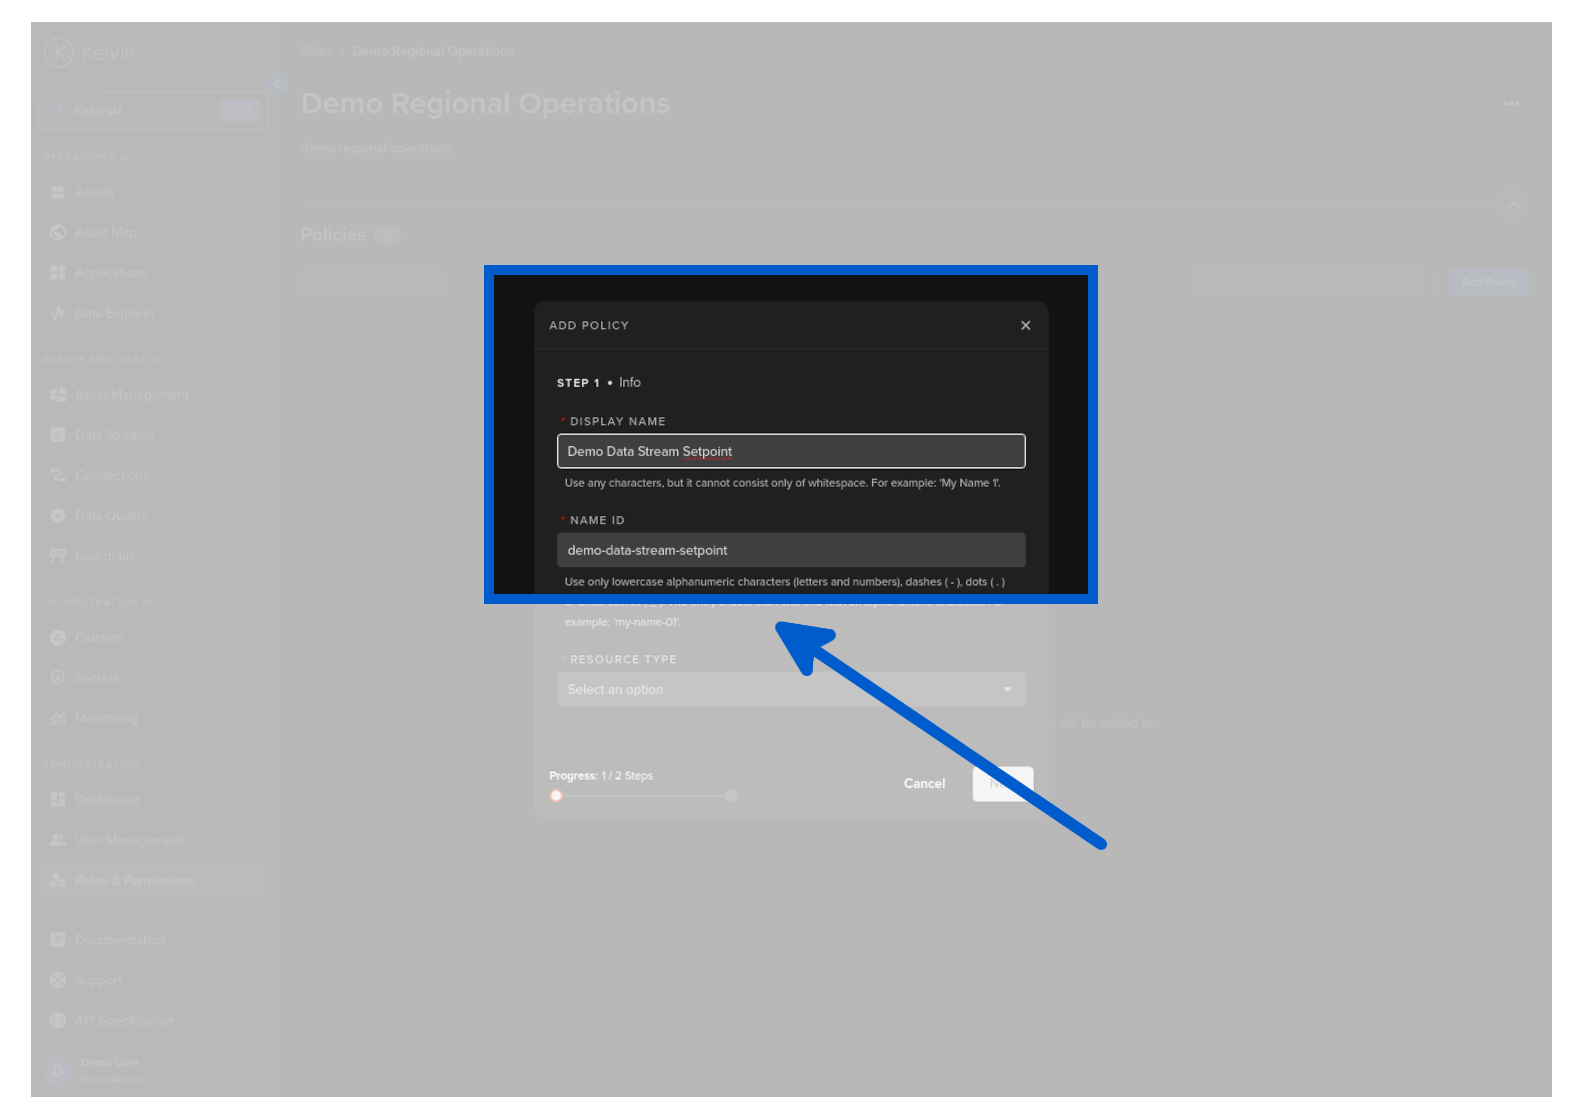
Now type a friendly Display Name.
The name ID will be automatically created from the Display Name. You can change this if required.
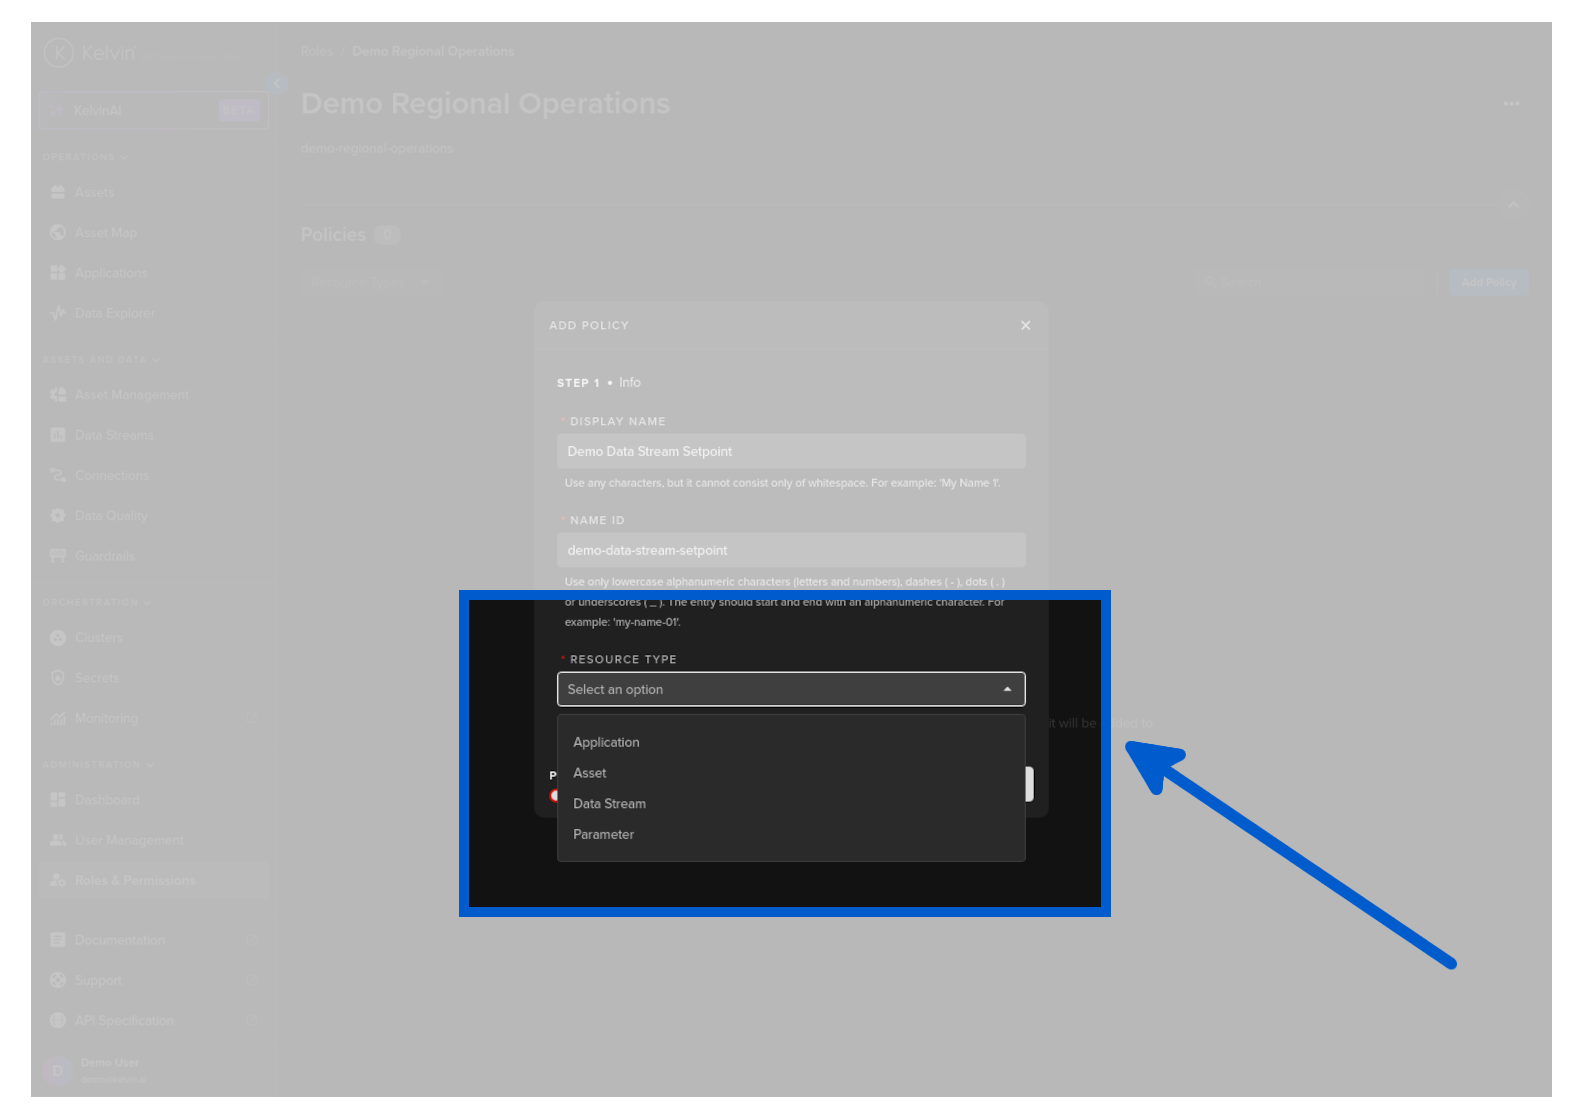
Add a resource type
| Option | Description |
|---|---|
| Application | Create certain policies (permissions) for Kelvin SmartApps™ or Docker Apps |
| Asset | Create certain policies (permissions) for Assets |
| Data Stream | Create certain policies (permissions) for Data Streams |
| Parameter | Create certain policies (permissions) for Kelvin SmartApps™ or Docker Apps Parameters |
In this example we will create a Policy that will allow any actions (create, read, update, delete) for the Data Stream with the name qamm-metric-00. So in this case we will select Data Stream.
Click next and then you can add the policy.
| YAML Policy to a Role Sample | |
|---|---|
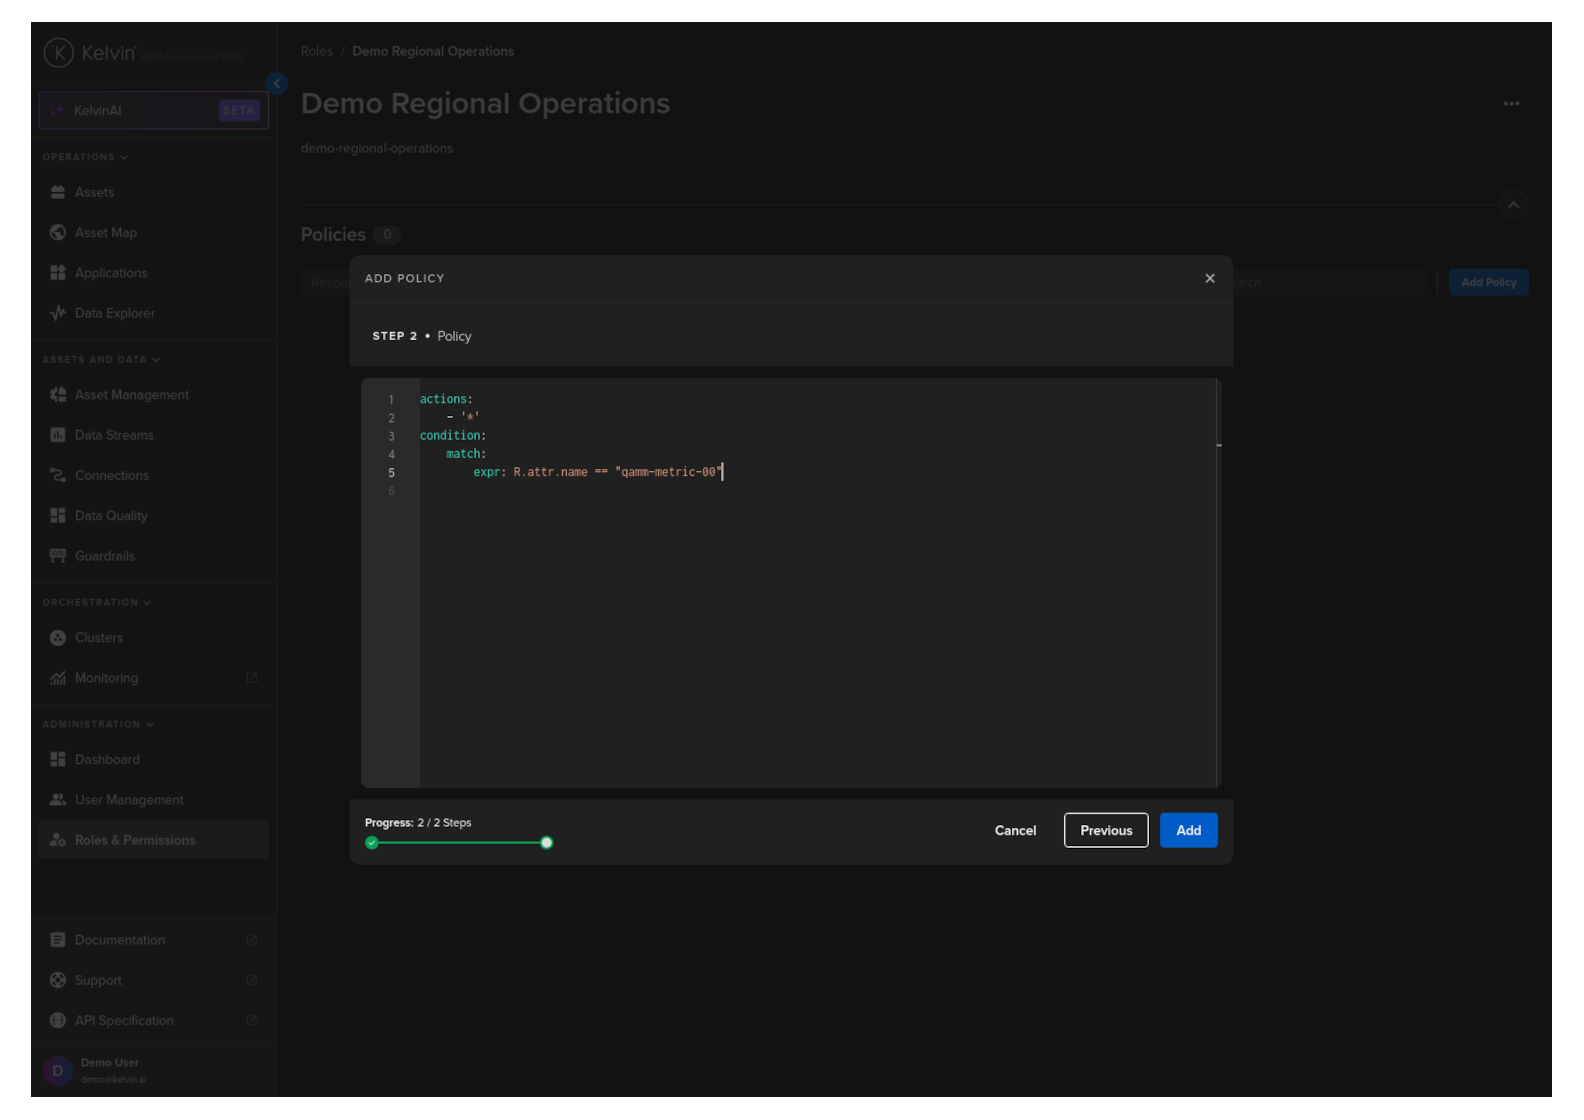
When finished click on the Add button to add the Policy to the Role.
Congratulations, you have added a Policy to a Role.
When creating a new Policy, the expressions section is very powerful and allows versatility in how to structure it.
There are three main expressions that are available;
Single boolean expression
all operator: all expressions must evaluate to true (logical AND)
| YAML Policy Expression Sample | |
|---|---|
and any operator: only one of the expressions has to evaluate to true (logical OR)
| YAML Policy Expression Sample | |
|---|---|
Let's create an expression that will limit the user to only be able to view or create Assets that are related to the Asset Type named wells.
Note
You will need to ensure that you selected Asset as the resource type for this Policy.
| YAML Policy Expression Sample | |
|---|---|
For a second example, let's allow the user to be able to take any actions (create, read, update, delete) for the Data Stream with the name speed-setpoint.
Note
You will need to ensure that you selected Data Stream as the resource type for this Policy.