Connect to data
Overview
You can connect to your data using a Connection.
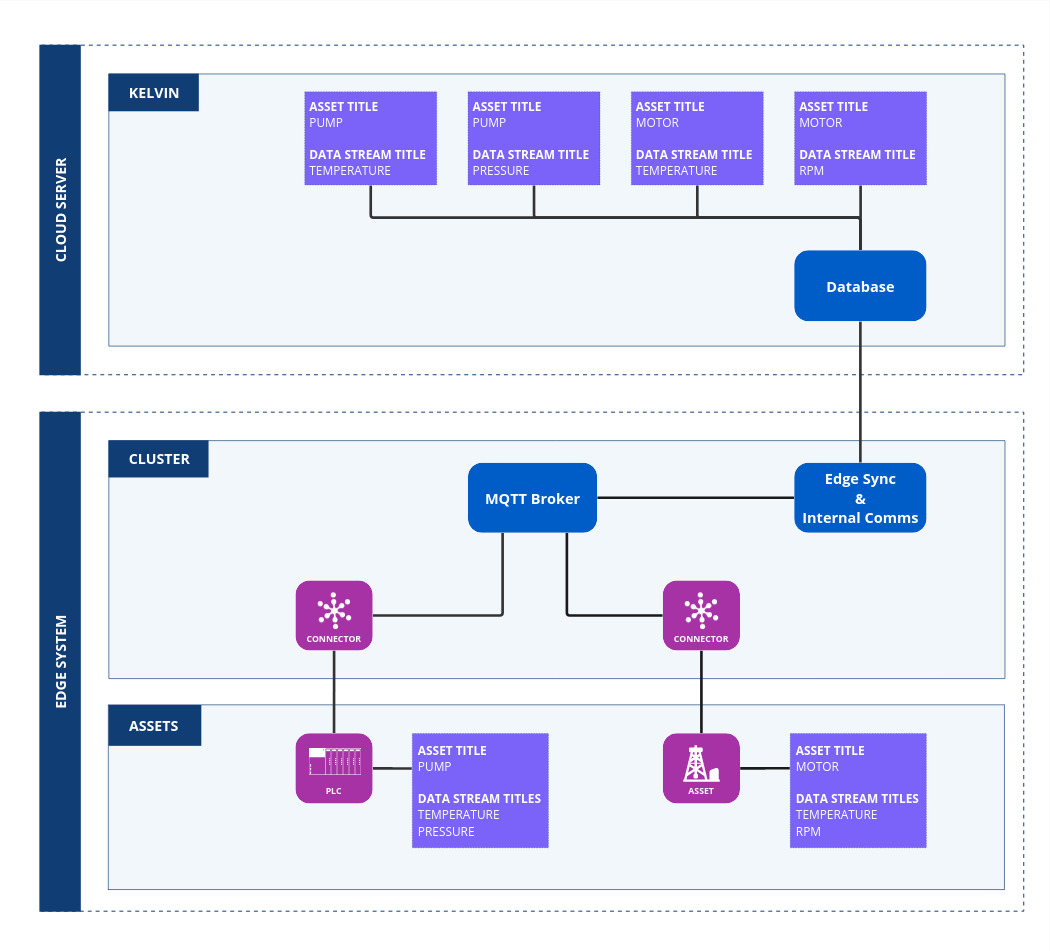
The primary role of a Connection is to channel real-time data streams from assets. With the capability to interface with a diverse set of industrial protocols and messaging protocols, the Connection ensures data contextualization, data normalization and data quality.
The following Connections are currently available for these protocols:
- OPC UA
- Modbus TCP/RTU
- Emerson ROC
You can also build your own Connection to connect to any source of data (APIs, databases, etc) using the Kelvin SDK.
In this guide, we will demonstrate how to seamlessly connect to an OPC UA server.
Connect to OPC UA Server
In order to connect to an OPC UA server, you need to deploy the OPC UA Connection to the cluster that has direct connection with the OPC UA server.
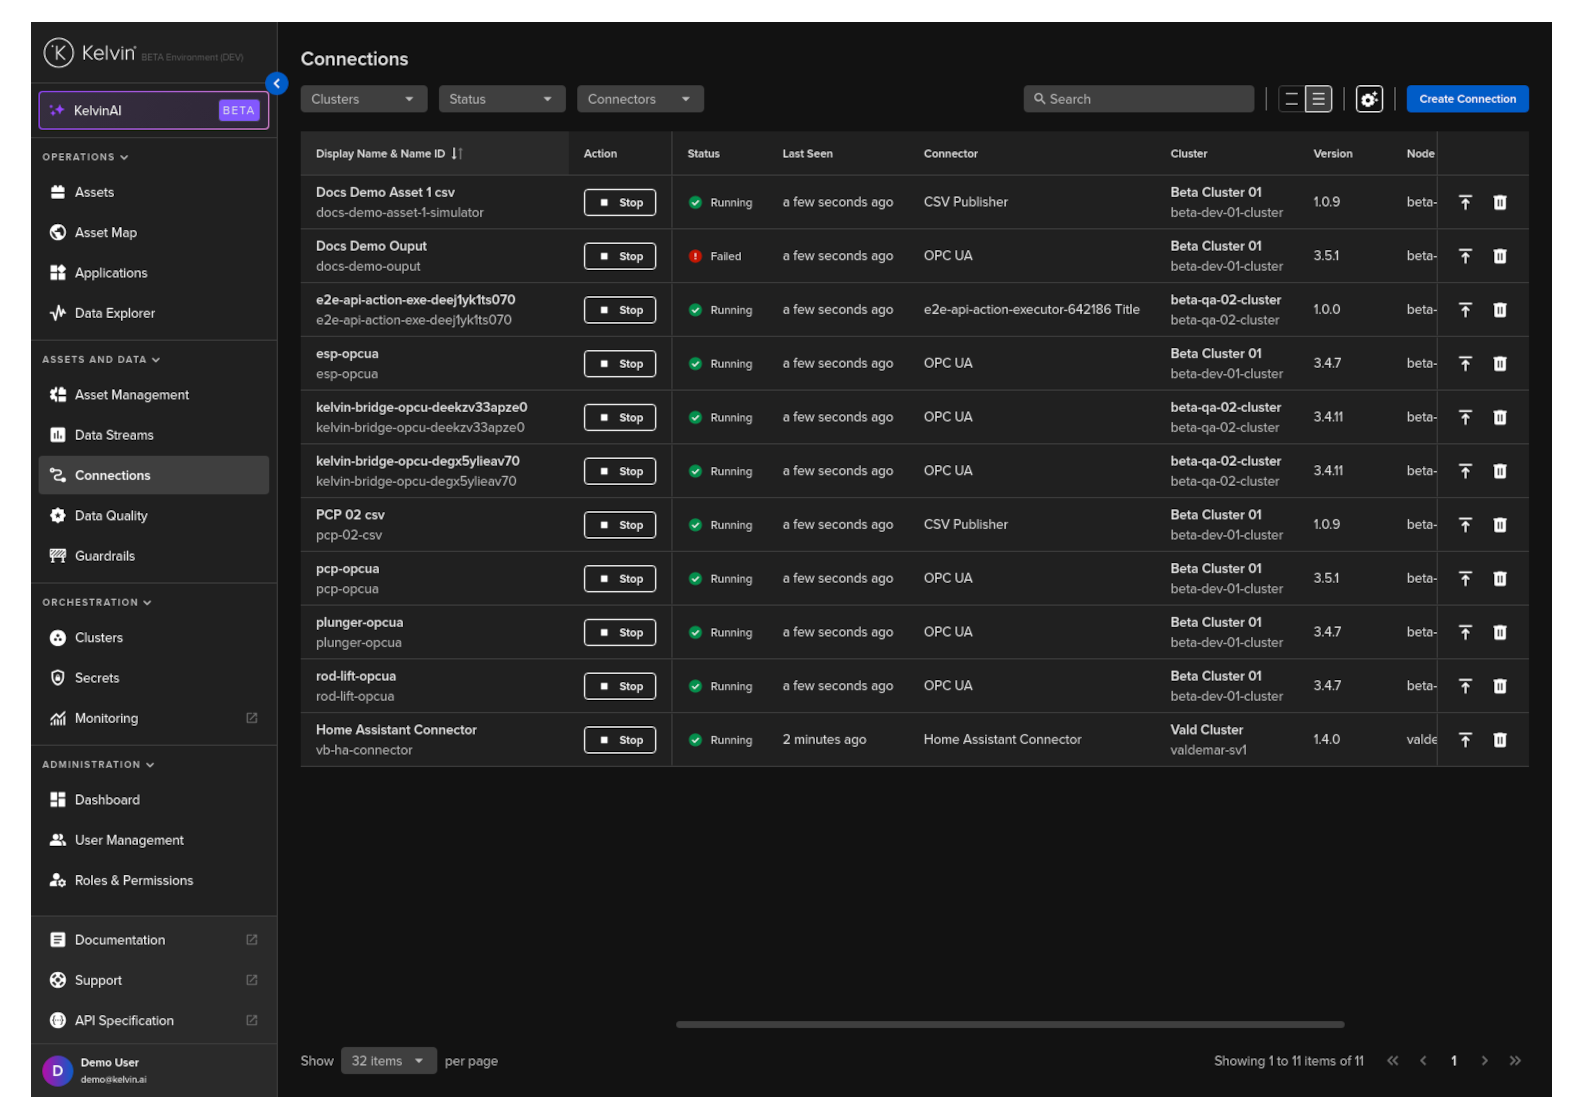
To start click on the Connections menu option from the left side bar menu.
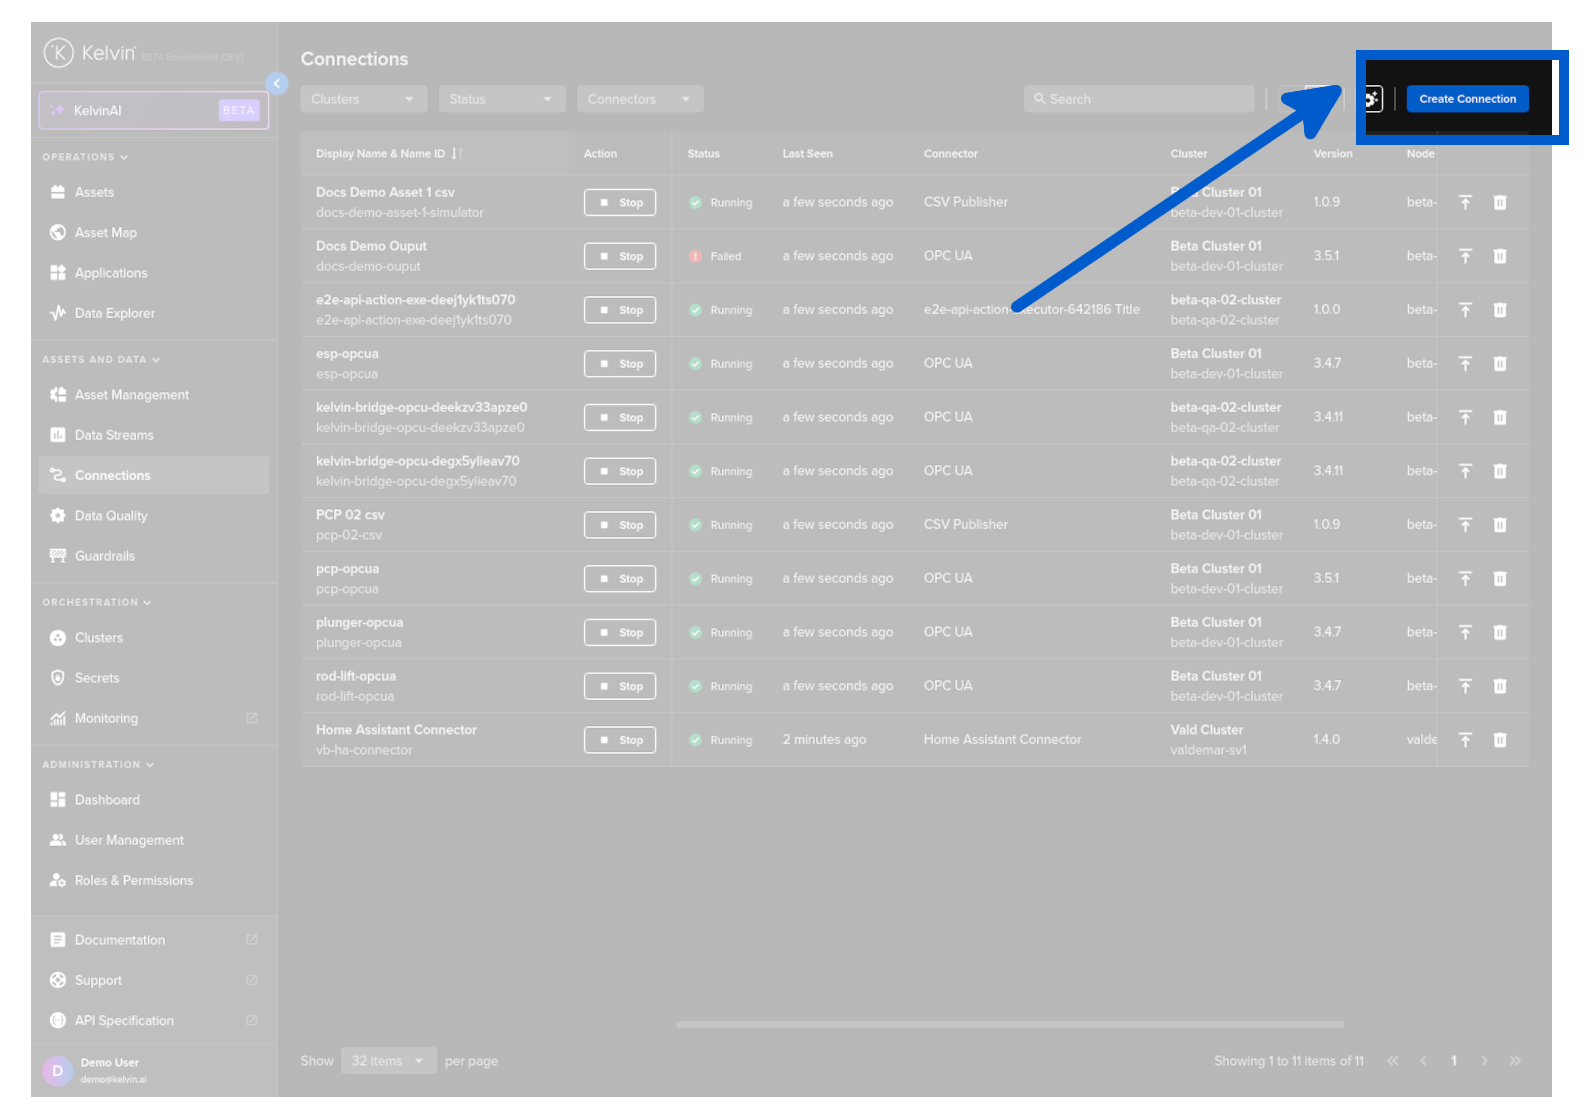
click on the Create Connection button.
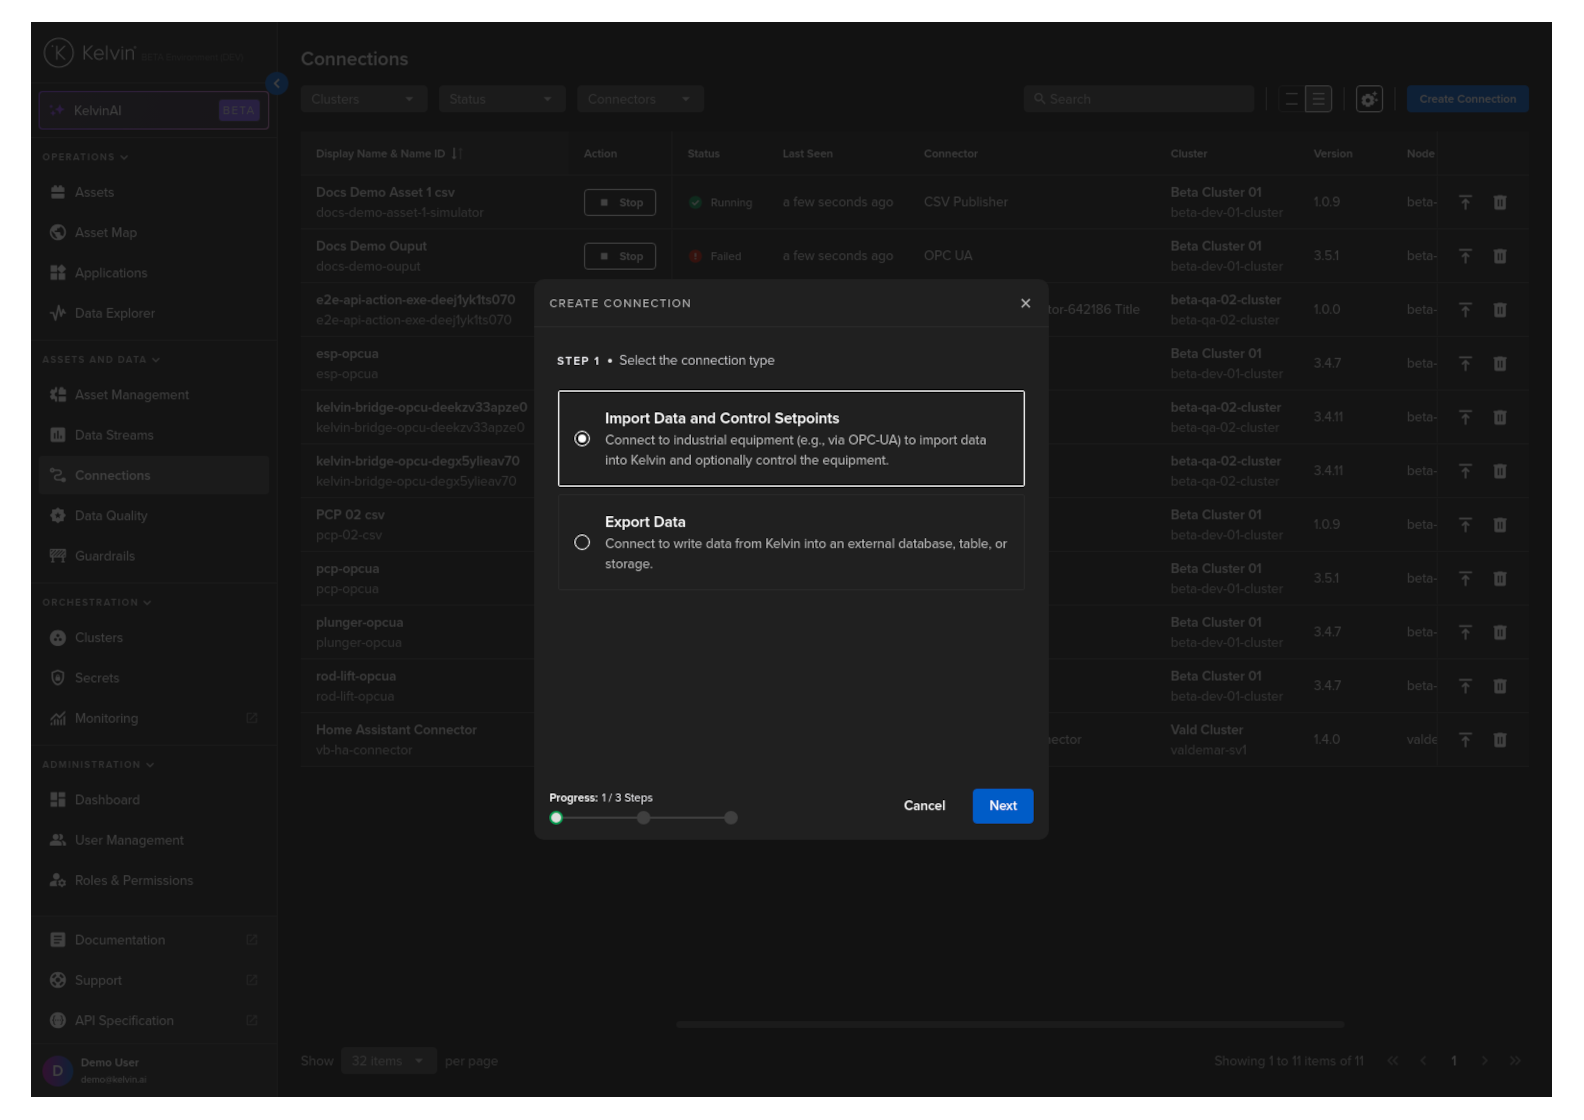
Step 1
Select Import Data and Control Setpoints and click Next.
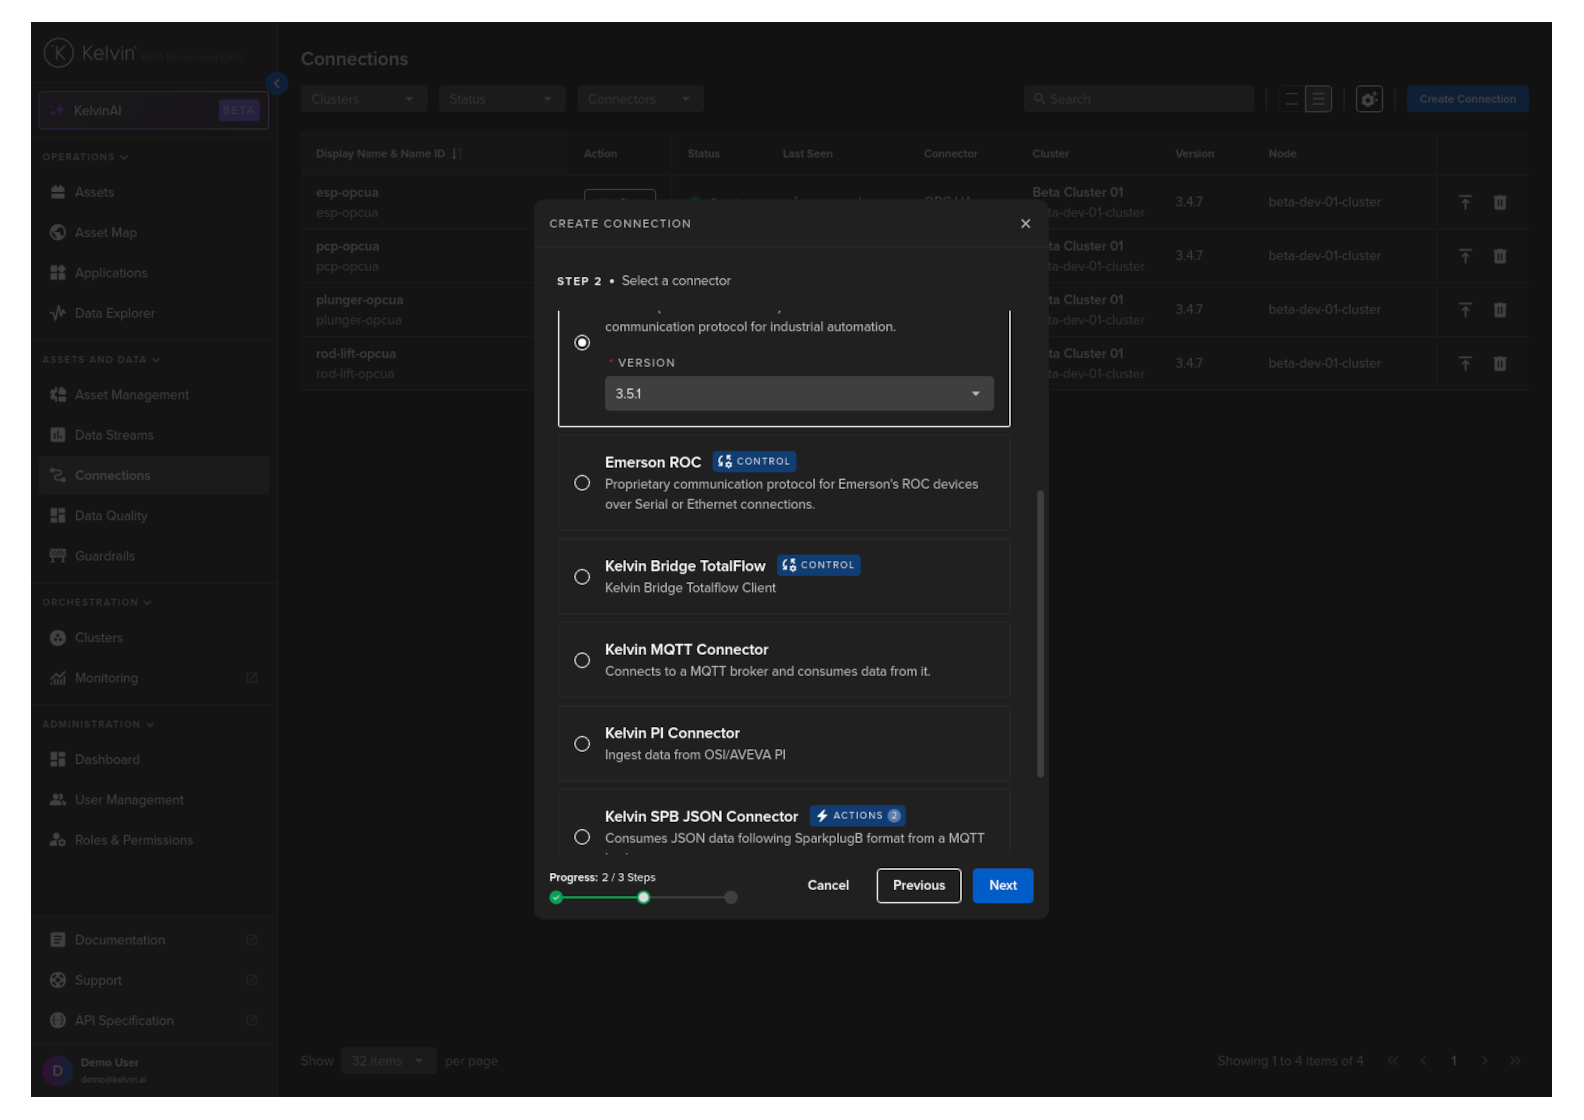
Step 2
Select the OPC UA option, select a Version and click Next.
Step 3
In Step 3 you have a range of options available.
Note
You will only be able to deploy your workload once all options have a green check ![]() .
.
Warning
The following screenshots for creating an OPC UA Connection are from the general documentation in the Platform Administration section here.
The actual information you need to enter will differ from the defaults in the screenshots.
For this example we will only highlight some key areas to be aware;
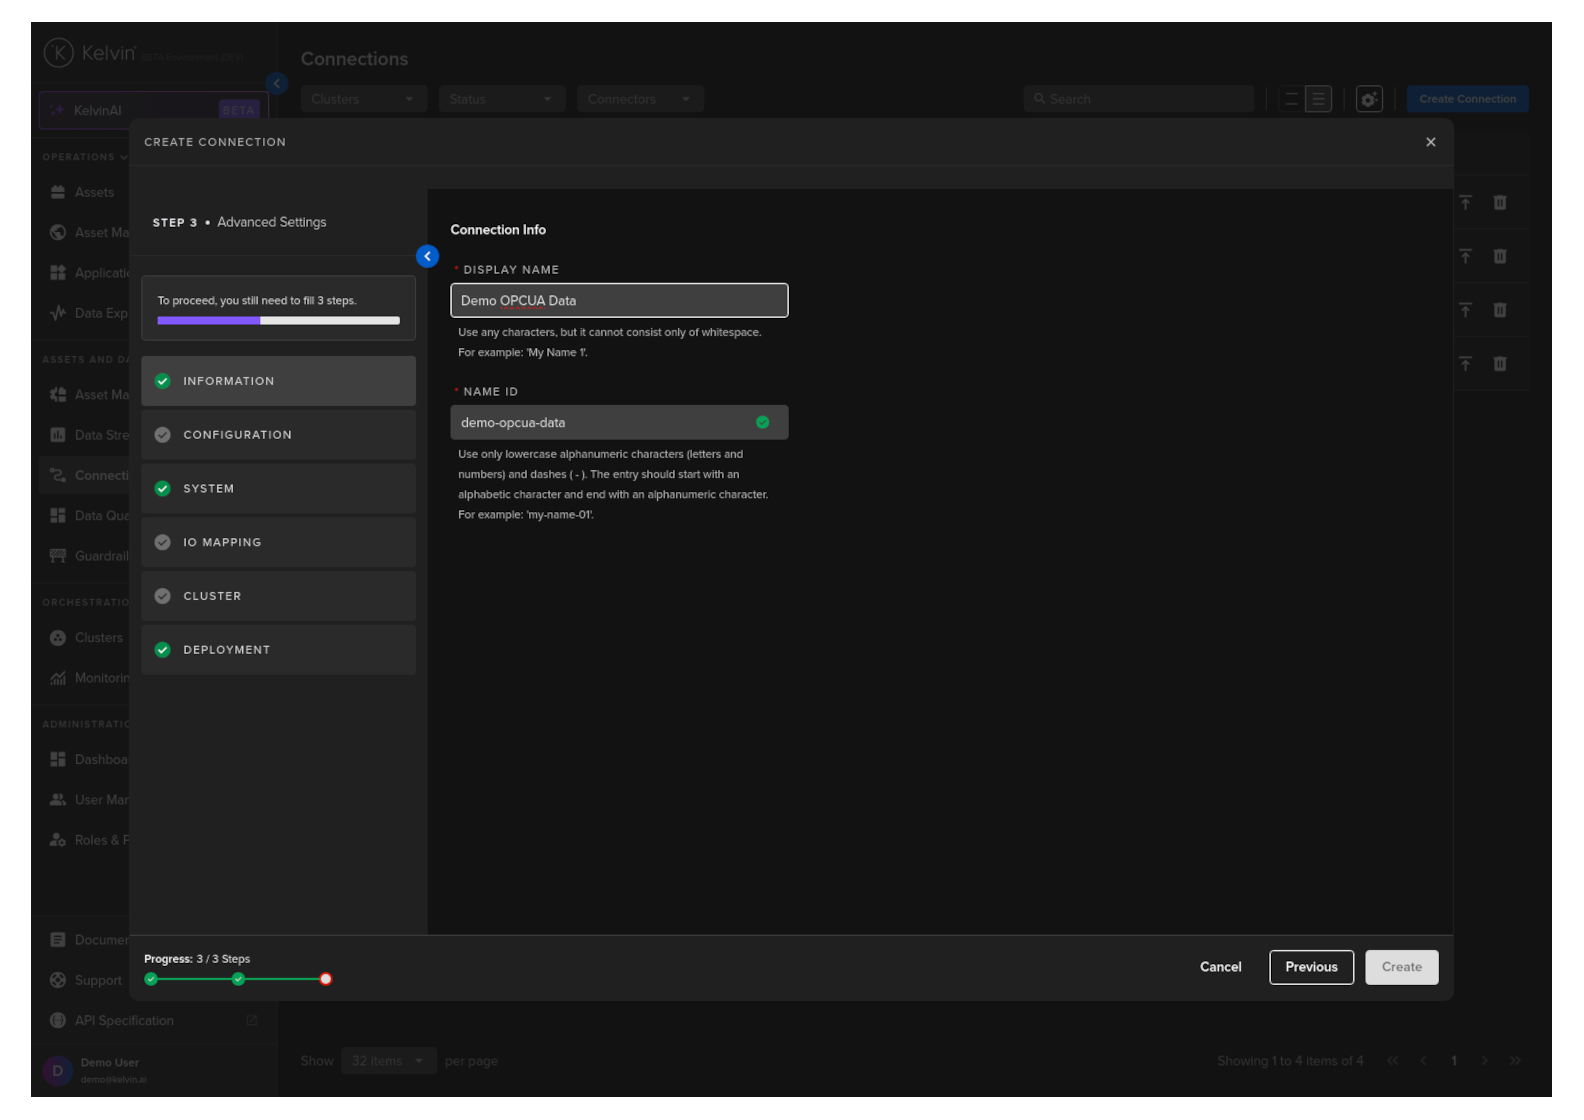
Information
Type in a memorable name in the Display Name text input. You can use any letters, numbers and special characters.
The Connection Name text input will be automatically converted and filled in as you type in the Display Name section. The conversion ensures the Connection Name only contains lowercase alphanumeric characters and ., _ or - characters.
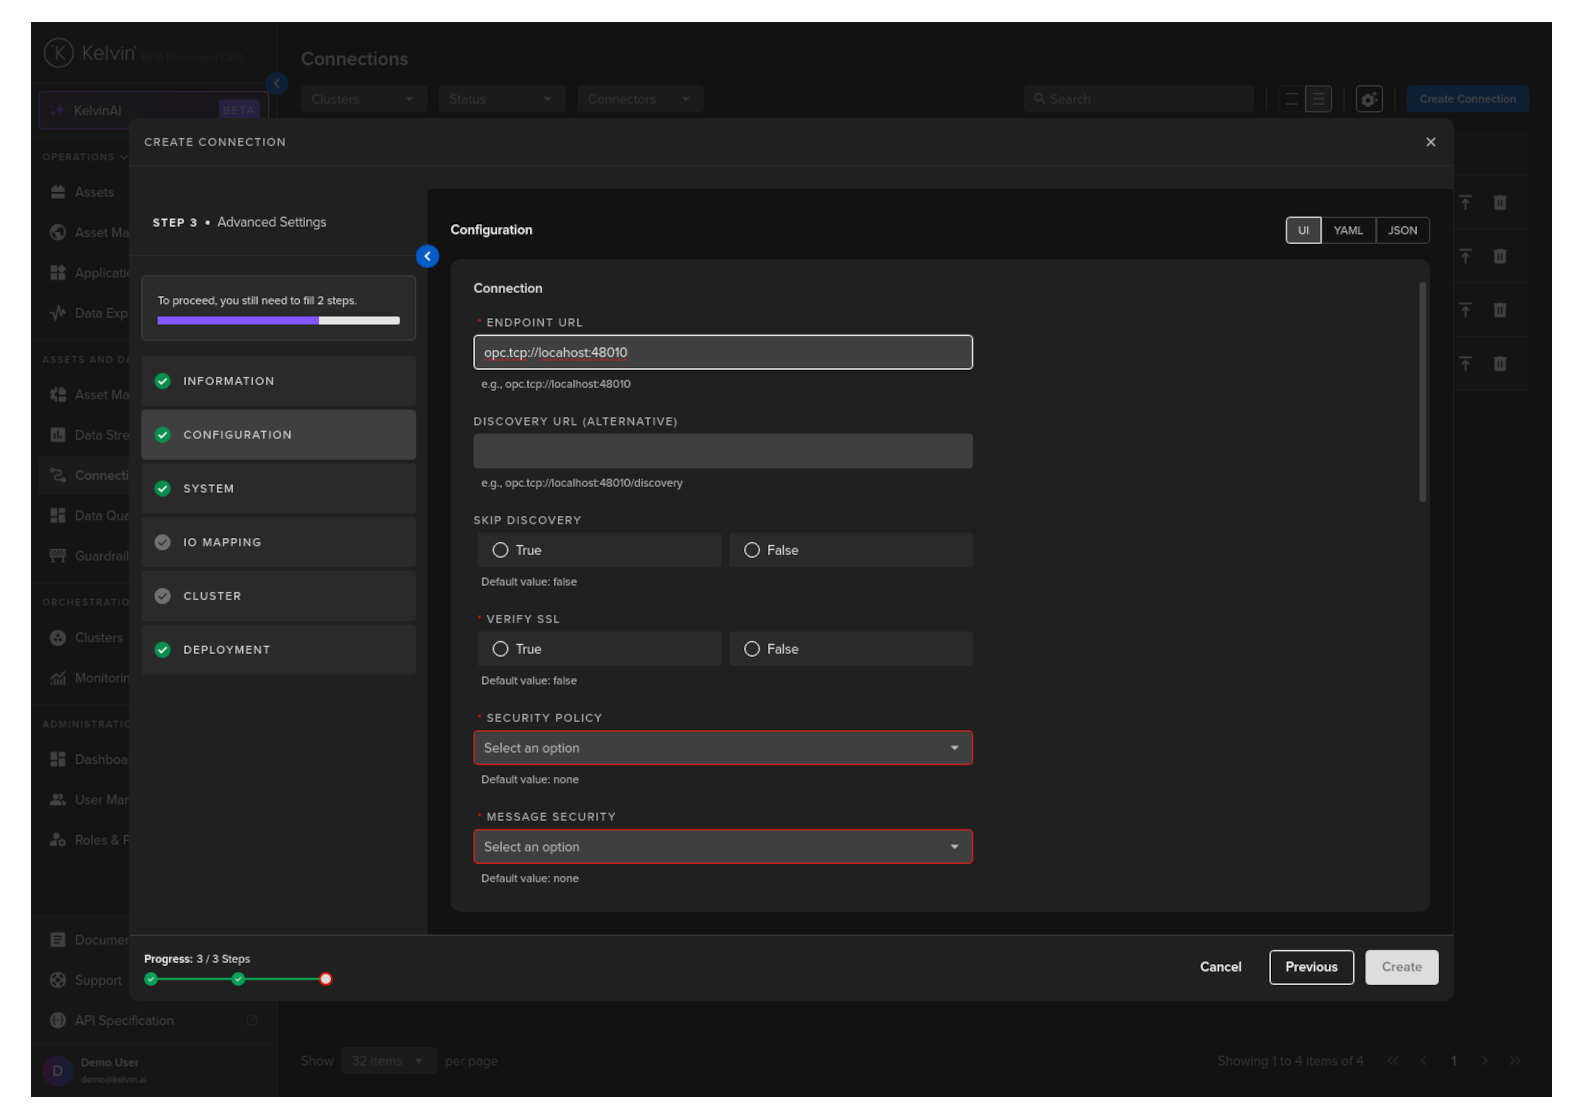
Configuration
Configure the OPC-UA connection to the asset. There are a number of optional and mandatory parameters to fill in.
Info
You can choose to use the UI view, or work directly in YAML or JSON format.
For the optional parameters, if you do not fill in any values, the default values will be used.
| Parameter | Options | Description | Default | Mandatory |
|---|---|---|---|---|
| Endpoint URL | String (opc.tcp://localhost:48010) | The URL of the OPC UA server endpoint to connect to. | Yes | |
| Verify SSL | Boolean (True/False) | Determines whether SSL certificates are verified when connecting to an OPC UA server over a secure channel. | False | Yes |
| Security Policy | String (specifying security type) | Specifies the security policy for the connection, such as None, Basic256Sha256, etc. This defines the level of security like encryption and data integrity. |
Yes | |
| Message Security | String (specifying security mode) | Determines the security mode of the messages, such as None, Sign, or SignAndEncrypt. |
None | Yes |
| Authentication Method | String (specifying method) | Specifies the method of authentication used when connecting to the OPC UA server, such as Credentials or Certificate. |
None | Yes |
| Username (Visible with credentials method only) | String | The username used for authentication if the Credentials option is chosen in Authentication Method. |
Depends | |
| Password (Visible with credentials method only) | String | The password corresponding to the username if the Credentials option is chosen in Authentication Method. |
Depends | |
| Certificates (Visible with certificate method only) | File path or certificate object | The path to the certificate file(s) or the certificate object itself if the Certificate option is chosen in Authentication Method. |
Depends | |
| Key Password (Visible with certificate method only) | String | The password for the private key associated with the client's certificate if the Certificate option is chosen in Authentication Method. |
Depends | |
| Read Timeout | Numeric value (in milliseconds) | Specifies the maximum time to wait for a response when reading data from an OPC UA server. | No | |
| Write Timeout | Numeric value (in milliseconds) | Specifies the maximum time to wait for a response when writing data to an OPC UA server. | No | |
| Watchdog Timeout | Numeric value (in milliseconds) | Defines the timeout for the watchdog mechanism, which monitors the health of the connection to the OPC UA server. | No | |
| Session Name | String | A custom name for the session, used for identification and logging purposes. | No | |
| Force Read After Write | Boolean (True/False) | Immediately tries to confirm if the write succeeded on the Asset and not wait for the standard read cycle. | False | Yes |
| Subscription Monitoring Interval | Numeric value (Seconds) | False | Yes | |
| Logging Level | String | Info, Debug, Warning, Error |
False | No |
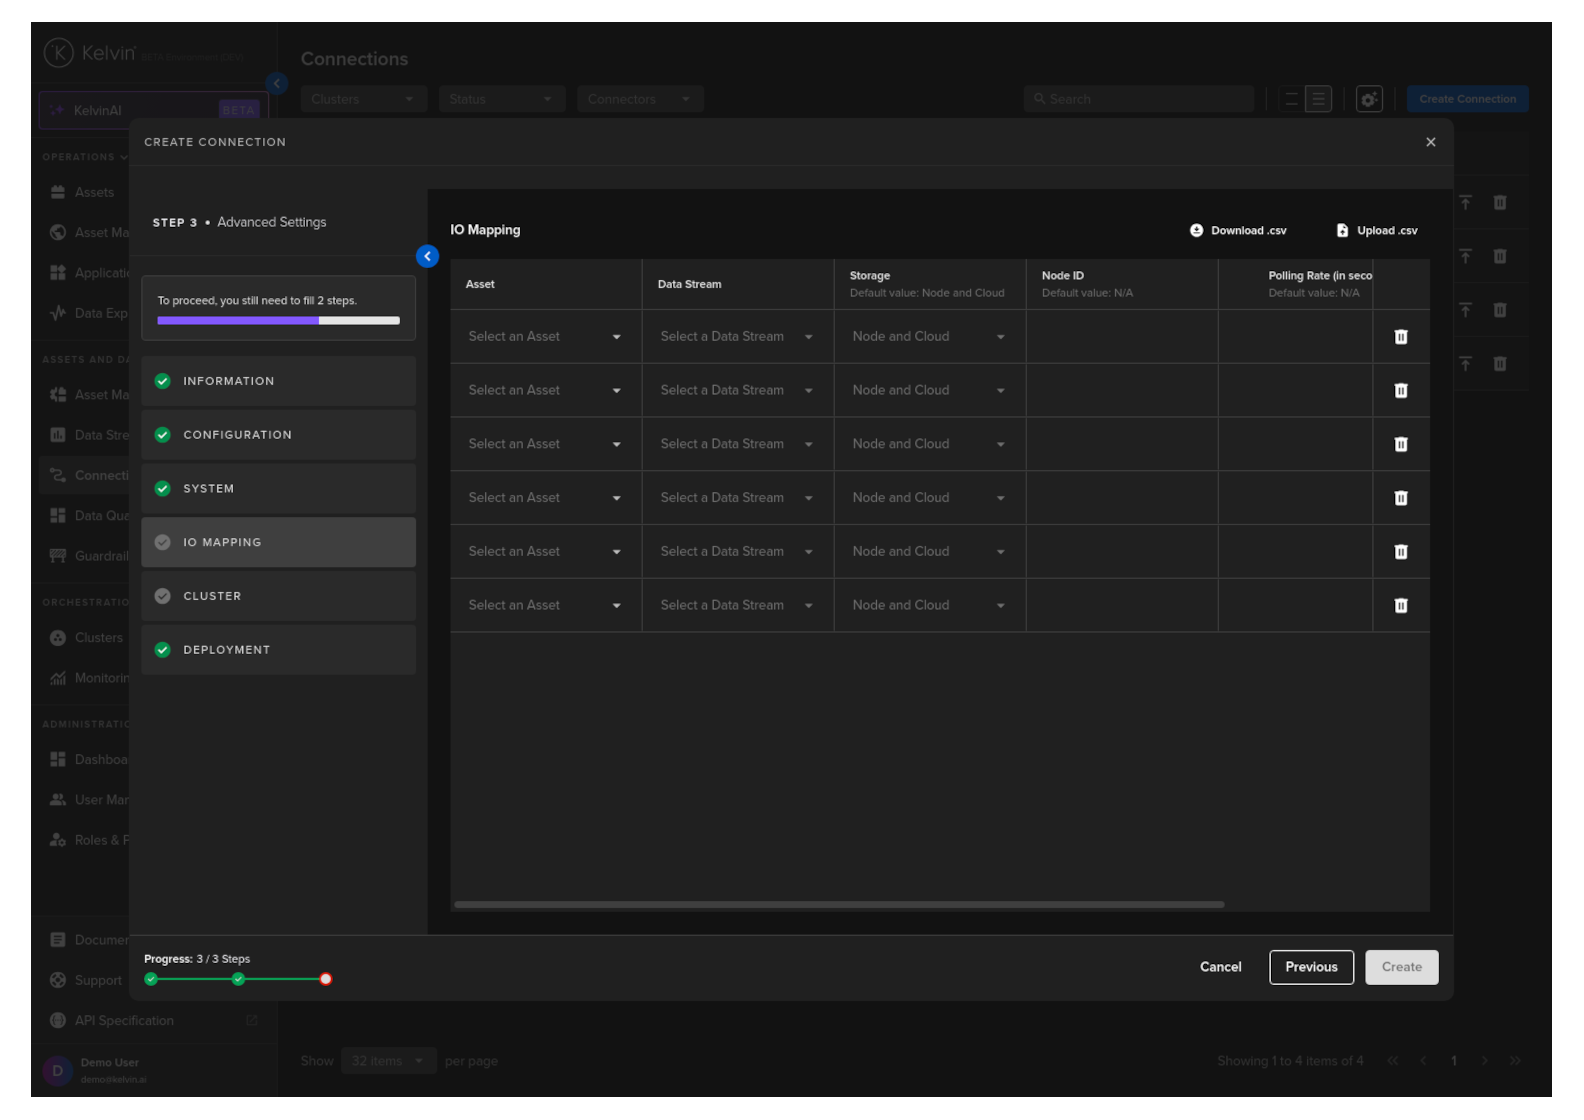
IO Mapping
Select an Asset, Data Stream and fill in the connection and other optional values.
Full descriptions of each column is giving below.
Success
If you have many connection IO to fill in, you can save time with the download/upload csv file option in the top right hand corner of the popup.
Use Microsoft Excel or Google Sheets to fill in all the Connection IO details.
You can only upload one file. Multiple file uploads is not allowed and only the latest selected file will be used.
Option Descriptions
| Header | Description | Example | Mandatory |
|---|---|---|---|
| Asset | The Kelvin Asset name (must be lowercase alphanumeric with no spaces) | well-01 | Yes |
| DataStream | The Kelvin Data Stream name (must be lowercase alphanumeric with no spaces) | water-flow | Yes |
| Storage | Location of the storage; "none", "node", "node-and-cloud" | node-and-cloud | No |
| Node ID | OPC UA data address | ns=4;i=1002 | Yes |
| Polling Rate (in seconds) | How often to pull the data from the asset | 30 | Yes |
| Control Writable | Read/Write (RW) or Read Only (RO) | RO | Yes |
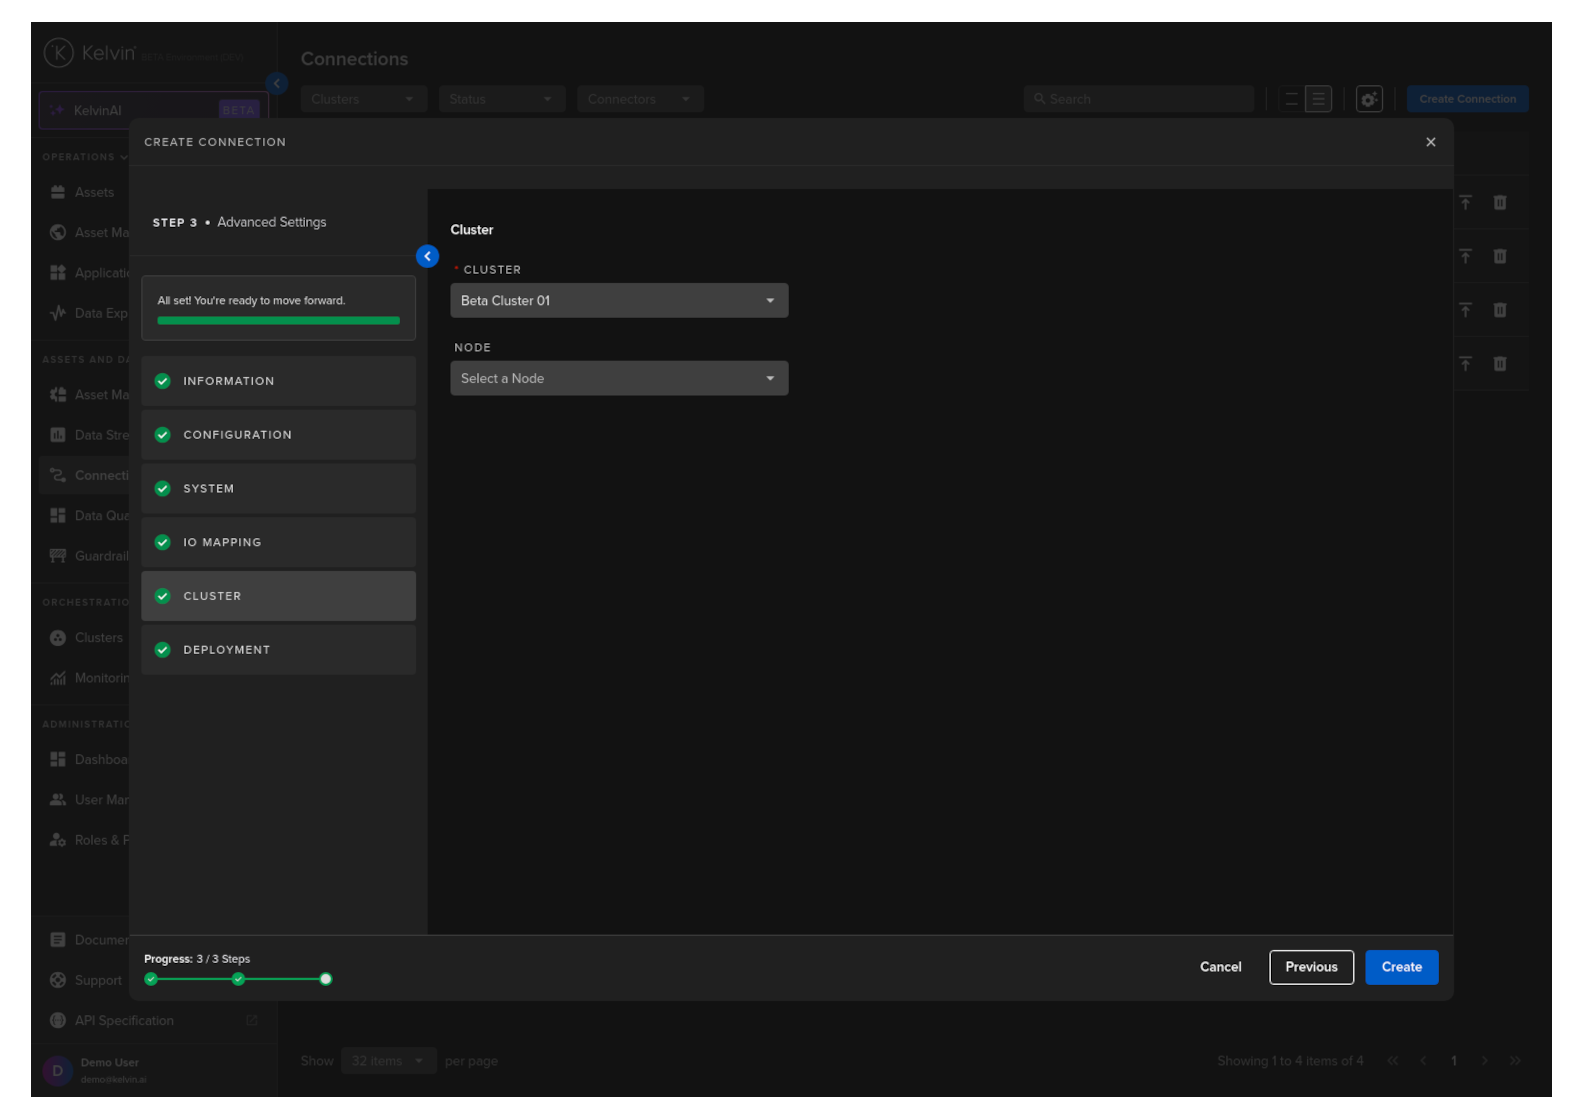
Cluster
Then select which Cluster to deploy the new Connector to.
Optionally you can also select the Node in the Cluster. If you do not then the system will automatically assign the Node.
It is important that the asset is reachable from the selected Cluster and Node.
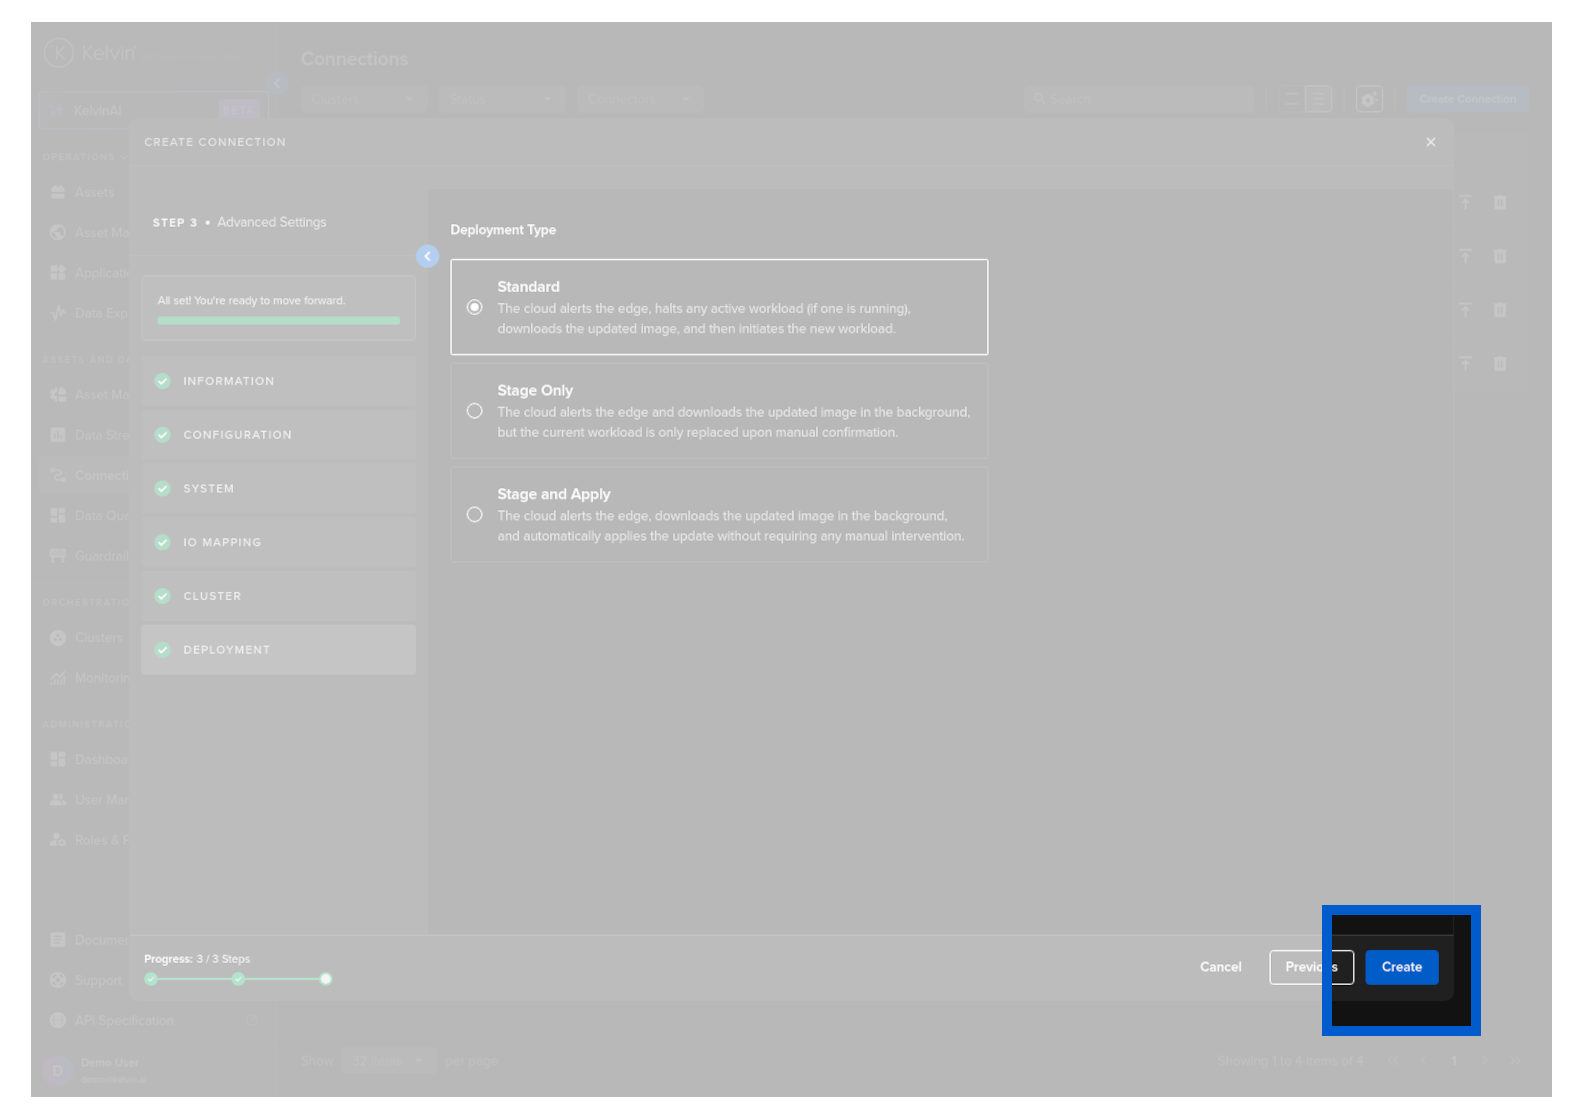
When you are ready and you have a green check ![]() on all options, you will see the Create button turn blue.
on all options, you will see the Create button turn blue.
Click on the button to initiate the deployment.
You can then see the status of the Connection in the Connections list going from Pending, Deploying to Running. It will start automatically, connect to the asset and start collecting data.
Congratulations! After a few minutes depending on your Internet speed your Connection should be getting the data.
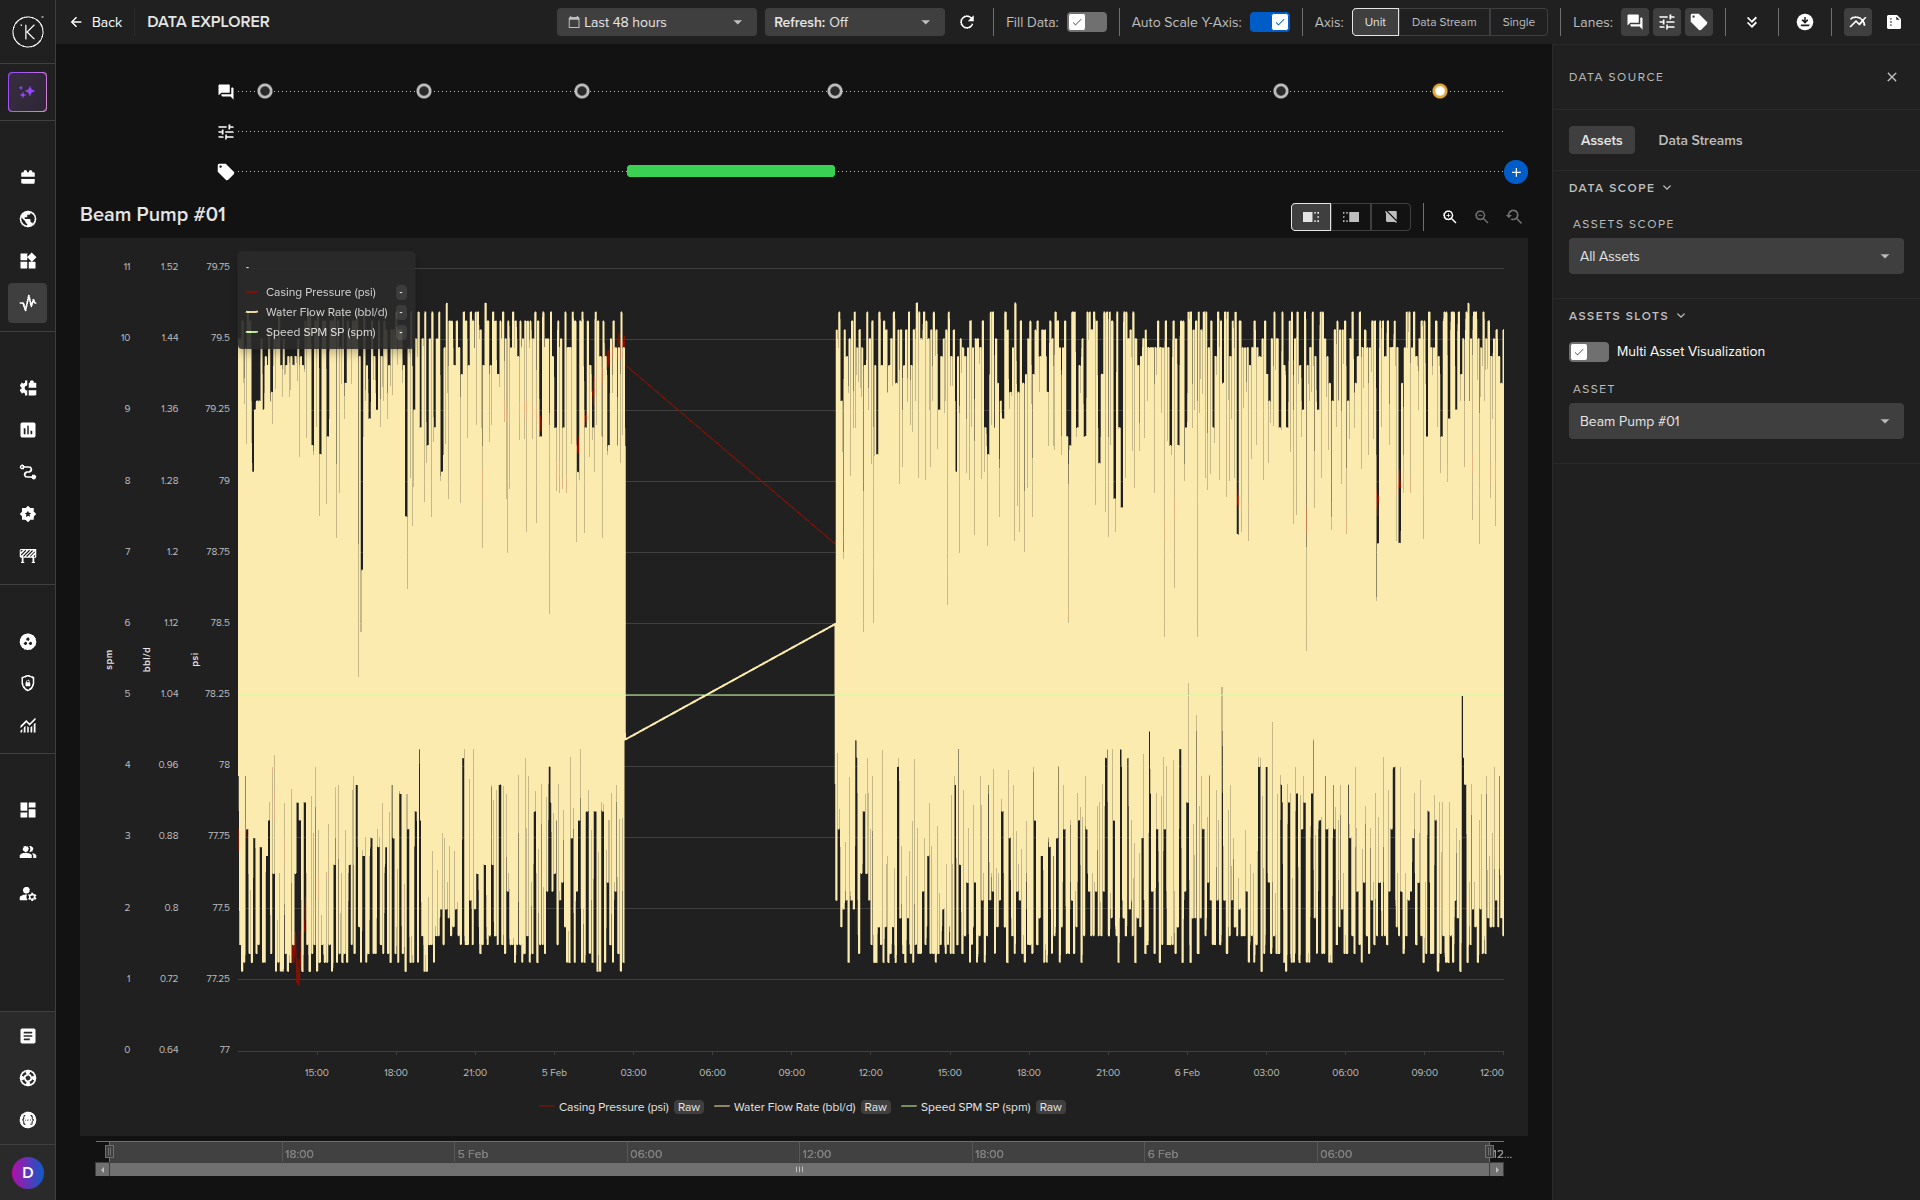
Visualize the Data
Now that you have a Connection deployed, you can view the data in the Kelvin UI.
This is just an example and the Assets / Data Streams shown here do not match the Assets / Data Streams we used to create the connection above.
Go to the Data Explorer page.
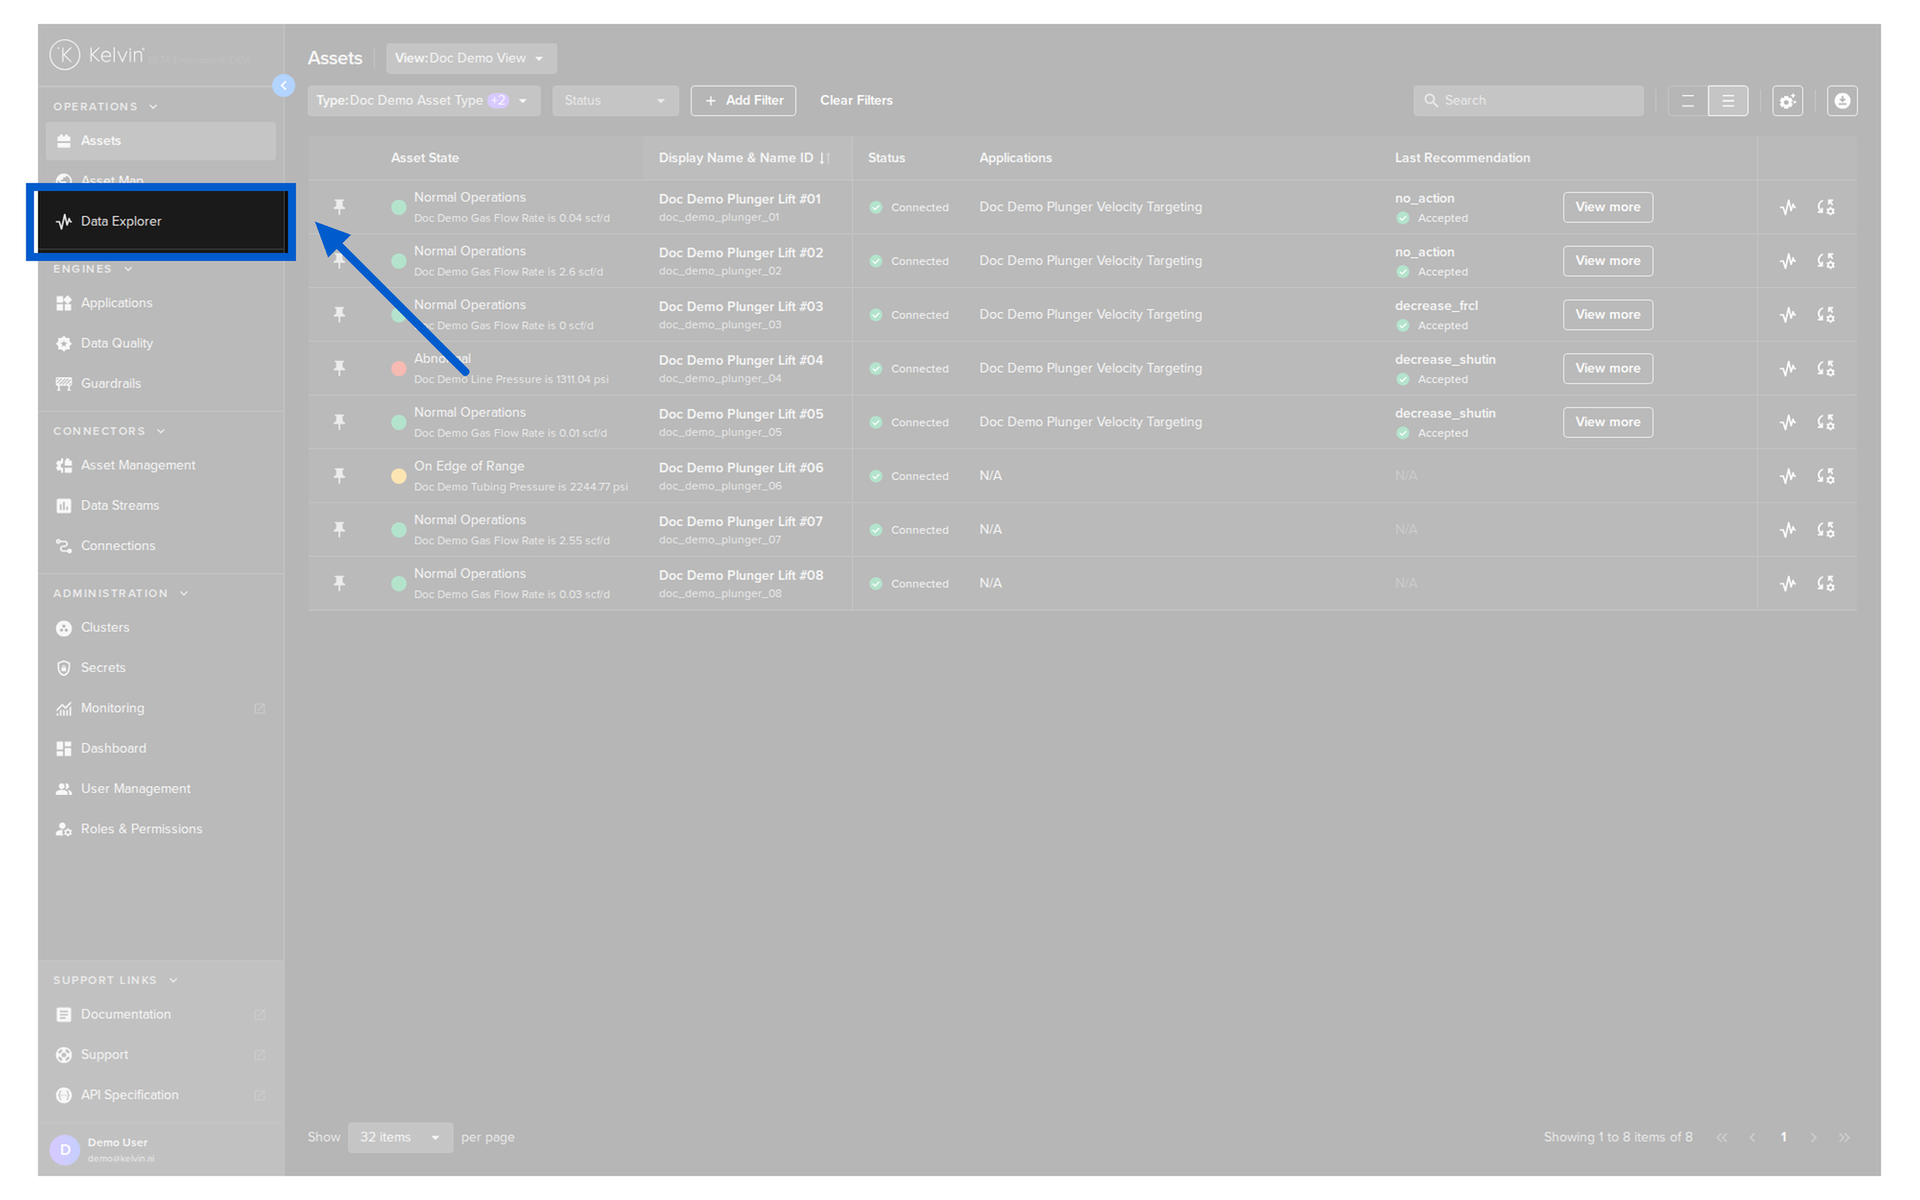
Select the Assets you want to view.
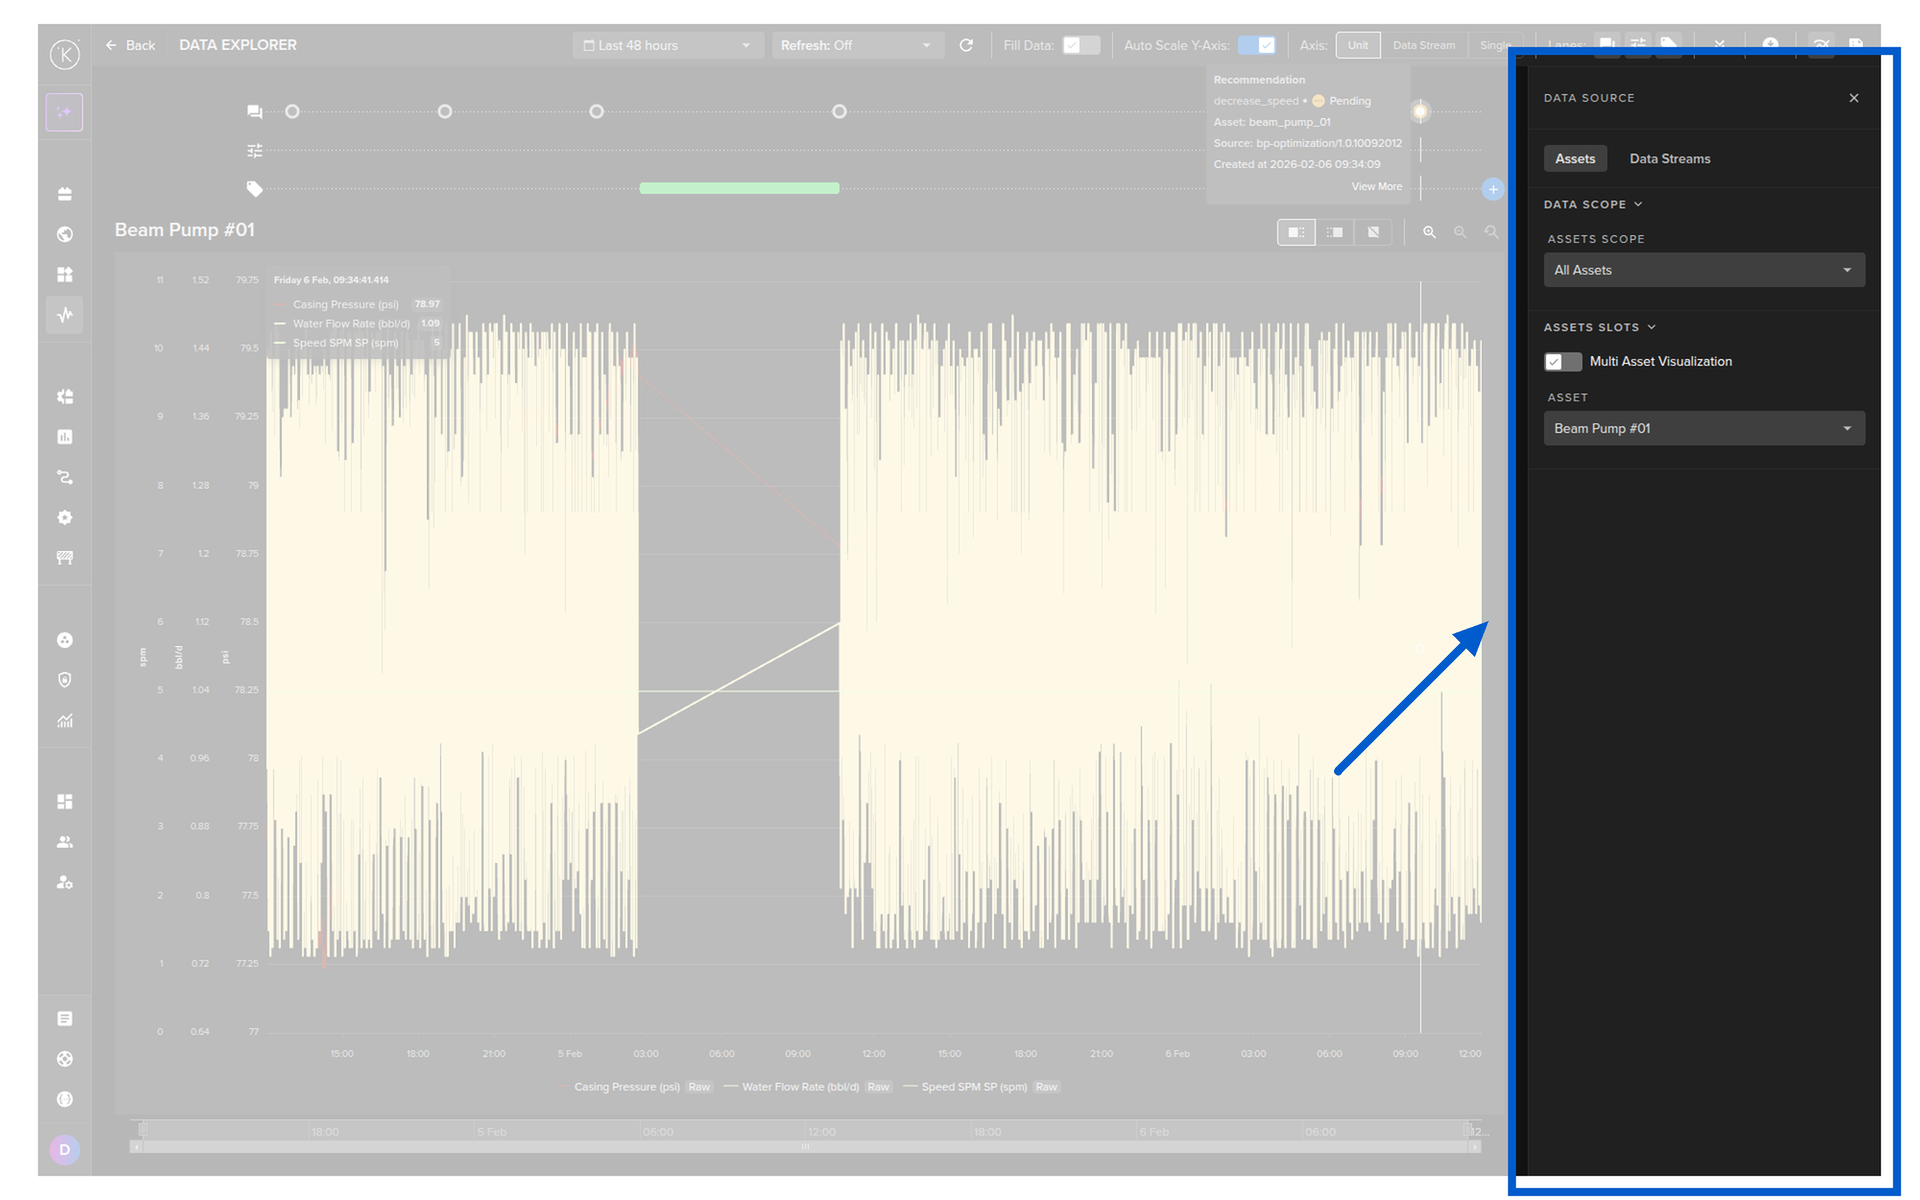
And finally, select the Data Streams you want to view.

Congratulations! You successfully connected to your data and are now able to view it in the Kelvin UI.
All done!
Congratulations! You've successfully provision and connected to your data. You are now ready to start exploring other topics within Kelvin.
To learn more about how to Add Connections for other protocols, click on the links below;